Sparx
:::info Monitoring note OpenLM integrates with the Sparx License Manager (SparxLM) through OpenLM Broker to collect license usage and statistics. :::
Requirements
- OpenLM Server v21.x or higher installed on a machine in your organization.
- OpenLM Broker v21.x or higher installed on the same machine as the Sparx License Manager.
OpenLM Broker configuration
- Install the latest OpenLM Broker. Follow the Broker configuration guide.
- In Broker configuration, select the hostname node (for example,
L312MD) → Add Port.
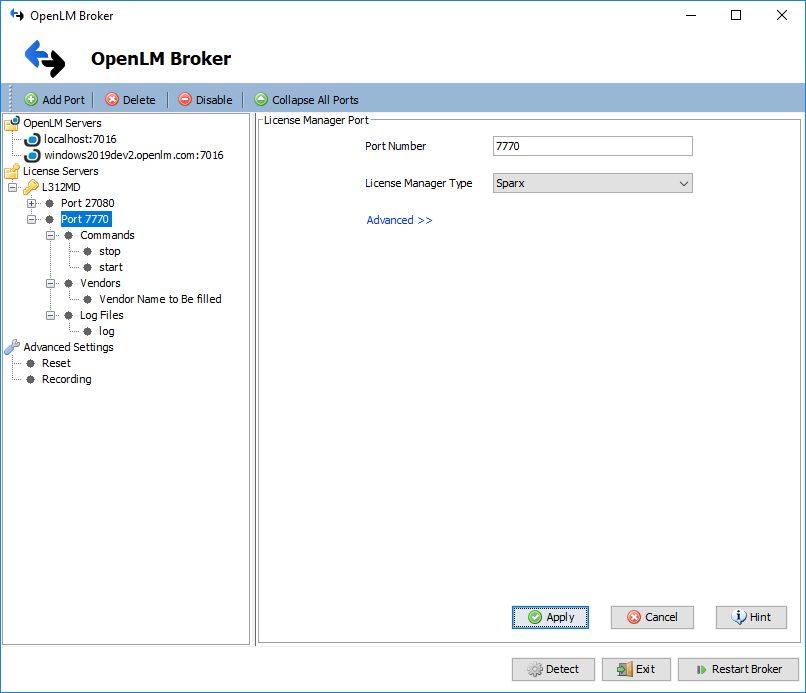
- Enter the Sparx server port (default: 7770) and select Sparx from the License Manager Type drop-down. Click Apply.
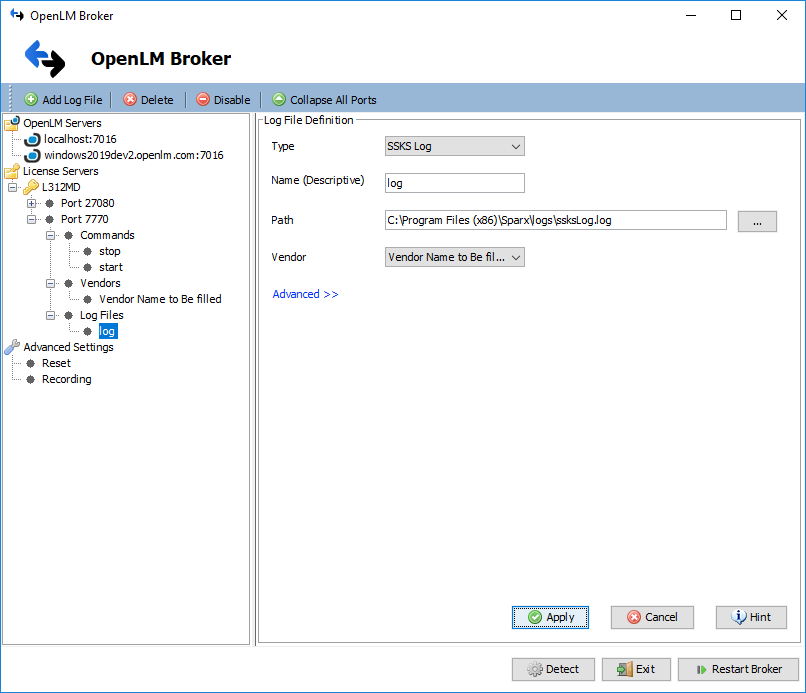
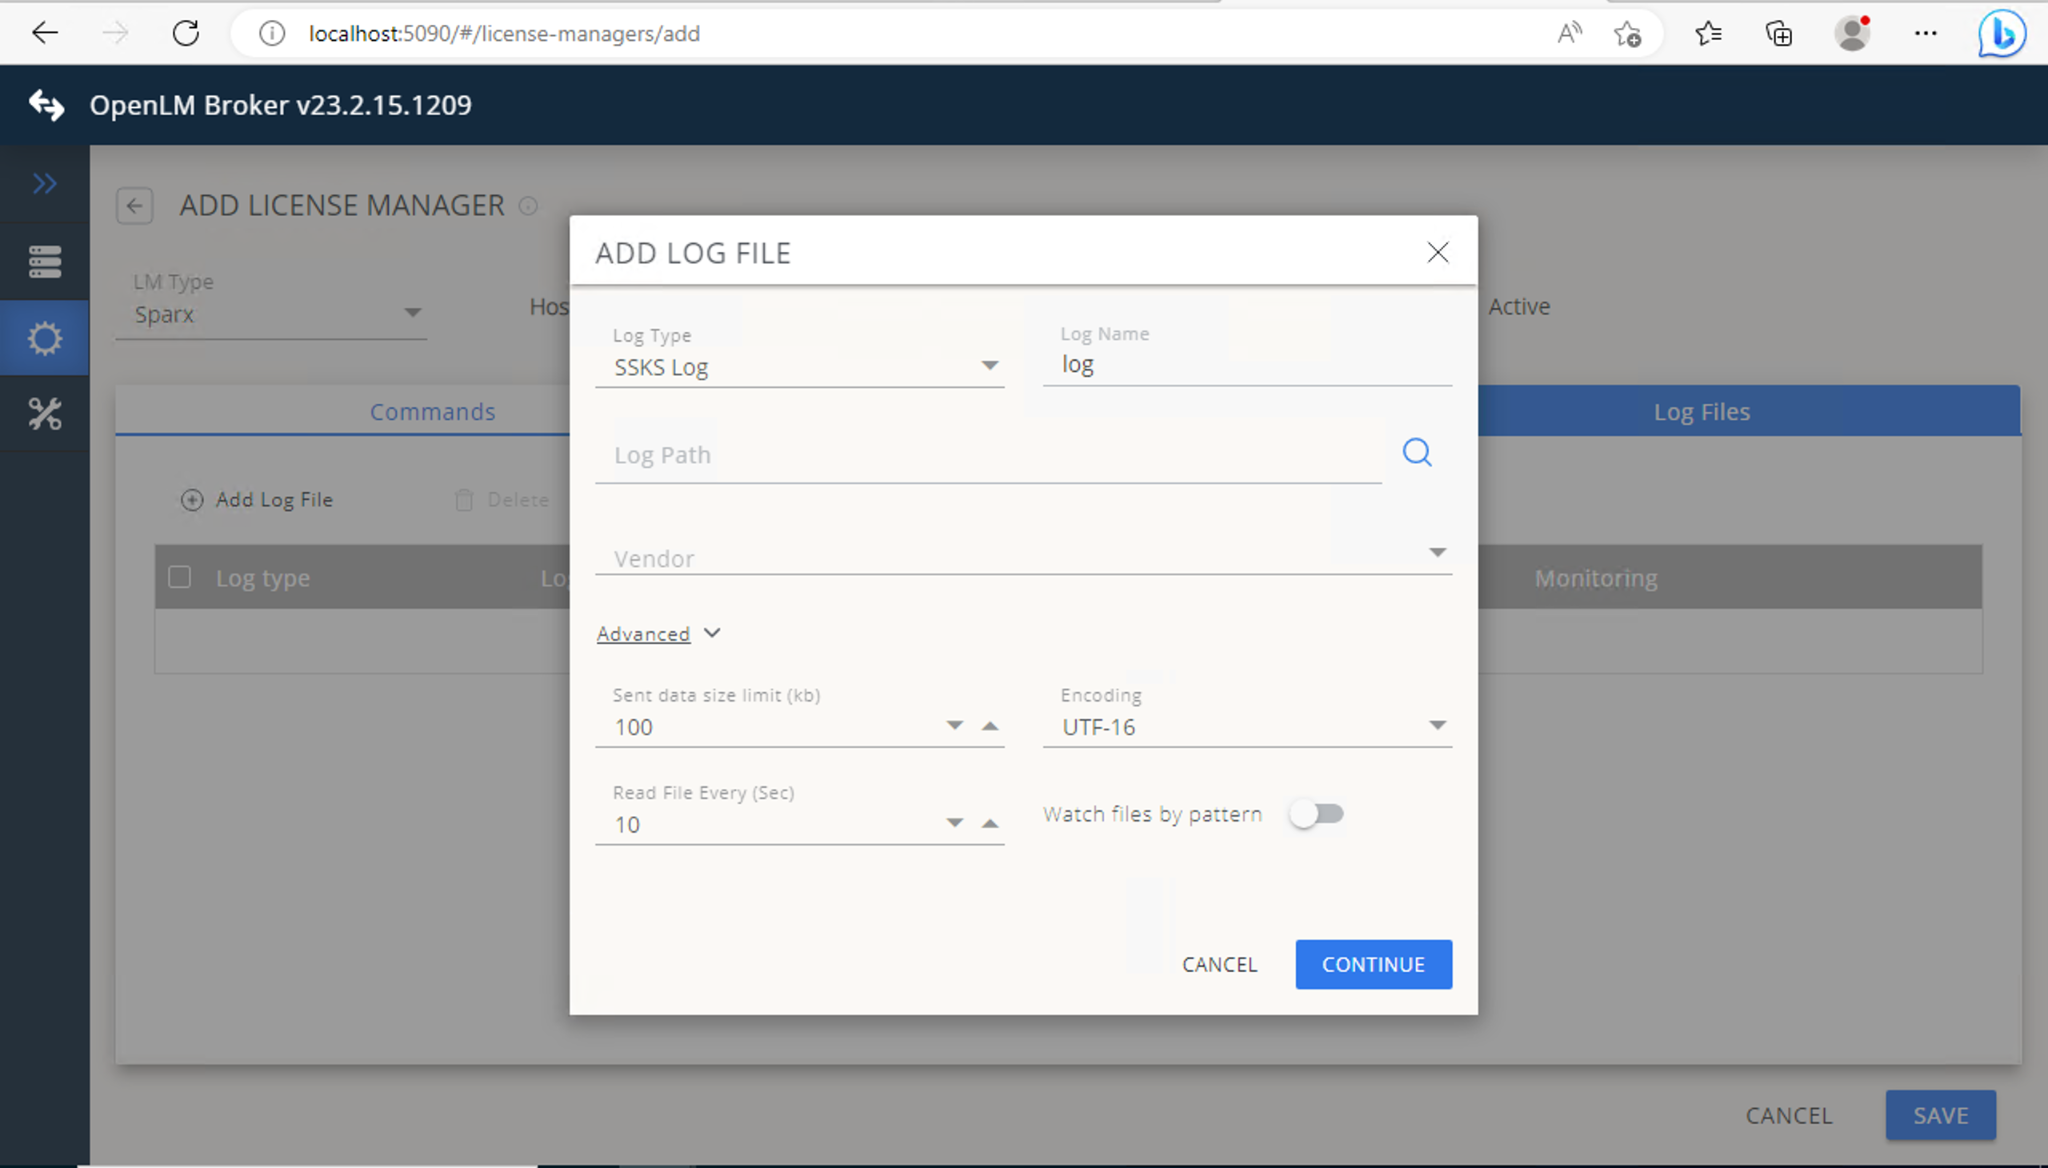
- Under the new port node, right-click Log Files → Add Log File. Configure as follows:
- Type: SSKS Log
- Name: descriptive name (for example, “Sparx log”)
- Path: navigate to the
ssksLog.logfile in the Sparx installation logs folder - Vendor: select the vendor defined in the Vendors node
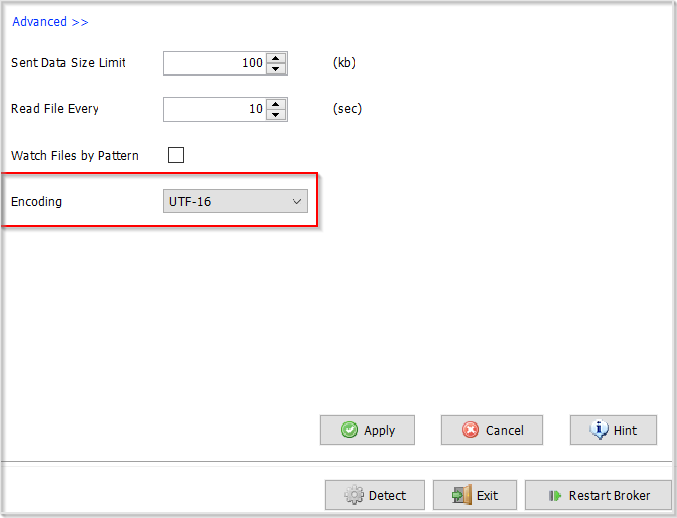
- Encoding: By default, Sparx logs use UTF-16 encoding. If BOM is missing in the log file, configure encoding manually in the Advanced section of the Log File Definition screen (choose UTF-16 or UTF-16LE).
- Click Apply.
- Click Restart Broker, wait a few seconds, then click OK on the “Service started successfully” message.
- Open the EasyAdmin interface (
http://<OpenLM Server FQDN>:5015orhttps://cloud.openlm.com) → in the License Servers window, click Approve on the Sparx entry.
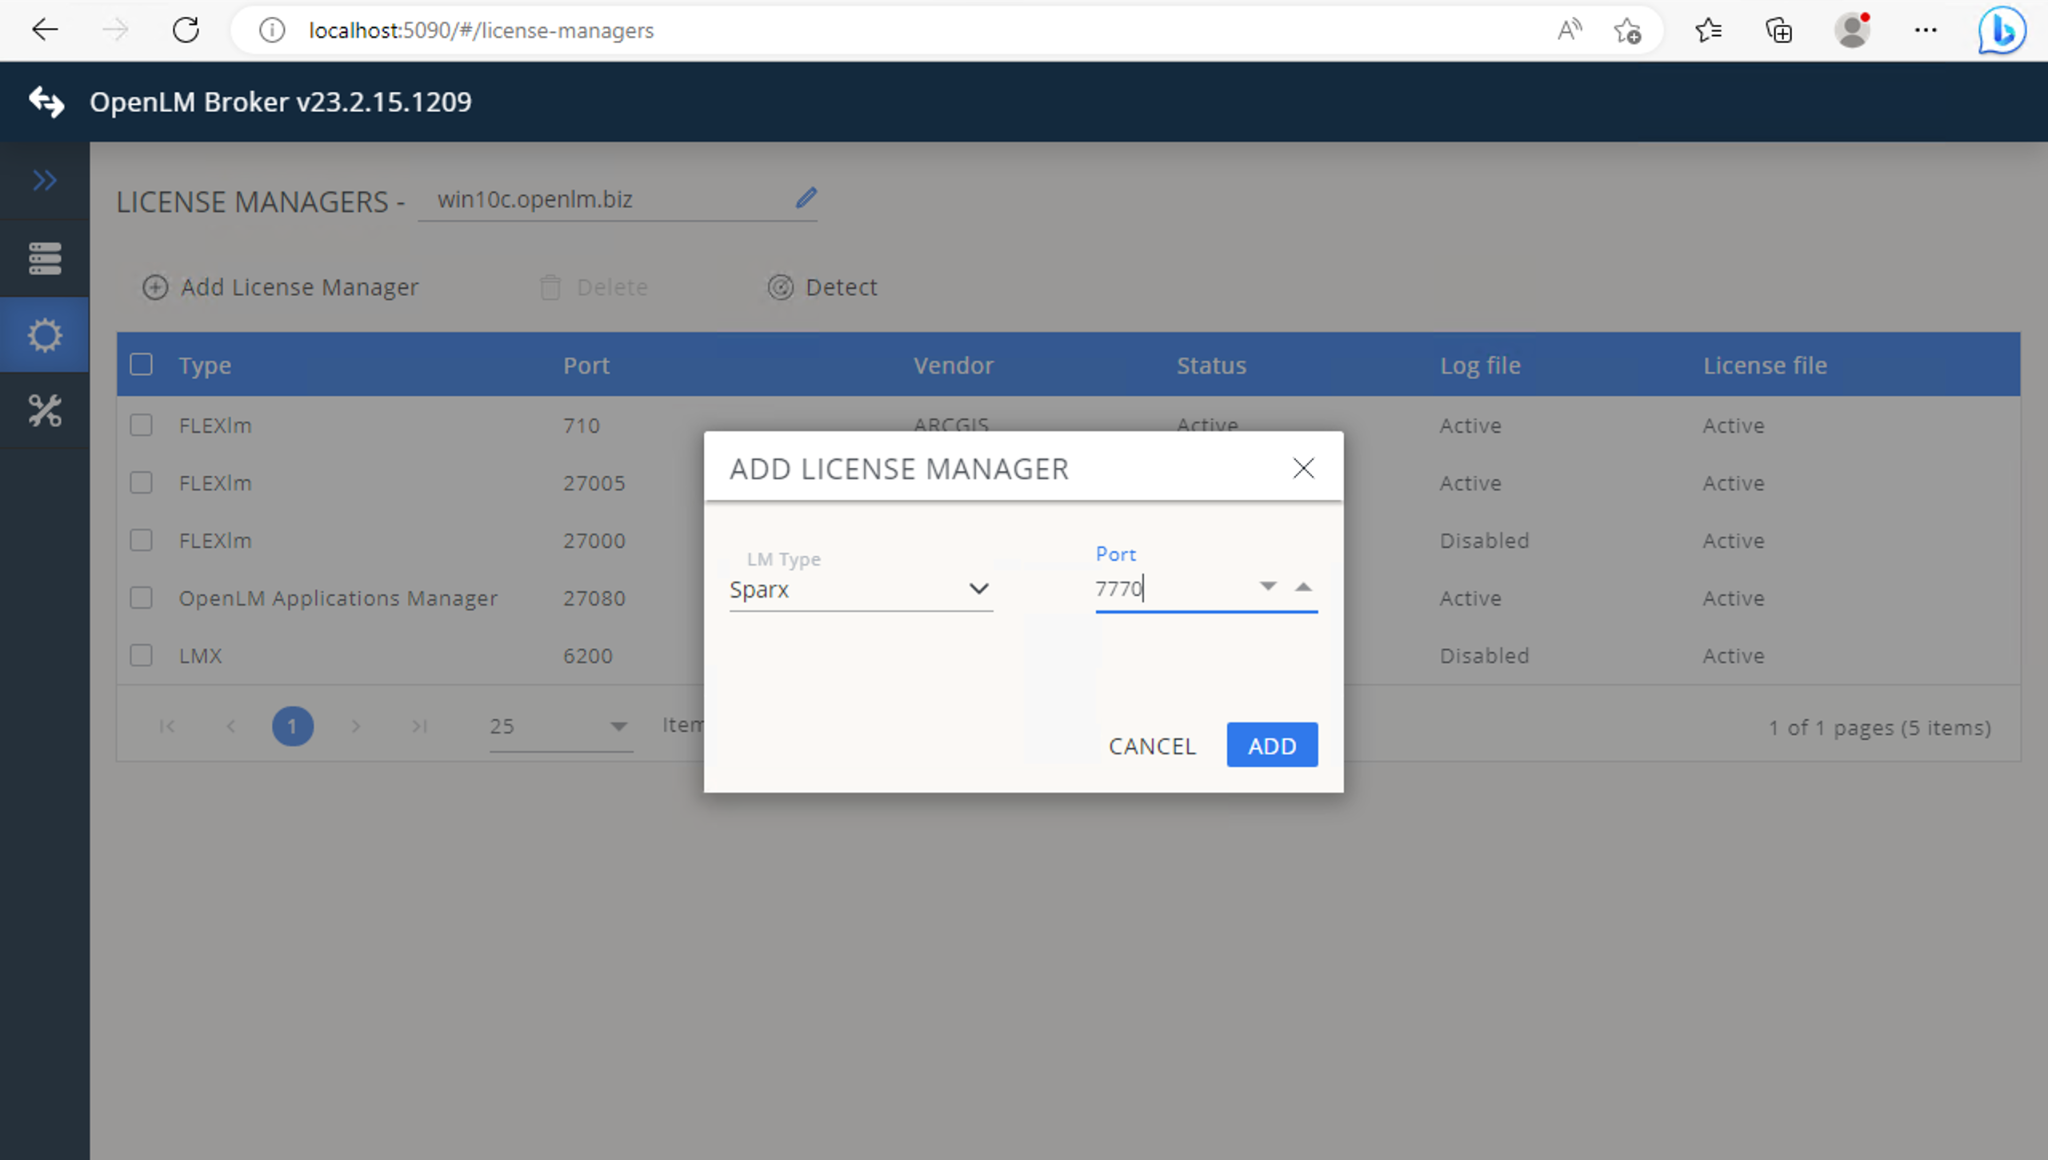
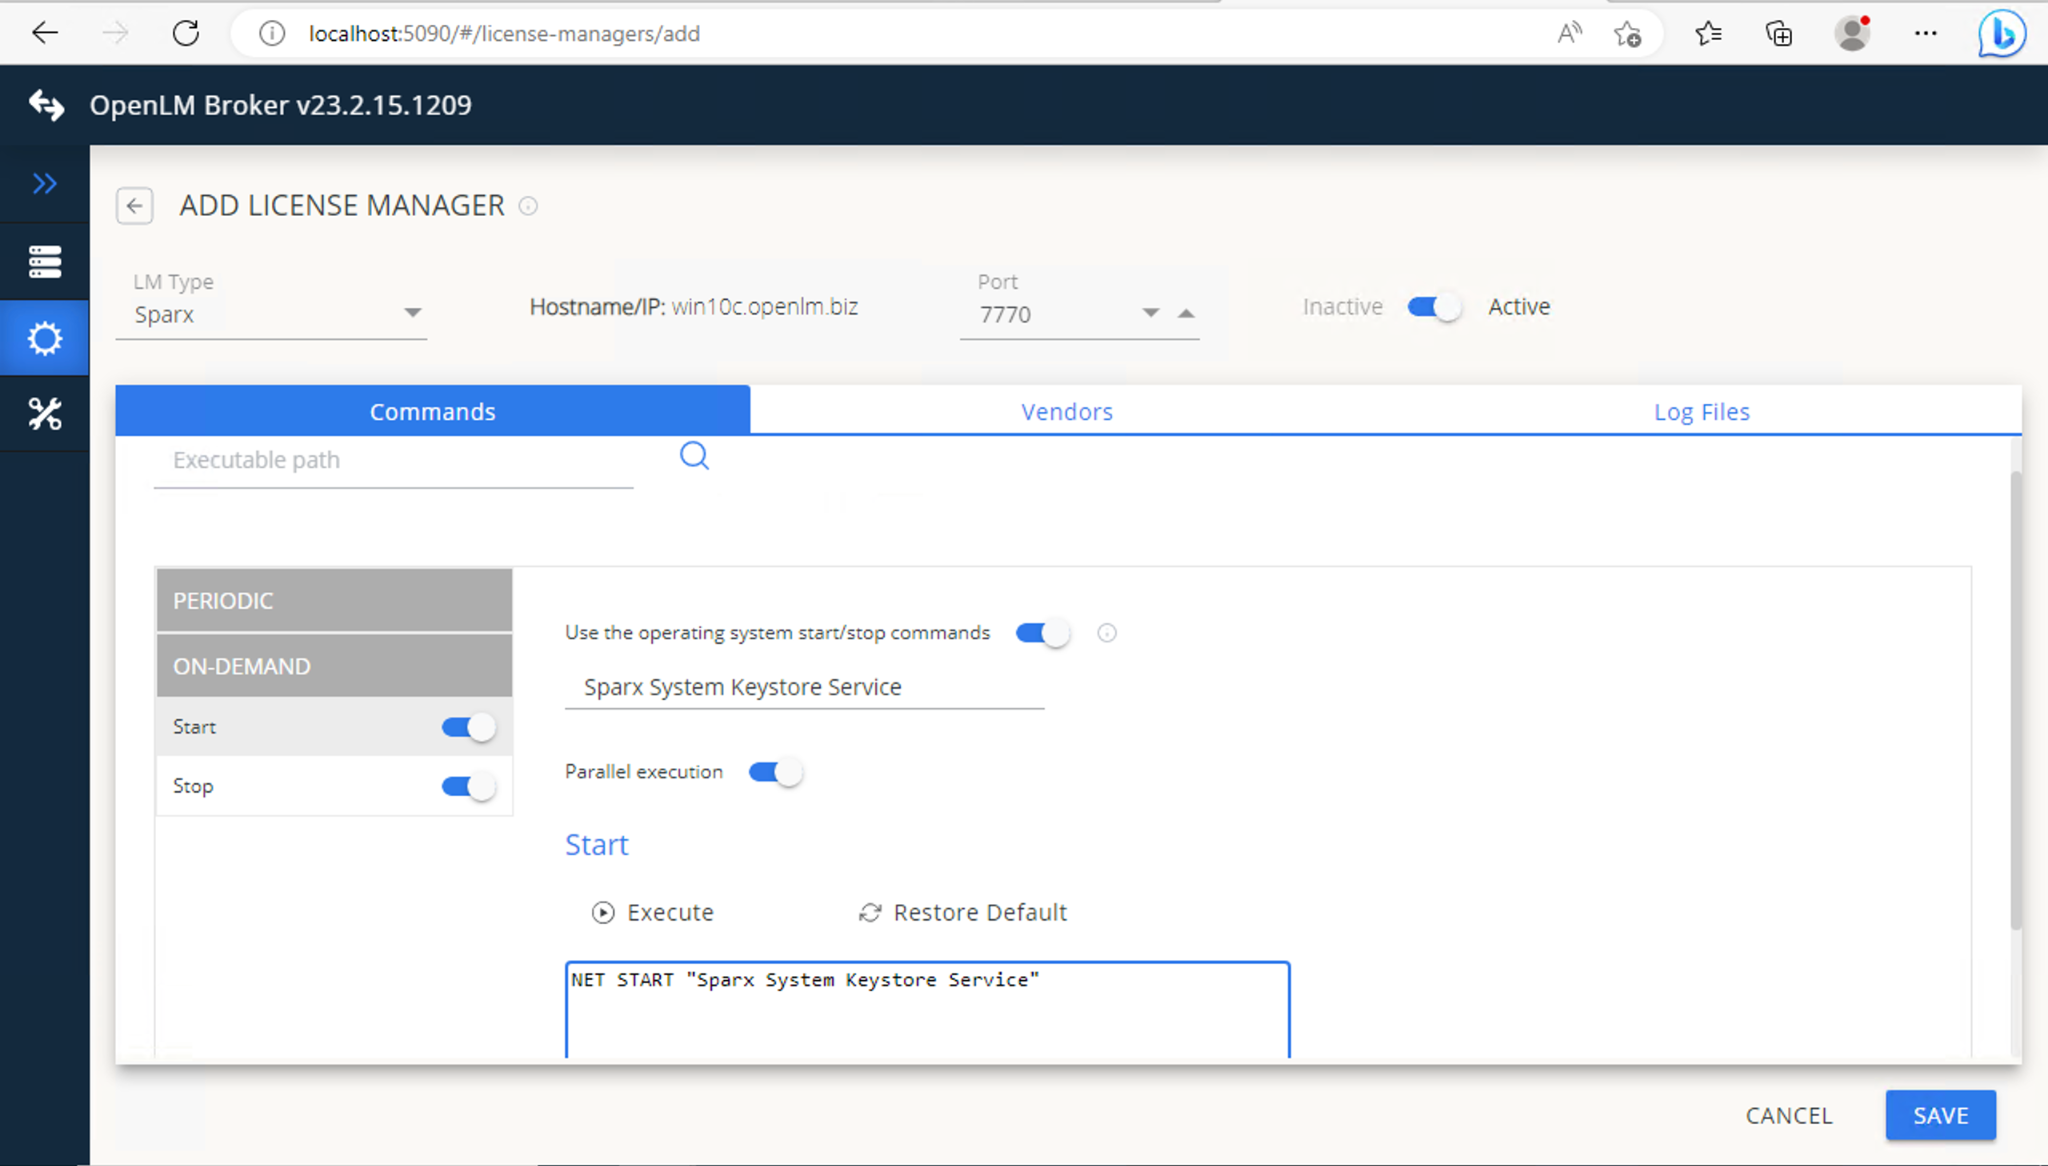
Configure through the Broker UI (alternative method)
- Open the Broker UI at
http://localhost:5090/. - Navigate to License Managers → Add License Manager.
- Select Sparx as the LM type, enter port (default 7770), and click Add.
- Configure command and execution options as needed (for example, start/stop toggles, periodic/on-demand inquiry).
- Add log file configuration (same as above).
- Type: SSKS Log
- Path:
ssksLog.log - Encoding: UTF-16
- Save the configuration.
OpenLM Server configuration
If automatic approval does not complete, configure manually:
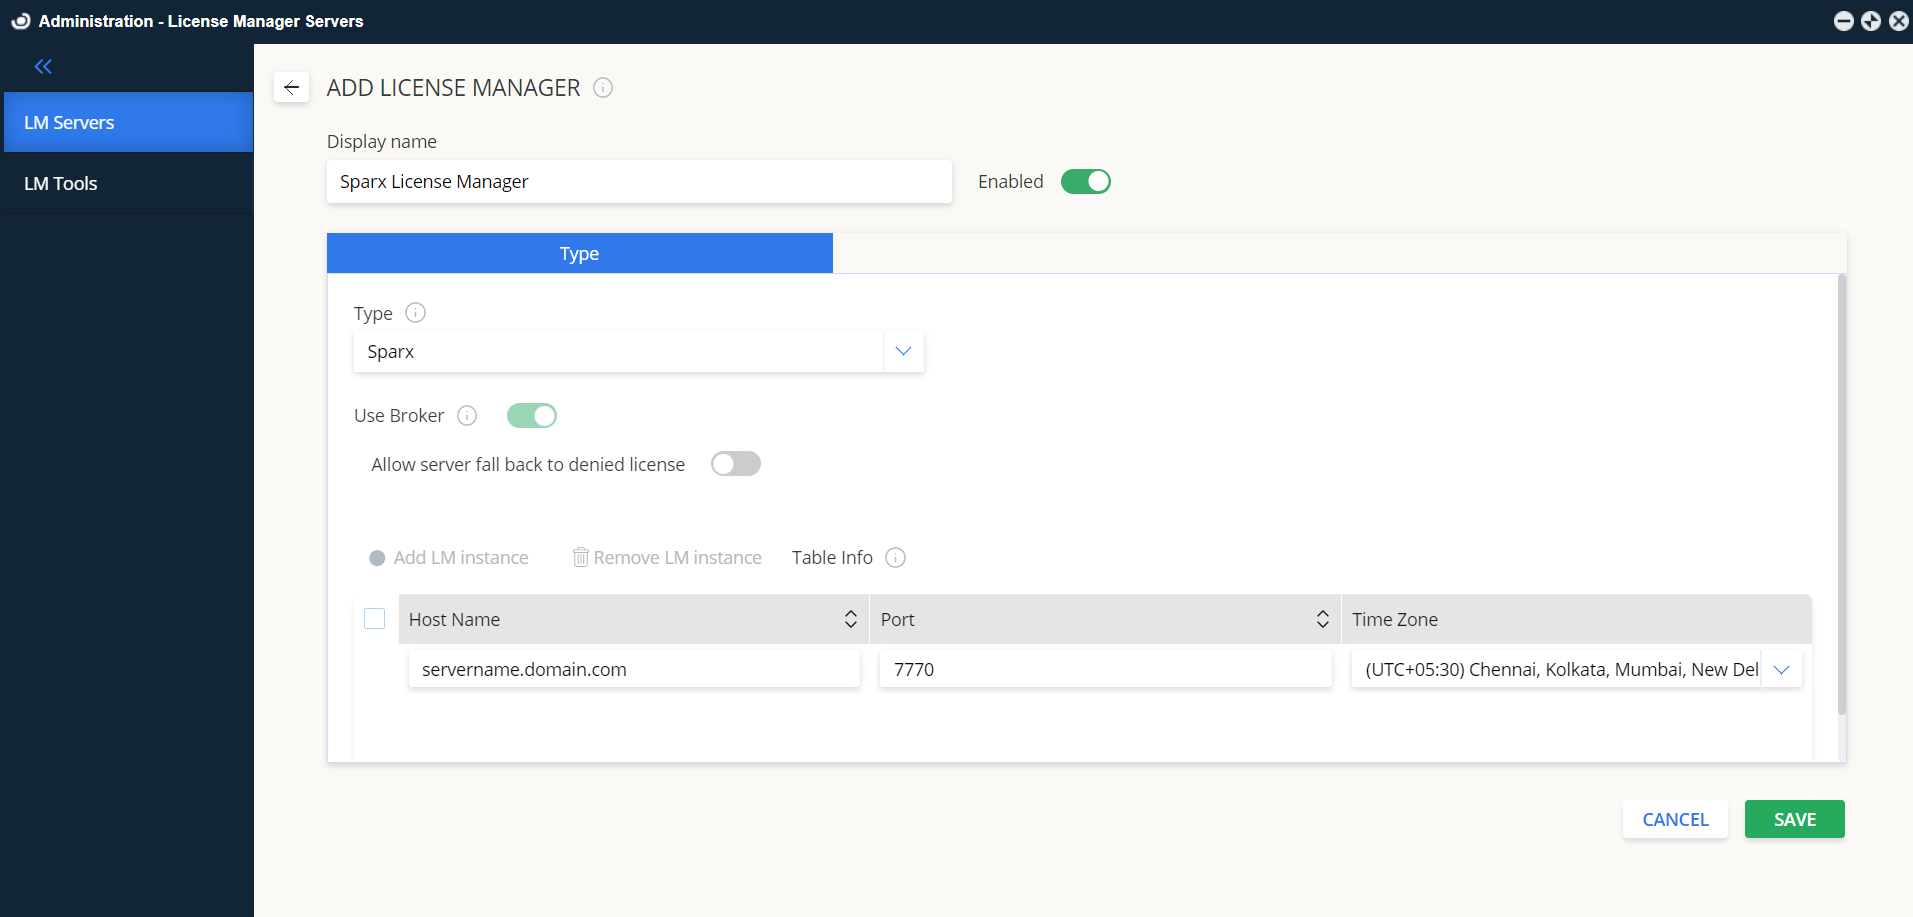
- In EasyAdmin → Administration → License Manager Servers, click Add LM.
- Enter:
- Display name: for example, SparxLM
- Type: Sparx
- Description: optional text (for example, “Sparx License Manager”)
- Time Zone: where the license server resides
- Hostname and Port: match the Broker configuration (default port 7770)
- Use Broker: checked
- Click Save.
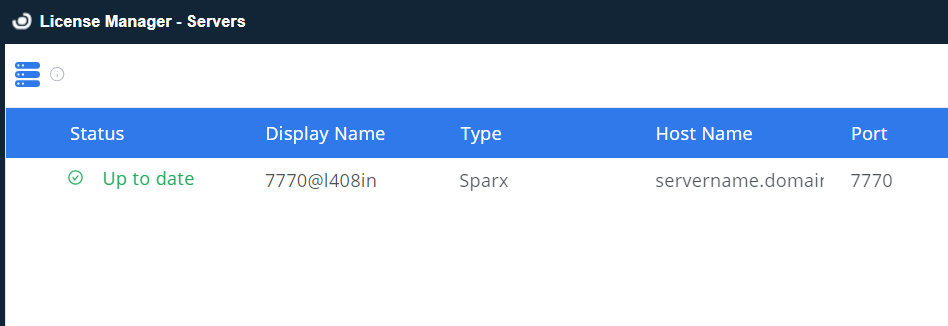
Verifying monitoring
- Open EasyAdmin (
http://<OpenLM Server FQDN>:5015orhttps://cloud.openlm.com). - Go to Start → Widgets → License Manager Servers.
- Verify that SparxLM appears in the list with a green status indicator (active connection).
Known limitations
- License denials are not monitored for Sparx.