Directory Sync
Directory Sync brings the users, computers, and groups in your directory into OpenLM Platform. OpenLM Platform uses them for license allocation, charge-back, and usage-by-group reporting. A Directory Synchronization Agent (DSA) on your network reads the directory on a schedule you set.
Pages in Directory Sync
To set up or check part of the sync, open its page from the sidebar. Directory Sync opens on Agents. The following table lists each task and its page:
| To do this | Open |
|---|---|
| Approve a Directory Synchronization Agent (DSA), and set how often it polls | Agents |
| Connect a directory | Domains |
| Set what to read from a domain, and when | Synchronizations |
| See what the syncs created, and exclude items from future syncs | Entities and Relations |
| Check whether a sync run succeeded, and where it stopped if it didn't | Sync History |
| Clear the entities and relations that Directory Sync stores in its own database | Service Configuration |
| Forward directory changes to Amazon S3 or Amazon SQS | Destination Systems |
| Remove people from SaaS services when they leave your directory | External Services |
Destination Systems and External Services are available on OpenLM Platform only. Each one appears in the sidebar when its product is active in OpenLM Products and you have that product's Admin role: the LDAP Connector product for Destination Systems, and the Identity Alignment product for External Services. Account administrators always see both. Without the role, Directory Sync hides the entry, and opening the page by its address returns you to Agents without a message. Directory Sync sends user-removal events to External Services only while the Identity Alignment product is active.
To sync through a Global Catalog in a multi-domain Active Directory forest, see Directory Sync with global catalog. That section is on the Global Catalog tab, and gives the ports and the GC:// start node.
- Standard DSS
- Global Catalog
Before you begin
Confirm these prerequisites:
- A Directory Synchronization Agent (DSA) installed on at least one machine in your network. See Install the Directory Synchronization Agent (DSA).
- An authorization file that allows the DSA to authenticate with Identity.
- The agents you installed, approved on the Agents page to complete the setup.
- Directory Sync active in OpenLM Products. If it isn't, Directory Sync opens a page that says so. Account administrators can request activation from that page, and everyone else has to ask an account administrator.
- The Directory Sync Admin role, to add, change, or delete anything.
With the Viewer role you can browse, filter, and export the lists, but Directory Sync hides the buttons that add, change, or delete, and Service Configuration is for admins only. With no Directory Sync role, Directory Sync shows a permissions message instead of the pages. To assign a role, see Users management in Identity.
To open Directory Sync, select Navigation (the grid icon in the OpenLM Platform header), then Users, then Directory Sync.
For related tasks, see Identity, Users and Groups, Destination Systems, and External Services.
Usage
This section covers how to open Directory Sync and the controls that its lists share.
Open Directory Sync
Select Navigation (the grid icon in the OpenLM Platform header), then Users, then Directory Sync. Or select Navigation and search for Directory Sync.
Directory Sync opens on Agents. Select an entry in the sidebar to move to another page.
If you arrive from the onboarding guide, a tutorial dialog for your current step opens over the page: approve an agent, add a domain, create a synchronization, add an external service, or add a destination system. Select Got It to mark the step as done. Closing the dialog doesn't mark it.
Work with the lists
Agents, Domains, Synchronizations, Entities, Relations, and Sync History share most of the same controls:
- Search: Enter text in the Search box to find rows. The grid highlights matches.
- Filter: Select the filter icon (Toggle Filters) to show the filters that a page offers in its column headers, for example Domains on Agents, and pick the values to show. Select the icon again to hide them. When you arrive through a link from another page, the list is already filtered to that item.
- Columns: Select the Grid settings menu (the three dots), then Columns to show or hide a column. Restore defaults resets the layout.
- Export: Select Export data to download the list as a CSV file. Every list has it.
- Refresh: Select Refresh data to reload the list.
- Row actions: Icons for editing or running an item appear when you point to its row.
- Links between pages: Counts and names in a row open the related page, already filtered. For example, the Domains count on an agent opens Domains filtered to that agent.
Each page keeps its own column layout, and clears its filters when you leave it. The number of rows per page follows Number of records per page in UI Configurations.
Agents
To start syncing, approve each Directory Synchronization Agent (DSA) you install, because a new agent does nothing until you do. Use Agents to see every DSA that reports to your account and to control how each one polls for work. Agents register themselves, so the page has no button to add one.
To see whether an agent is working, check its Status and Last Connection Date in the grid, which also lists each agent's Agent Name, Description, Domains, and Syncs. Use the column menu to add Request Interval and Sync Method. Status is Pending until you approve the agent, then Enabled or Suspended. The Domains count opens Domains filtered to the agent, and the Syncs count opens Synchronizations. Last Connection Date shows -- until the agent reports after you approve it, and a warning icon when the agent hasn't reported within its expected interval.
The following screenshot shows the Agents page.
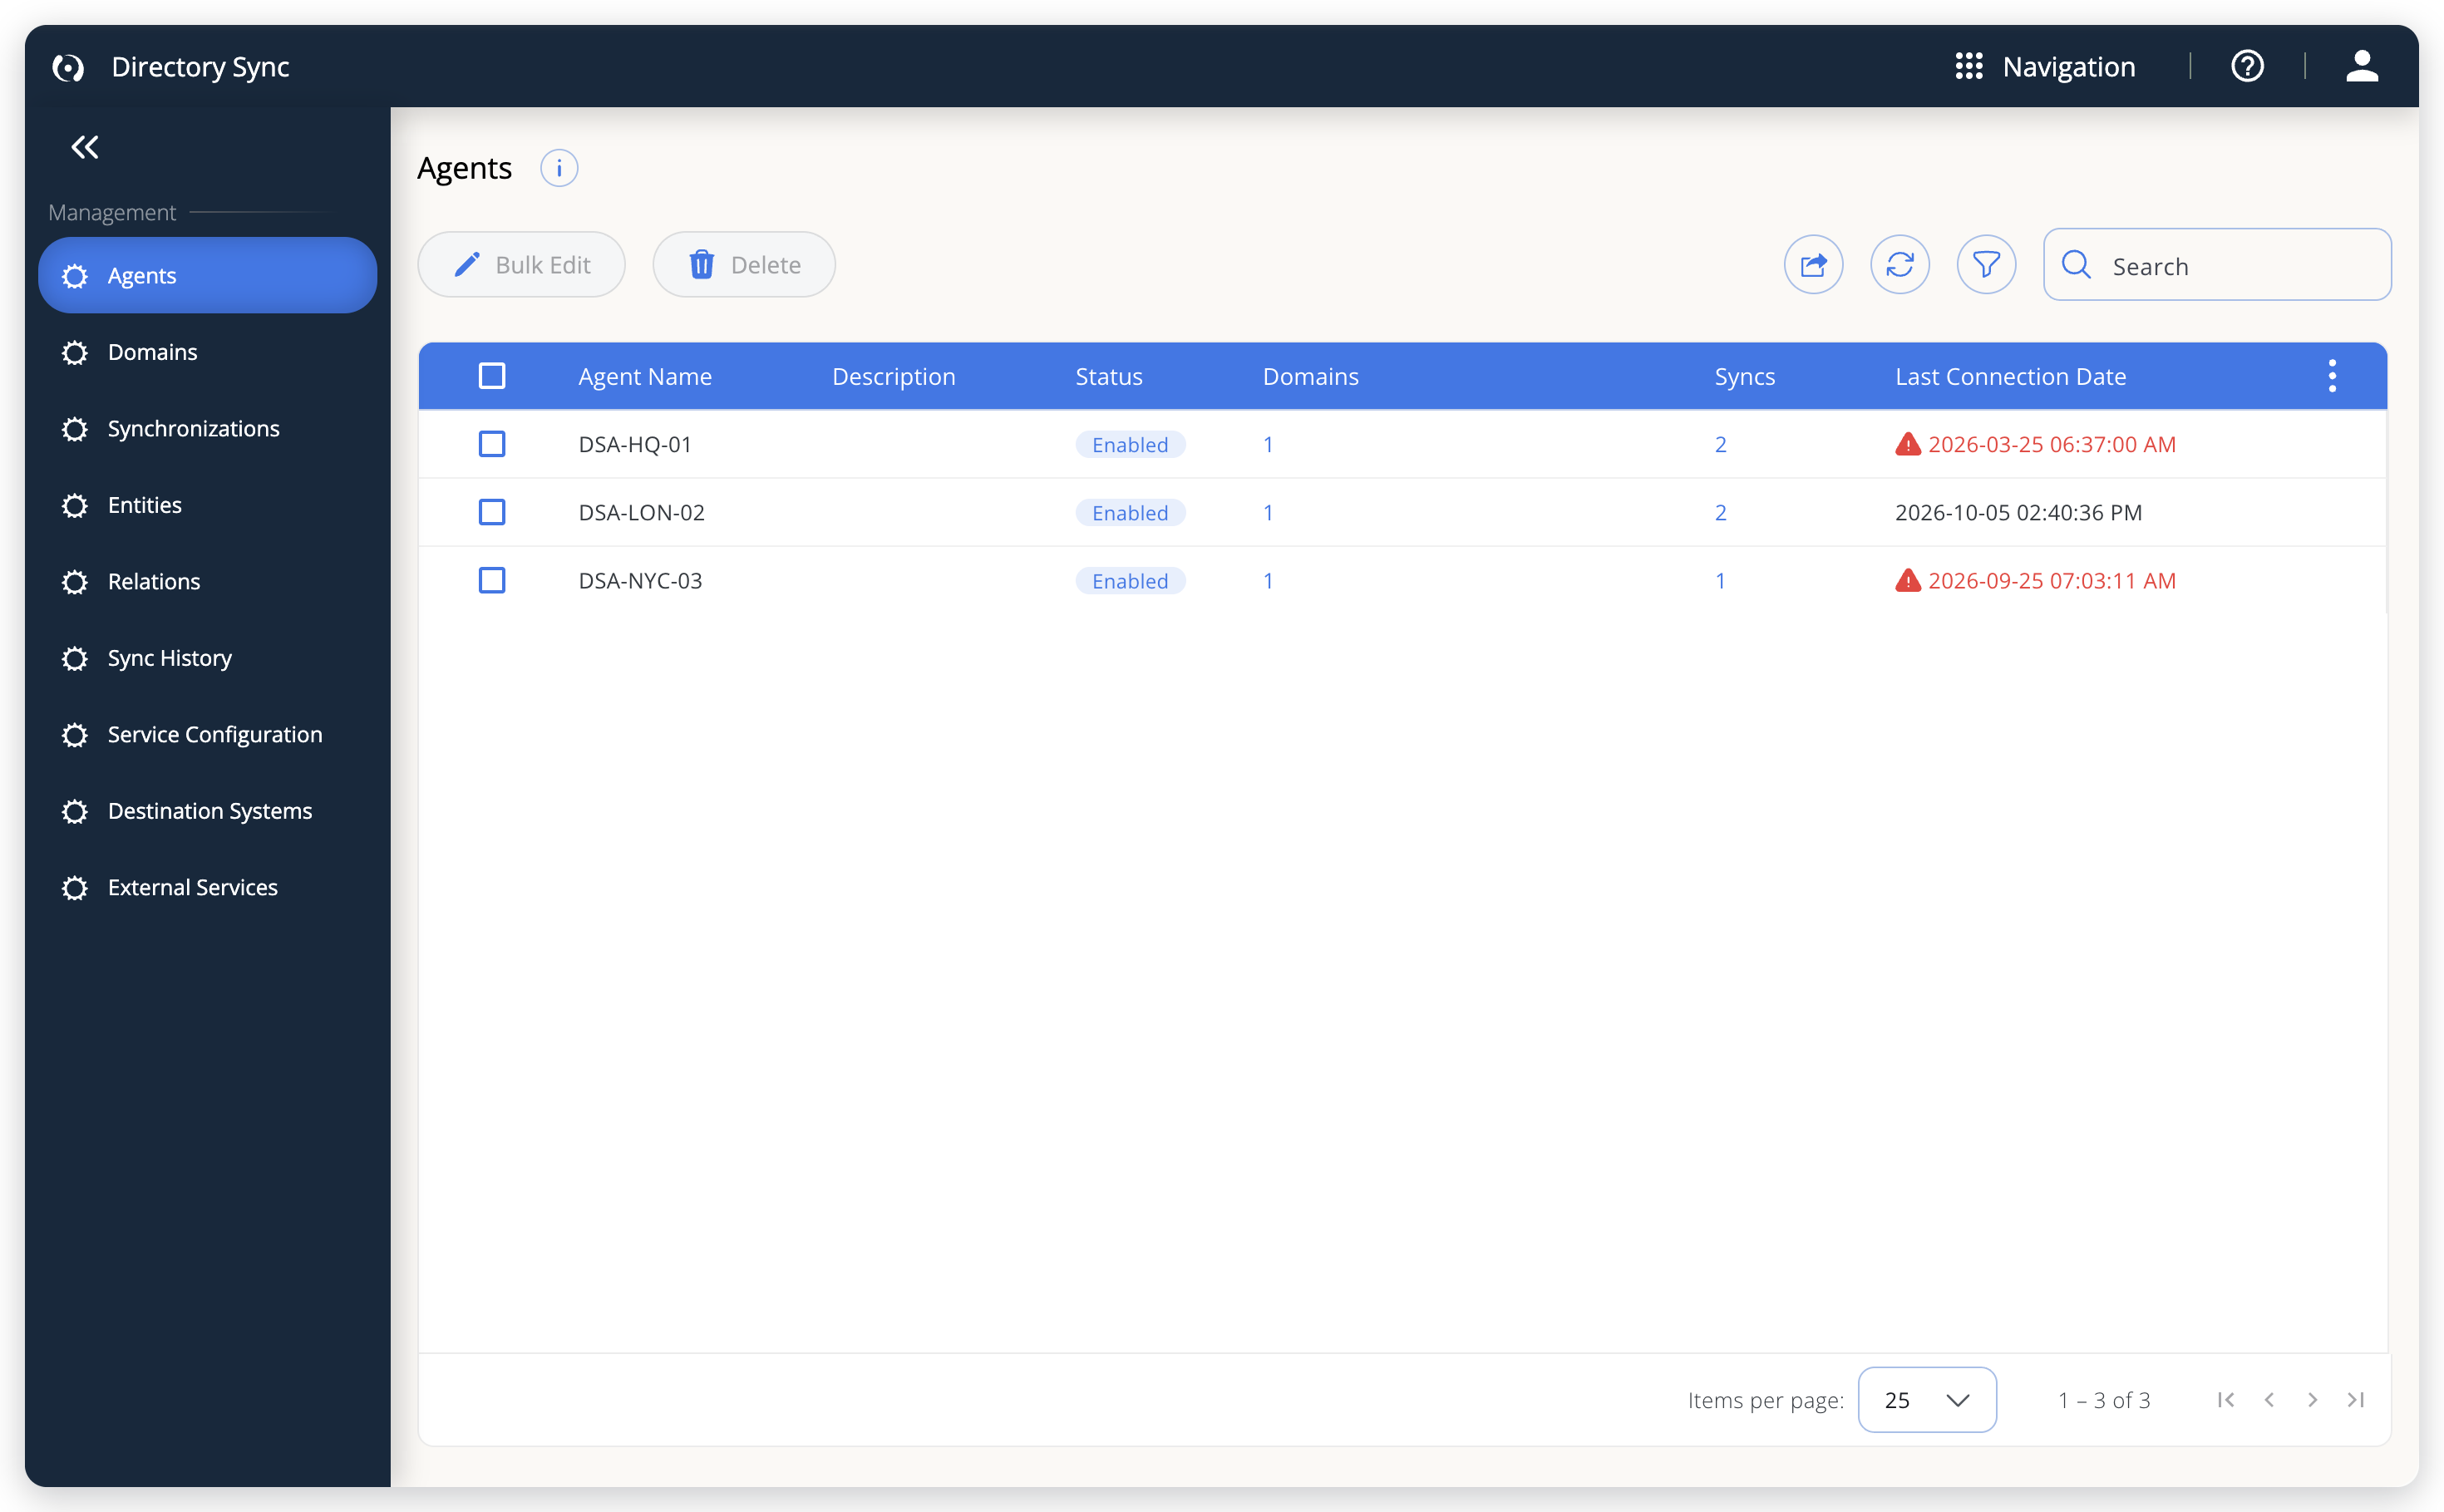 The Agents page, where Directory Sync opens.
Approve a new agent
All installed DSAs must be approved before they become operational.
To approve an agent:
-
Open Agents. If an installed DSA isn't listed, select Refresh data.
-
Point to the agent whose Status is Pending.
-
Select the Approve agent icon.
The agent changes to Enabled right away.
-
If you want to change the agent's settings while you approve it, select Edit agent instead.
On the Approve Agent page, set the Status to Enabled, then select Approve.
To keep a pending agent from syncing without deleting it, select Suspend agent instead.
Edit an agent's properties
To edit agent details:
- Point to the agent's row.
- Select the Edit agent icon.
- Adjust the fields:
- Agent Name: The display name for the agent, used across OpenLM Platform.
- Description: Optional notes for identification, up to 200 characters.
- Status: Enabled means the agent is operational. Suspended means sync is paused until the agent is activated again.
- Agent Log Level: The minimum severity the agent logs: Trace, Debug, Information, Warning, Error, Critical, or None. Trace logs everything, including sensitive data such as passwords. Critical logs only failures that affect how the agent works.
- If you want to change how the agent polls or runs syncs, expand Advanced settings and adjust:
- Request Interval (sec): How often, in seconds, the agent asks Directory Sync for new sync requests. Enter a value from 5 to 300. The default is 30.
- Sync Method: Parallel runs multiple syncs concurrently. Serial runs syncs sequentially, first in, first out (FIFO).
- Select Save.
A change to Sync Method applies from the next sync.
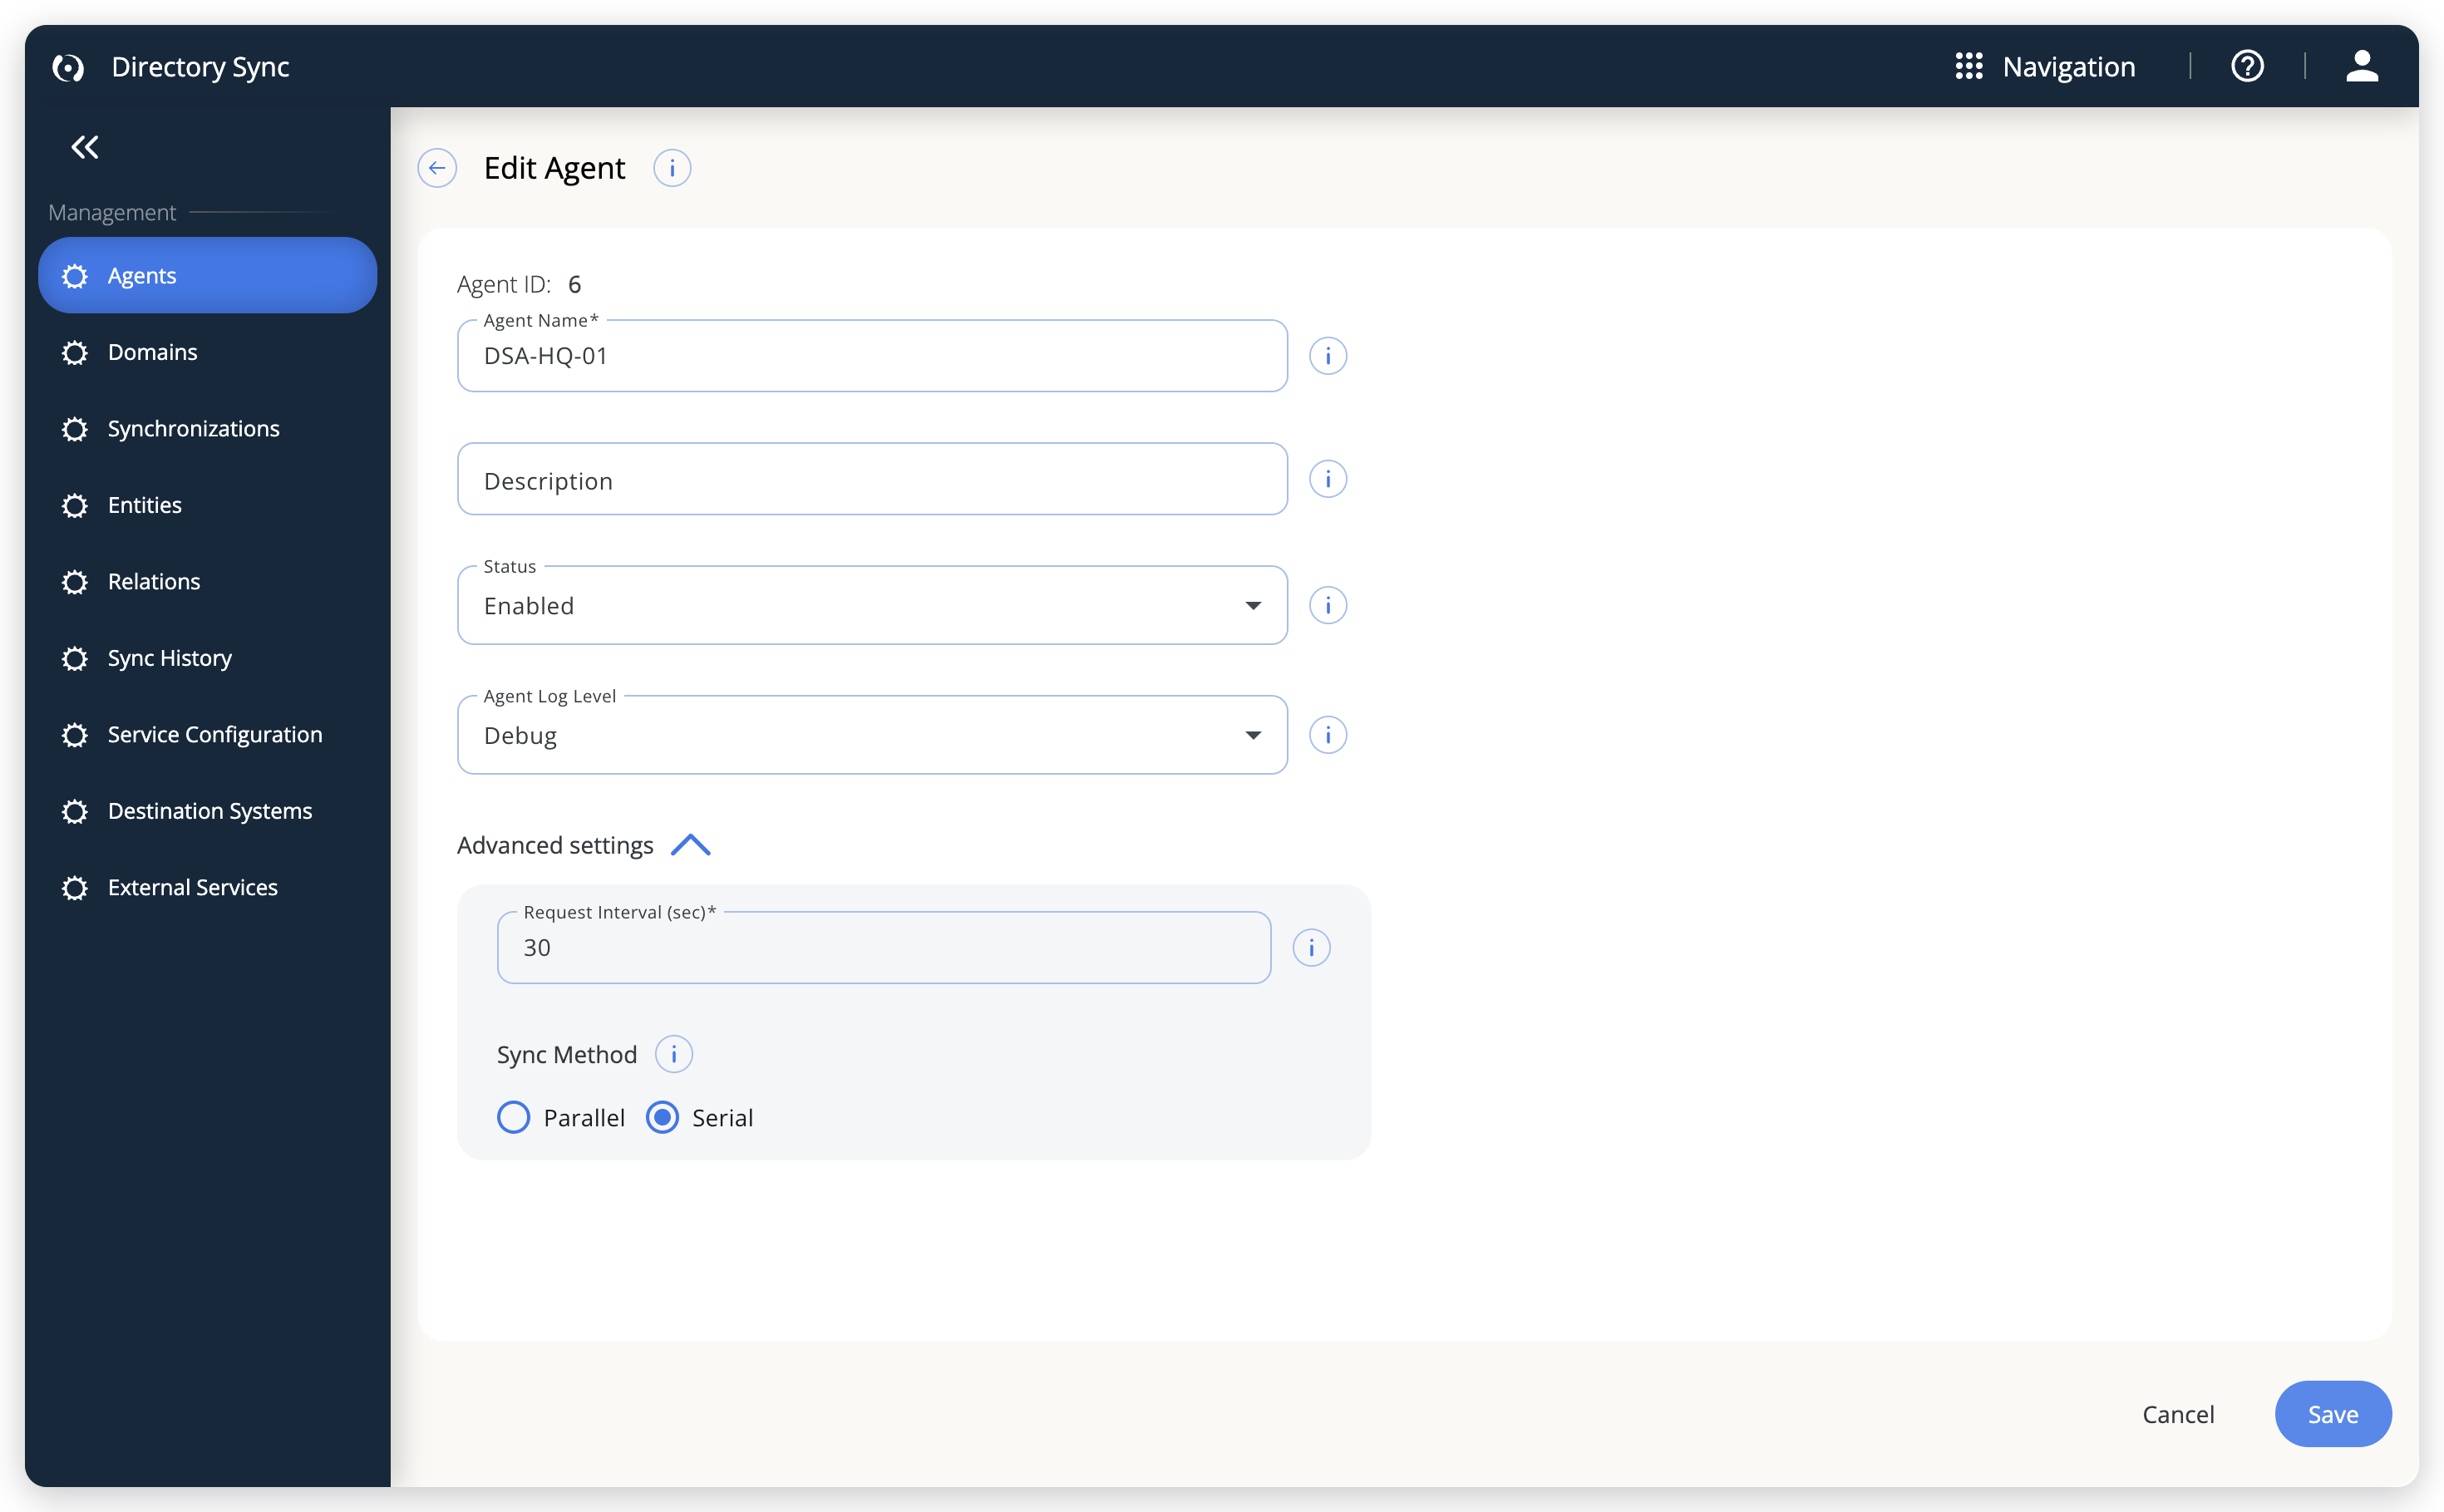 Change an agent's status, polling interval and sync method.
Edit agent properties in bulk
To bulk edit agent properties:
- Select the check boxes of two or more agents.
- Select Bulk Edit to open the editor.
- Set the fields you want to change: Status, Request Interval (sec), or Sync Method. Fields you leave empty stay as they are. Name, description, and log level can't be changed in bulk.
- Select Save.
- Select Confirm.
Delete an agent
To delete agents:
-
Select the check boxes of the agents to delete.
-
Select Delete.
-
If any of the agents has syncs, in Agent to assign the syncs to, select another enabled agent.
The dialog asks you to hand those syncs over. Confirm stays unavailable until you do.
-
Select Confirm.
Domains
To connect a directory to OpenLM Platform, add it as a domain. A domain tells the agent which directory to read: its type, address, and credentials. Open Domains to add, edit, or delete domains.
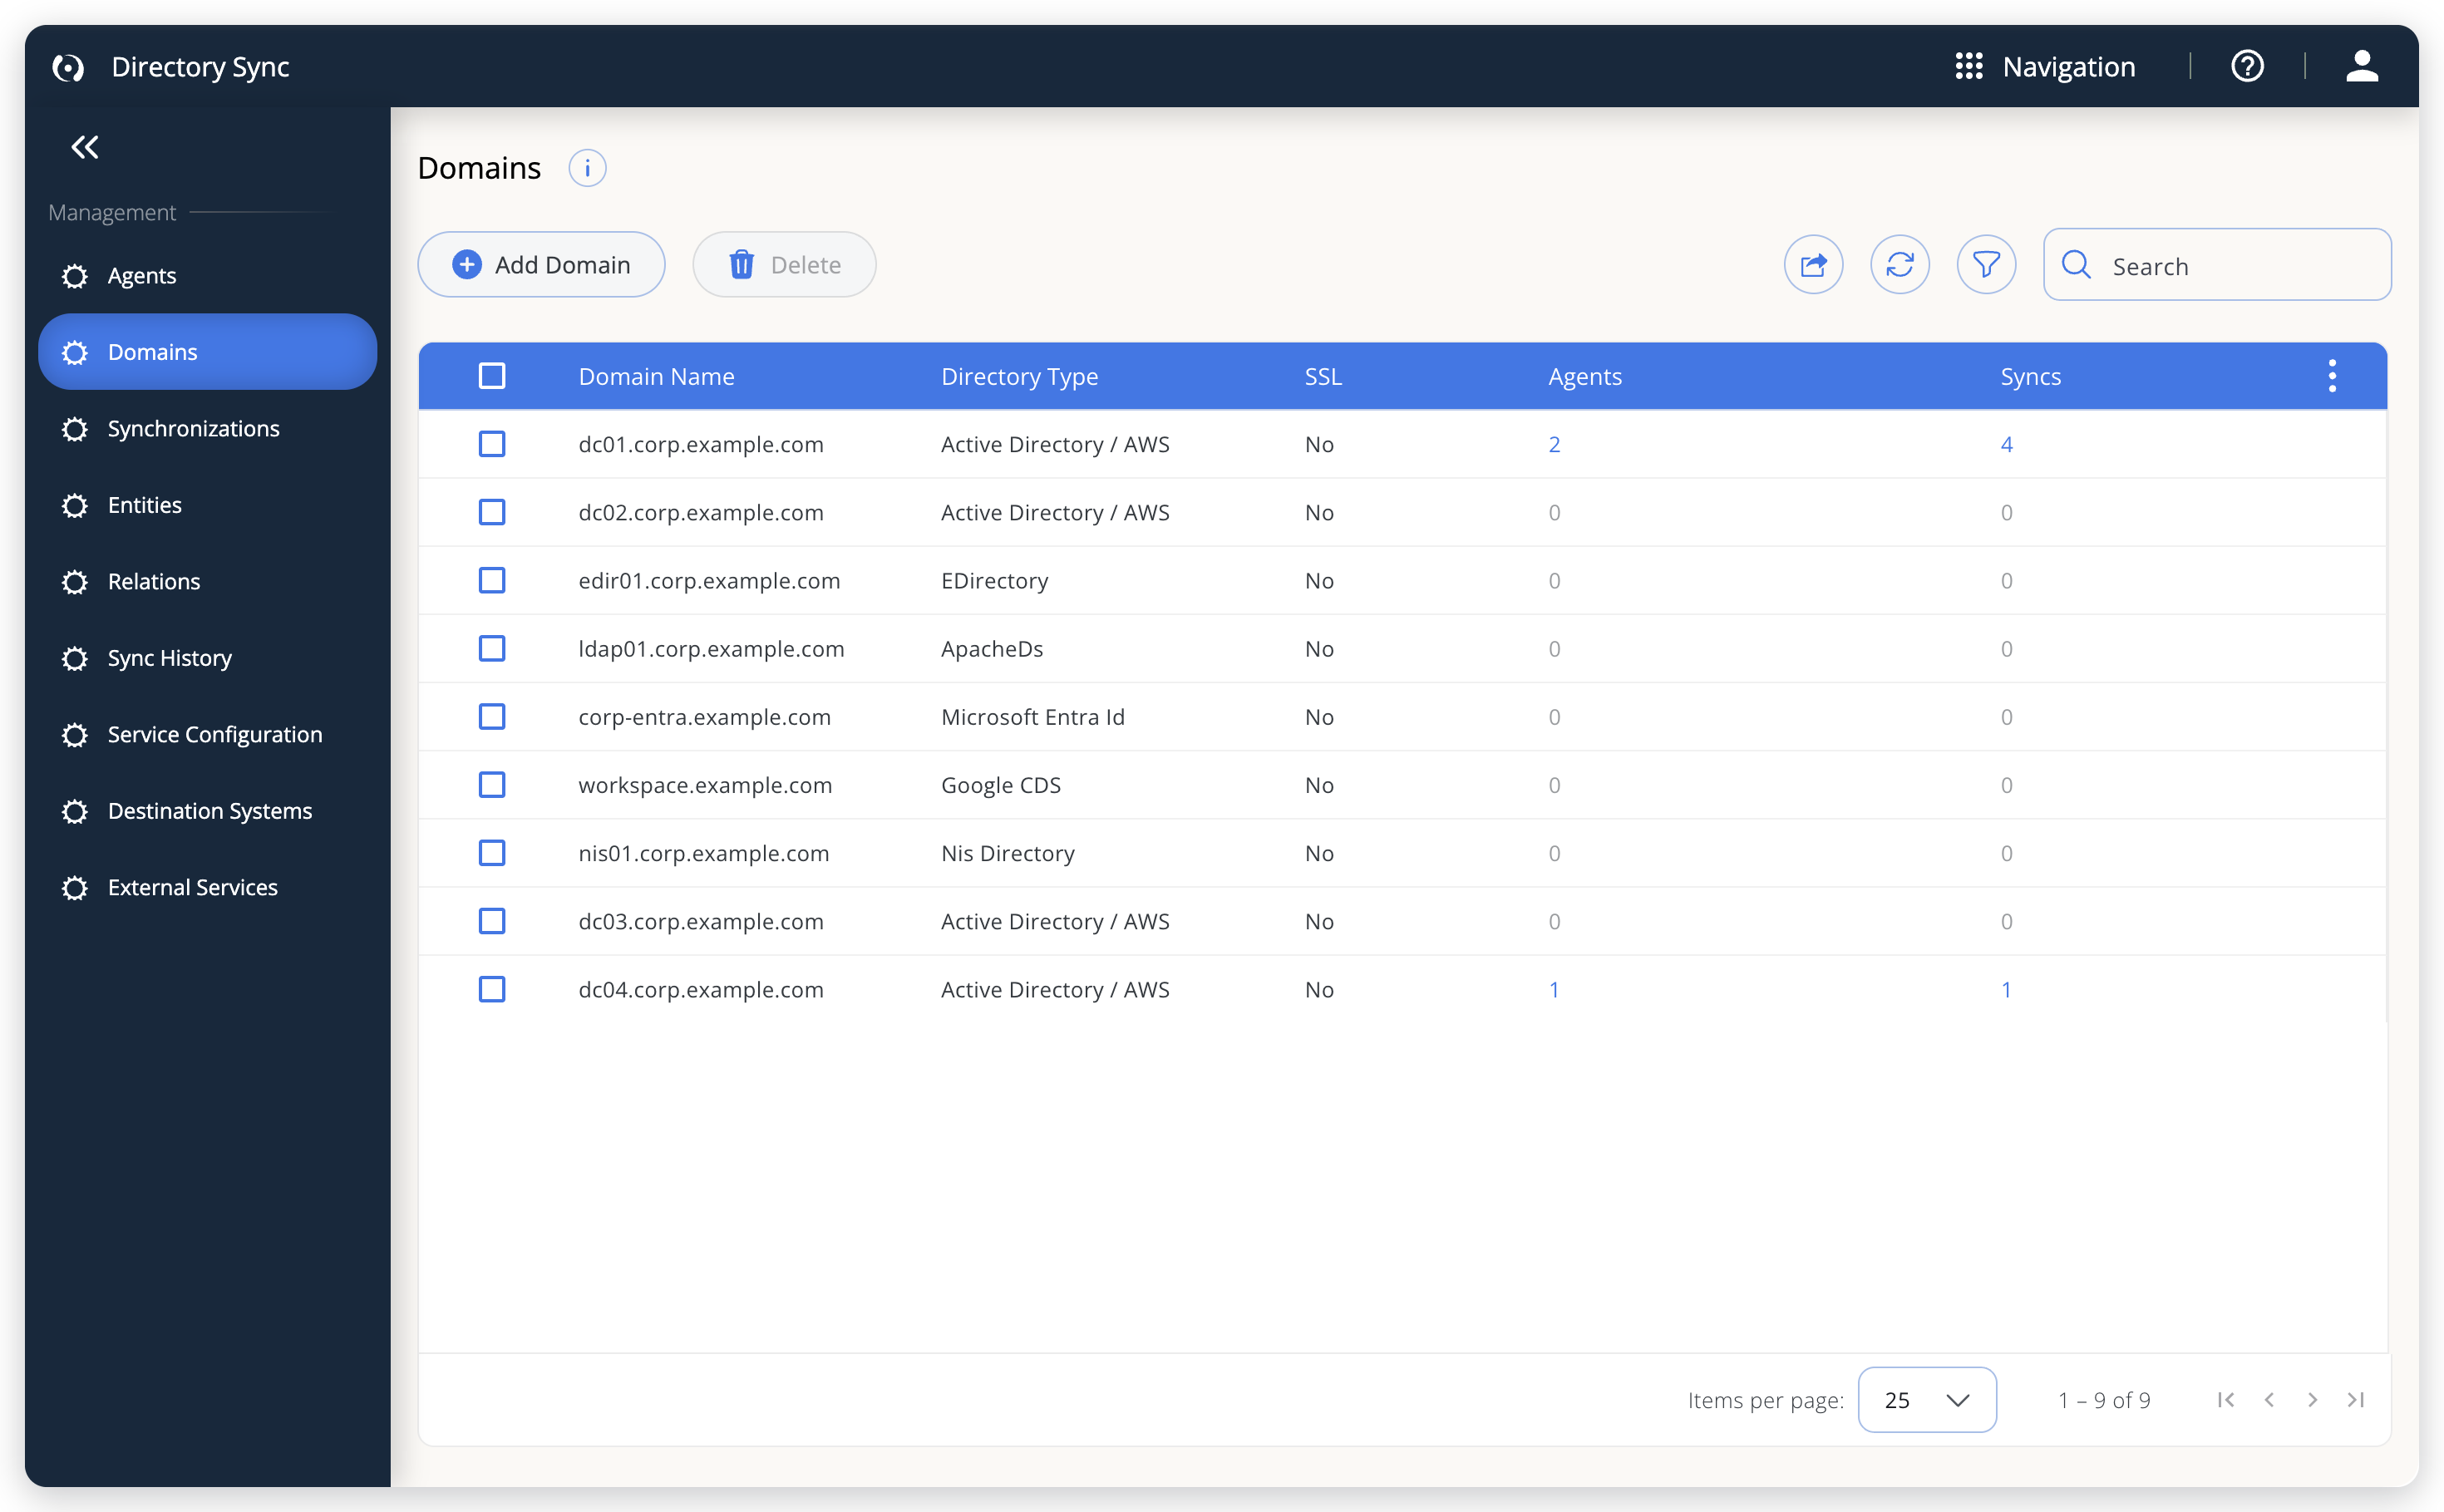 Each connected directory is a domain.
To see which directories are connected, check the grid, which shows each domain's Domain Name, Directory Type, SSL, and the number of connected Agents and Syncs. Use the column menu to add Last Connection On.
Supported directory types
Directory Sync supports these directory types:
- Active Directory / AWS
- EDirectory
- ApacheDs
- Microsoft Entra Id
- Google CDS
- Okta Directory
- Nis Directory
Add a sync domain
To add a domain:
-
Select Add Domain.
-
In Directory Type, select the type of your directory. The default is Active Directory / AWS.
-
Fill in the fields for that type. Every field that appears is required, except the toggles.
Directory Type Fields Active Directory / AWS, EDirectory, ApacheDs Domain Name, Port, Anonymous Connection, SSL, Username, Password Microsoft Entra Id Domain Name, Client ID, Client Secret, Tenant ID Google CDS Domain Name, Client Private Key, Username Okta Directory Okta Domain, Client ID, Client Private Key Nis Directory Domain Name, Port, SSL, Username, Password -
Domain Name: The name that Directory Sync lists the domain under, for example in the Domain list of a synchronization. It must be unique.
For Active Directory / AWS, EDirectory, ApacheDs, and Nis Directory, enter the IP address or fully qualified domain name (FQDN) of the domain controller. For Okta Directory, enter your Okta domain in Okta Domain instead, for example
company.okta.com. -
Port: Domain controller port, from 1 to 65535. For Nis Directory the port is fixed at 22.
-
SSL: Turn on to encrypt the connection.
-
Anonymous Connection: Connect without credentials. It hides Username and Password.
-
Username and Password: Admin credentials (read access required). Select Show password to reveal what you typed.
-
Client Secret: Select Show client secret to reveal what you typed.
-
For Microsoft Entra Id, register an app and grant its permissions first. See Register an app in Microsoft Entra ID.
-
For Google CDS synchronization, see the Google CDS support guide (PDF).
NoteChanging SSL or Directory Type resets the port to the default for that combination: 389 (636 with SSL) for Active Directory / AWS and EDirectory, 10389 (10636 with SSL) for ApacheDs, and 22 for Nis Directory. If your previous port wasn't one of the defaults, a message tells you the new default. Set SSL and Directory Type first, and then enter a custom port.
-
-
Select Check Domain Connection.
-
In the dialog, select the Agent that runs the test.
-
Select Continue.
The test takes up to 2 minutes, and Abort stops waiting. When it ends, check for Successfully connected or Connection check failed. For a failure, point to the info icon for possible causes: an incorrect username or password, an unsupported domain or directory type, or network connectivity.
-
Select Save.
To continue straight to a new synchronization with this domain selected, select Save Domain & Add Sync instead.
The following screenshot shows the connection fields for a new directory.
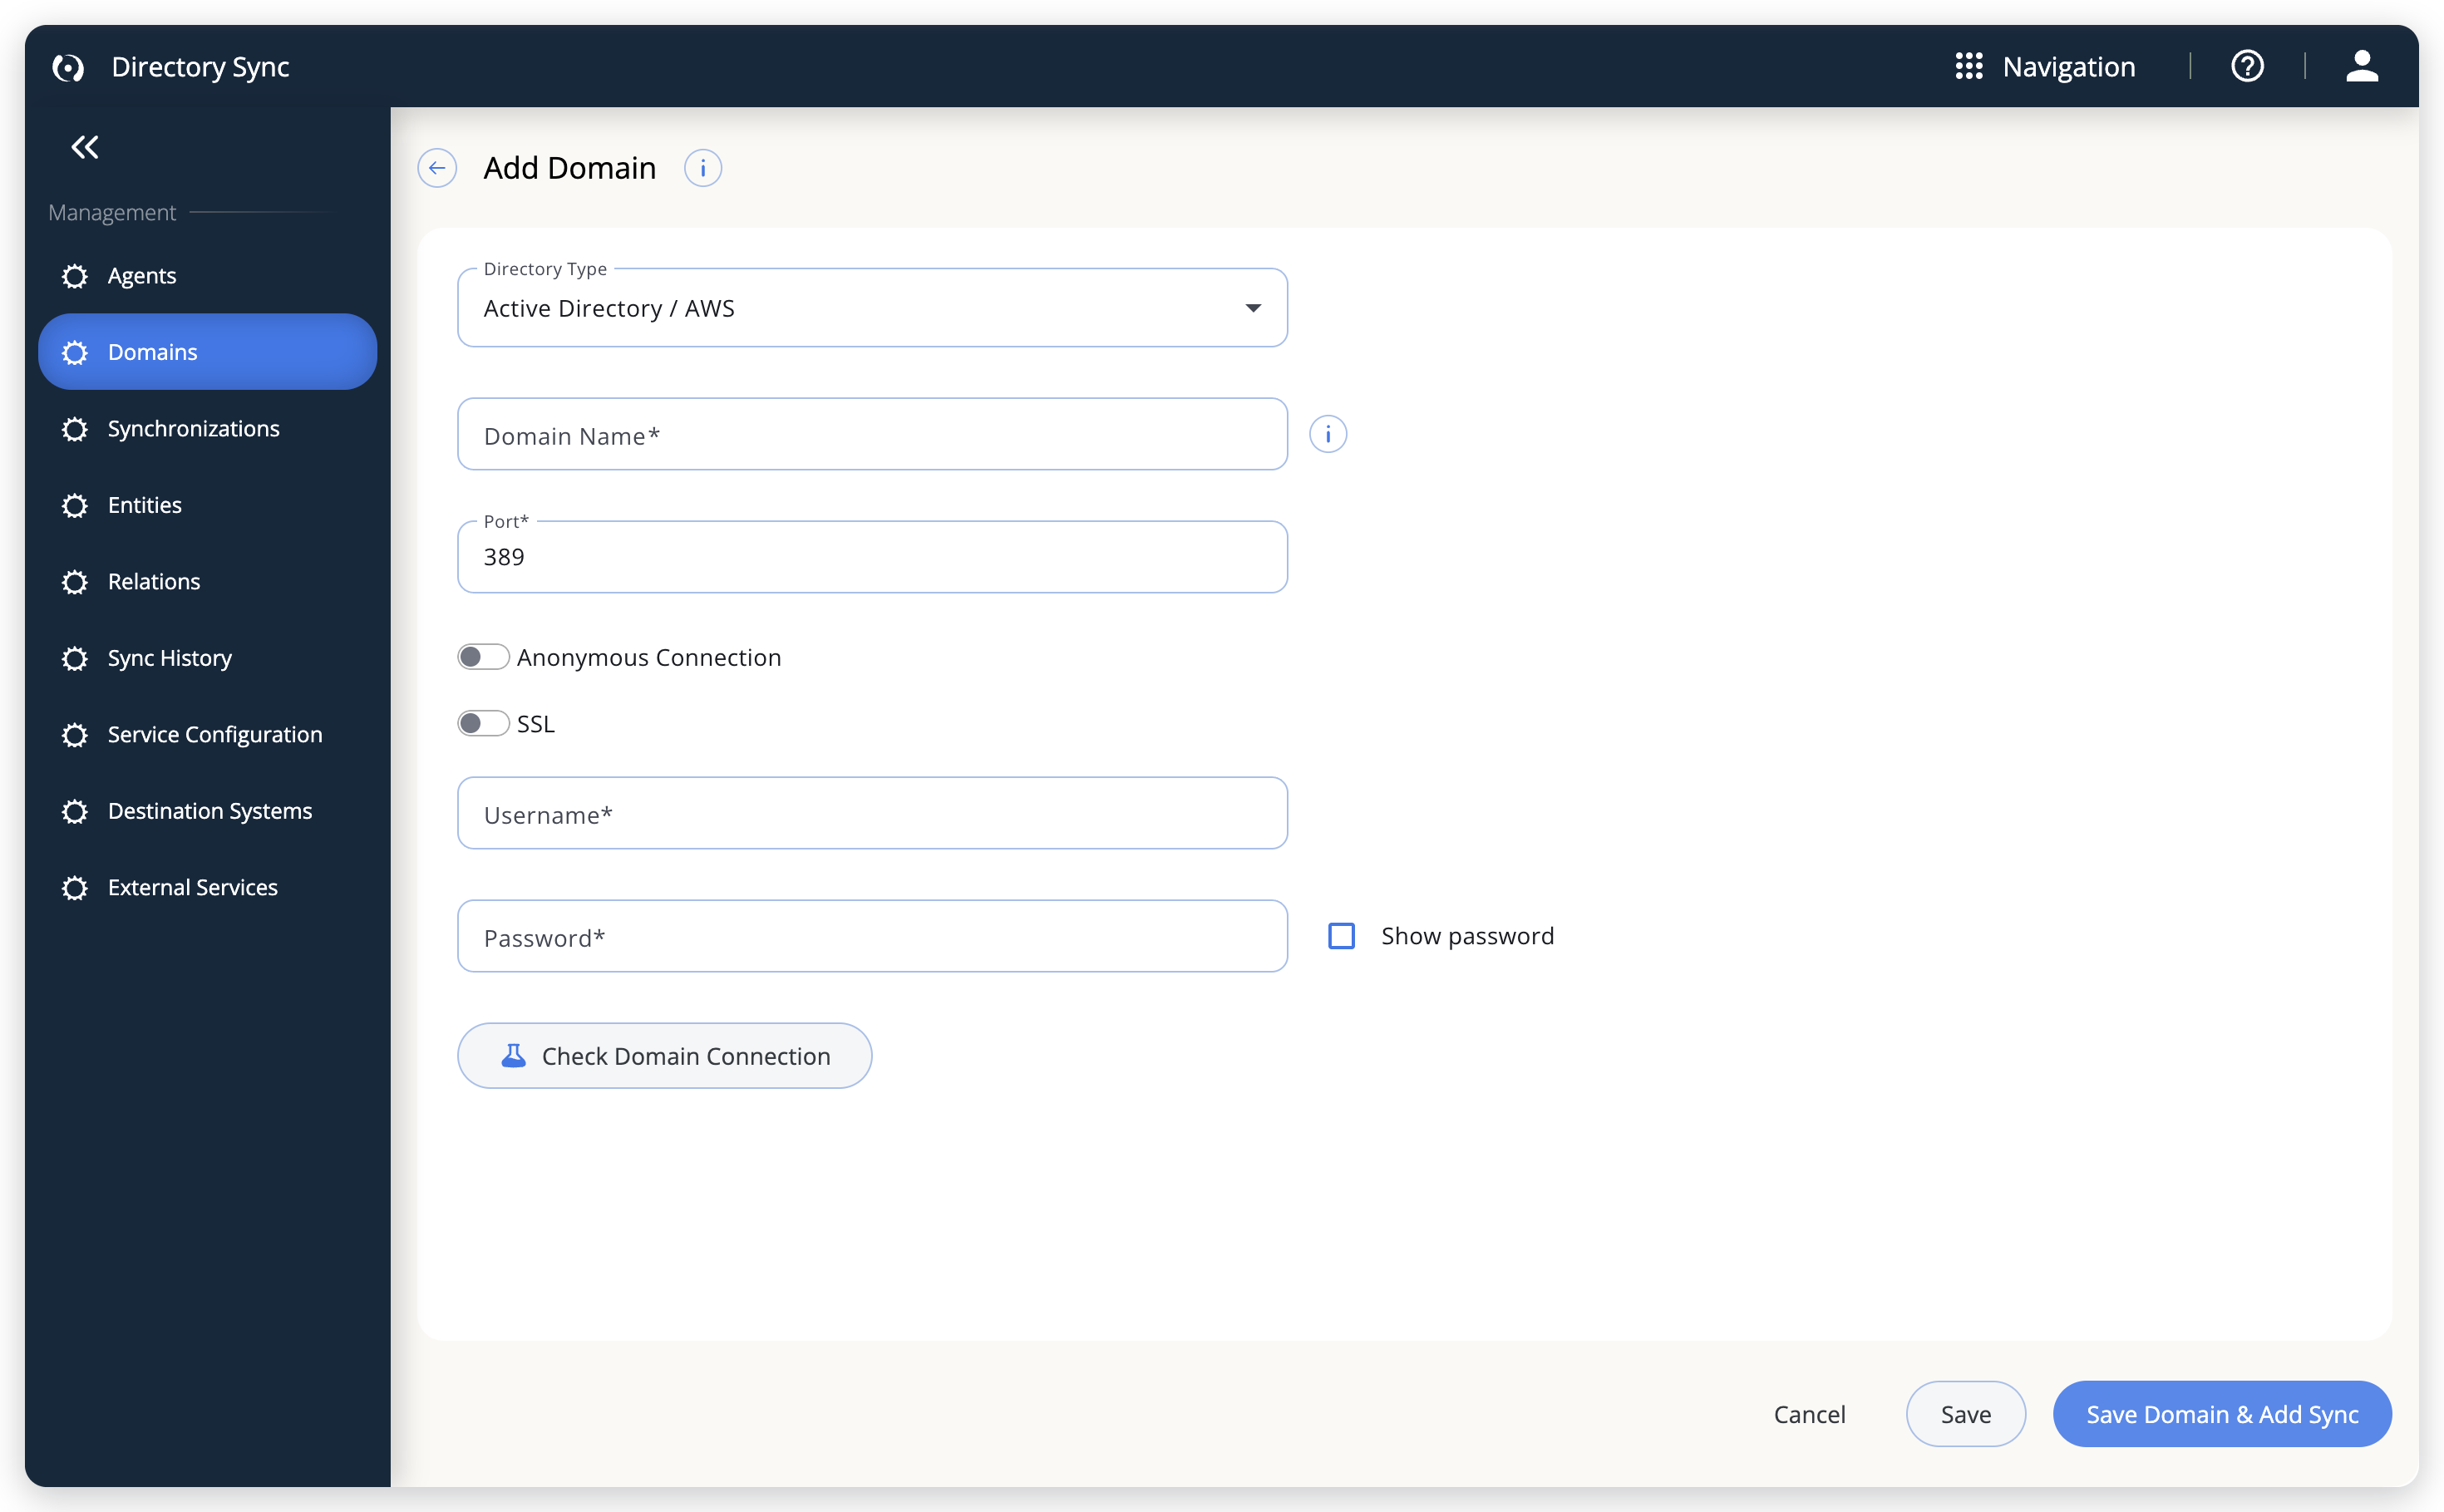 Enter the directory's connection details, then test them with Check Domain Connection.
Register an app in Microsoft Entra ID
Directory Sync connects to Microsoft Entra ID with app-only authentication (the client credentials flow) and reads your directory through Microsoft Graph. Before you add the domain, register an app for it in Entra ID:
- In the Microsoft Entra admin center, select App registrations, then register a new app for Directory Sync.
- Copy the app's Application (client) ID and Directory (tenant) ID. You enter them as Client ID and Tenant ID.
- Under Certificates & secrets, create a client secret and copy its value. Entra ID shows the value only once. When the secret expires, sync stops until you enter a new one in the domain.
- Under API permissions, add the Microsoft Graph application permissions in the following table, and then select Grant admin consent.
| Permission | Why Directory Sync needs it | When it's needed |
|---|---|---|
User.Read.All | Read users and their attributes. | Always. |
Group.Read.All | Read groups, their properties, their members, and nested group membership. | Always, unless the sync starts from an administrative unit that contains no groups. |
Organization.Read.All | Read the tenant's name, shown at the top of the sync tree, and test the connection. It returns only tenant-level information. | Always. |
AdministrativeUnit.Read.All | Read administrative units. | When the sync starts from the tenant root or from an administrative unit. You can leave it out when Start Sync From is a group. |
GroupMember.Read.All isn't enough on its own: Directory Sync reads group properties, which need Group.Read.All. Because Group.Read.All already covers members and memberships, you don't need GroupMember.Read.All as well. Directory Sync doesn't use delegated permissions or beta endpoints.
Edit a domain
To edit a domain, point to its row and select the Edit domain icon. The form doesn't show saved passwords, client secrets, or private keys, and they're required, so enter them again before you select Save. When you edit an existing domain, Save Domain & Add Sync returns you to Domains like Save does.
Delete a domain
To delete a domain:
- Select the domains.
- Select Delete.
- Select Confirm.
Deleting a domain also deletes the sync definitions that use it. The dialog warns you and keeps Confirm unavailable for 10 seconds. If one of those syncs is running, Directory Sync cancels the deletion and lists the running syncs. Turn those syncs off and try again.
Synchronizations
To set what Directory Sync reads from a domain, and when, create a synchronization (sync). A sync ties an approved agent to a domain, sets a schedule, and defines which users or computers to collect and which groups and projects to build from them. Open Synchronizations to add, edit, run, stop, or delete syncs.
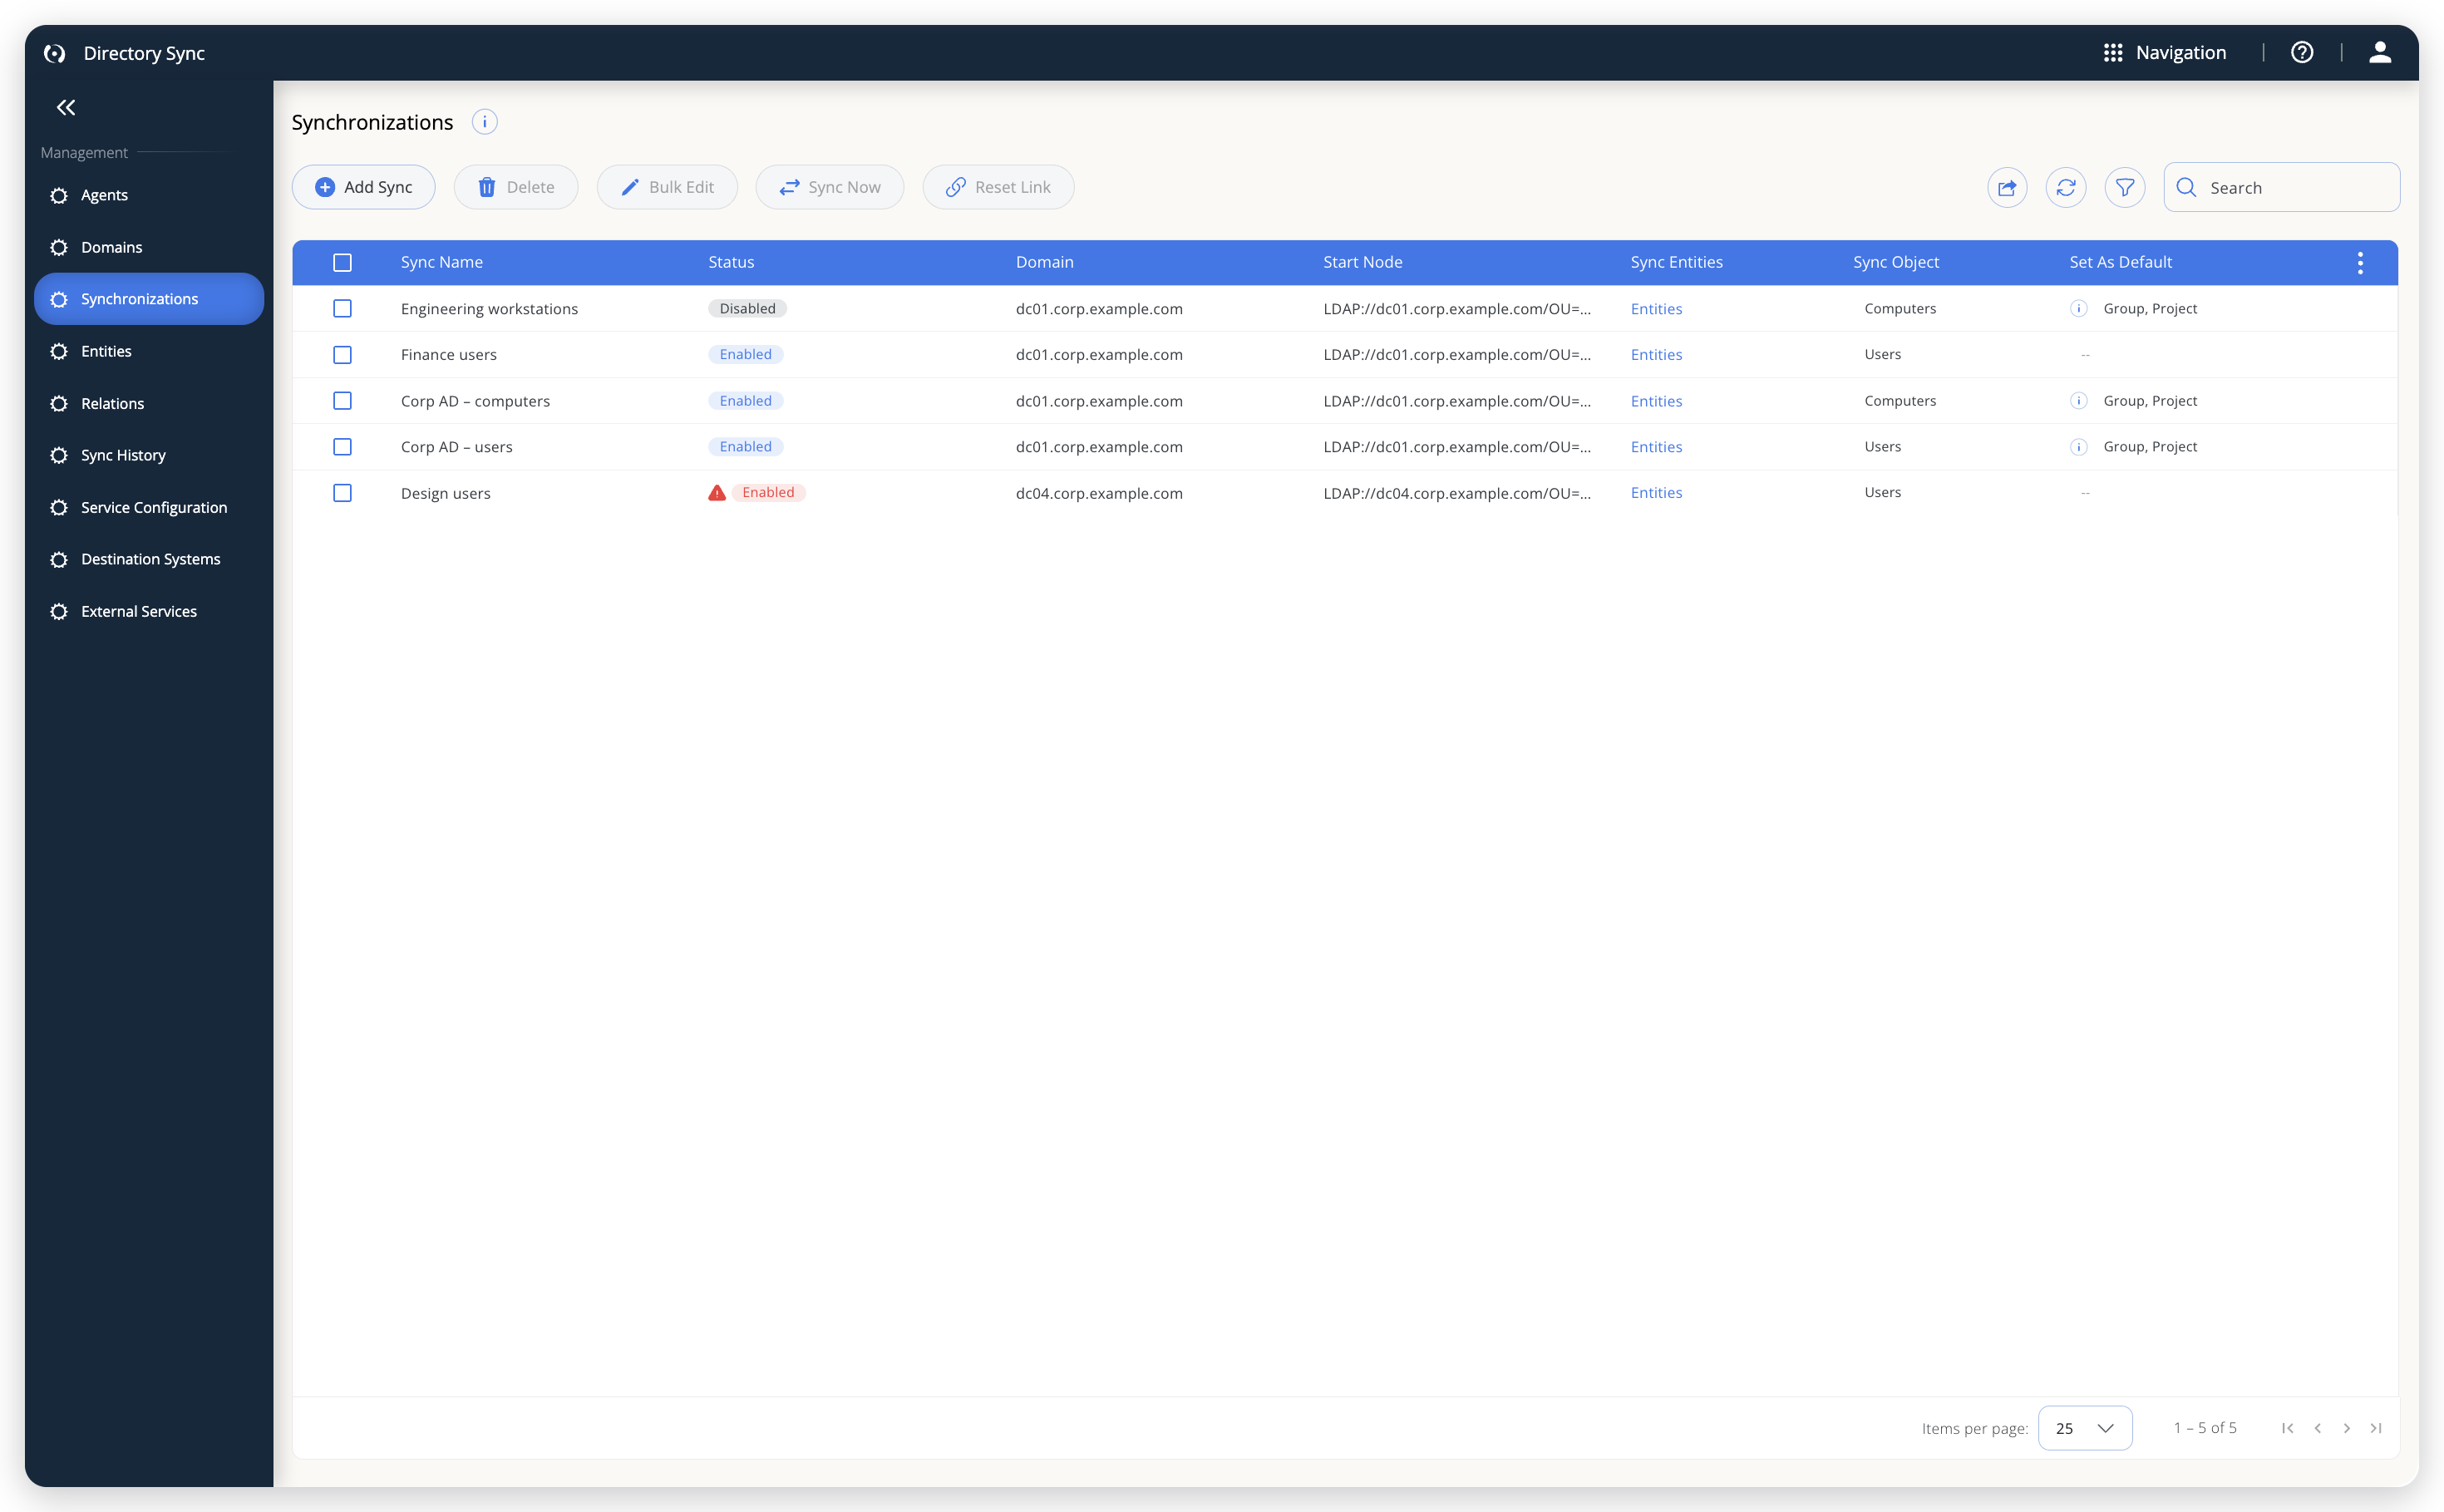 Each row is a sync definition.
The grid shows each sync's Sync Name, Status, Domain, Start Node, Sync Entities, Sync Object, and Set As Default. Use the column menu to add Agent, Created On, and Last Synced On. Status is Enabled, Disabled, or Running. A warning icon marks a sync whose last run failed. Check the DSA logs or Sync History for details. When any listed sync is running, a banner counts them, and Show running only limits the grid to those syncs. The Entities link in Sync Entities opens Entities, filtered to that sync.
Add a sync definition
To add a sync definition:
- Select Add Sync.
- If you have no domains yet, Directory Sync asks you to add one first. Select Confirm to open Add Domain.
- Fill in sync definition details:
- Sync Name: Unique name for the sync definition.
- Enabled: Turn the sync on or off. It's on by default. An enabled sync runs only when its agent is enabled.
- Work through the four tabs: Destination & Time, Object, Group & Rules, and Project Rules. Select Next to move on to the next tab.
- Select Save. If a tab has an error, Directory Sync opens the first one that does. When you edit an existing sync, Save is available on every tab.
Destination & Time tab
On this tab, set the following:
-
Agent: Select the agent that runs this sync. Only enabled agents are listed.
-
Domain: Select the domain to sync from.
-
Start Node: The Lightweight Directory Access Protocol (LDAP) path node where the sync starts. For Active Directory / AWS, EDirectory, and ApacheDs domains the field is required, and it fills in as
LDAP://<domain-address>when you select the domain. When you arrive from Save Domain & Add Sync, the domain is already selected and the field stays empty, so enter the start node yourself.Examples:
LDAP://10.0.0.153/OU=OU_AB,DC=testdev1domain,DC=openlm,DC=bizLDAP://server2008r2ldap.openlm.biz/CN=SecGroup,DC=openlm,DC=comFor the other directory types the field is called Start Sync From and is optional. Leave it empty to sync the whole directory, or enter a starting point:
Directory Type Starting point Google CDS ou=<ou-name>orgroup=<group-name>Microsoft Entra Id groups/<object-id>oradminunits/<object-id>Okta Directory groups/<group-name>orusers/<user-email>Nis Directory groups/<group-name>orusers/<username>In these starting points,
<ou-name>,<group-name>,<object-id>,<user-email>, and<username>stand for the object to start from. -
Test Start Node: Select it to check that the agent can reach the start node. It needs a valid agent, domain, and start node. The Start Node Validation dialog waits up to 2 minutes. When it ends, check for Start Node tested successfully or Failed to test the Start Node.
-
Sync Method (the schedule, not the agent setting of the same name):
- By Time: Set specific days and times. Select a day in Days and a Start Time in 30-minute steps, and then select Add. Repeat for each run. The day and time pairs appear in a list.
- By Interval: Define intervals from 1 to 720 hours. Set a Start Time and an Interval Time (hours). A new sync starts as By Interval, every 24 hours from 00:00.
Times follow the Time zone in your UI Configurations, and Directory Sync converts them to Coordinated Universal Time (UTC) when you save.
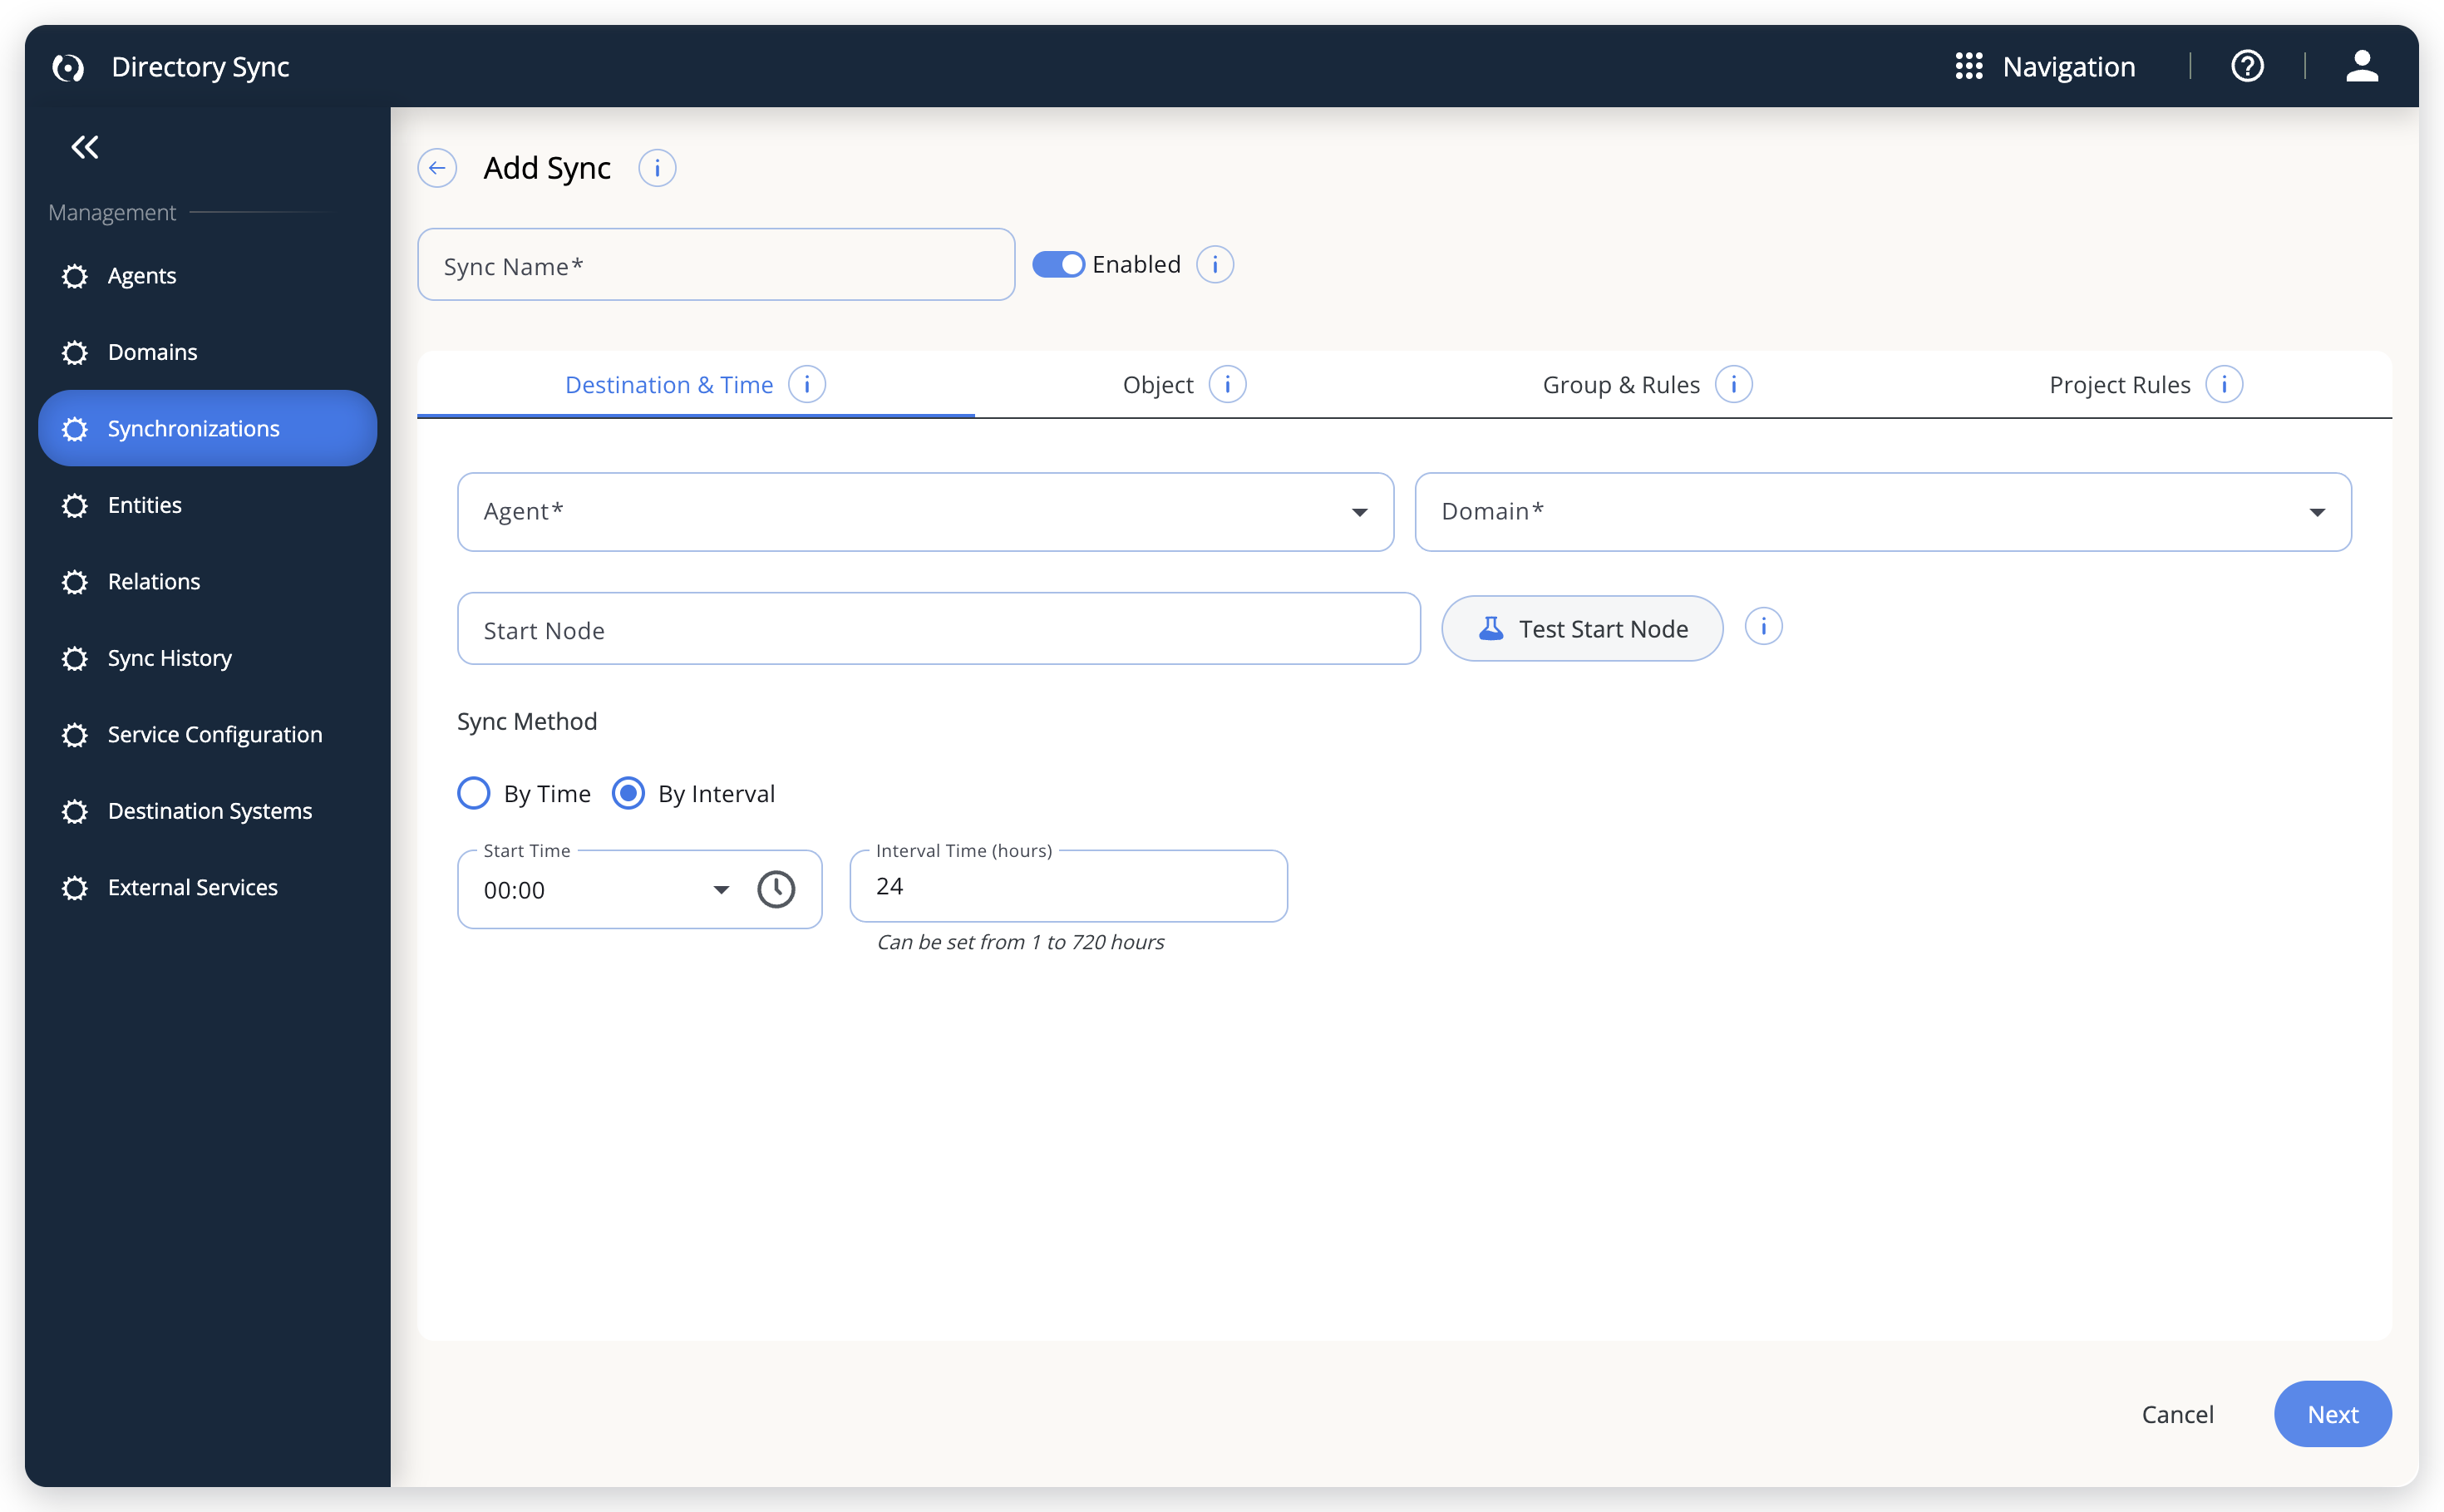 Choose which agent reads which domain, from which start node, and when.
Object tab
On this tab, set what the sync reads:
- Sync object type:
- Users: Select Only users monitored by UGS to limit the sync to users monitored by OpenLM Platform.
- Reflect user status: Select it to mirror each user's enabled or disabled state from your directory into OpenLM Platform. Not available for NIS domains.
- Computers: Available for Active Directory / AWS, EDirectory, and ApacheDs only. Microsoft Entra Id, Google CDS, Okta Directory, and Nis Directory support Users only.
- Sync Attribute: Directory attribute that identifies each user (for example,
cn,sAMAccountName,userPrincipalName). The options depend on the directory type, and the first one is the default. - Membership Filter: Sync all objects or only those in specific groups, organizational units (OUs), or administrative units. The options depend on the directory type.
- Search Depth: Limit depth of sync. Enter the number of levels to sync from the start node, from 0 to 1000. The default, 0, syncs all levels. For Okta Directory the maximum is 1. For Microsoft Entra Id and Google CDS the depth must be 0 unless you set a start group, administrative unit, or OU in Start Sync From.
- Sync Attributes: Either sync all attributes (the default) or select a custom list. If you activate Custom selection of attributes, only the selected attributes are retrieved from LDAP and sent to external systems such as the Users and Groups service. Select All selects every attribute. Mandatory attributes stay selected. Custom selection isn't available for computers.
The options for Sync Attribute and Membership Filter, and the mandatory attributes, depend on the directory type:
| Directory Type | Sync Attribute options | Membership Filter options | Mandatory attributes |
|---|---|---|---|
| Active Directory / AWS | CN, samAccountName, userPrincipalName | All objects, Only members of OUs, and Only members of Security Groups | cn, sAMAccountName, userPrincipalName, whenChanged |
| EDirectory, ApacheDs | CN, mail | All objects, Only members of OUs, and Only members of Security Groups | cn, mail |
| Microsoft Entra Id | userPrincipalName, onPremisesSamAccountName, mailNickname | All objects, Only members of Administrative Units, and Only members of a group | userPrincipalName, mail, onPremisesSamAccountName, mailNickname |
| Google CDS | email | All objects, Only members of OUs, and Only members of Security Groups | primaryemail |
| Okta Directory | login | All objects | login |
| Nis Directory | username | All objects and Only members of Security Groups | username |
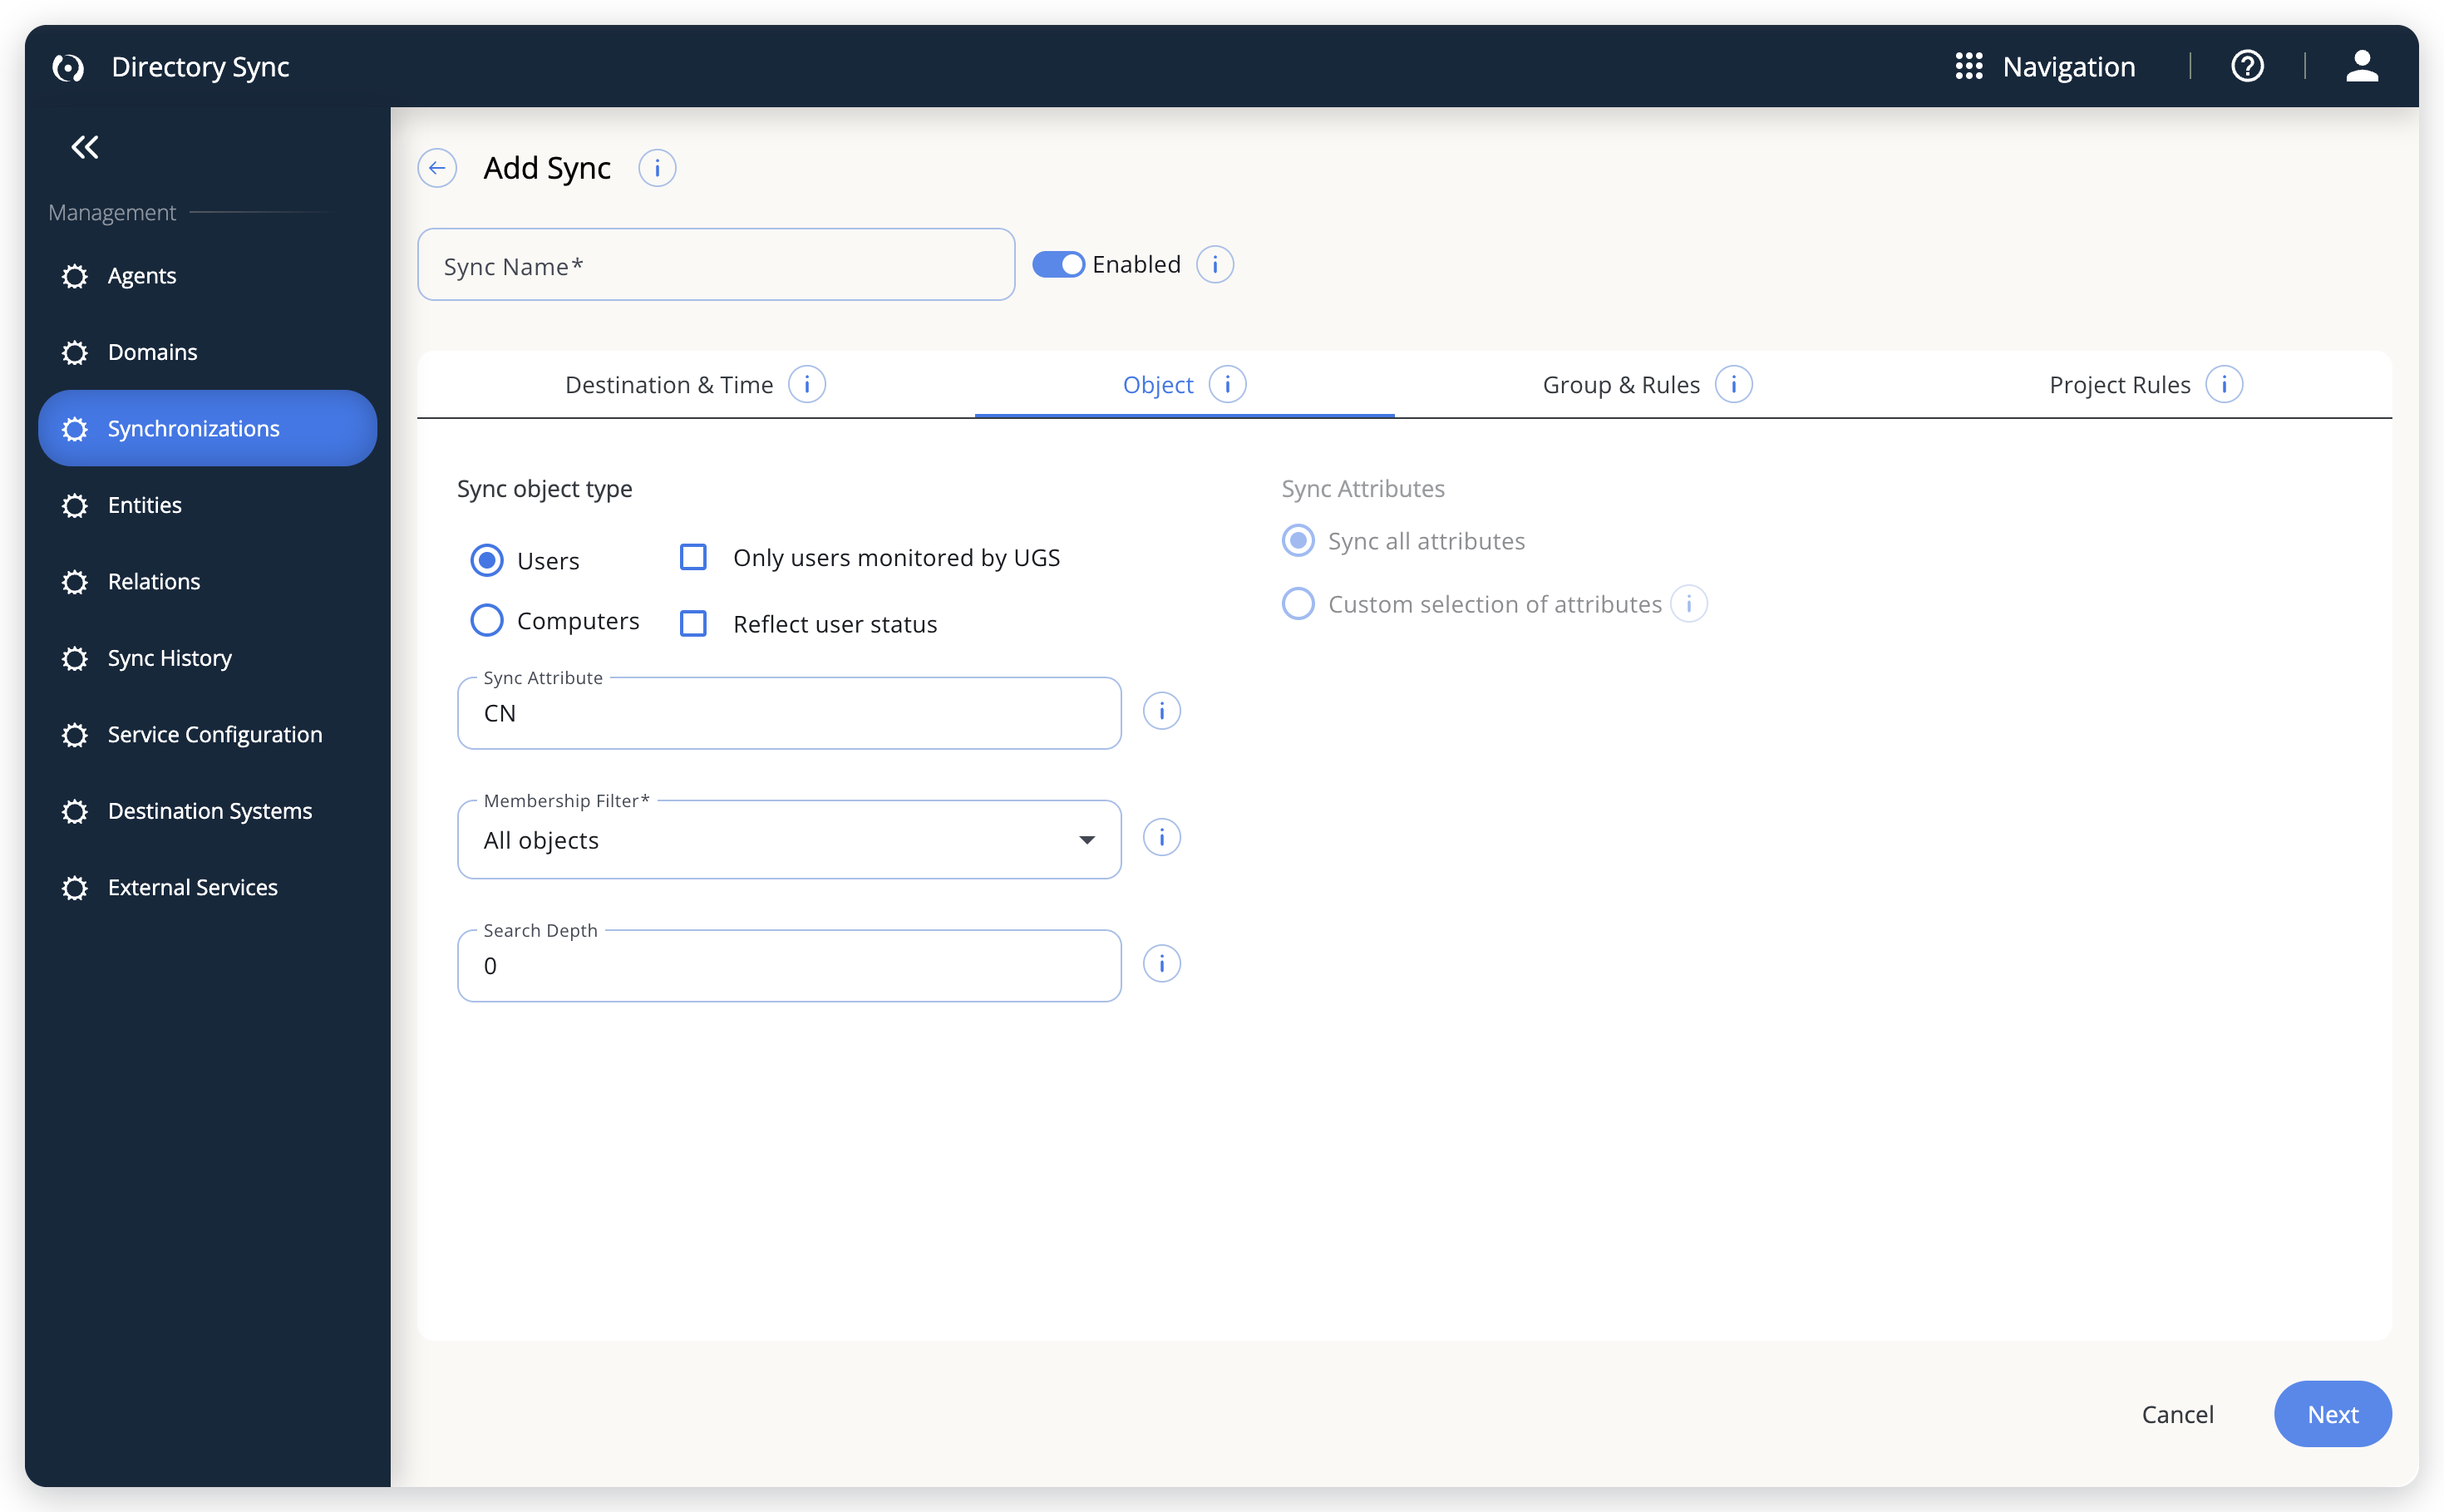 Choose what the sync reads: users or computers, the attribute that identifies them, and the attributes to bring in.
Users and Groups clears a user's properties before it applies a sync. Any non-mandatory attribute that you deselect under Custom selection of attributes is therefore empty after the sync.
If DSS is integrated with OpenLM SLM, OpenLM SLM clears all user properties except Mobile Phone, Email, and Country before it updates data through LDAP sync. As a result, any non-mandatory attributes you deselect in the DSS sync settings are wiped during synchronization and left empty.
Group & Rules tab
To build OpenLM Platform groups from the synced objects, select a rule in Rule to create a group:
-
No Group (the default): All objects assigned to default group.
-
Flat: All objects assigned to one group. Enter a Group Name.
-
Hierarchical: Create groups according to directory hierarchy. Select the object classes to build groups from:
- Security groups
- Distribution groups (Active Directory only)
- OU (Active Directory, EDirectory, ApacheDs, and Google CDS)
- Administrative Units (Microsoft Entra Id)
- Customized & Unknown object classes (Active Directory, EDirectory, and ApacheDs)
Search Depth limits how many levels become groups. For Active Directory domains it can't be larger than the Search Depth on the Object tab. Include start node makes the start node itself a group. Its contents sync either way. For Microsoft Entra Id it's Include start group.
-
Entity Attribute: Create groups based on specified attributes. Select one or more attributes in Attribute To Group By. With several attributes, the group name joins their values with underscores. The optional Regular expression is available only when you select a single attribute. Attributes you didn't turn on under Sync Attributes on the Object tab are unavailable.
With Flat, Hierarchical, or Entity Attribute, you can also set:
- Set as default group: Overrides default group assignment for reporting. It assigns all users from this sync to the group and sets it as their default. A user can have only one default group, so if several syncs set one, the sync that finishes last sets the default group.
- Wrapper Parent Group Name (Optional): Sets a parent group for all synchronized objects. It must differ from the Group Name of a flat rule.
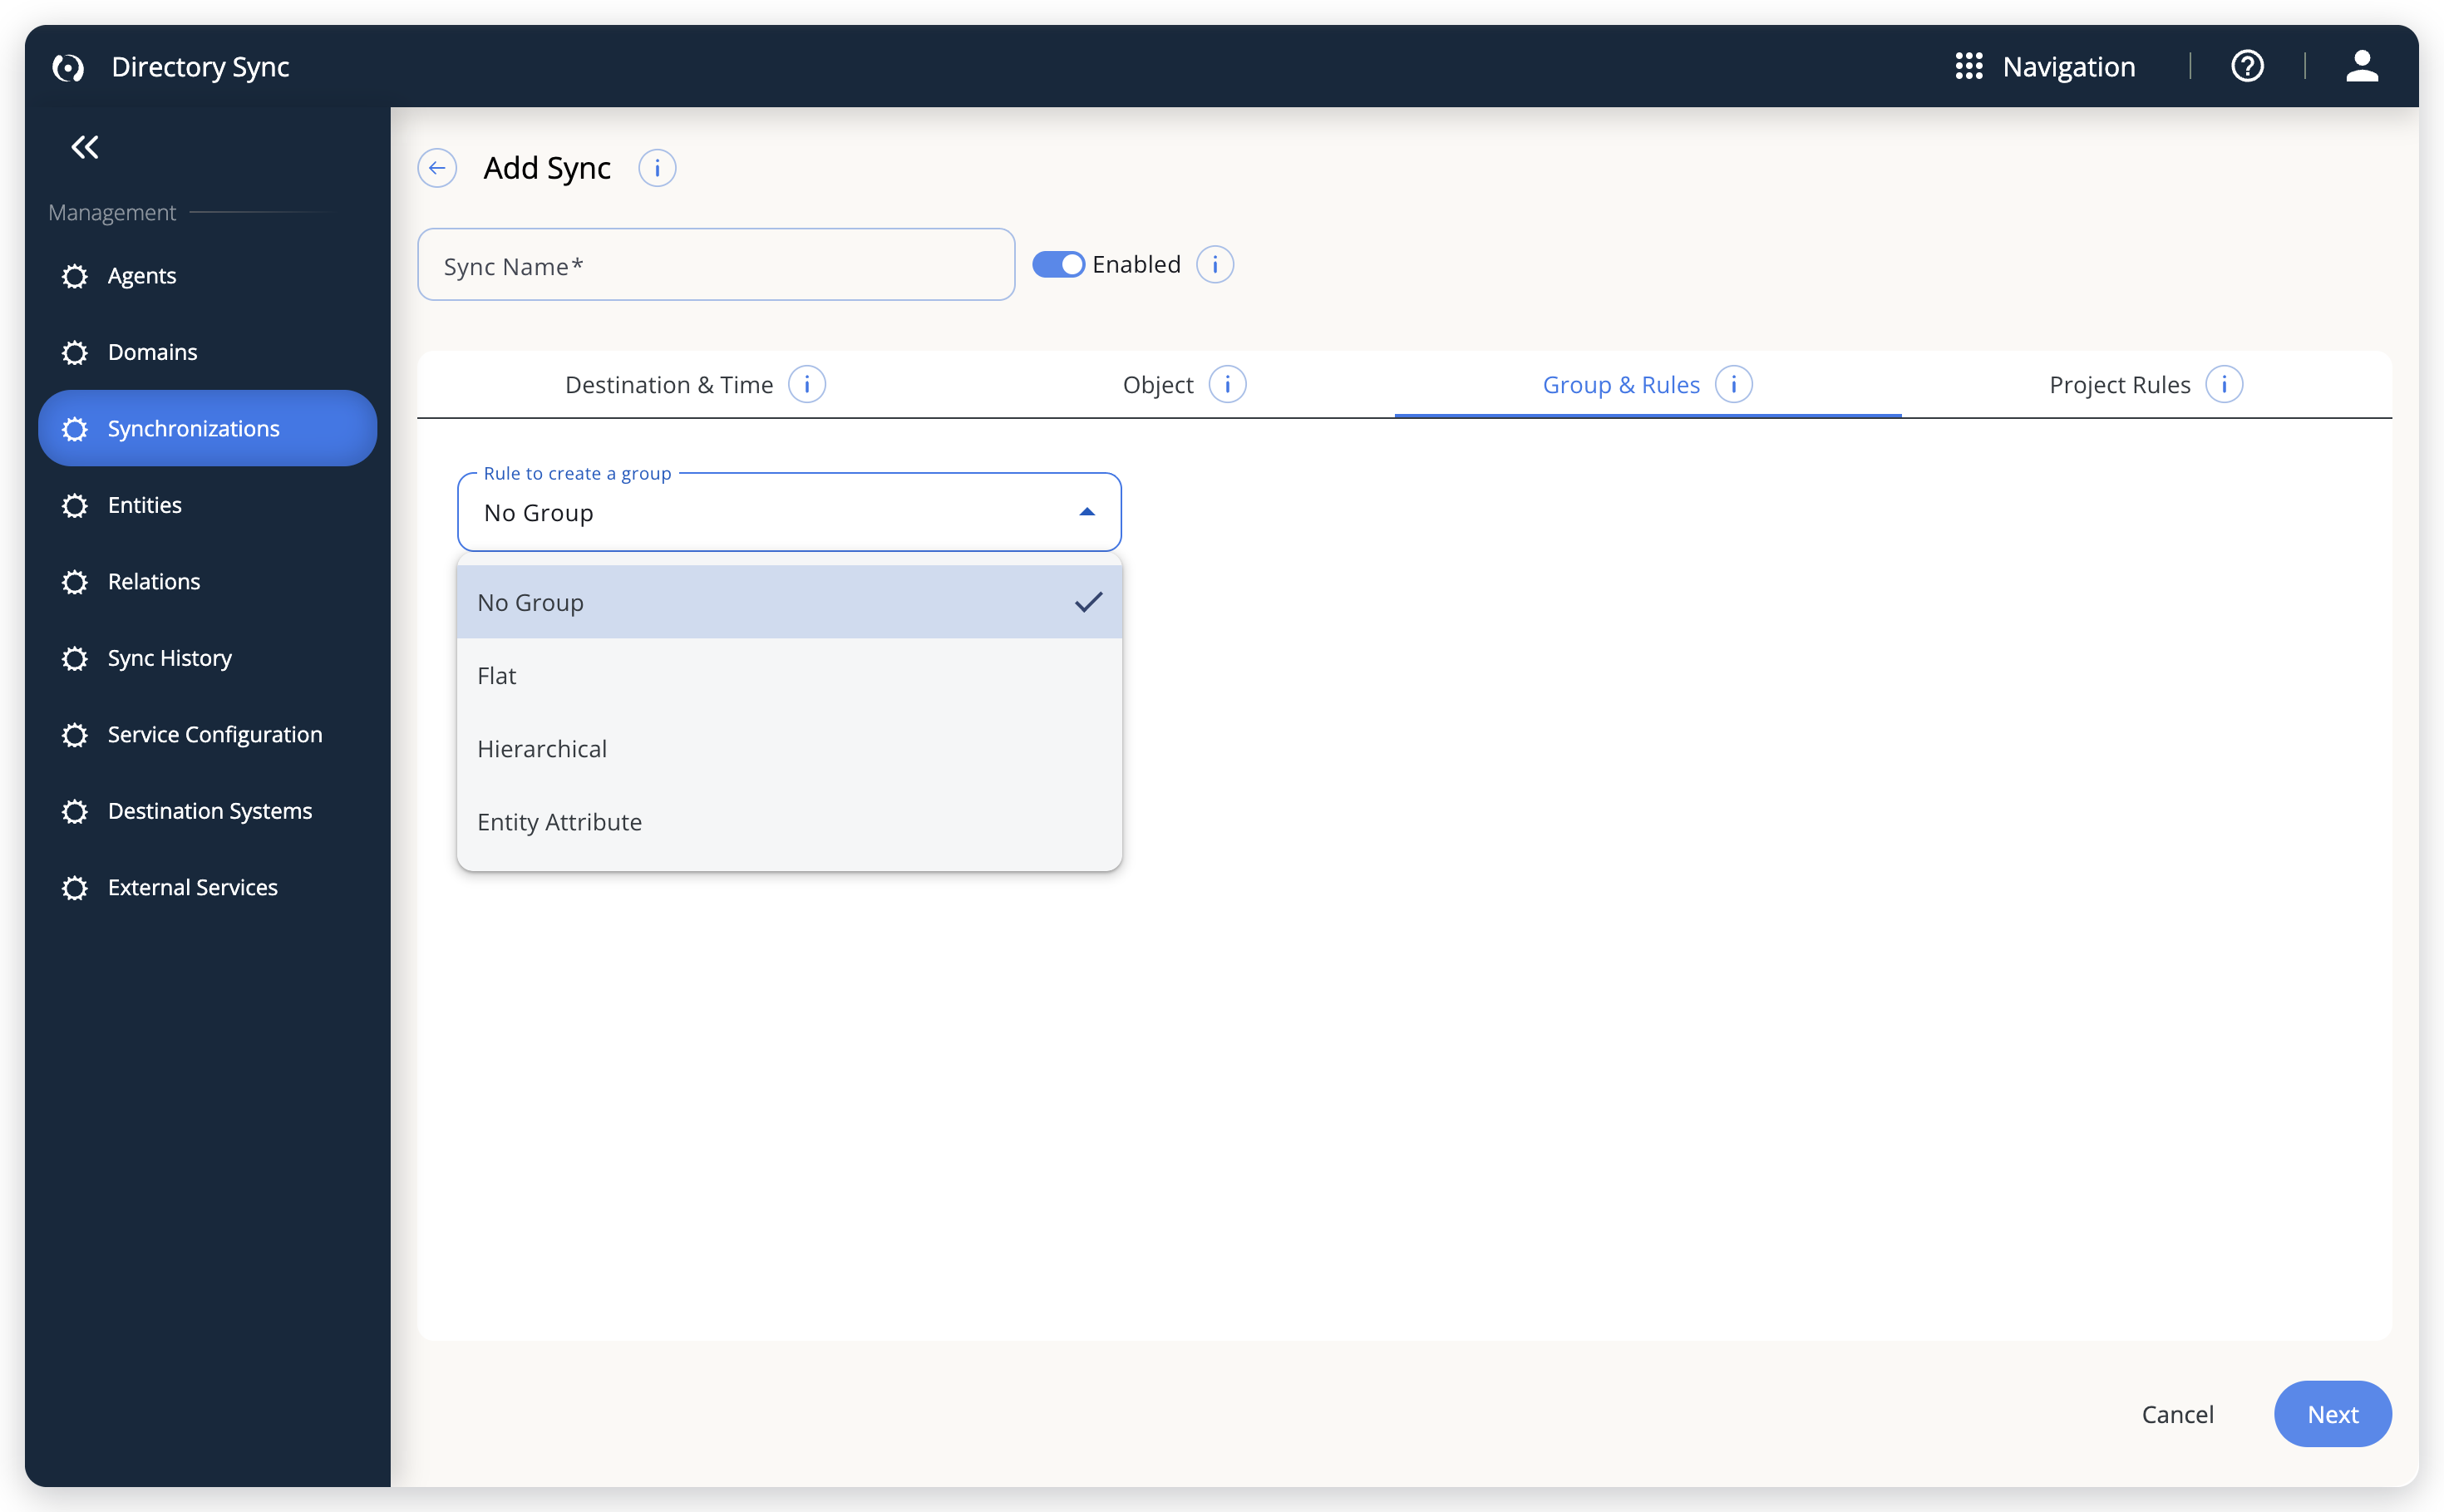 Pick how Directory Sync builds OpenLM groups from the directory.
ApacheDS groups synchronize differently: group membership is read from the groupOfNames and groupOfUniqueNames object classes and their member / uniqueMember definitions.
Project Rules tab
To build projects from the synced objects, select a rule in Rule to create a project. The options match Group & Rules, applied to projects.
The rules are No Project, Flat, Hierarchical, and Entity Attribute. The fields are named for projects: Project Name, Security projects, Distribution projects, Attribute To Project By, and Wrapper Parent Project Name (Optional).
Set as default project overrides default project assignment.
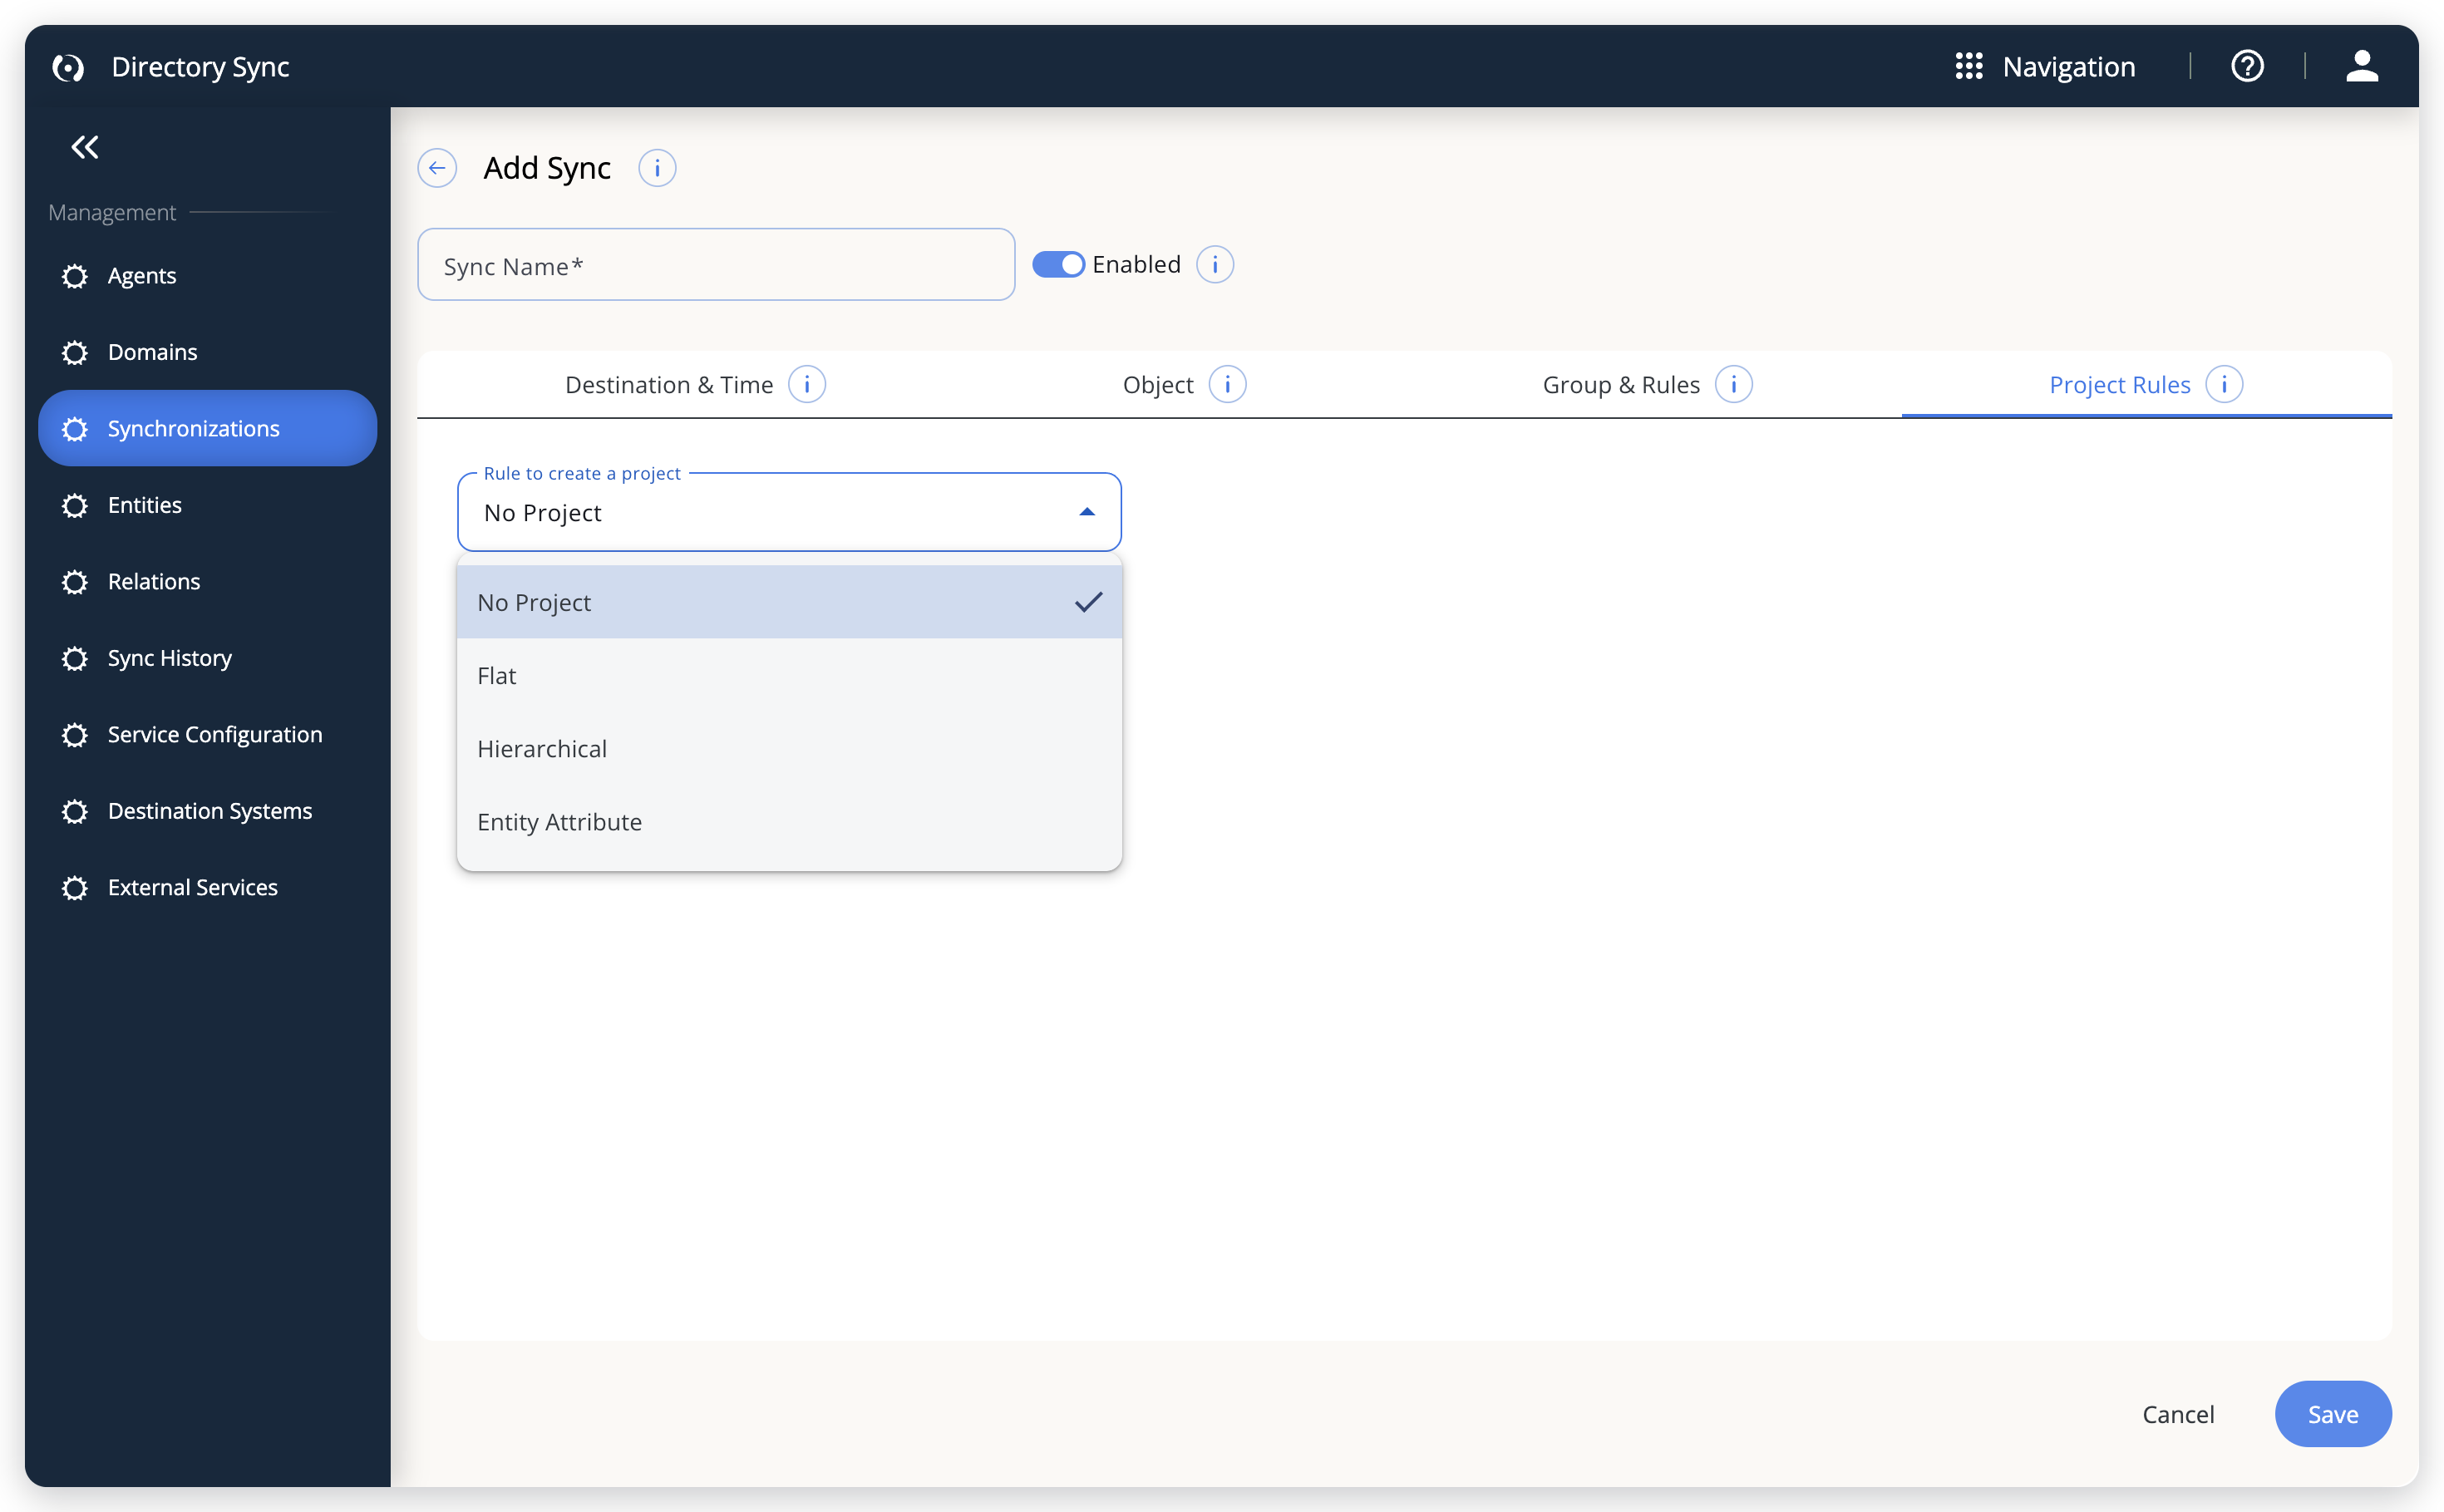 Pick how Directory Sync builds projects, or leave projects out.
Run a sync manually
To run selected syncs now:
- Select one or more sync definitions.
- Select Sync Now.
Directory Sync doesn't start any of the selected syncs if one of them has no agent, is disabled, or has a suspended agent. It shows a message, or the Agent Suspended dialog that lists the suspended agents, so you can fix the problem and try again.
Reset entity-relationship data
To reset the relationship data that the syncs generated:
- Select the sync definitions.
- Select Reset Link.
- Confirm the action.
This clears the relationship data that the syncs generated, including any ignore flags you set on entities, without affecting user data. Syncs that are running are skipped.
Stop a running sync
If synchronization is stuck, use Stop Sync. Sync Now changes to Stop Sync when any selected sync is running, and a running sync's row has its own stop icon. Data that was already synced stays, and you start the sync again to get the full result. To see where a run stopped, open Sync History.
Edit syncs in bulk
To edit several syncs at once:
- Select two or more sync definitions.
- Select Bulk Edit.
- Set the fields you want to change: Status, Agent, Domain, or the schedule (By Time or By Interval). Fields you leave empty stay as they are.
- Select Save.
- Select Confirm.
After a migration from an earlier Directory Sync, an Attention dialog can tell you that syncs are missing their agent. Edit each sync and select an agent, or use Bulk Edit to update many at once.
Delete a sync definition
To delete a sync definition:
- Select the sync definitions.
- Select Delete.
- Confirm the deletion.
Running synchronizations can't be deleted. If you select running syncs, the dialog warns you and deletes only the syncs that aren't running.
Entities
To check what a sync created, and to exclude or refresh individual items, open Entities. It lists the entities, such as users and groups, that Directory Sync Service (DSS) syncs created.
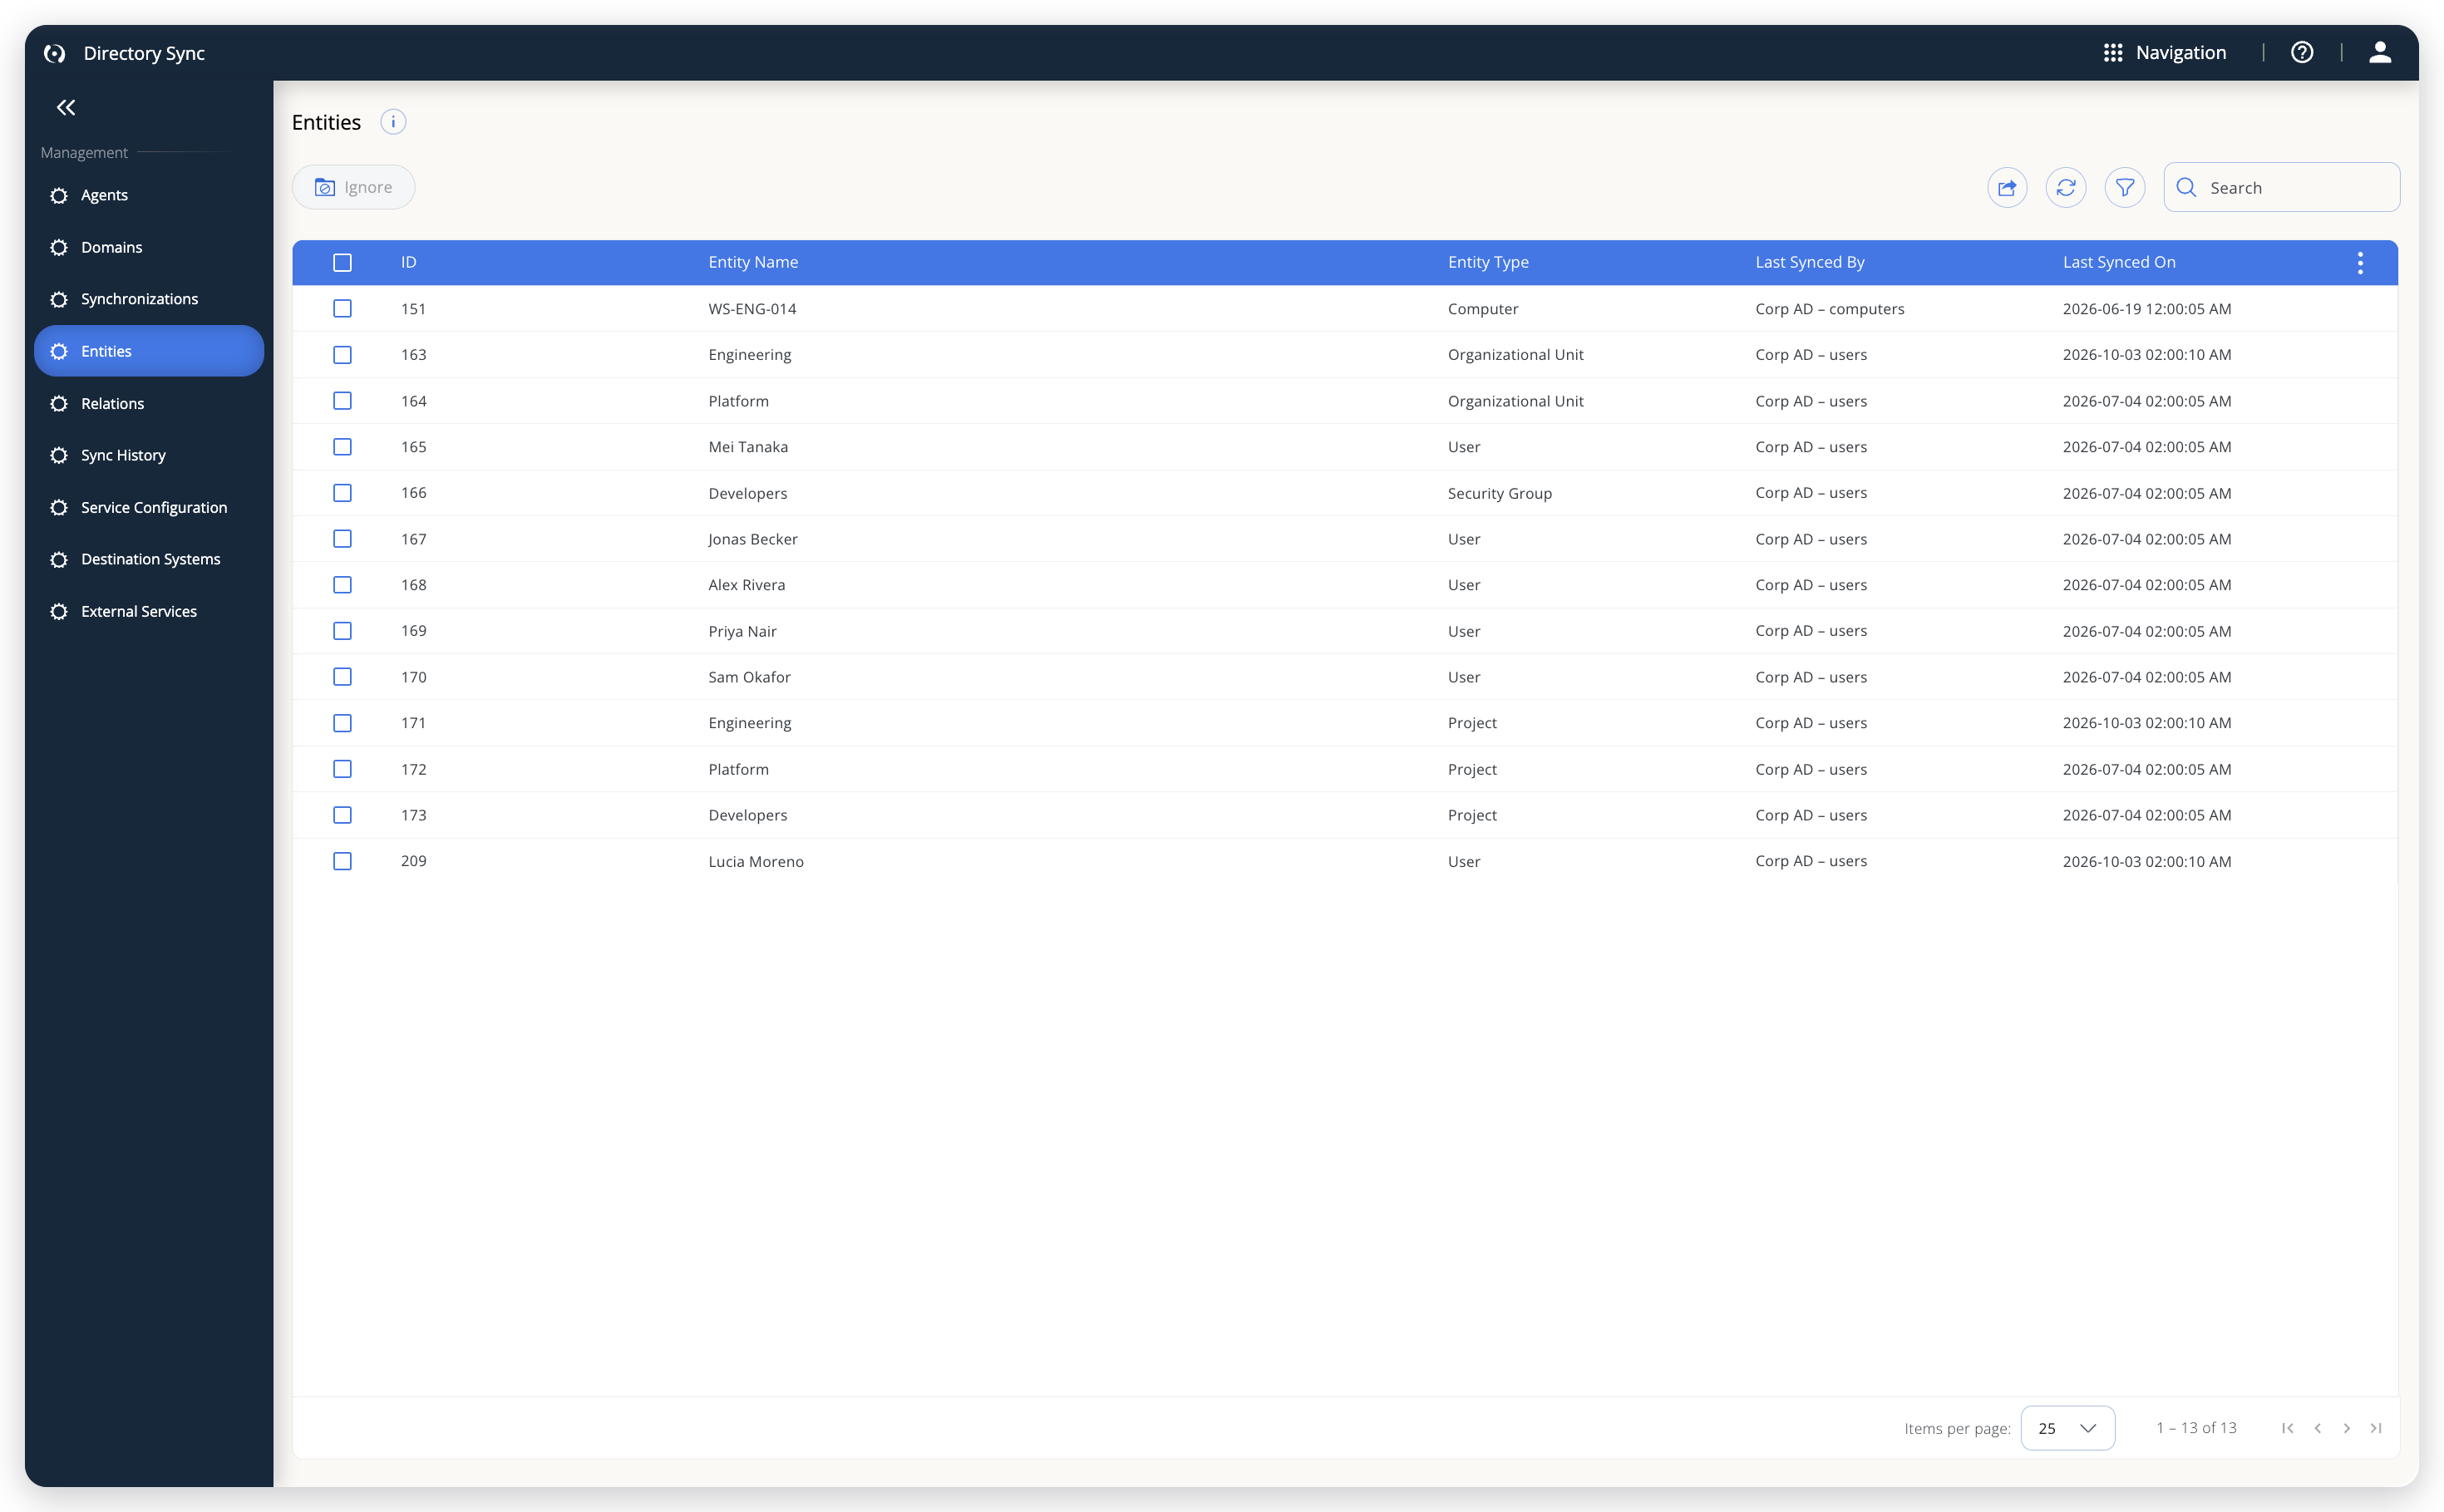 Everything a sync created, with its type and last sync time.
On Entities, you can do the following:
- Check the grid, which shows ID, Entity Name, Entity Type, Last Synced By, and Last Synced On. Use the column menu to add Distinguished Name.
- Filter and search the entities, and select Export data to download them as a CSV file.
- To ignore entities from future synchronizations, select them, then select Ignore. An icon marks ignored entities, and the button changes to Restore when a selected entity is already ignored.
- To synchronize an entity individually, point to its row and select Sync now. If the sync that last handled the entity was deleted, Directory Sync can't sync it.
- To view an entity's relationships, point to its row and select View relations.
Relations
To see how a sync linked entities to their parents, open Relations and check Agent, Domain, Sync Name, Entity Name, Entity Type, Parent Name, Parent Type, and Last Synced On. Select a value in the first seven columns to open the related page. Filter and search the relations, and select Export data to download them as a CSV file.
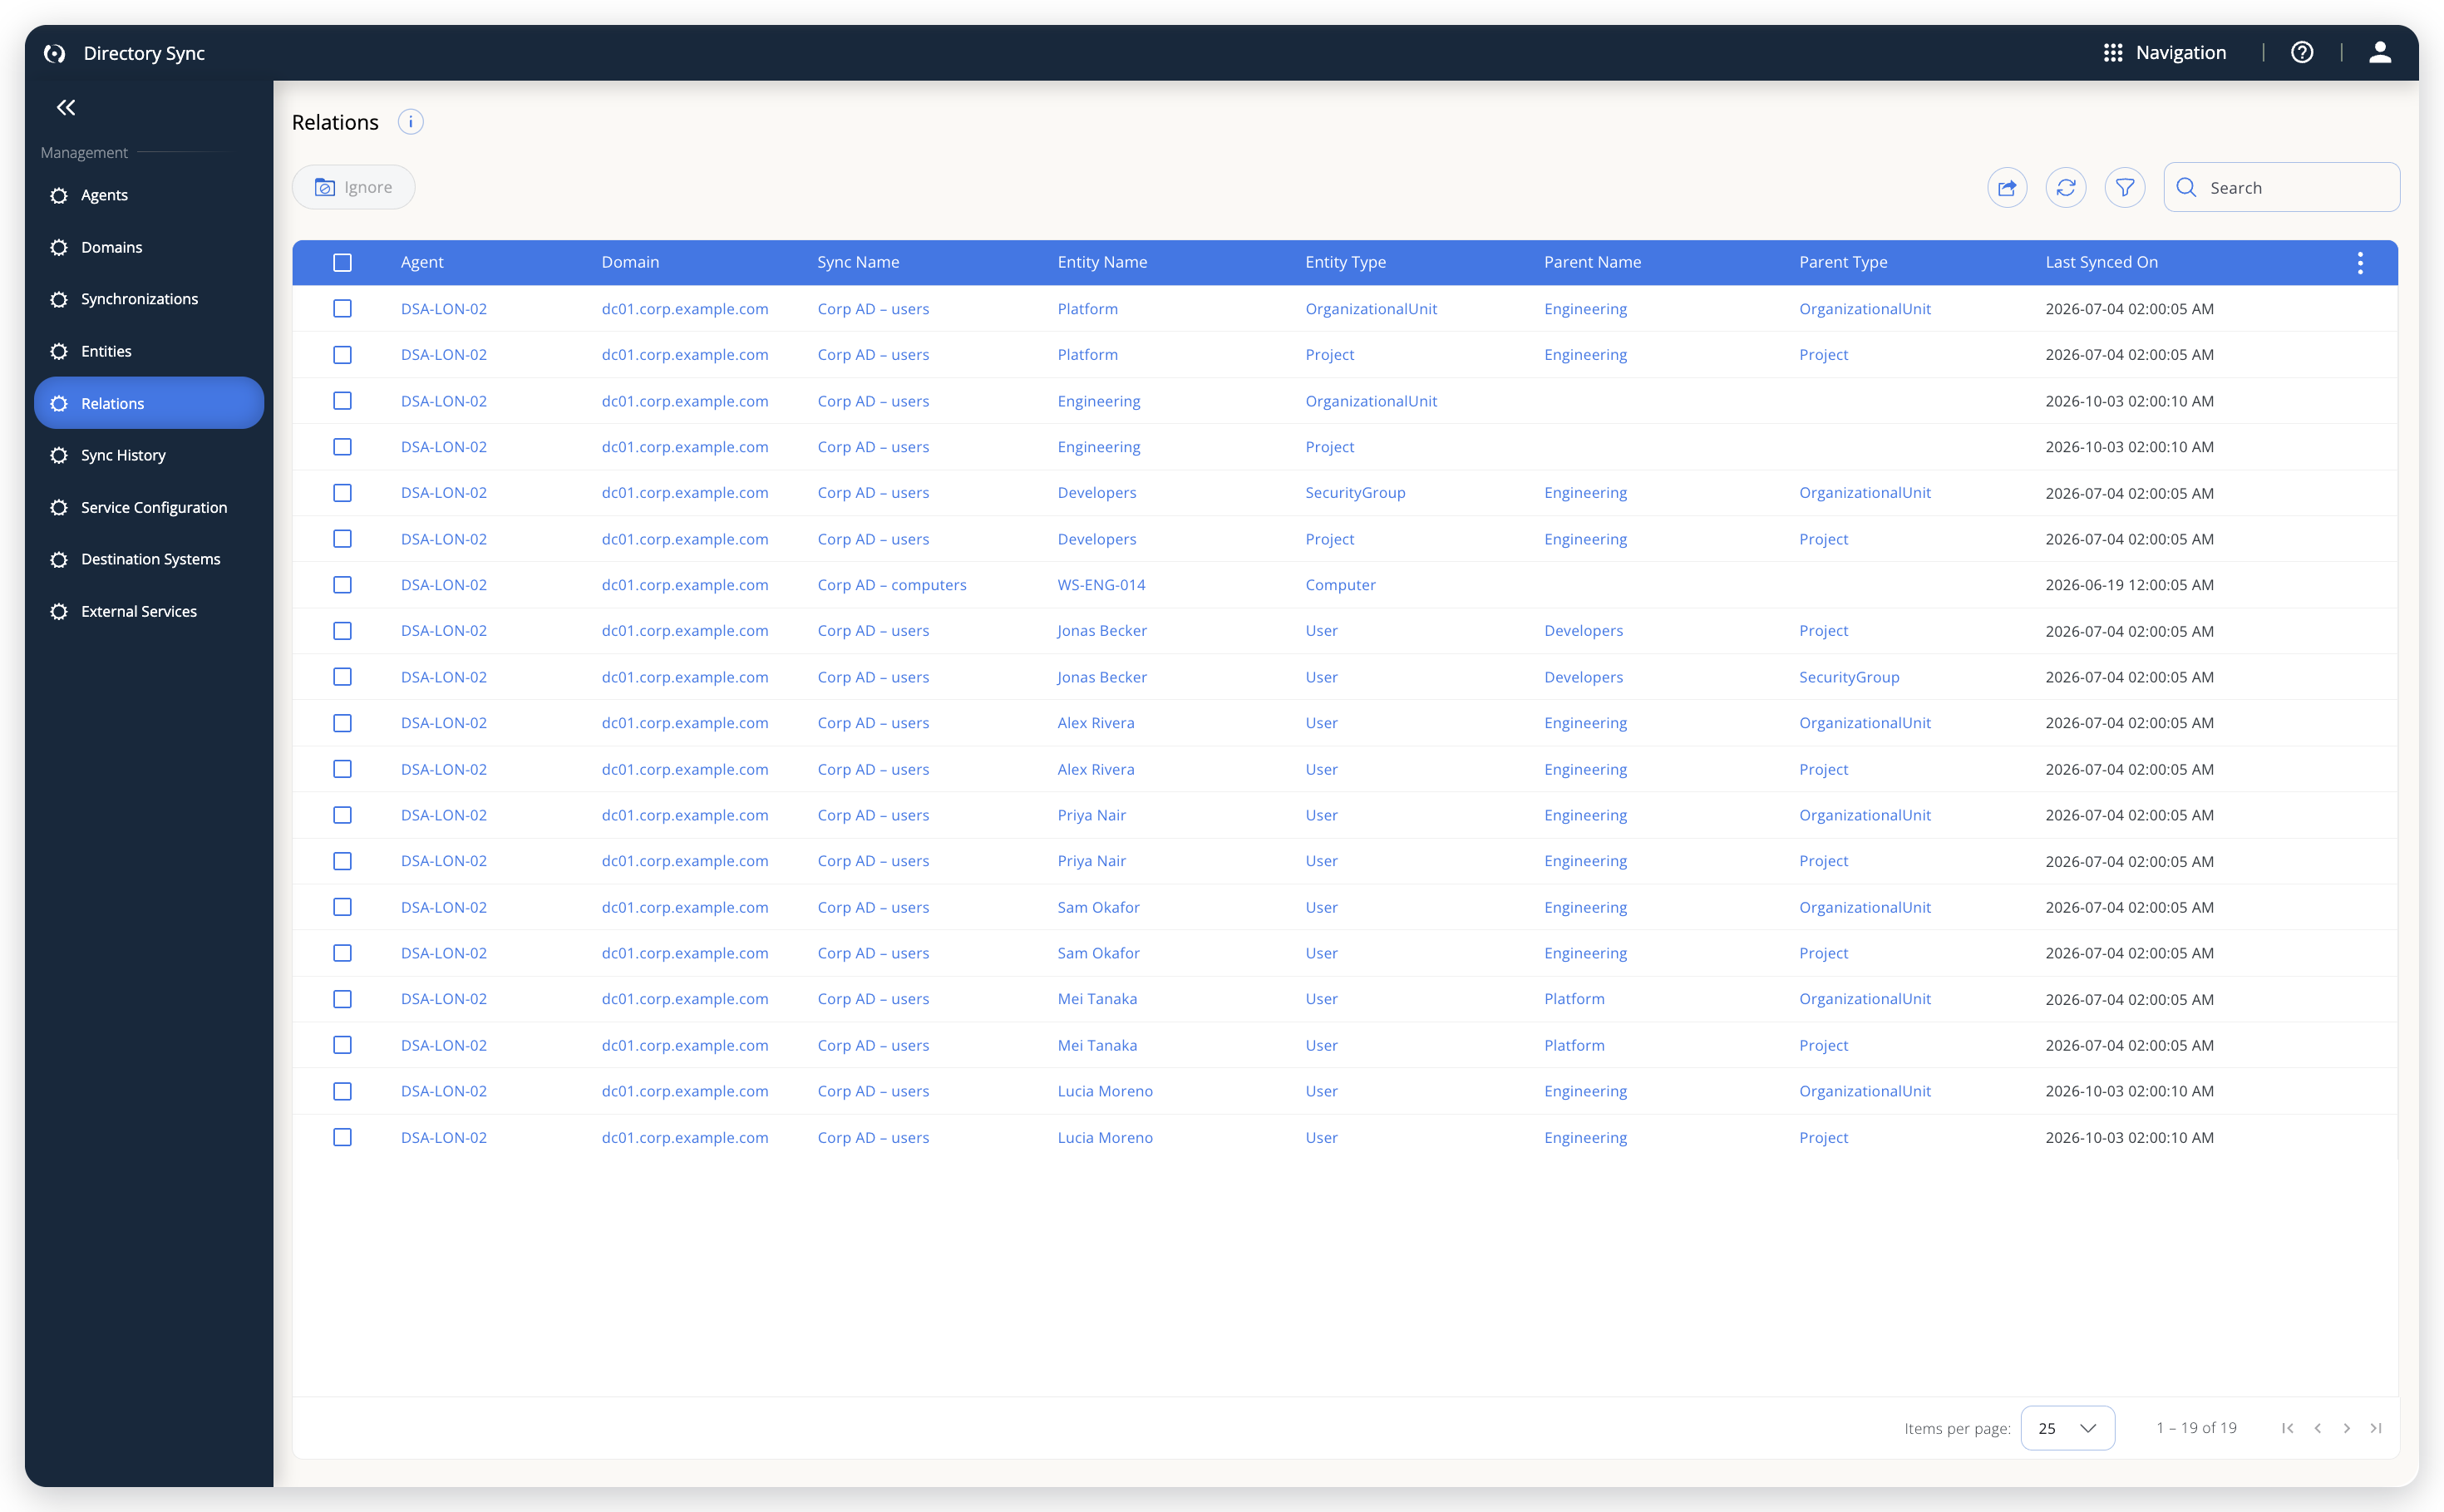 How each entity was linked to its parent, and by which sync.
To ignore entities for specific sync definitions, select the relations, then select Ignore. An ignored relation isn't changed by the next sync. Select Restore to include it again.
Sync History
To check whether a sync run succeeded, and where it stopped if it didn't, open Sync History. It records past runs, whether they finished, failed, or were stopped.
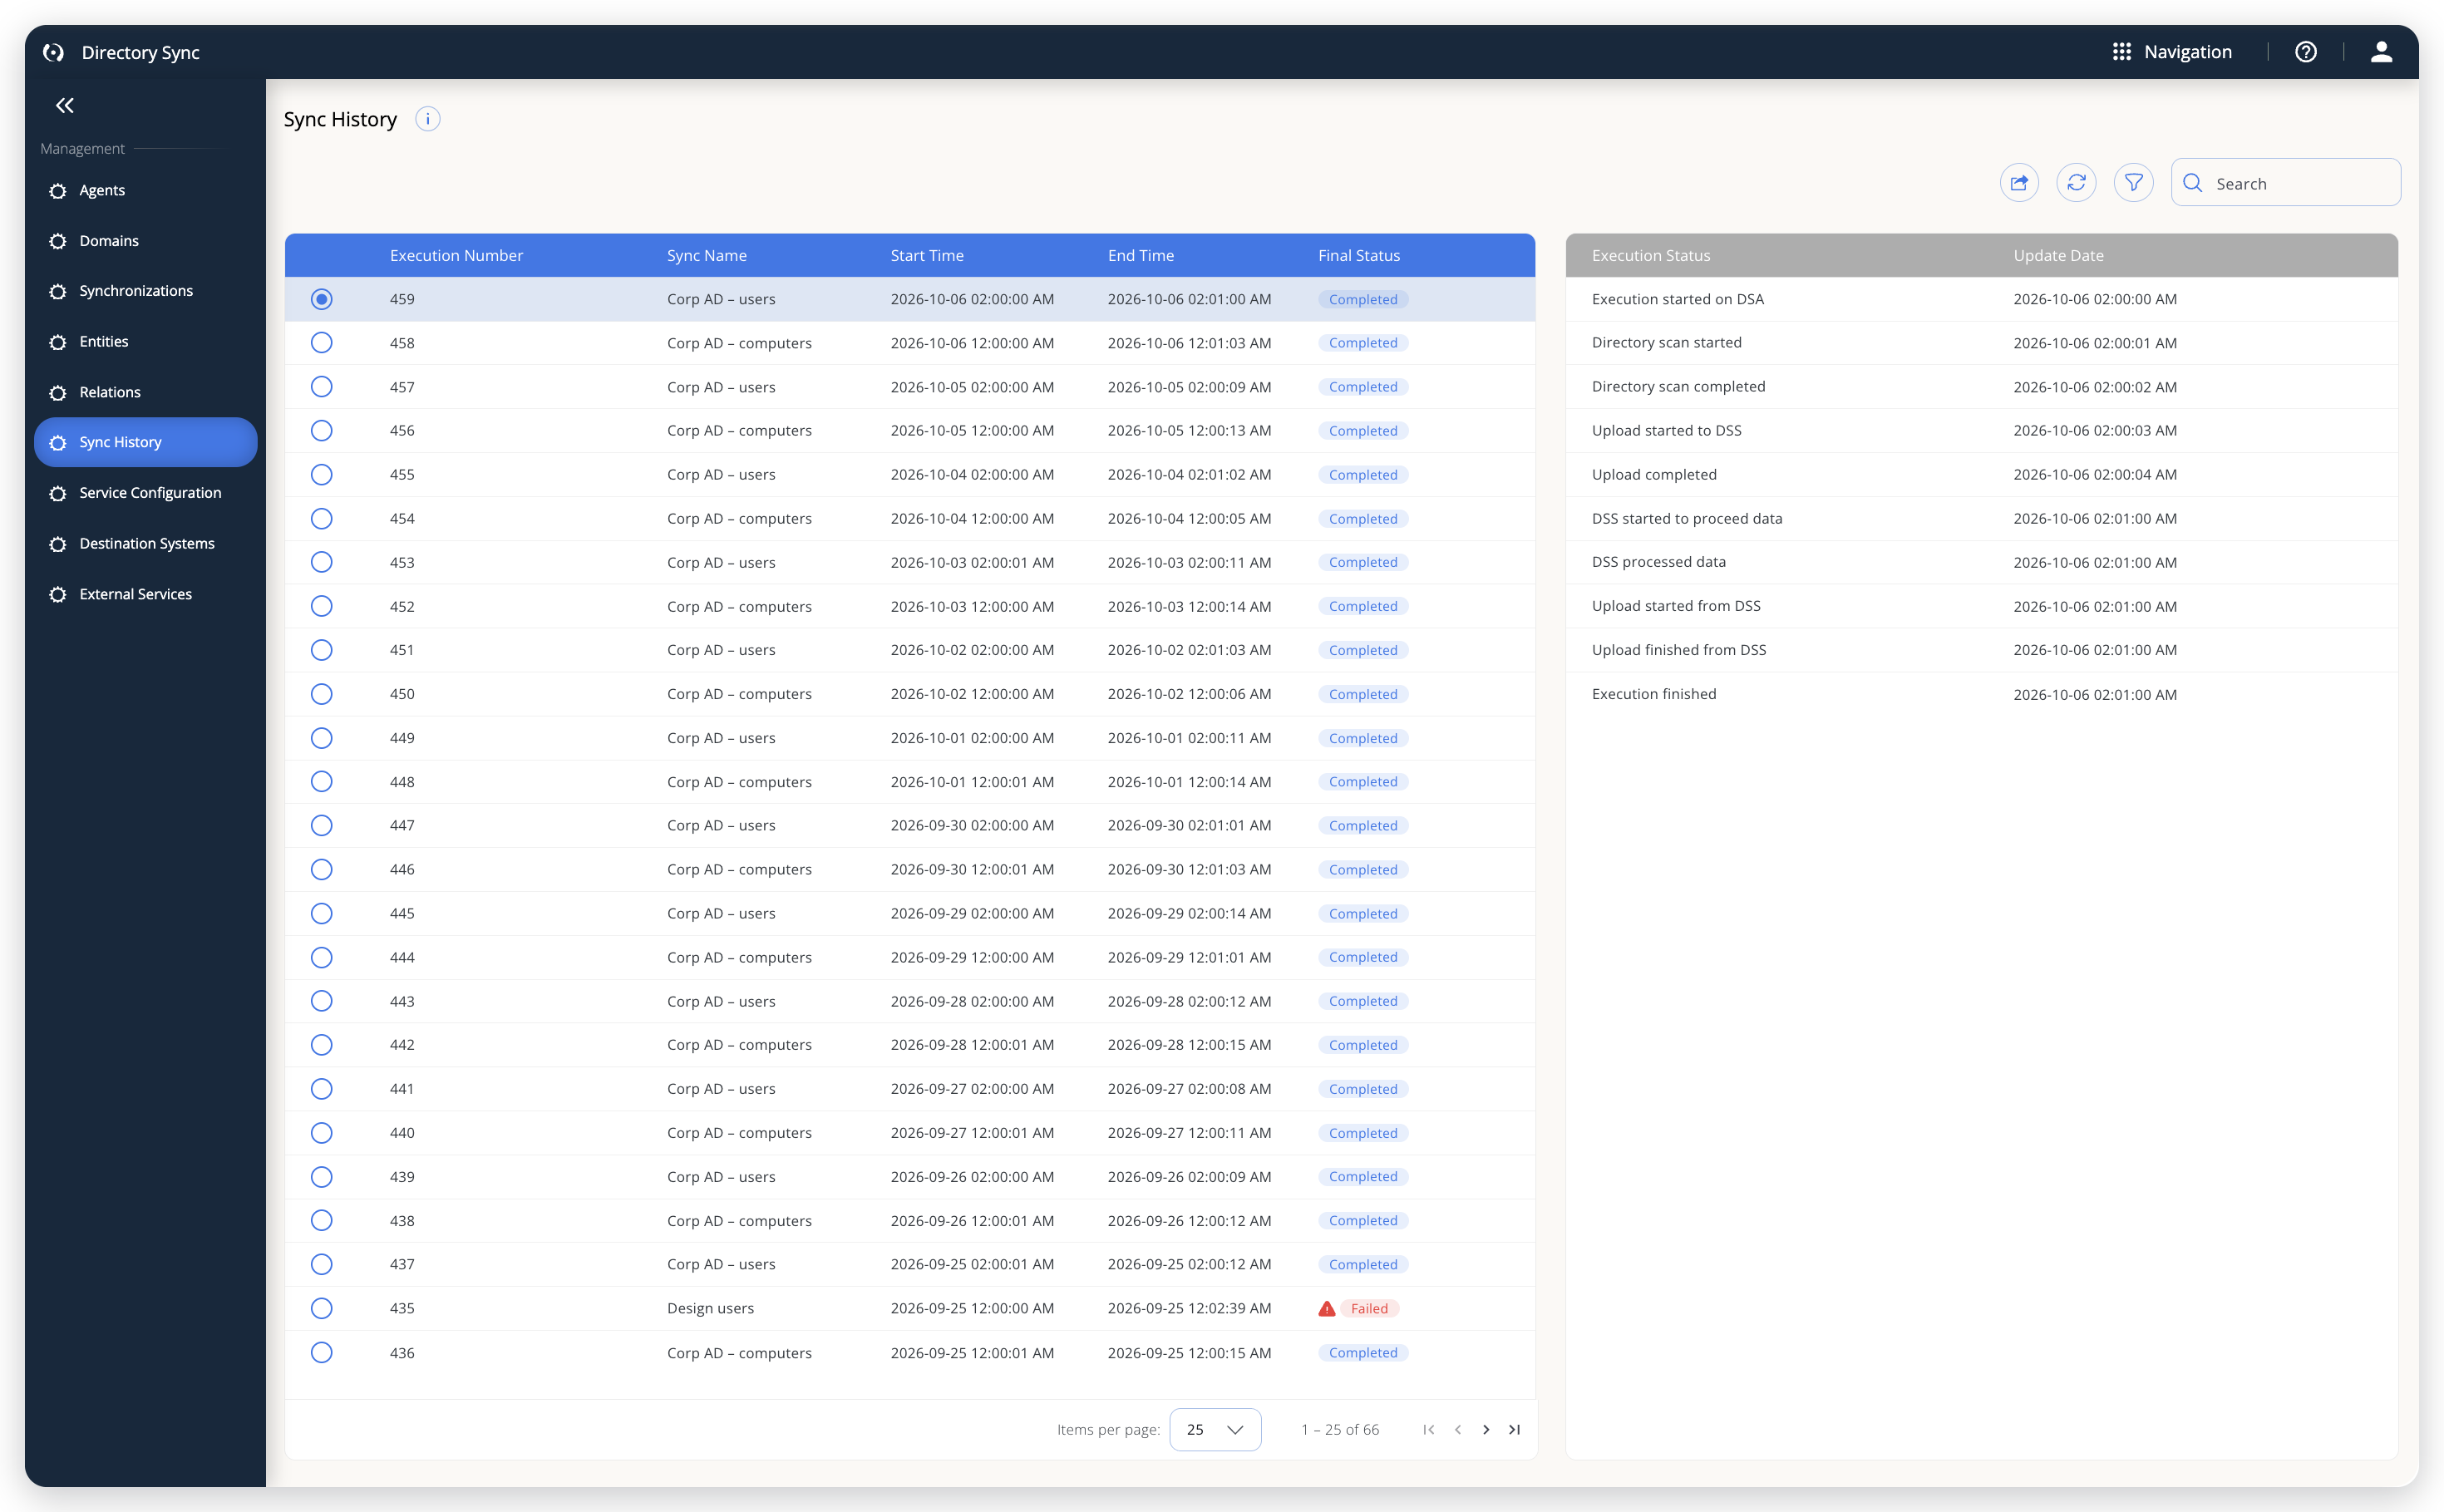 Past runs, with the status each one reached.
The top grid lists the runs. It shows Execution Number, Sync Name (a sync you deleted later appears as Deleted - <sync-name>), Start Time, End Time, and Final Status. Final Status is Completed for a run that finished, Failed or Stopped for one that didn't, and Executing while the run is in progress. Select a run to see its steps in the lower grid. The first run is selected for you. Execution Status names the step and Update Date shows when it happened. A run goes through these steps:
- Sync will start shortly
- Execution started on DSA
- Directory scan started and Directory scan completed
- Upload started to DSS and Upload completed
- DSS started to proceed data and DSS processed data
- Upload started from DSS and Upload finished from DSS
- Execution finished, Execution Failed, or Execution stopped
If a run fails, the failing step is marked with an icon, and a panel under the grid shows the step, the time it failed, and the error message. Use the message to troubleshoot the sync. Filter the history by Sync Name, search it, and select Export data to download it. Runs in progress update on their own.
Service Configuration
To clear the entities and relations that Directory Sync keeps in its own database, open Service Configuration. This page is for admins only.
The action is irreversible, but Directory Sync recreates the entities and relations during the next sync.
To clear the entities and relations:
- Select Delete Entities & Relations From DSS DB.
- In the Delete Entities & Relations dialog, wait for the 10-second countdown on Confirm.
- Select Confirm.
This does not affect users/groups in the main database.
The page has two tabs:
- Directory Sync Connectivity shows the DSS IP/Hostname, the address that a Directory Synchronization Agent (DSA) connects to, with a Copy button. You don't enter it when you follow Install the Directory Synchronization Agent (DSA): the DSA takes the address from its authorization file.
- Identity Alignment Notifications appears on OpenLM Platform only, for users with the Identity Alignment Admin role. It holds the default notification addresses for External Services.
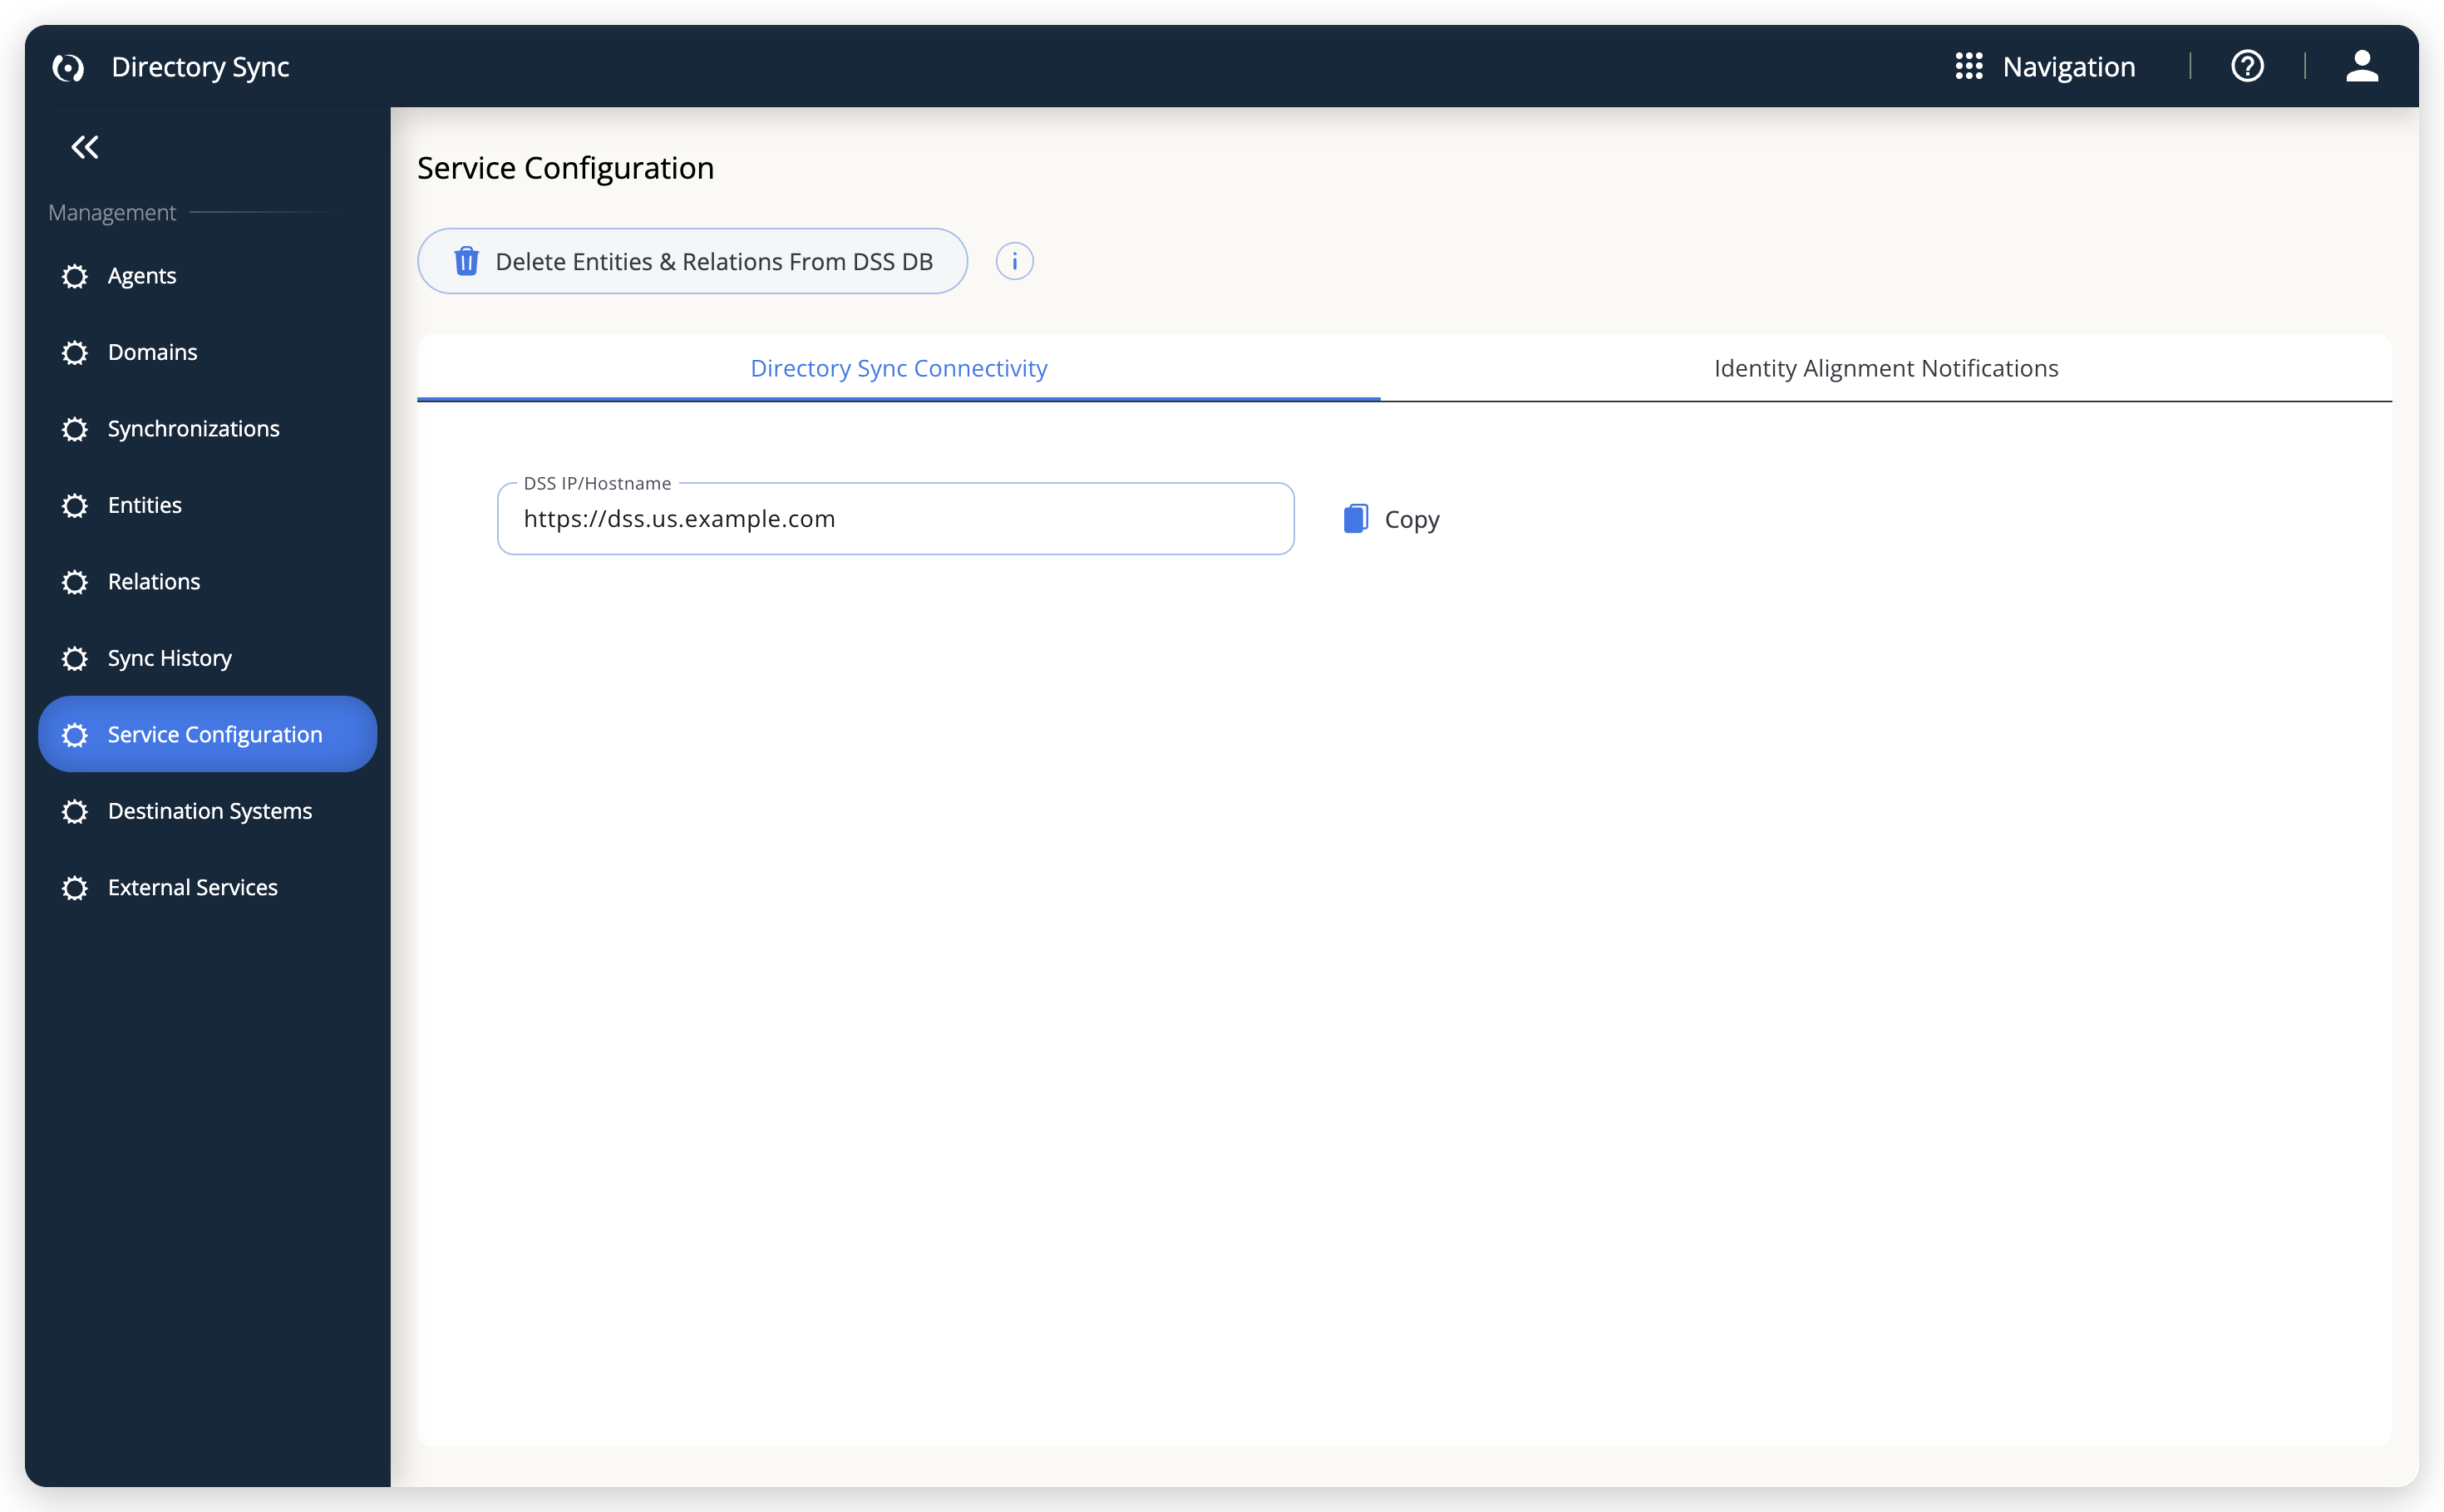 The DSS address on the Directory Sync Connectivity tab.
Directory Sync with global catalog
To sync users across domains in an Active Directory forest, use the Global Catalog. The Global Catalog is a central repository in a multi-domain Active Directory forest. With it, Directory Sync can retrieve essential information and structural data about users across domains. It includes general attributes about all objects within the forest.
When to use the Global Catalog
Use the Global Catalog when you need the following:
- Forest-wide searches across multiple domains
- Faster queries for common attributes
- Simpler access to multi-domain environments
Limitations
The Global Catalog has these limitations:
- Contains only a subset of object attributes
- Might not include detailed user properties
Because the Global Catalog doesn't include all user attributes, use caution when syncing. Some data might be missing.
For example, these attributes aren't synced using the GC:// protocol in Directory Sync Service (DSS):
titledepartmentmobilephysicalDeliveryOfficeName
These attributes sync successfully when you use the LDAP:// protocol for the same entity.
Configure global catalog in DSS
To configure the Global Catalog in DSS:
-
Add the domain with the correct port:
- Port
3268for non-SSL connections - Port
3269for SSL connections
Set SSL and Directory Type first, and then enter the port. Changing either one resets the port to its default and shows a message about the default port.
- Port
-
Set the start node:
- When creating a new sync, set the Start Node to use the
GCprotocol instead ofLDAP. The field fills in asLDAP://<domain-address>when you select the domain, so replaceLDAP://withGC://.
- When creating a new sync, set the Start Node to use the
The documentation team might draft this page using a large language model. A technical writer reviews every page and verifies it against the product before publishing it. A human makes the final decision.