Moldex3D
本ガイドでは、OpenLM を使用して Moldex3D License Manager を監視し、ライセンス使用状況と統計情報を取得する方法を説明します。
要件
次をインストールしてください:
- OpenLM Server v5.6 以降、または OpenLM Cloud アカウント
- Moldex3D License Manager と同じマシンに OpenLM Broker v4.12 以降
監視機能
OpenLM Broker 経由で利用できる監視機能は次のとおりです:
| 機能 | 粒度 | ライセンス総数 | ライセンス使用状況 | 拒否 | 借用ライセンス | 有効期限 | 冗長化 |
|---|---|---|---|---|---|---|---|
| 対応 | 秒 | ✔ | ✔ | ✔ | ✔ | ✔ | ❌ |
Broker を使用すると、次の機能も有効になります:
- OpenLM Server とのバッファ付き通信
- ライセンスマネージャーサービスのリモート起動・停止
OpenLM Broker の設定
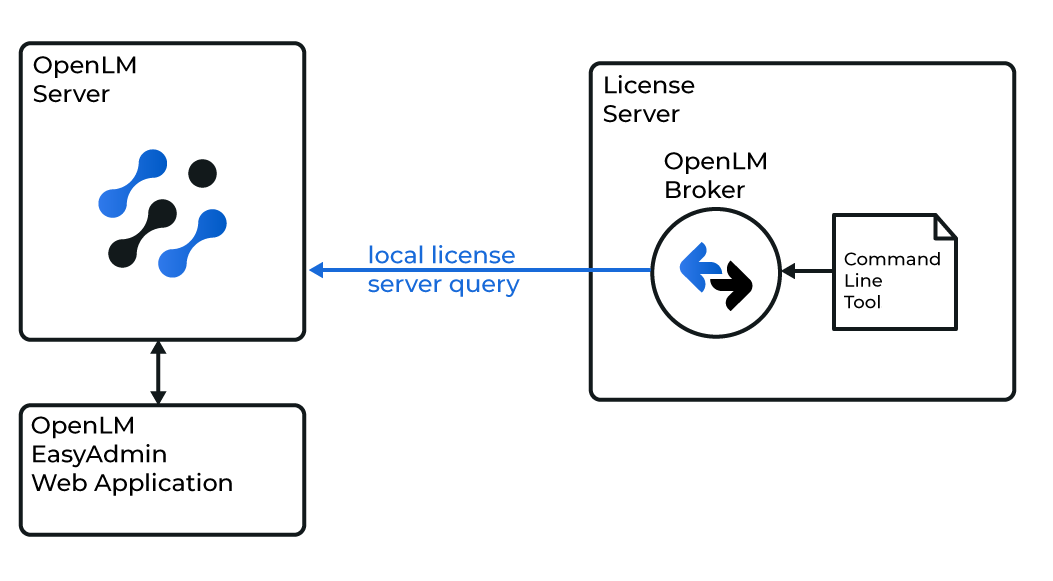
Broker は MDX3DLMUtil ユーティリティを使用して Moldex3D License Manager をローカルで問い合わせ、データを OpenLM Server に送信します。
Broker の自動設定
- Broker で Detect をクリックします。

- Moldex3D サービス(例: Moldex3D-LM Service)が稼働していれば、Broker が自動設定します。
- 設定後、Restart Broker を選択します。
- data_inquiry → Execute を実行し、出力が有効であることを確認することを推奨します。
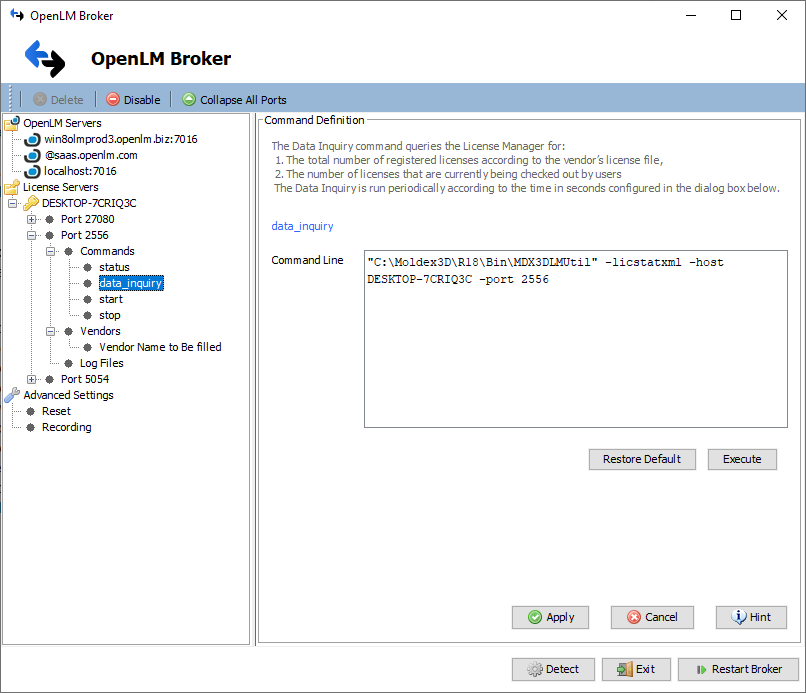
Broker の手動設定
自動検出が失敗した場合:
- Add Port をクリックします。
- Moldex3D のポート(既定: 2556)を入力します。
- Type から Moldex3D を選択し、Apply をクリックします。
- Commands で
MDX3DLMUtil.exeがあるフォルダを参照します(例:C:\Moldex3D\LMSR\Tools\MDX3DLMUtil)。Update → Apply をクリックします。 - data_inquiry で Execute をクリックし、出力が有効であることを確認します(エラーなし)。
- Restart Broker をクリックします。
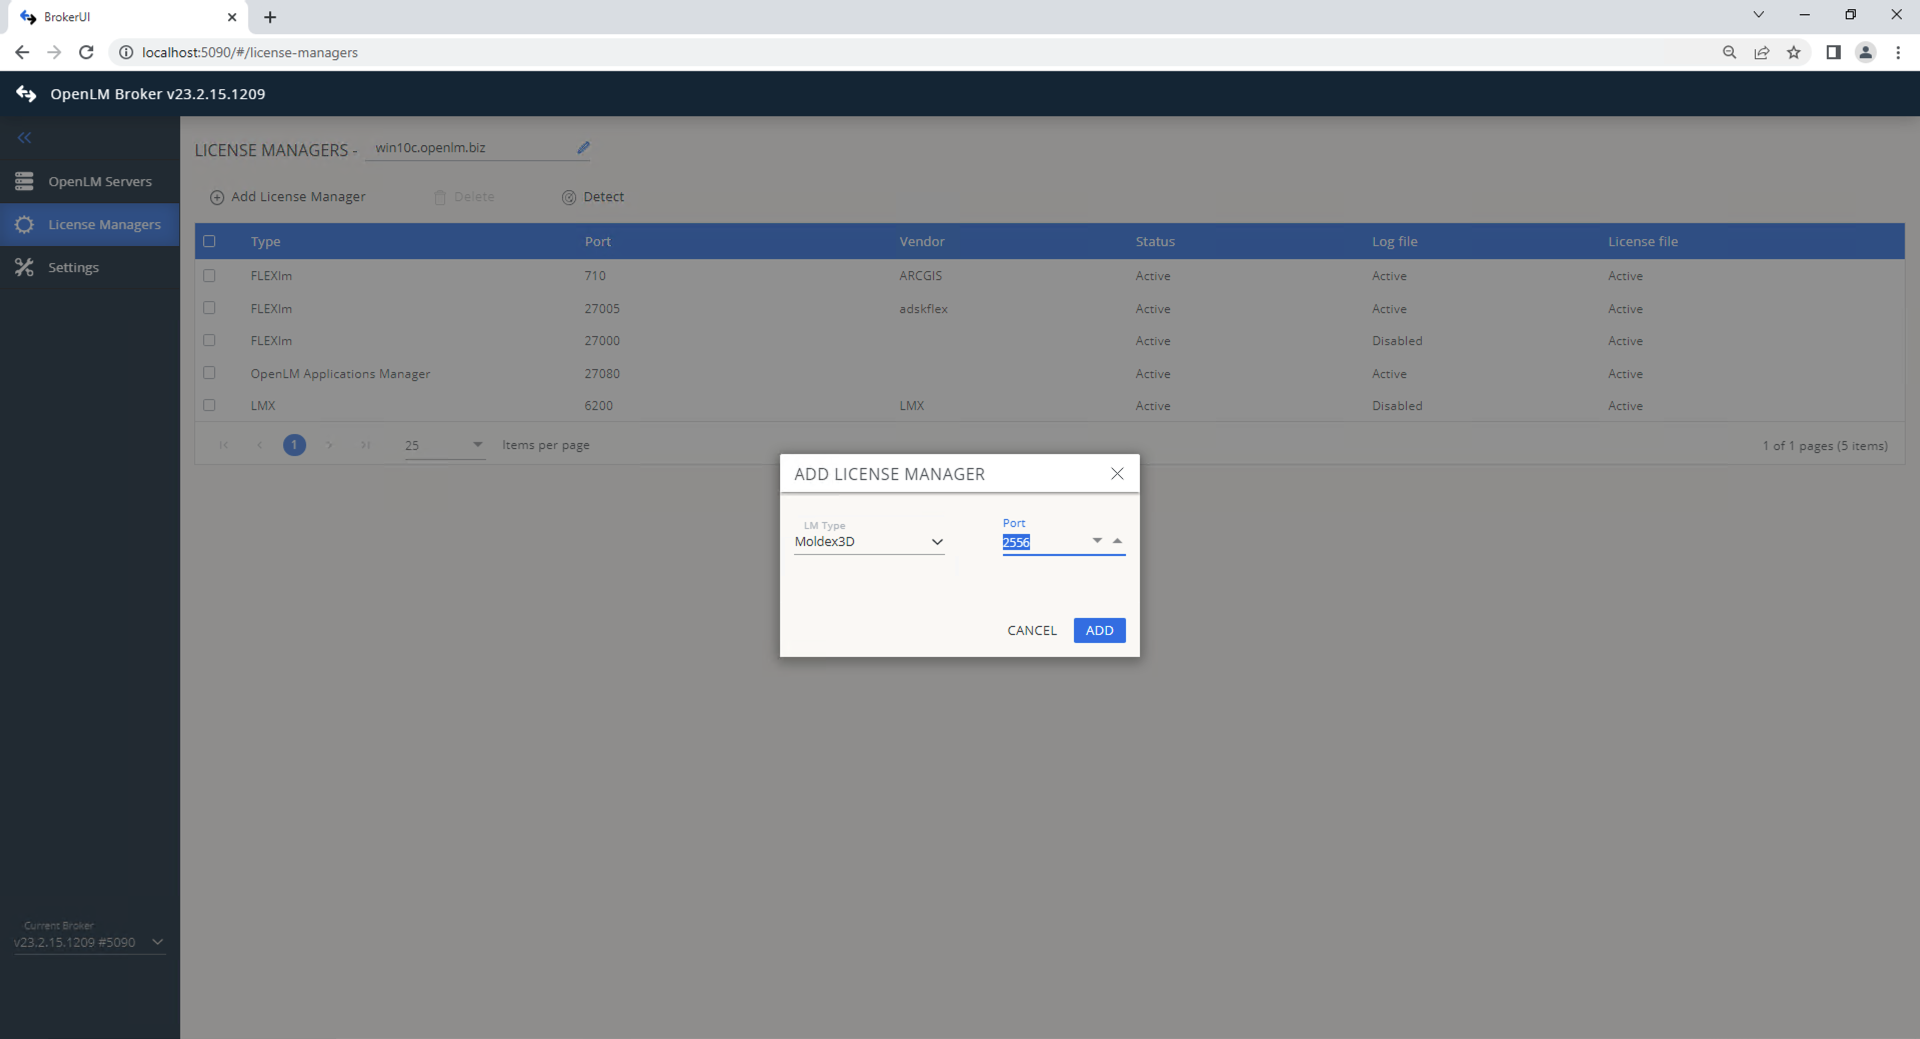
Broker Web UI の設定
- 最新の Broker をインストールします。
- http://localhost:5090/ を開きます。
- License Managers に移動します。
- Moldex3D サービスが稼働している場合は Detect をクリックします。
- 自動検出が失敗した場合は Add License Manager をクリックし、Type で Moldex3D を選択してポートを入力し、Add をクリックします。
- Commands で
MDX3DLMUtil.exeのパスを設定し、Execute をクリックして確認します。 - Vendors で Add Vendor をクリックし、
Moldex3Dを入力して Continue をクリックします。
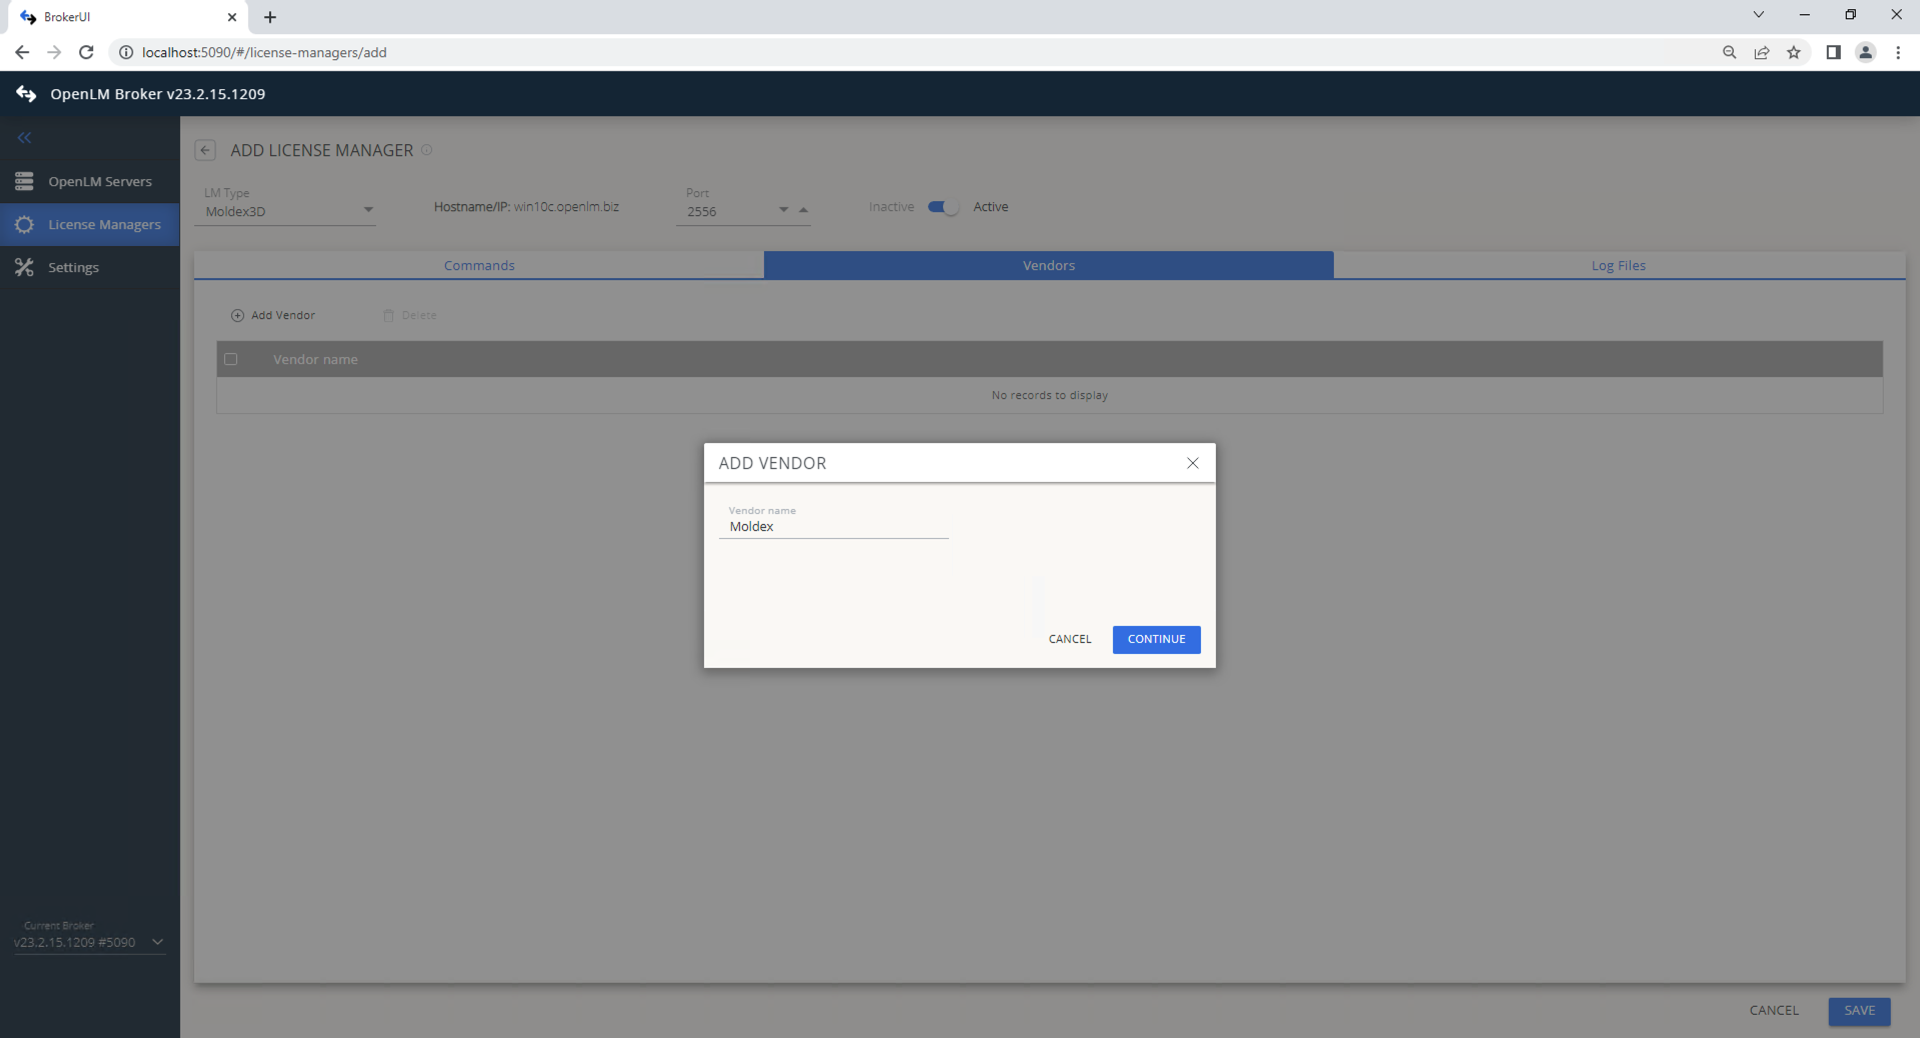
- Save をクリックします。
OpenLM Server の設定
EasyAdmin による自動設定
Broker が正しく設定されていれば、Server にデータが送信されます。EasyAdmin で承認します:
- EasyAdmin を開きます(
http://<OpenLM Server>:5015または Windows Start → OpenLM → EasyAdmin)。 - License Manager Servers で There are # servers pending approval をクリックします。

- 保留中の LM エントリを編集します(ダブルクリックまたはペンアイコン)。

- 必要に応じて Display name を更新します。
- Approve をクリックします。
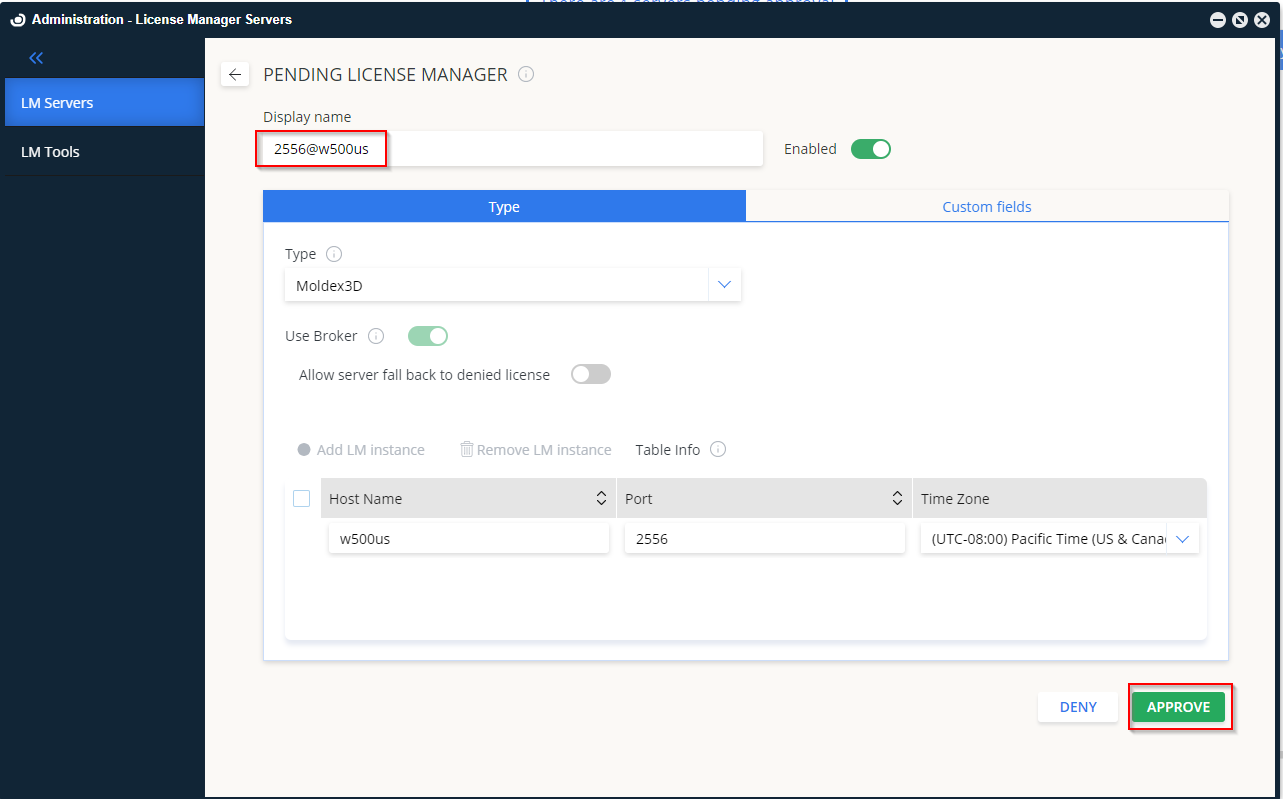
- Moldex3D License Manager が追加されます。

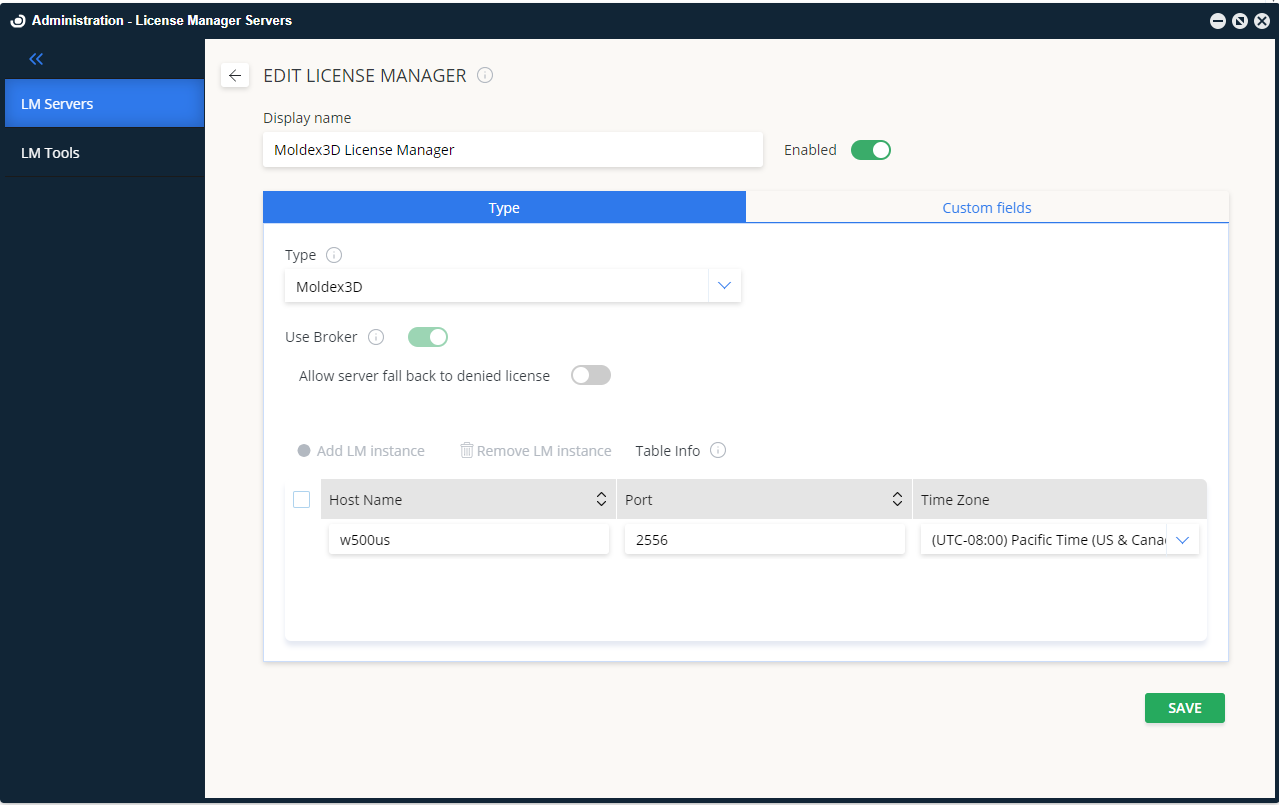
手動設定
自動承認が失敗した場合:
- EasyAdmin で Start → Administration → License Manager Servers に移動します。
- Add LM をクリックします。
- Type から Moldex3D を選択します。
- Description を入力します(例:
Moldex3D License Manager)。 - 正しい Time Zone を設定します。
- Broker 設定と一致する Hostname と Port を入力します。
- Is Triad Configuration はオフのままにします。
- Use Broker をオンにします。
- Save をクリックします。
設定の確認
- EasyAdmin を開きます(
http://<OpenLM Server hostname>:5015)。 - Start → Widgets → License Manager Servers に移動します。
- 一覧に Moldex3D が表示されることを確認します。
- 緑色の Up to date アイコンは接続が有効であることを示します。

注意
新しい接続の場合、ステータス表示の更新に最大 3 分 かかることがあります。