Identity Service 設定
Identity Service がインストールされていない場合、誰でもすべての OpenLM コンポーネントにセキュリティなしでアクセスできます。Identity Service をインストールし、Security Configuration を設定すると、各コンポーネントに Client ID と Secret Key が必要になります。
Security Configuration には 2 種類あります:
a. Identity Service の URL 設定
- OpenLM Software License Management (SLM)
- Directory Sync
- Reports Scheduler
- ServiceNow
b. URL を設定すると、ブラウザで URL を開いたときにログイン認証が要求されます。Client ID と Secret Key は appsettings.json や property ファイルなどに挿入されます。セキュア化すると、OpenLM SLM に接続される各コンポーネントはセキュリティモードで設定する必要があります:
- EasyAdmin User Interface の Authorization JSON ファイル:
- Broker
- DSA
- Workstation Agent
- End User Services (Personal Dashboard)
- Applications Manager
- OpenLM SLM API
Identity Service で OpenLM SLM (Server) をセキュアモードに設定したら、EasyAdmin User Interface から Authorization JSON ファイルを発行し、各コンポーネントにインポートします。
OpenLM コンポーネントをセキュア環境で動作させるには、Identity Service の Security Configuration タブ を選択します:
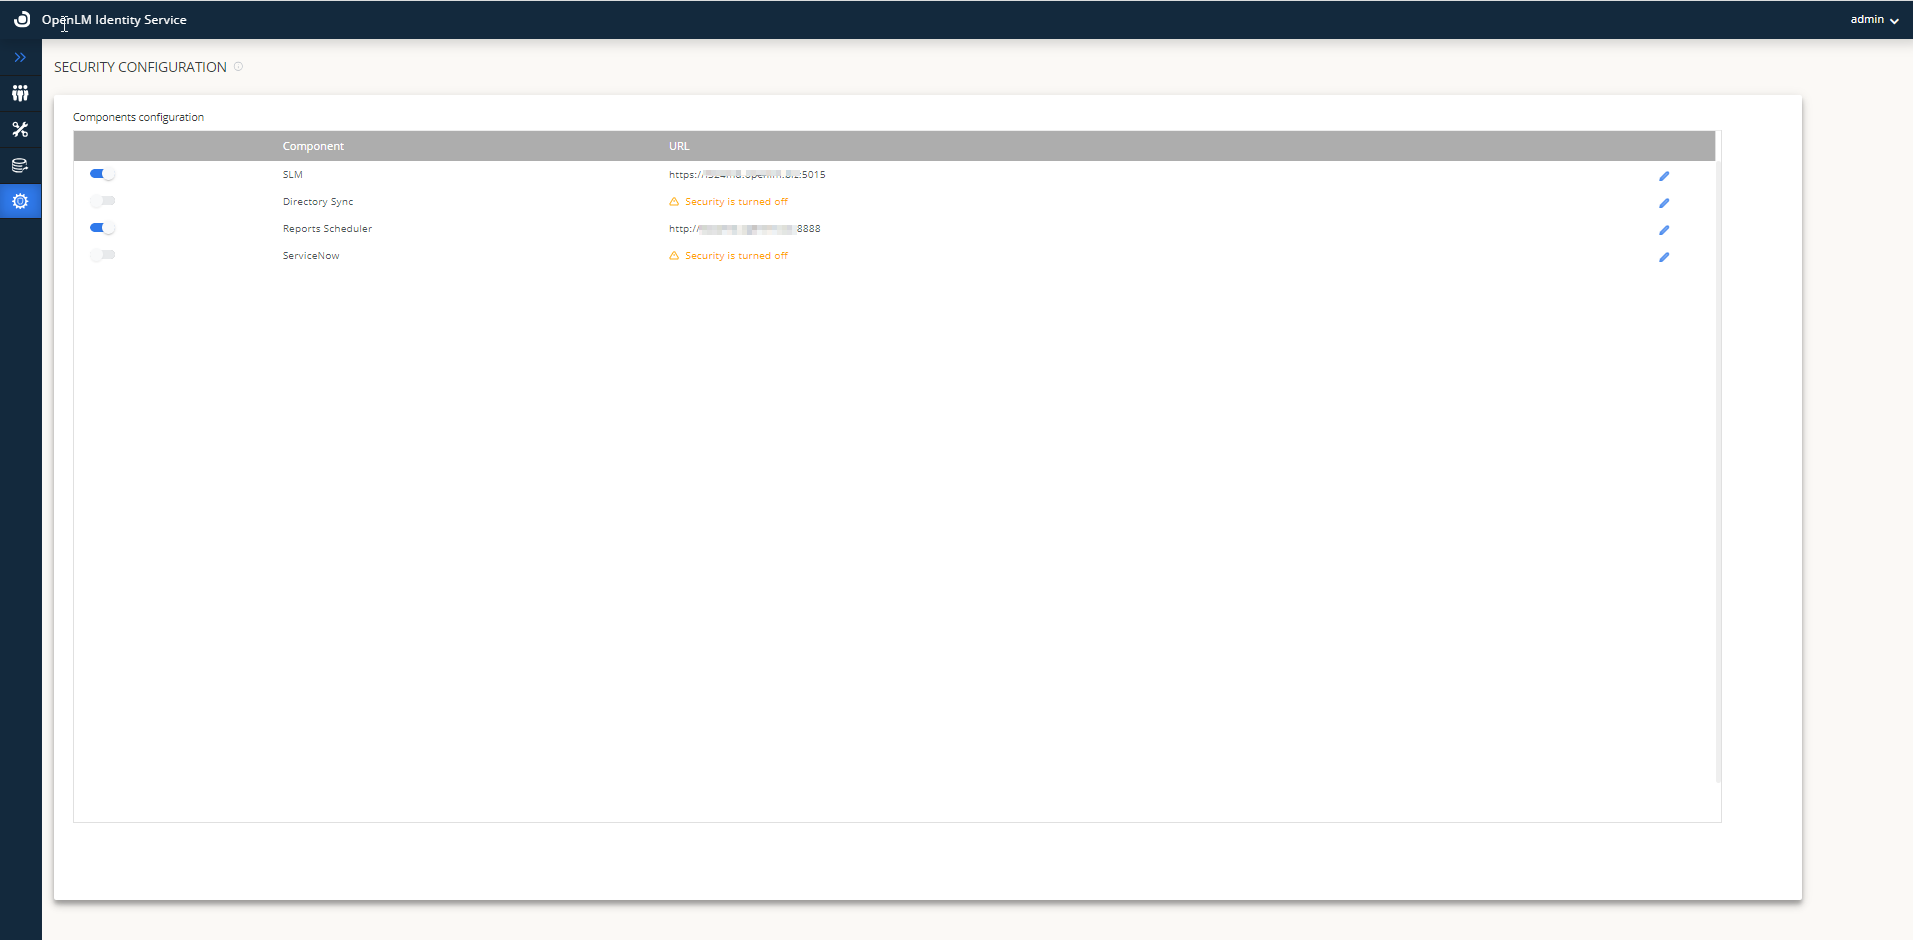
セキュア環境で OpenLM SLM (Server) を構成する
- Identity Service UI で Security Configuration タブを選択します。
- SLM トグルスイッチをオンにします。
- OpenLM SLM マシンの FQDN を入力します(例: http://FQDN:5015)。
- ユーザー名を入力します(デフォルトは Admin)。
- Save をクリックします。
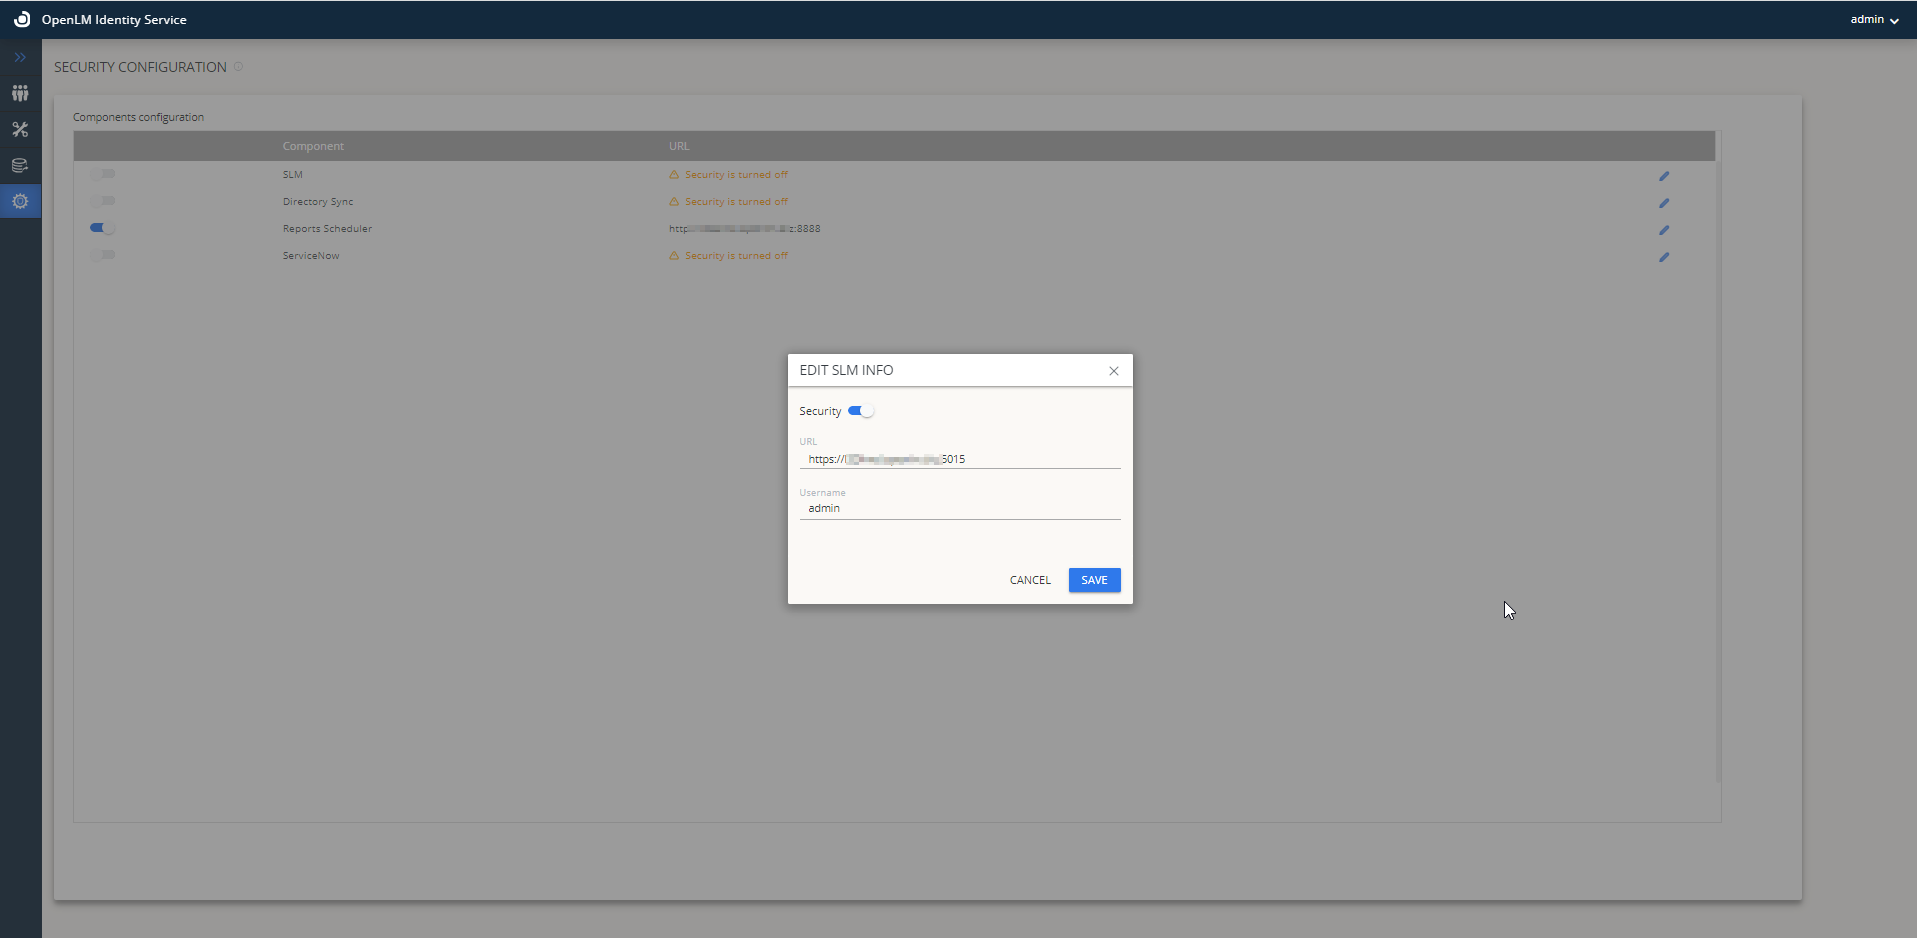
注: これにより、"C:\Program Files\OpenLM\OpenLM SLM\bin\appsettings.json" にある appsettings.json ファイルで Security、Client ID、Secret Key が有効になります。
"Auth": {

"EnableSecurity": true,

"Authority": "https://fqdn:5009",

"Audience": "openlm.server.api",

"AuthProvider": "",

"ClientId": "openlm.server.client",

"ClientSecret": "c0936471-0f6a-44af-9078-99d150683cad",

"ClientScope": "openlm.cloud.scope openlm.ugs.read.scope IdentityServerApi openlm.dss.scope openlm.etlmanager.scope",

"TokenEndpoint": "/connect/token"

}
- Services に移動し、Identity Service と OpenLM SLM の両方を再起動します。
Services の再起動は、新しい Client ID と Secret Key を取得するために必須です。
EasyAdmin User Interface ダッシュボードでは、ログイン済みアカウントのログアウトボタンが表示されます:
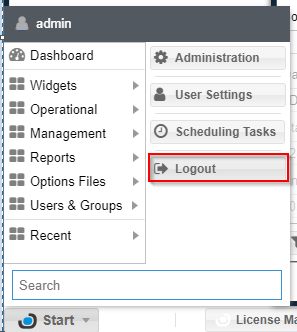
一方、Server のトグルスイッチ(Non-Security Mode)をオフにすると、ログアウト/ログインボタンは表示されません。誰でも EasyAdmin User Interface にアクセスできます。
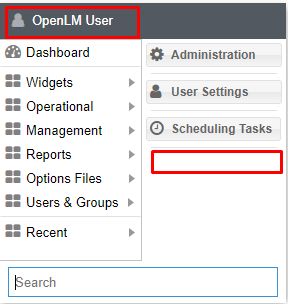
注: OpenLM SLM のセキュリティを 2 回目以降にオフにする場合は、appsetings.json→EnableSecurity パラメータを False に変更します(ファイルは "C:\Program Files\OpenLM\OpenLM SLM\bin\appsettings.json" にあります)。
"Auth": {

"EnableSecurity": "False",

"Authority": "https://fqdn:5009",

"Audience": "openlm.server.api",

"AuthProvider": "",

"ClientId": "openlm.server.client",

"ClientSecret": "c0936471-0f6a-44af-9078-99d150683cad",

"ClientScope": "openlm.cloud.scope openlm.ugs.read.scope IdentityServerApi openlm.dss.scope openlm.etlmanager.scope",

"TokenEndpoint": "/connect/token"
警告: Security Mode のオン/オフを切り替えるたびに、OpenLM SLM Service を再起動して変更を反映してください。
セキュア環境で Directory Sync を構成する
- Identity Service UI で Security Configuration タブを選択します。
- DSS トグルスイッチをオンにします。
- OpenLM SLM マシンの FQDN を入力します(例: http://FQDN:7026)。
- Save をクリックします。
注: これにより、appsettings.json ファイルで Security、Client ID、Secret Key が有効になります。C:Program FilesOpenLMOpenLM Directory Synchronization Service
- Services に移動し、DSS Service を再起動します。
Services の再起動は、新しい Client ID と Secret Key を取得するために必須です。
セキュア環境で Reports Scheduler を構成する
- Identity Service UI で Settings タブを選択し、Security Configuration を選択します。
- Reports Scheduler トグルスイッチをオンにします。
- OpenLM SLM マシンの FQDN を入力します(例: http://FQDN:8888)。
- Save をクリックします。
注: これにより、report_scheduler.properties ファイルで Security、Client ID、Secret Key が有効になります。C:*Program Files***OpenLM***OpenLM Reports Scheduler***
- Windows Services に移動し、Reports Scheduler Service を再起動します。
Services の再起動は、新しい Client ID と Secret Key を取得するために必須です。
セキュア環境で ServiceNow Adapter を構成する
- Identity Service UI で Security Configuration タブ を選択します。
- ServiceNow トグルスイッチをオンにします。
- OpenLM SLM マシンの FQDN を入力します(例: http://FQDN:5005)。
- Save をクリックします。
注: これにより、appsettings.json ファイルで Security、Client ID、Secret Key が有効になります。C:/Program Files/OpenLM/OpenLM External Platforms/Service
- Services に移動し、ExternalPlatformServices Service を再起動します。
Services の再起動は、新しい Client ID と Secret Key を取得するために必須です。
Identity Service のアカウントと Role&Permissions
ライセンスファイルに Role&Permission がない場合でも、Identity Service にはユーザーに割り当てる基本ロールがあります。これは編集専用モード(追加、削除、複製は不可)で表示されます。
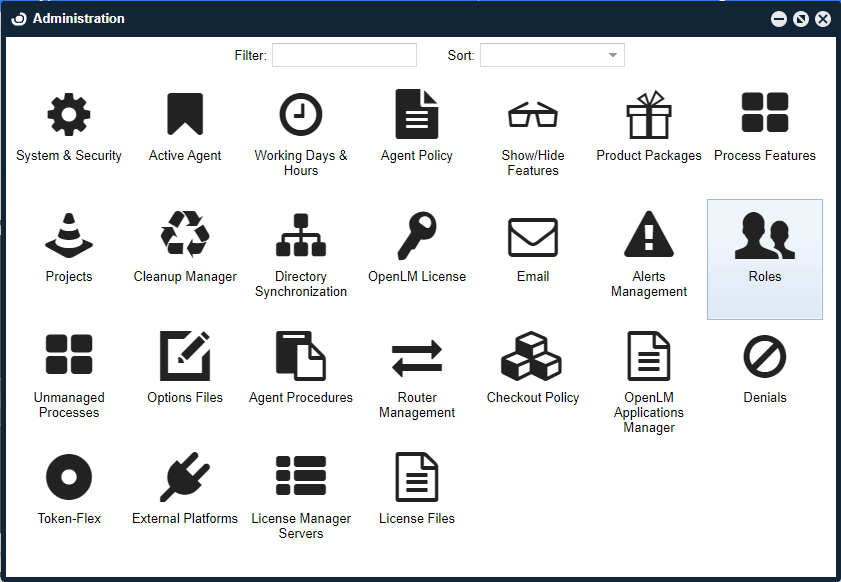
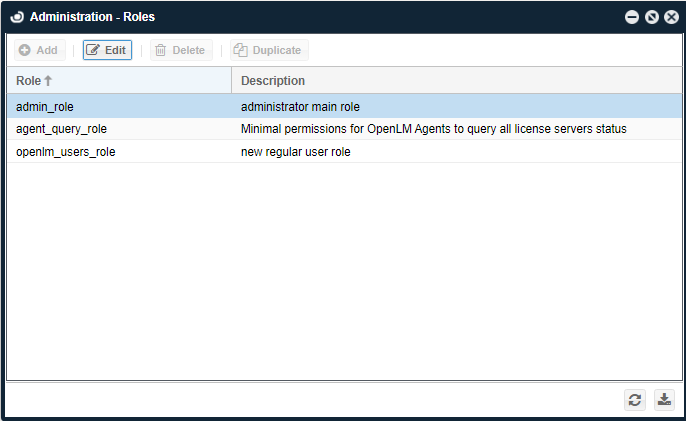
ライセンスファイルに Role&Permission がある場合は、以下のようにロールのフル機能を利用できます。
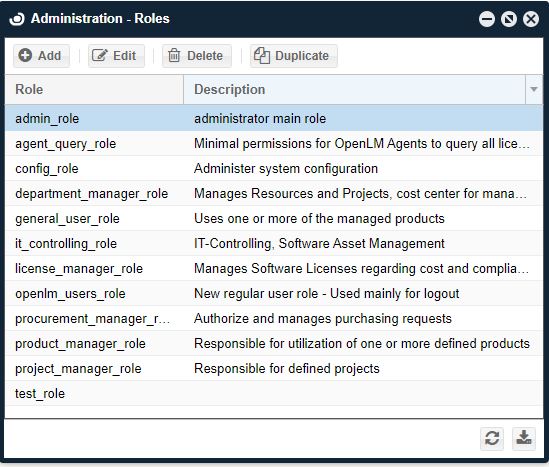
フル機能が必要な場合は sales@openlm.com までお問い合わせください。
Identity Service の最初の既定アカウントは Admin です。新しいユーザーを作成する場合は次の手順に従います。
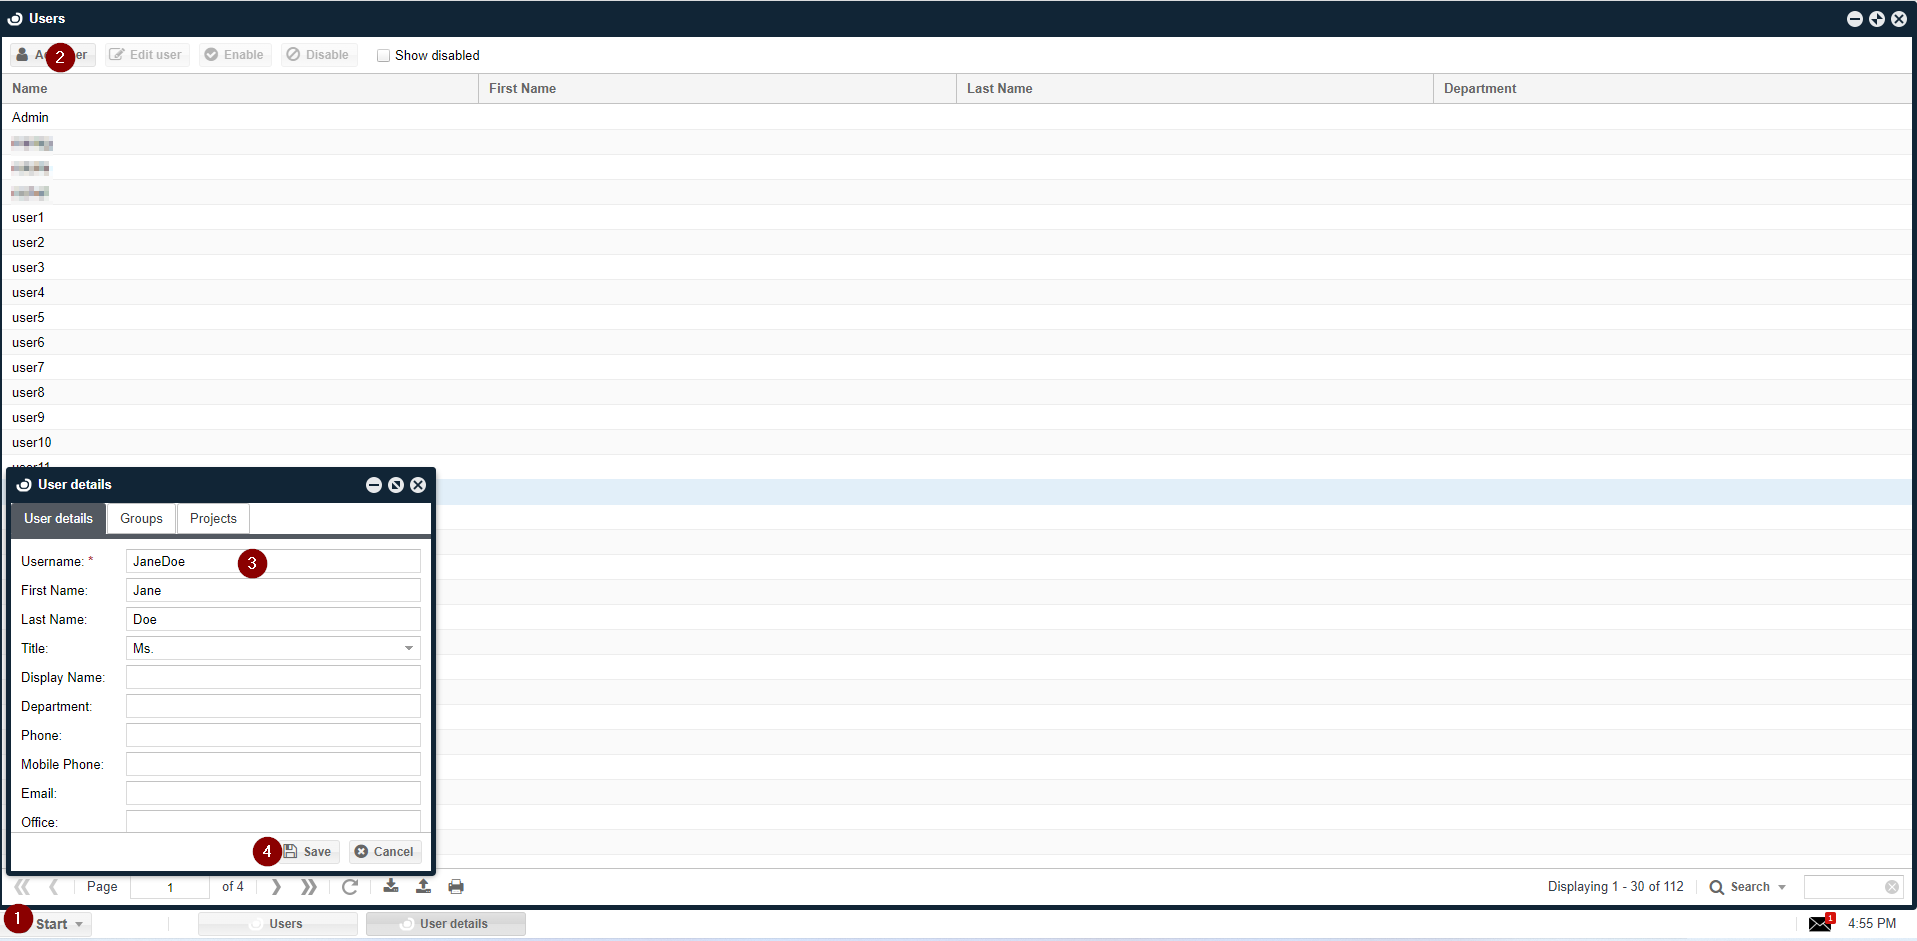
- EasyAdmin User Interface でユーザーアカウントを作成します: EasyAdmin User Interface→Start→Users&Groups→Users→Add User→ユーザーデータ入力→Save。
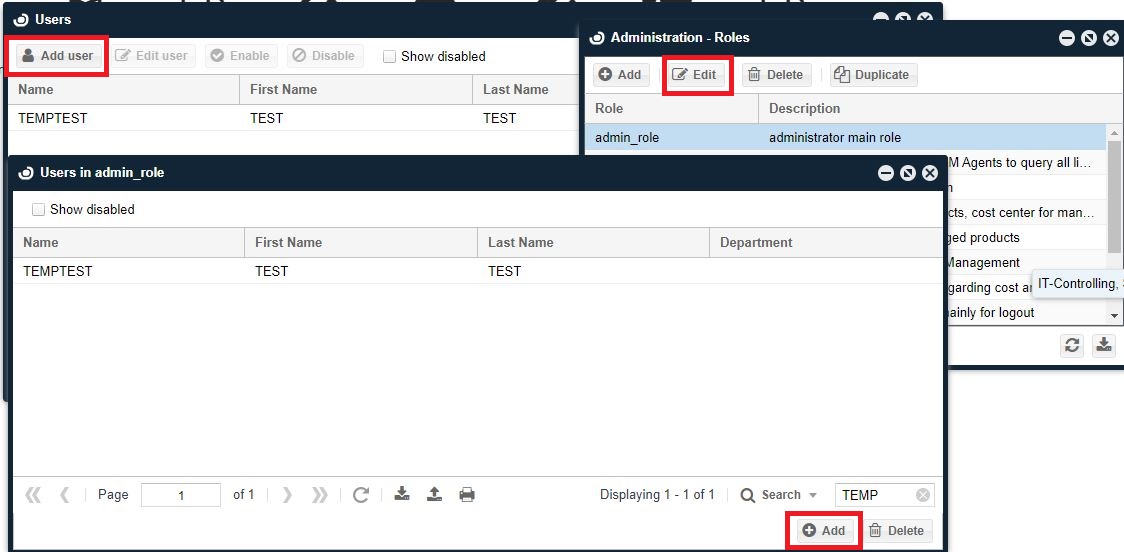
- EasyAdmin User Interface にログインできるよう、ユーザーに Role を割り当てます(詳細は Roles&Permissions の ドキュメント を参照)。
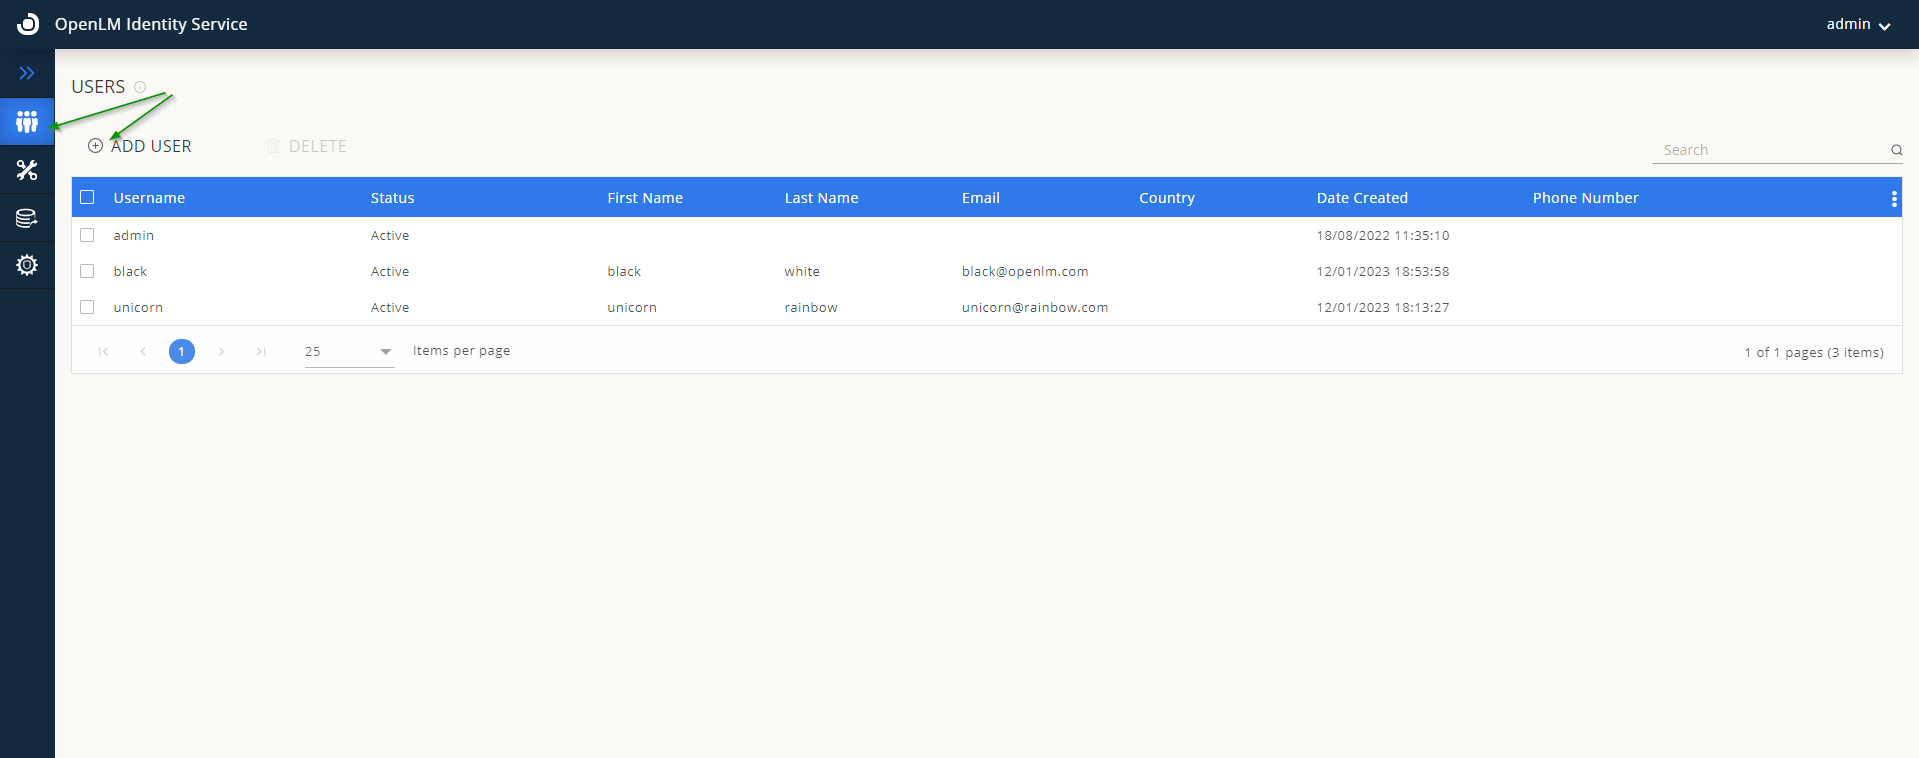
- Identity Service インスタンス→ Users タブ→Add User をクリックし、EasyAdmin User Interface と同じユーザーを作成→Save をクリック。
→
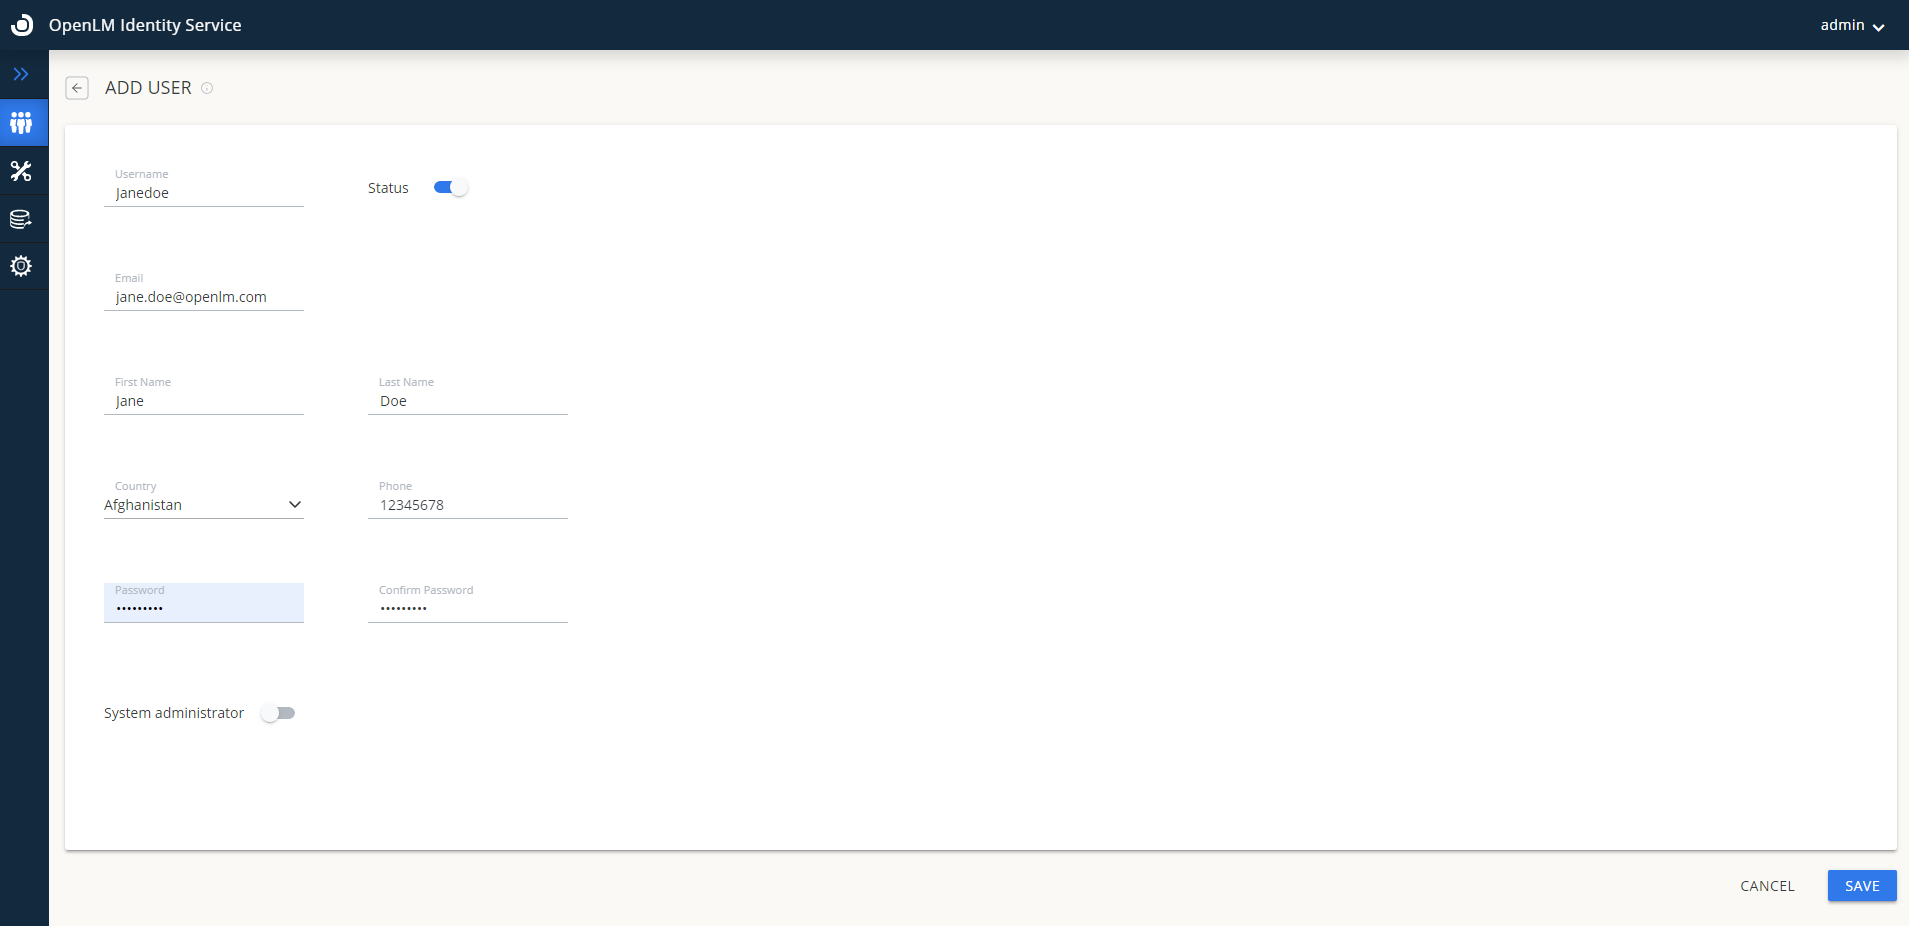
注: ユーザーが Identity Service の設定を編集できるようにする場合は、System Administrator トグルを有効にします。
- そのユーザーアカウントで EasyAdmin User Interface にログインします。
現時点では、EasyAdmin User Interface と Identity Service UI の両方に同じユーザーを手動で追加する必要があります。パスワード変更は Identity Service UI のシステム管理者のみが行えます。
セキュリティモードで各コンポーネントを構成する
Identity Service で OpenLM SLM のセキュリティモードを有効にした後、接続される各コンポーネントには Client ID と Secret Key(Authorization JSON ファイル)が必要です。
EasyAdmin User Interface → Security&Service→Security Tab→Authorization Tab に移動します。
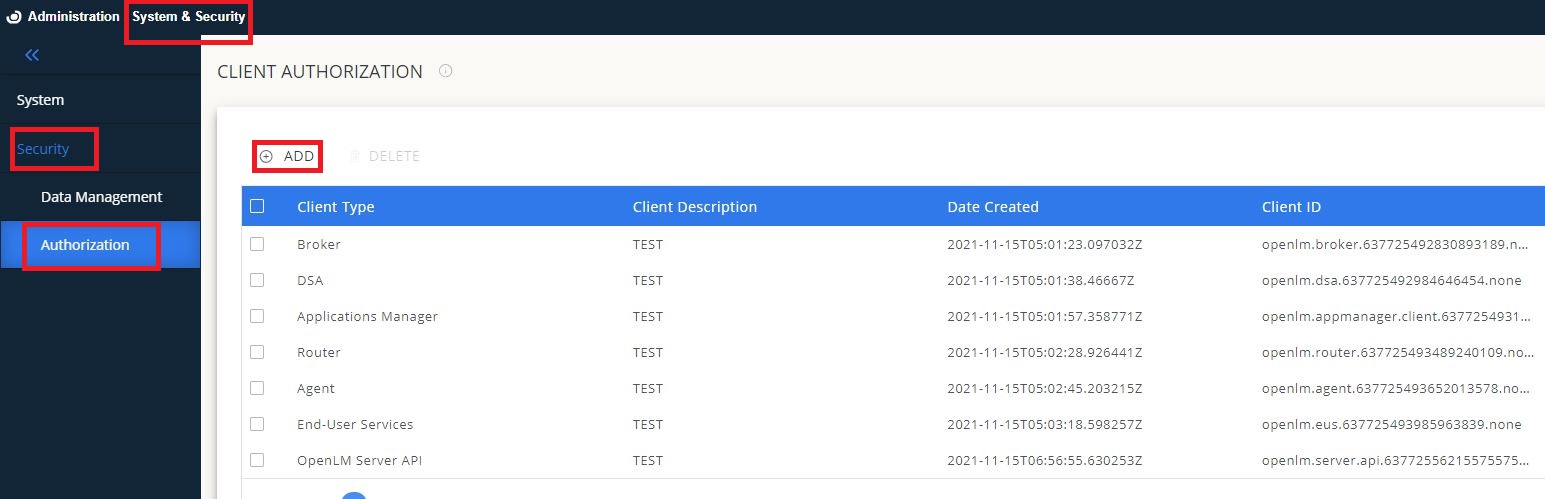
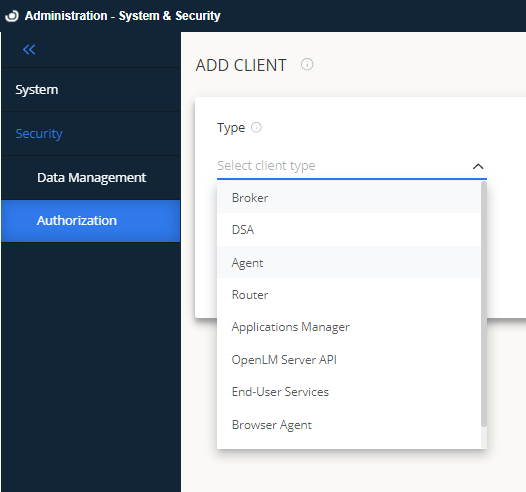
使用する各コンポーネントを追加し、Authorization JSON ファイルをダウンロードします。
各コンポーネントのインストール時に JSON ファイルをインポートするか、インストールフォルダに配置します。
(コンポーネントによって異なります)
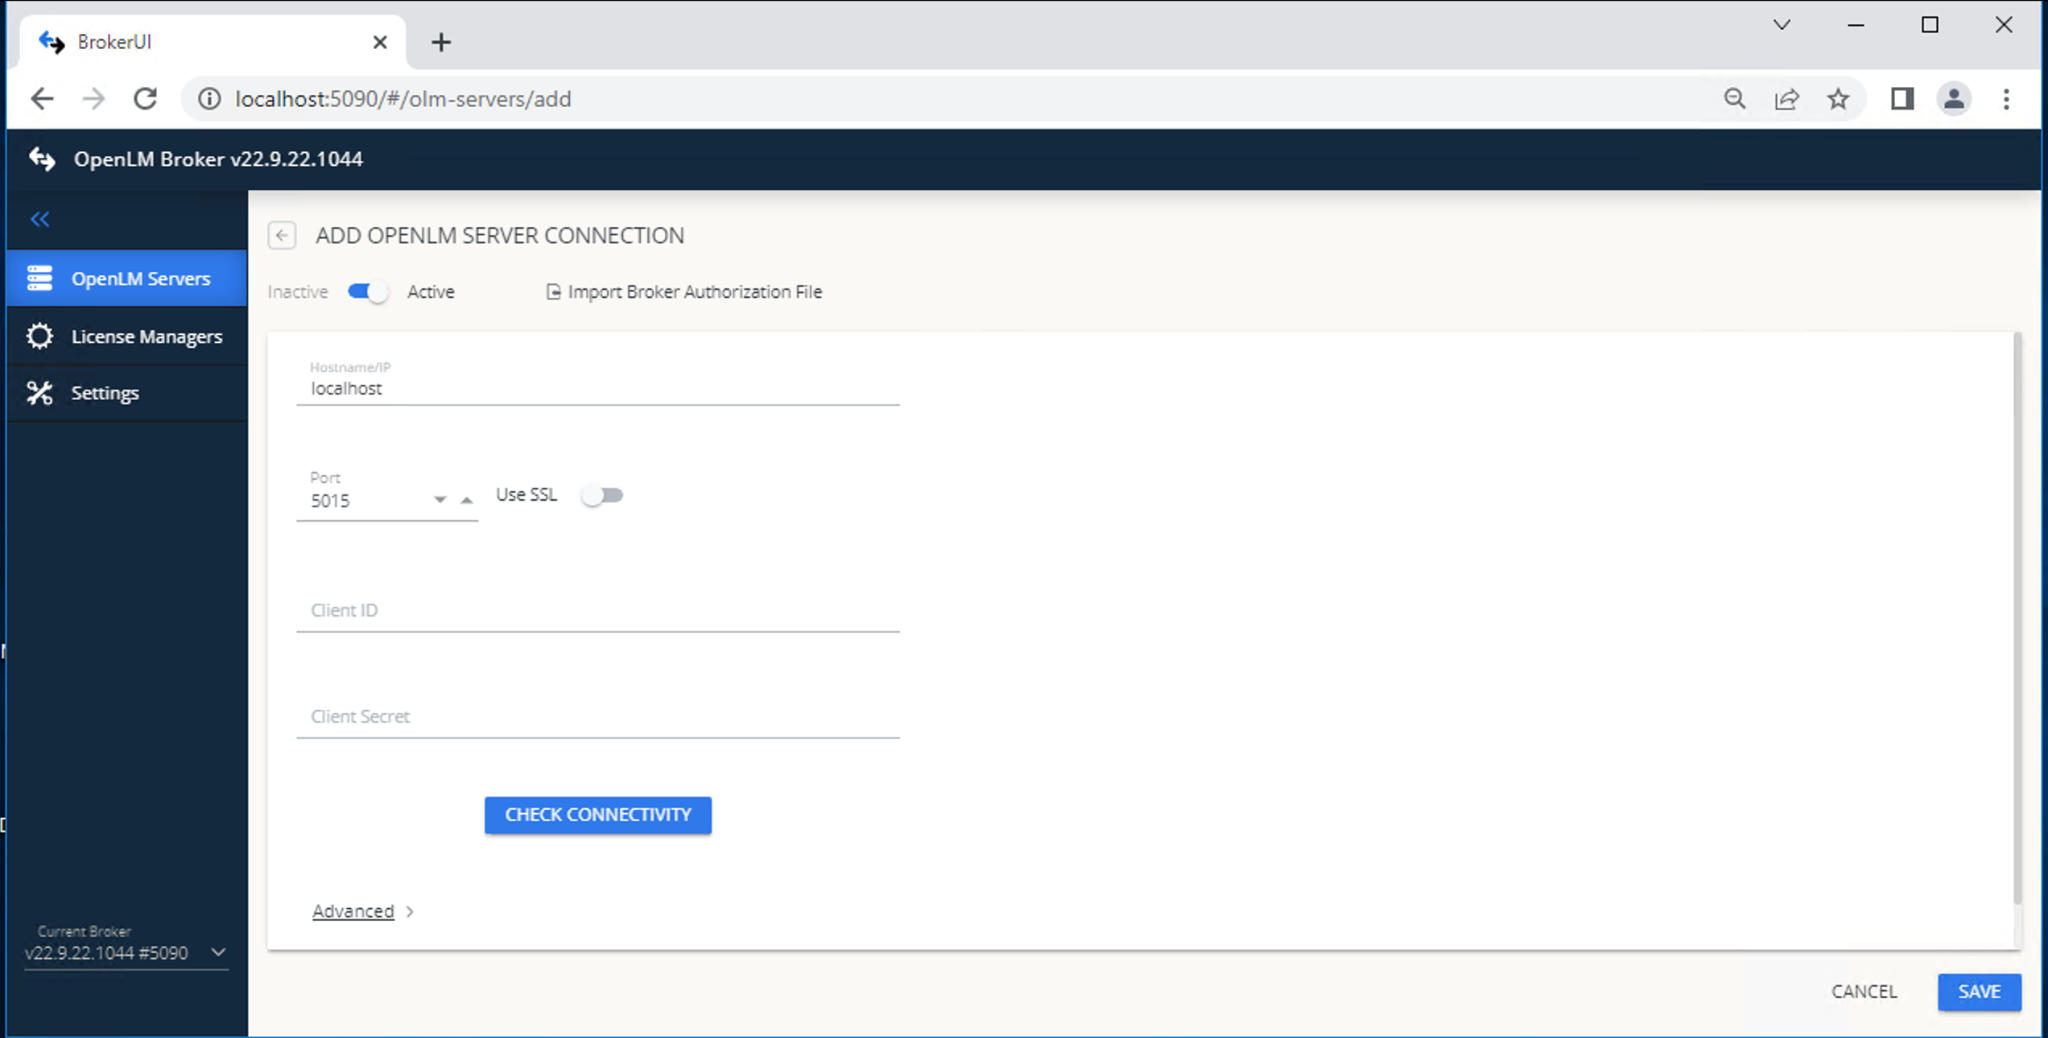

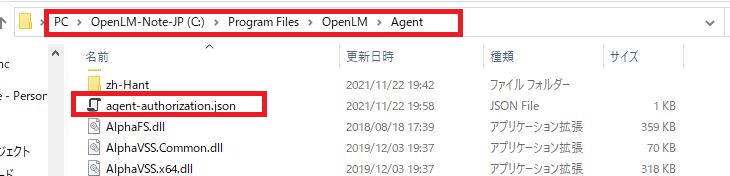
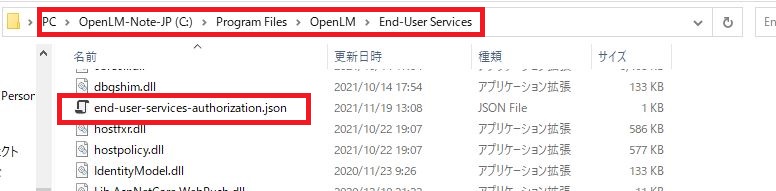
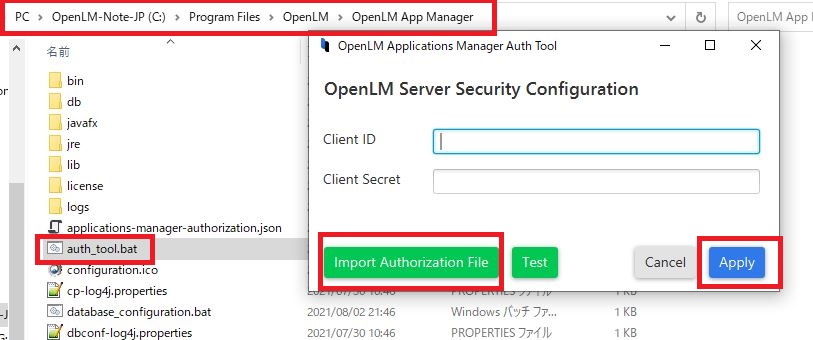
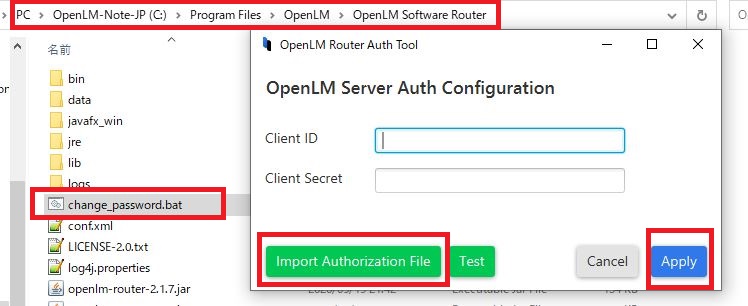
OpenLM SLM と Identity Service のサービスが稼働している状態で、Windows Service から各サービスを再起動します。
OpenLM SLM は各コンポーネントから Client ID と Secret Key を読み取る必要がある点に注意してください。
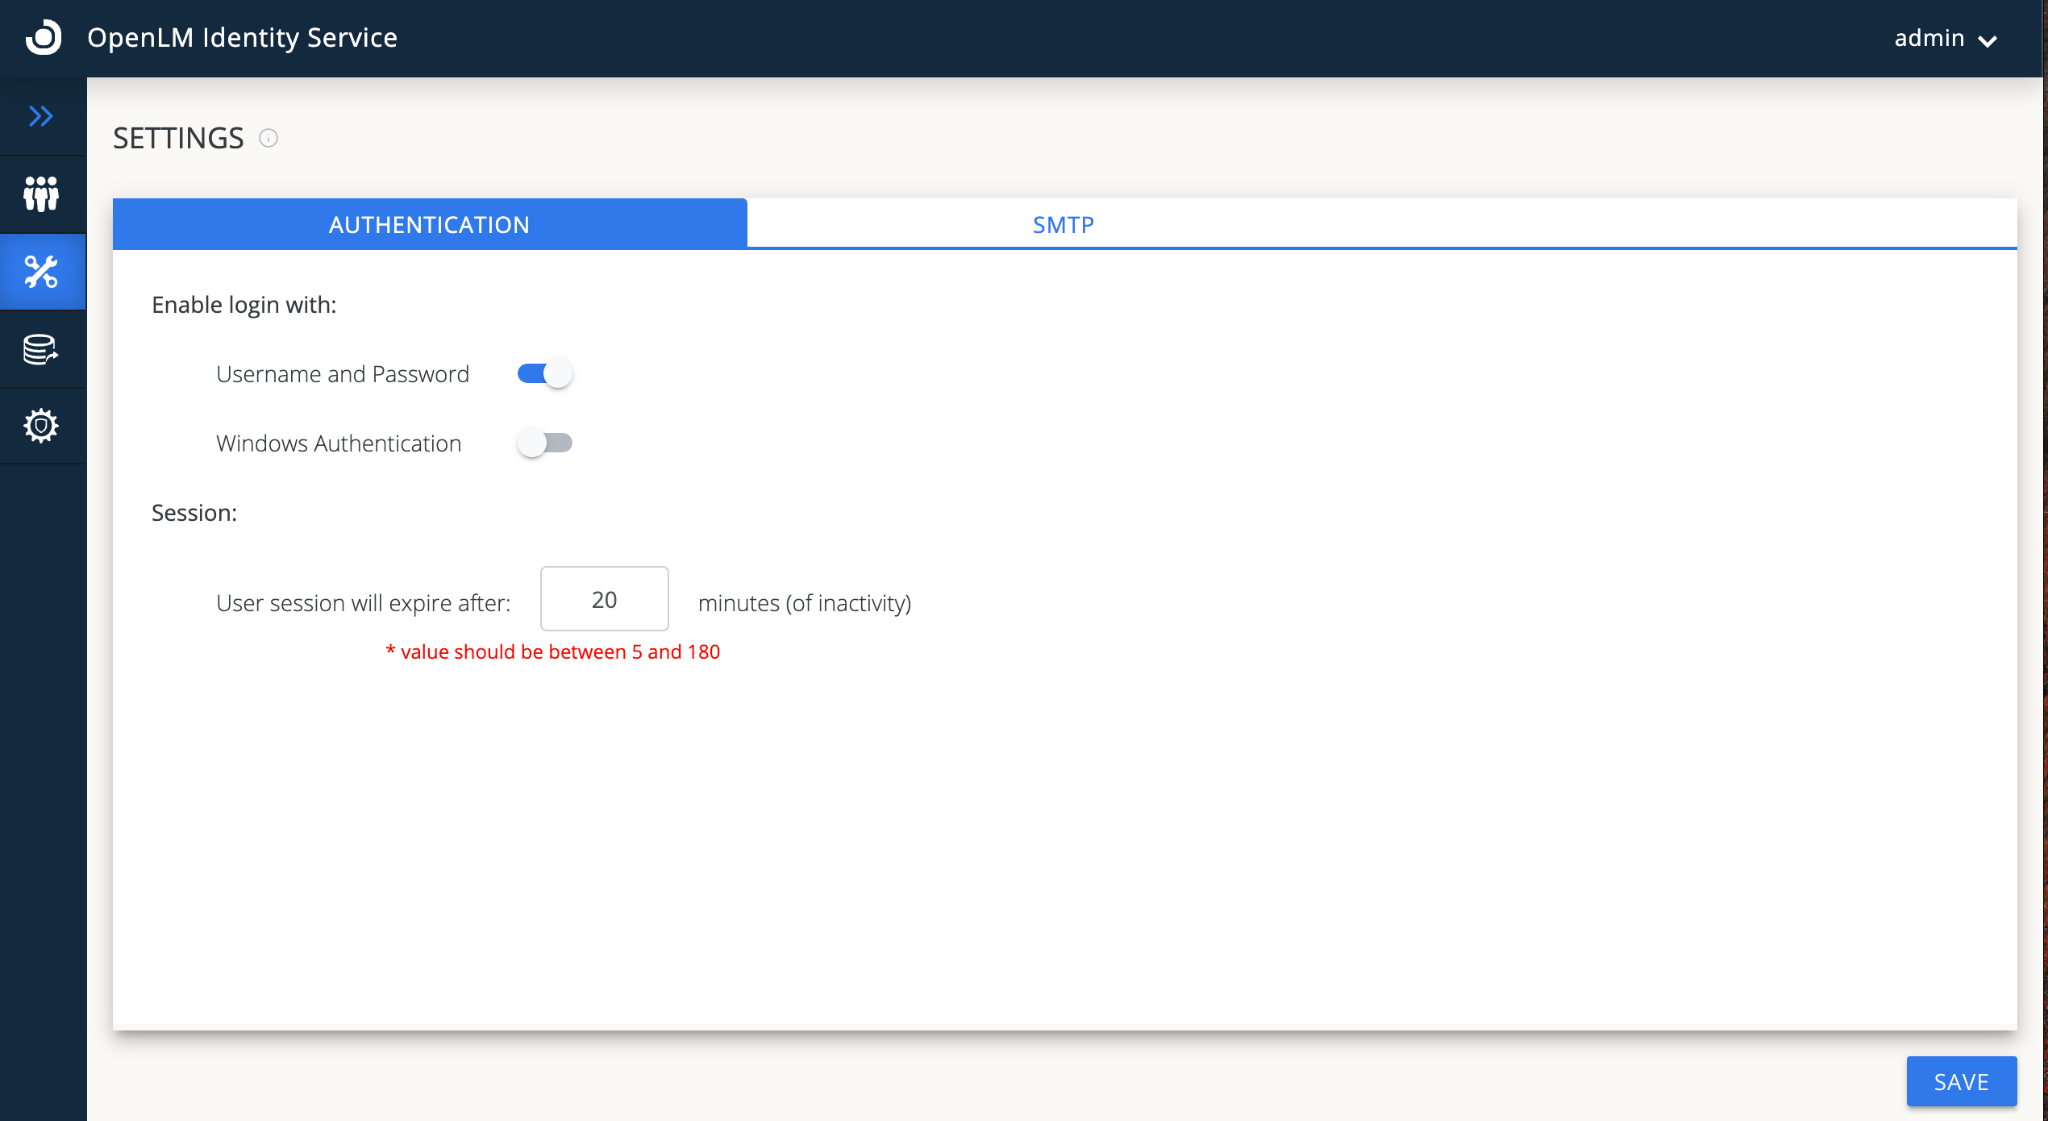
ユーザー名とパスワードの設定
セキュリティを無効にしたい場合を除き、ユーザー名とパスワードのトグルはオフにしないでください。
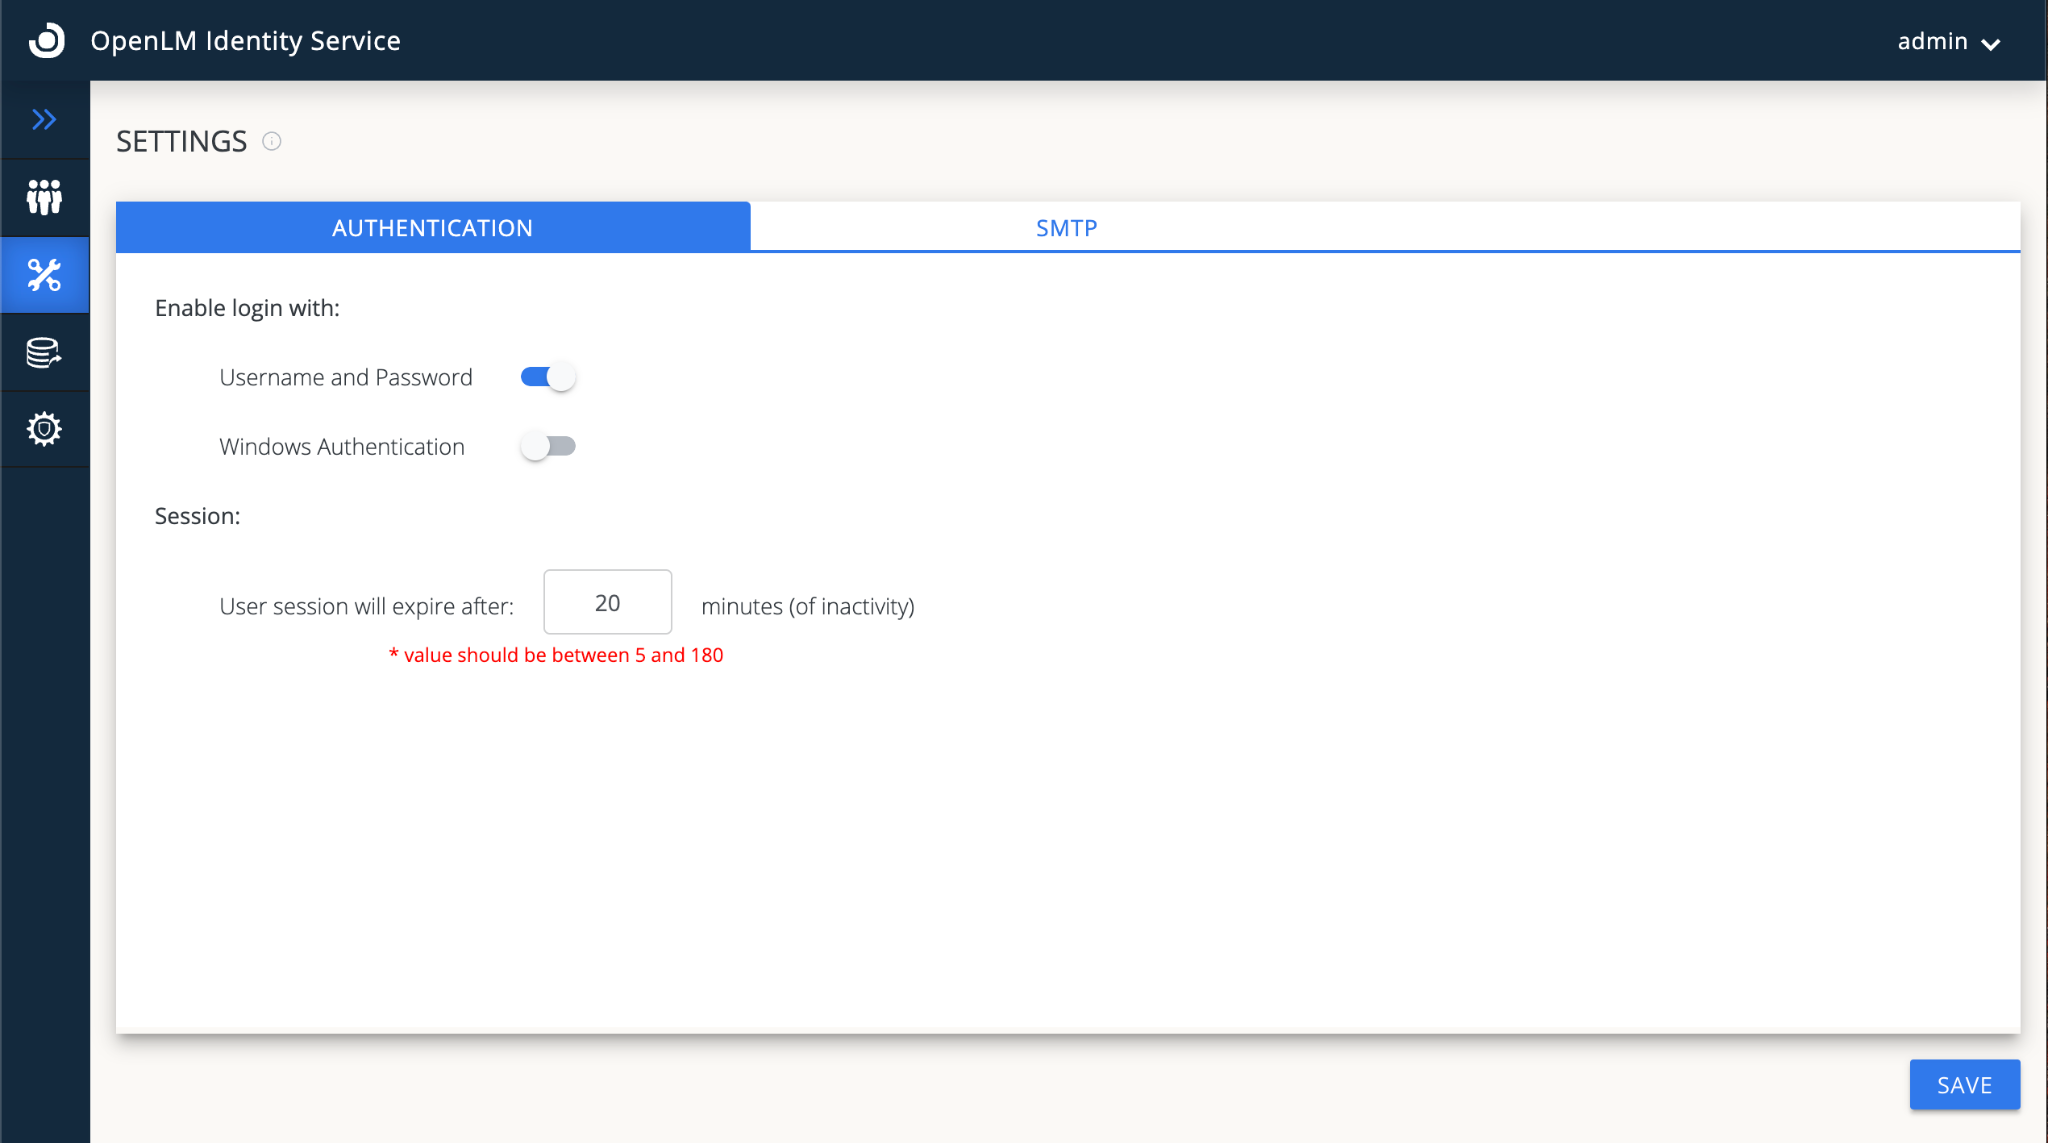
Windows Authentication の設定
こちらのドキュメントを参照してください。
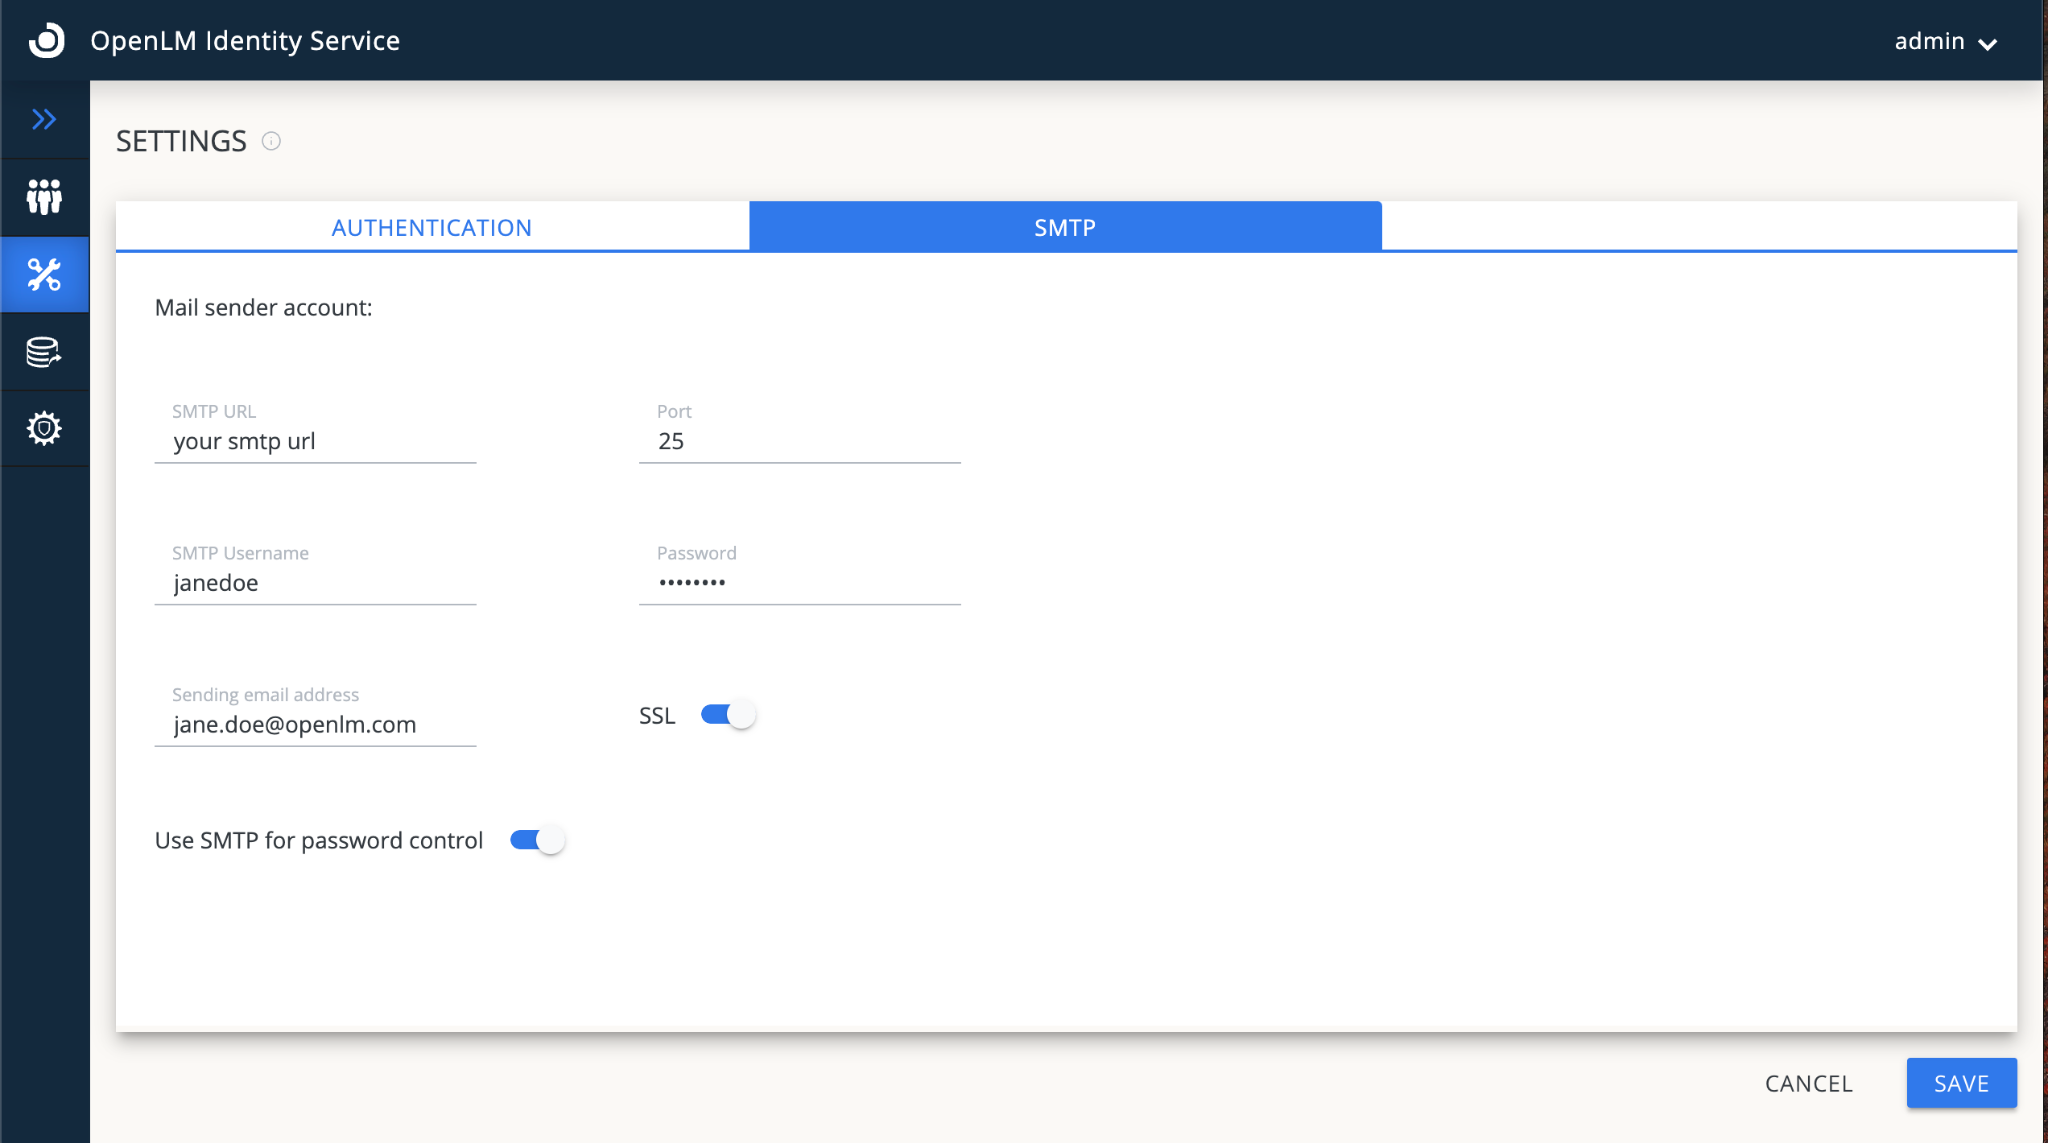
SMTP の設定
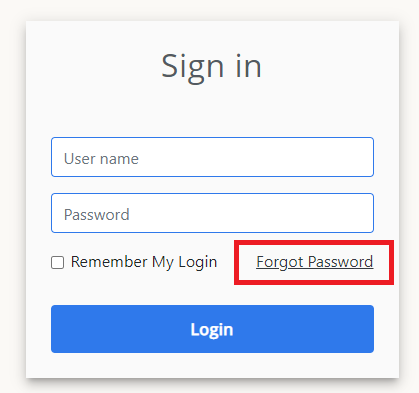
アカウントのパスワードを忘れた場合、このボタンでメールアドレスを使って再設定できます。
セッション時間の設定
このタブでスクリーンタイムを設定し、認証情報でログインできます。