GitLab
Follow these steps to configure OpenLM to monitor license usage and retrieve statistics from GitLab.
Requirements
Before starting, make sure you have:
- OpenLM Broker v22.2 or higher installed on a machine in the same LAN as GitLab
- OpenLM Server v21.12 or higher
- TCP/IP communication activated
- A configured GitLab instance
- A GitLab account
Monitoring capabilities
The current monitoring capabilities for GitLab through OpenLM Broker are:
| Feature | Resolution | License totals | License usage | Denials reporting | Borrowed license reporting | Expiration date reporting | Multiple server redundancy |
|---|---|---|---|---|---|---|---|
| Support | By minute | ✔ | ✔ | ✔ | ❌ | ✔ | ❌ |
OpenLM Broker configuration
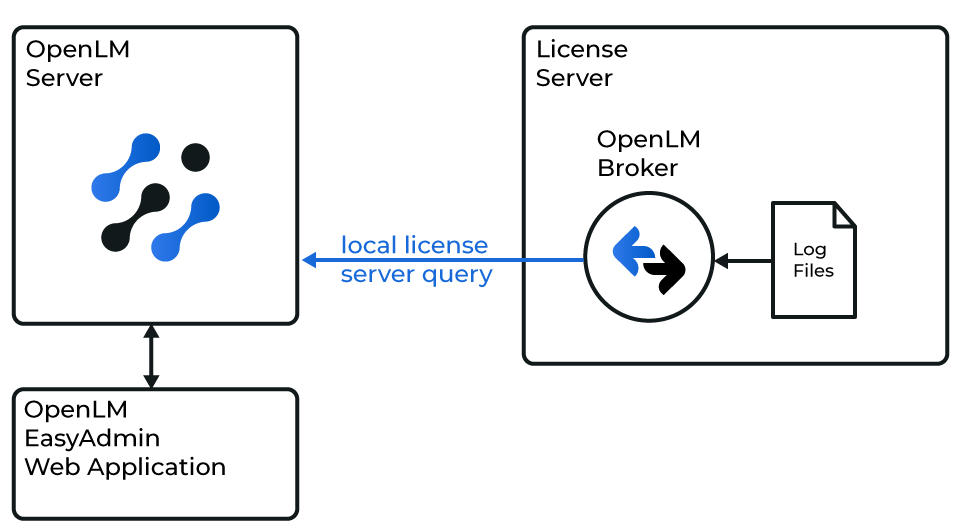
Diagram of how OpenLM interfaces with GitLab
OpenLM Broker must already be installed and configured to report to OpenLM Server before proceeding.
Manual configuration (Broker desktop UI)
-
Select Add Port.
-
Enter the GitLab port number (default:
80). -
From License Manager Type, select GitLab and select Apply.
-
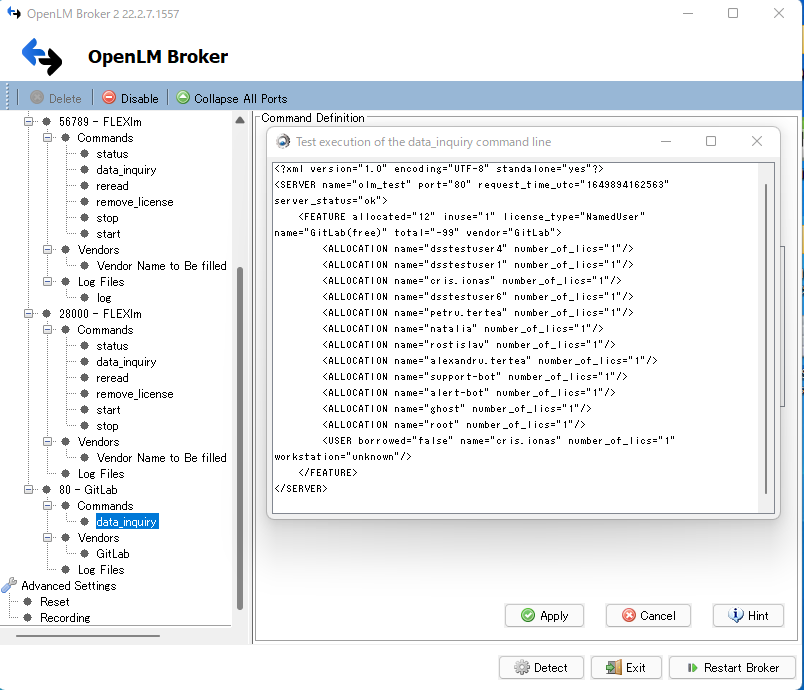
In the Commands node, select Data Inquiry and enter the GitLab API endpoint for users, for example:
http://FQDN:80/api/v4/users -
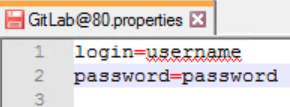
In
C:\Program Files\OpenLM\OpenLM Broker, open thegitlab@80.propertiesfile, provide login information, and save.
-
In Broker, select Execute, then Apply. Ensure the license data output is displayed.
-
Under Vendors, select the vendor placeholder node, enter GitLab, and select Apply.
-
Select Restart Broker.
Verify your configuration
- Open EasyAdmin in your browser.
- Go to Start → Widgets → License Servers.
- Approve the GitLab license manager from the Pending Approval list.

It may take up to 3 minutes for a new connection to display as active.