Hardlock
Follow these steps to configure OpenLM to monitor license usage and retrieve statistics from the Hardlock license manager.
Requirements
Before starting, make sure you have:
- OpenLM Server v5 or higher installed on a machine in your organization
- OpenLM Broker v4.14 or higher installed on the same machine as Hardlock
Monitoring capabilities
The current monitoring capabilities for Hardlock through OpenLM Broker are:
| Feature | Resolution | License totals | License usage | Denials reporting | Borrowed license reporting | Expiration date reporting | Multiple server redundancy |
|---|---|---|---|---|---|---|---|
| Support | Log file parsing | ✔ | ✔ | ❌ | ❌ | ❌ | ❌ |
OpenLM Broker configuration
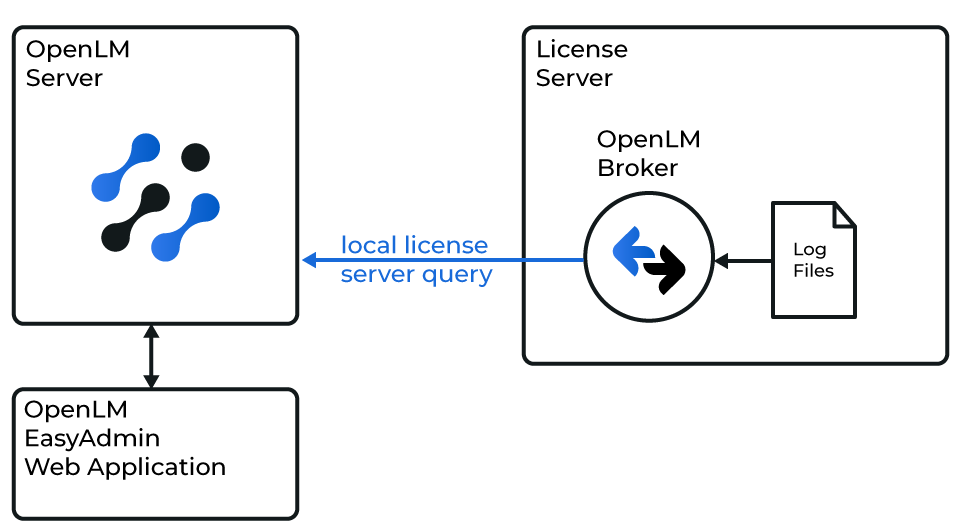
Diagram of how OpenLM interfaces with the Hardlock license manager
note
OpenLM Broker must be installed and reporting to OpenLM Server before starting these steps.
Manual configuration (Broker desktop UI)
- Click Add Port.
- Since Broker reads only the log file, enter any port number (for example,
21723). - From License Manager Type, select Hardlock and click Apply.
- Under Vendors, select Vendor Name to Be Filled, enter Hardlock, and click Apply.
- Go to the Log Files node → Add Log File.
- Select the new log node, click […], and browse to the Hardlock
.logfile location. - Click Apply.
- Click Restart Broker.
Manual configuration (Broker web UI)
- Open a browser and go to http://localhost:5090/.
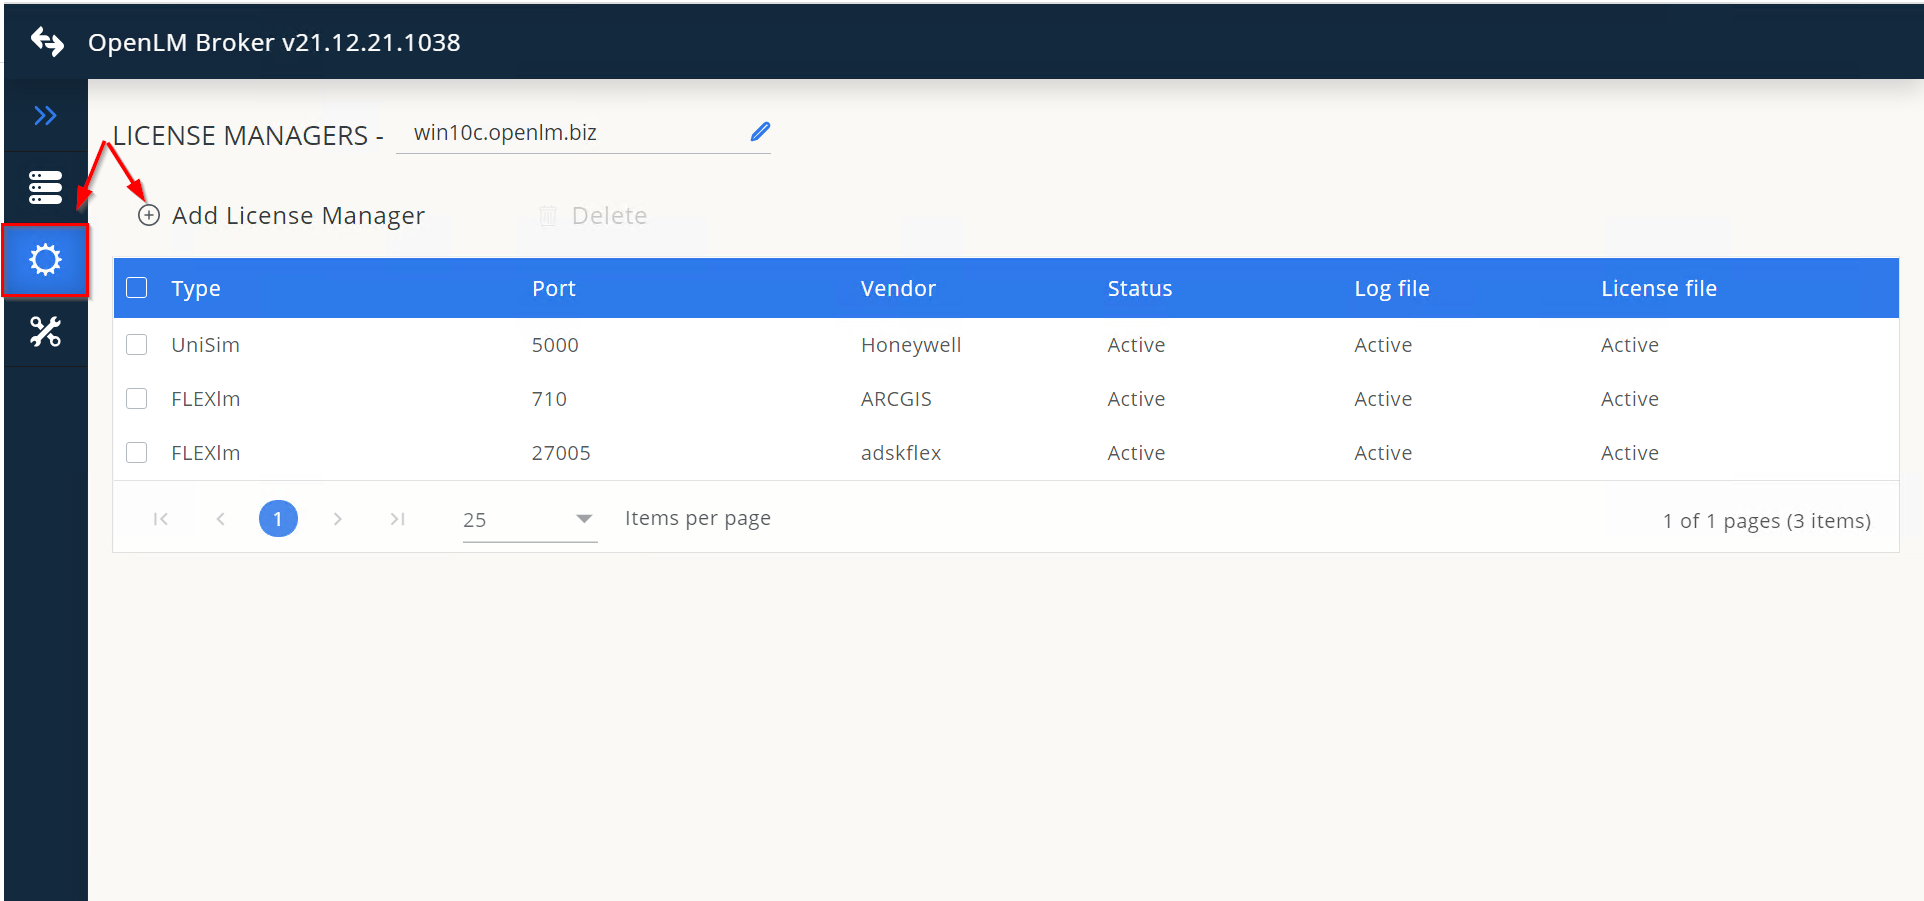
- Go to License Managers → Add License Manager.
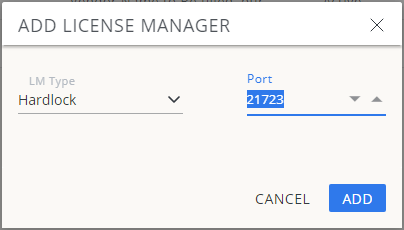
- Select Hardlock, enter any port number (for example,
888), and click Add.
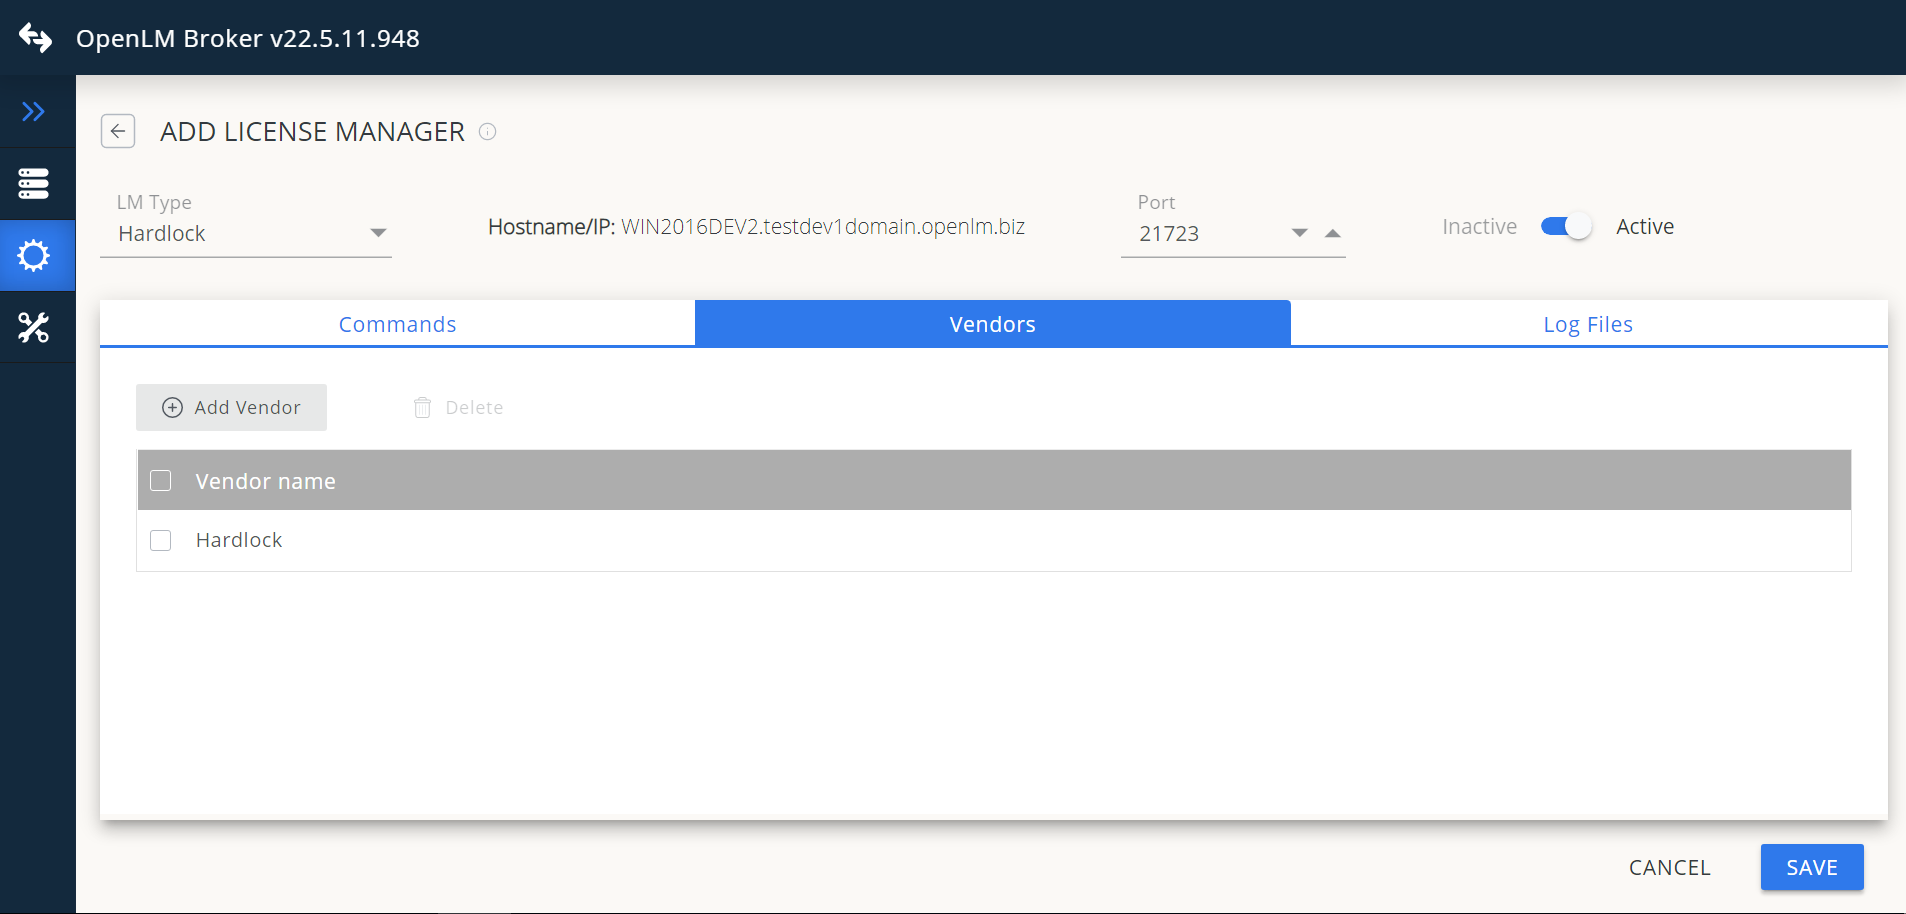
- In Vendors, click Add Vendor, enter Hardlock, and click Continue.
- In Log Files, click Add Log File, browse to the
.logfile, and click Open. - Select the vendor Hardlock and click Continue.
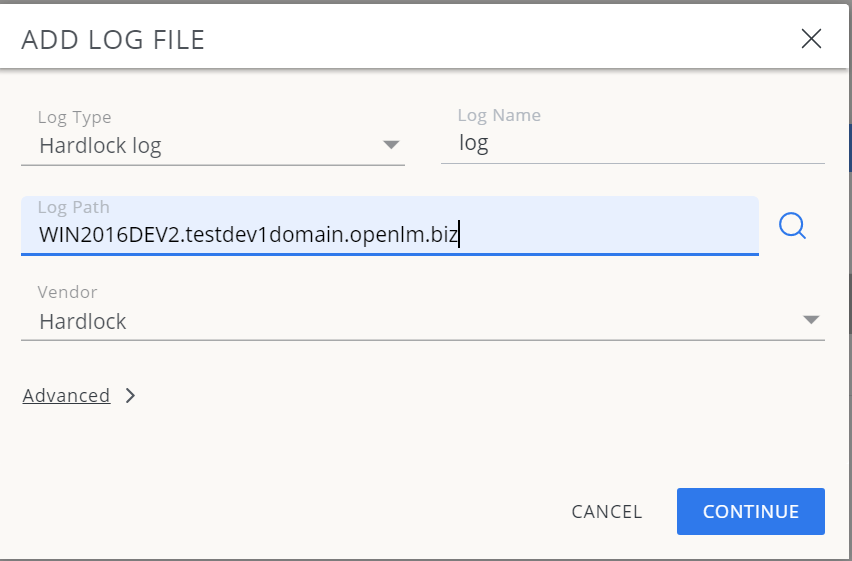
- Click Save.
OpenLM Server configuration
Automatic configuration through EasyAdmin
- Open EasyAdmin (Start → Widgets → License Manager - Servers).
- Double-click the Hardlock entry.
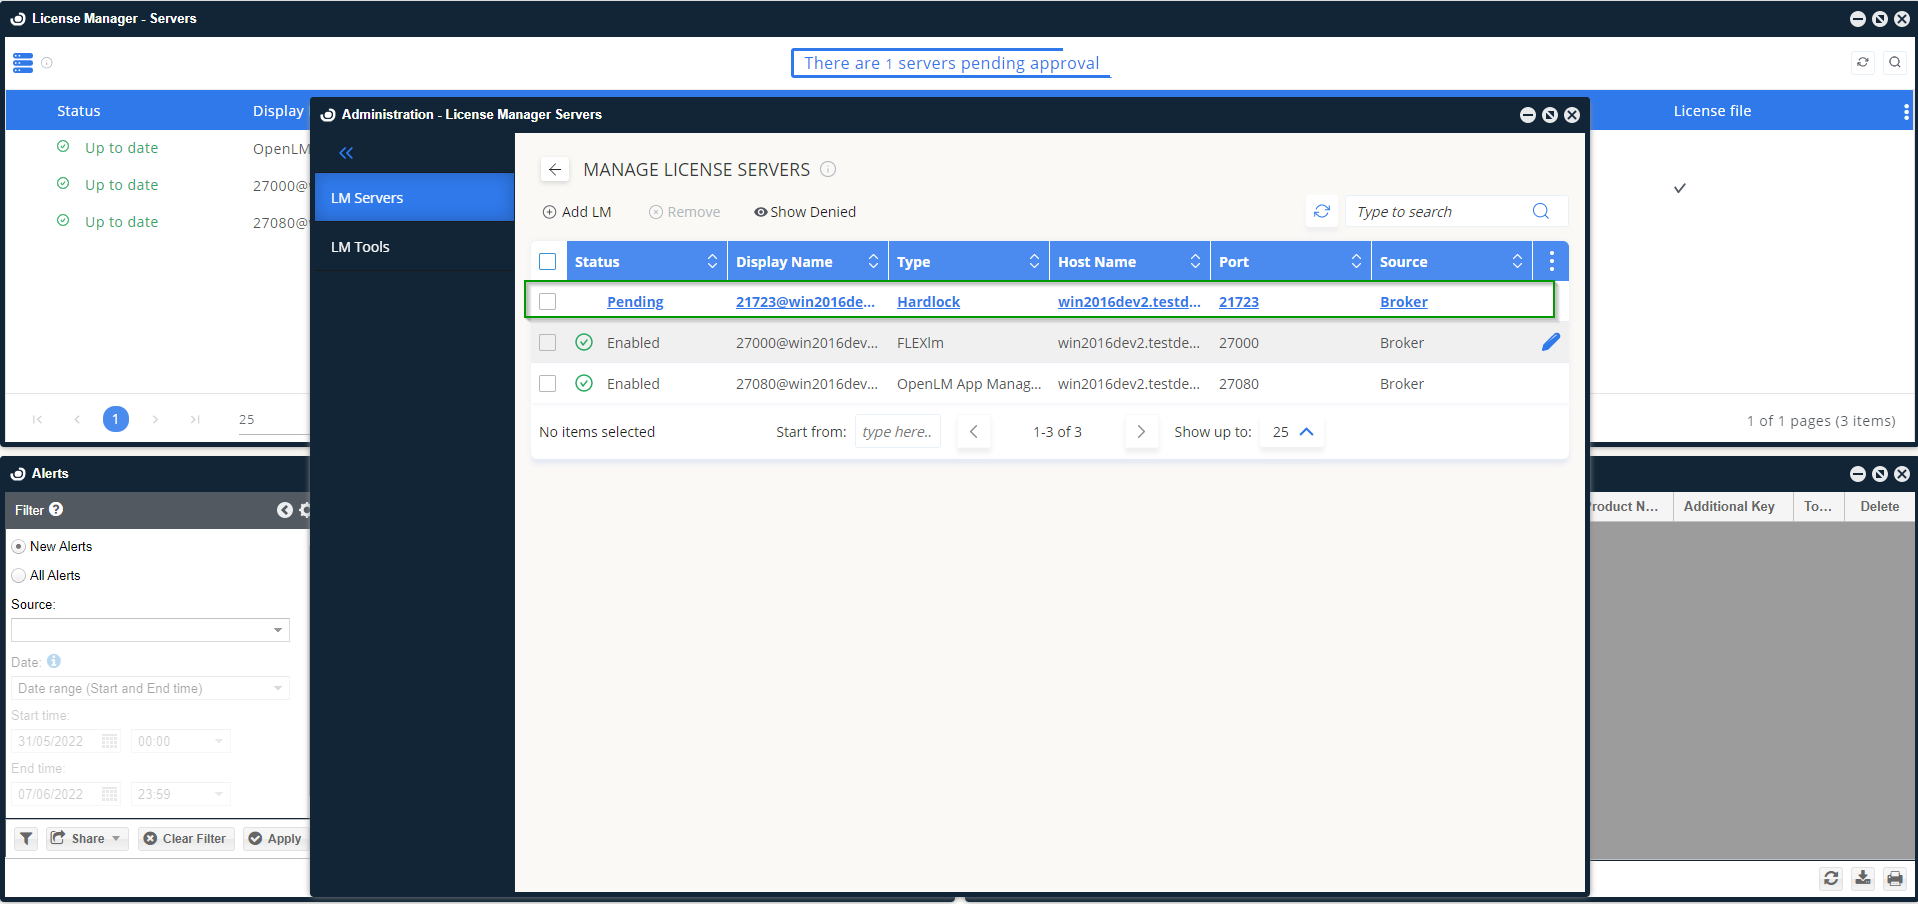
- Optionally rename the connection, leave the type as Hardlock, and click Approve.
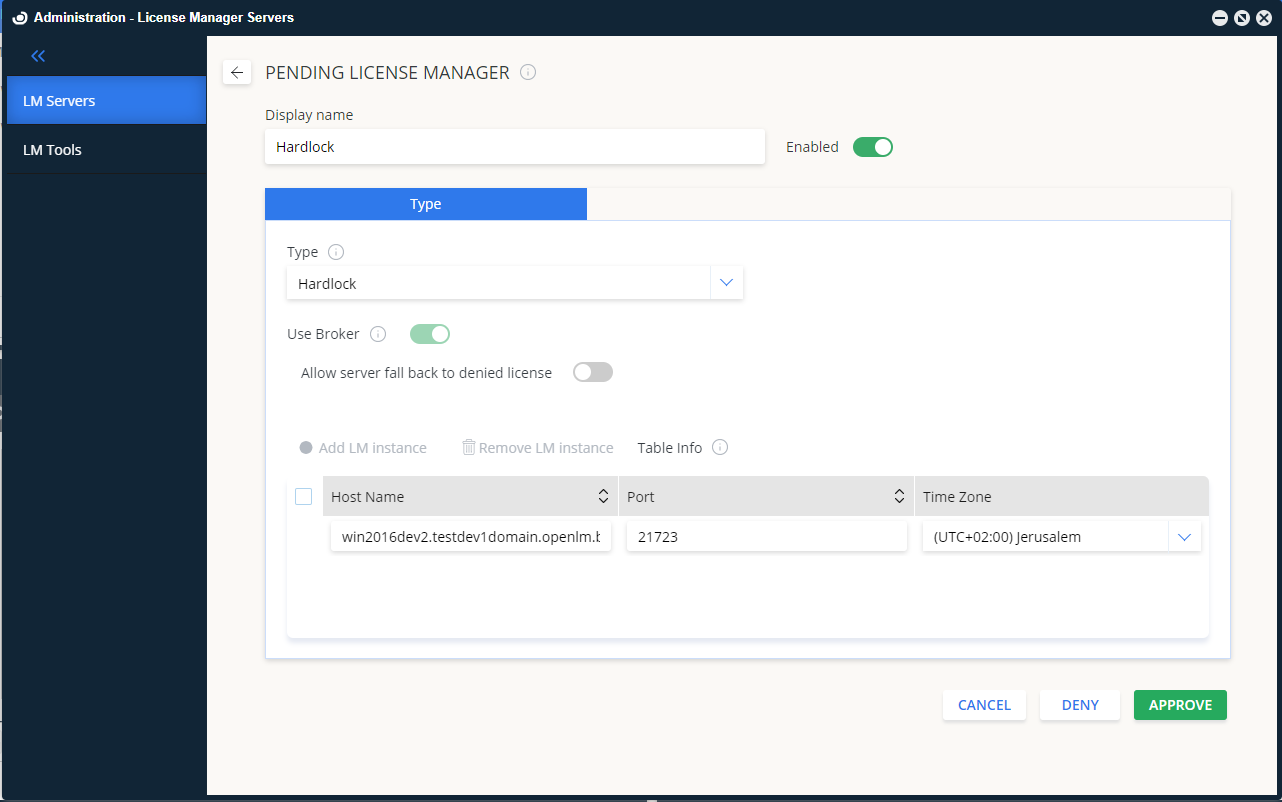
Manual configuration through EasyAdmin
If automatic configuration fails:
- Go to Start → Administration → License Manager Servers.
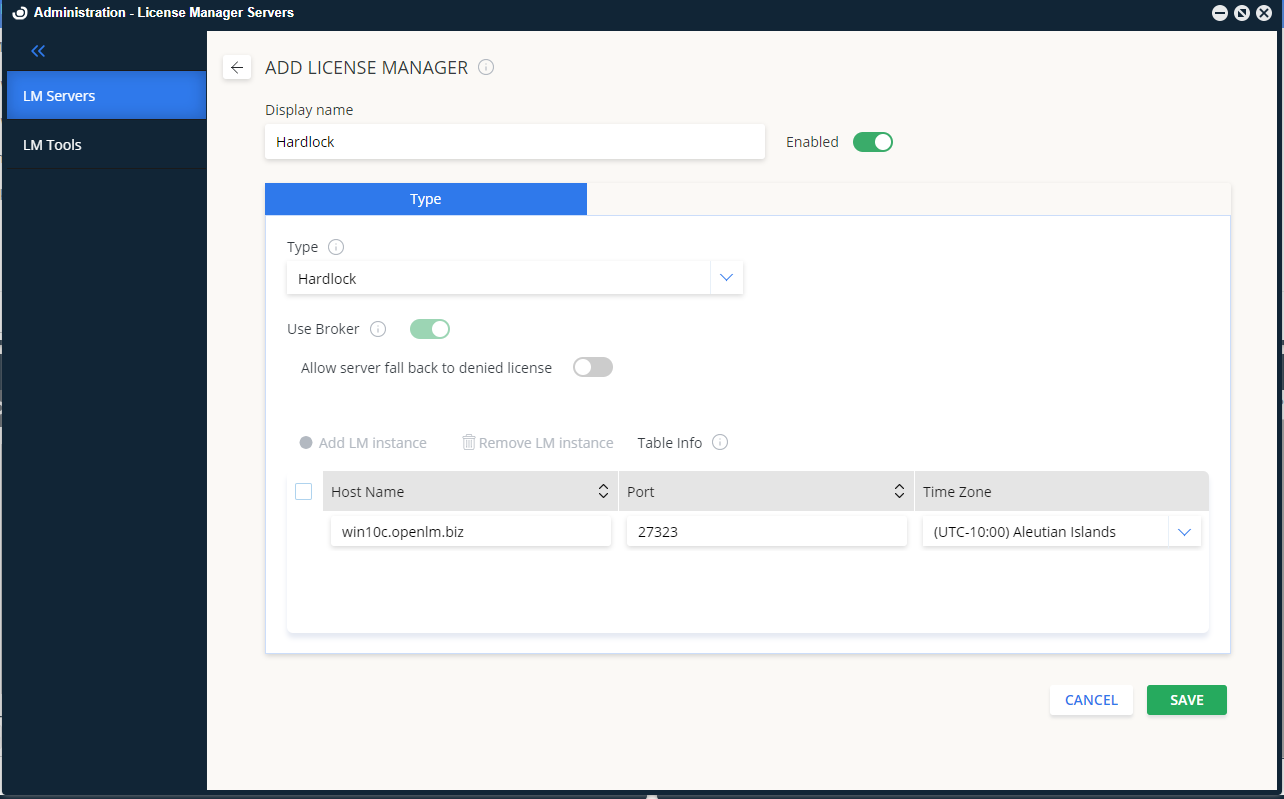
- Click Add LM.
- From Type, select OpenLM Hardlock.
- Enter a description (for example, "Hardlock").
- Set the time zone for the license server location.
- Enter the Hostname and Port configured in Broker.
- Uncheck Is Triad Configuration.
- Check Use Broker.
- Click Save.
Verify your configuration
- Open EasyAdmin in your browser.
- Go to Start → Widgets → License Servers.
- Confirm that Hardlock appears in the list with a green status circle.
note
It may take up to 3 minutes for a new connection to display as active.