LM-X
Scope
OpenLM supports monitoring for a wide and growing variety of license managers.
This guide describes how to configure OpenLM to interface with LM-X, monitor license usage, and obtain license statistics.
There are two ways to query an LM-X server:
- Option 1: Remotely query the license server from OpenLM Server.
- Option 2: Install OpenLM Broker on the LM-X server to query locally and forward the data to OpenLM Server.
Option 1: OpenLM Server only
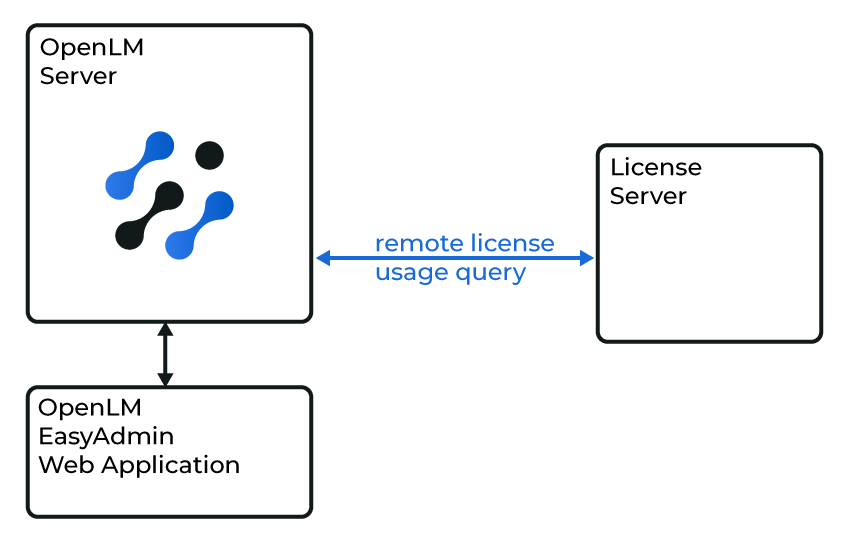
Diagram: OpenLM Server querying LM-X directly
Configuring OpenLM Server
- Open the EasyAdmin interface.
- Navigate to Start → Administration → License Manager Servers.
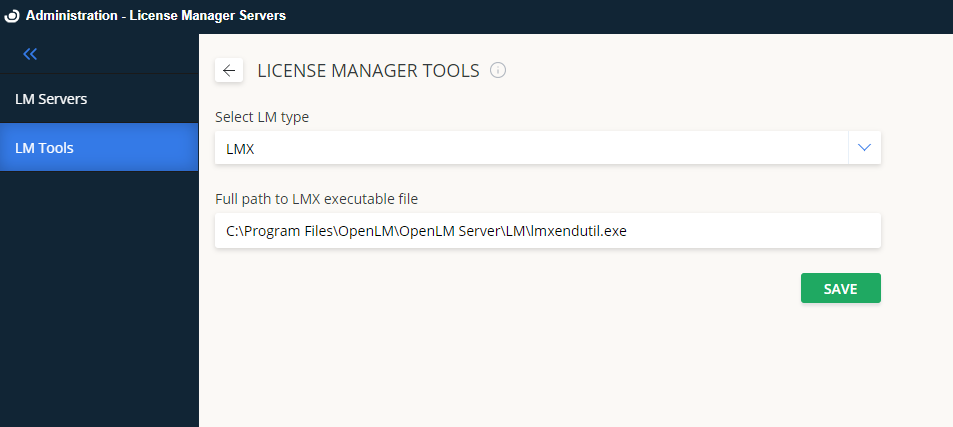
- Select LM Tools.
- From the LM Type drop-down menu, select LMX.
- Copy the
lmxendutil.exefile toC:\Program Files\OpenLM\OpenLM Server\LMand provide the full path. - Select Save.
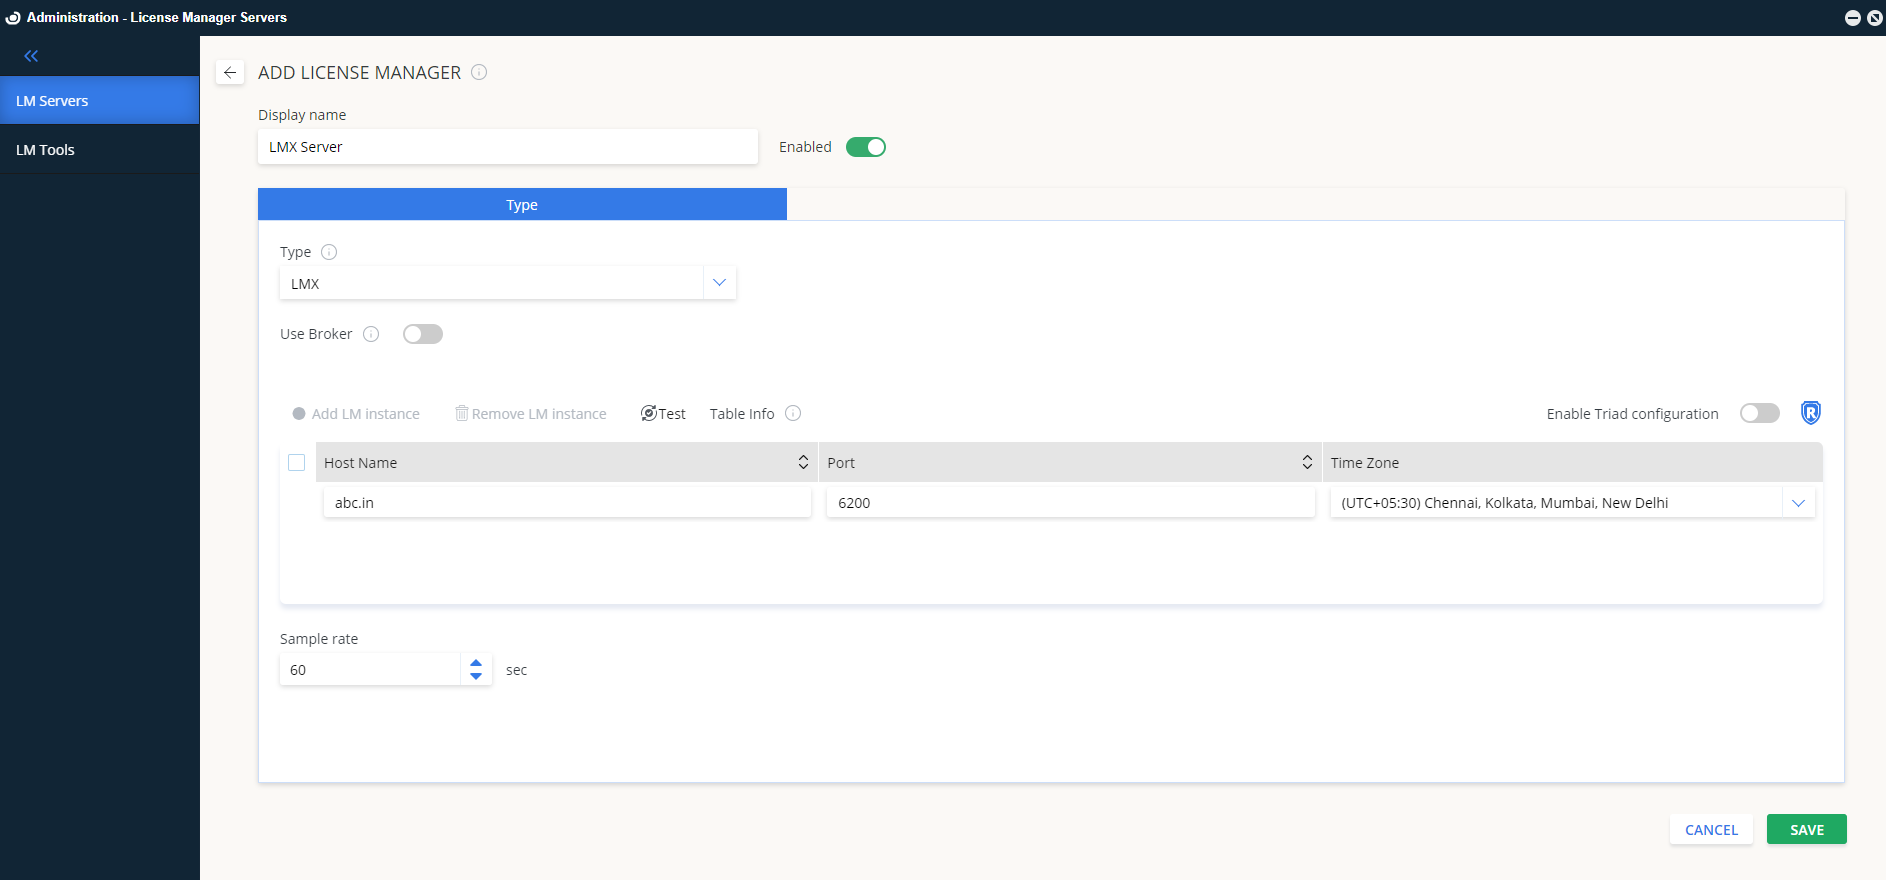
Adding a new LM-X server
- In EasyAdmin, select Add LM.
- Enter a descriptive name in Display name.
- From the Type menu, select LMX.
- Enter the Hostname and Port (default port: 6200).
- Set the server Time Zone.
- Configure redundancy:
- Enable Triad configuration: Not supported for LM-X. Leave off.
- Use Broker:
- Off (default): OpenLM Server queries LM-X directly.
- On: Data is collected by OpenLM Broker instead.
- Select Save.
OpenLM Server can now query your LM-X license server and present usage information in EasyAdmin.
Option 2: OpenLM Broker
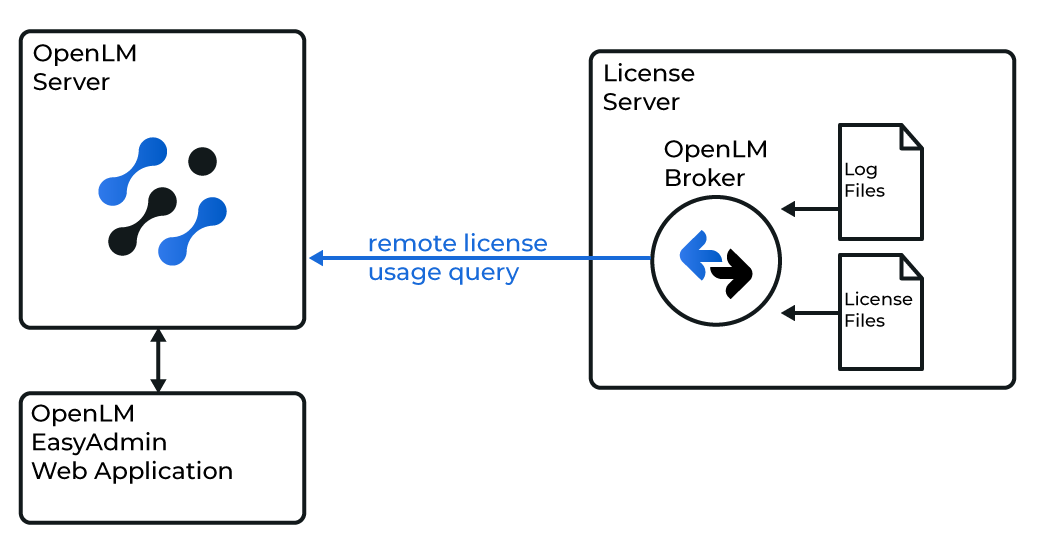
Diagram: OpenLM Broker querying LM-X locally
The OpenLM Broker is optional but recommended. Installed on the LM-X host, it queries usage locally and forwards it to OpenLM Server. Broker ensures buffered communication in case of network outages or security restrictions.
In addition, Broker can query LM-X for license request denials, providing valuable insight into license efficiency.
Configuring OpenLM Server
Follow the same steps as in Option 1, but set Use Broker to On.
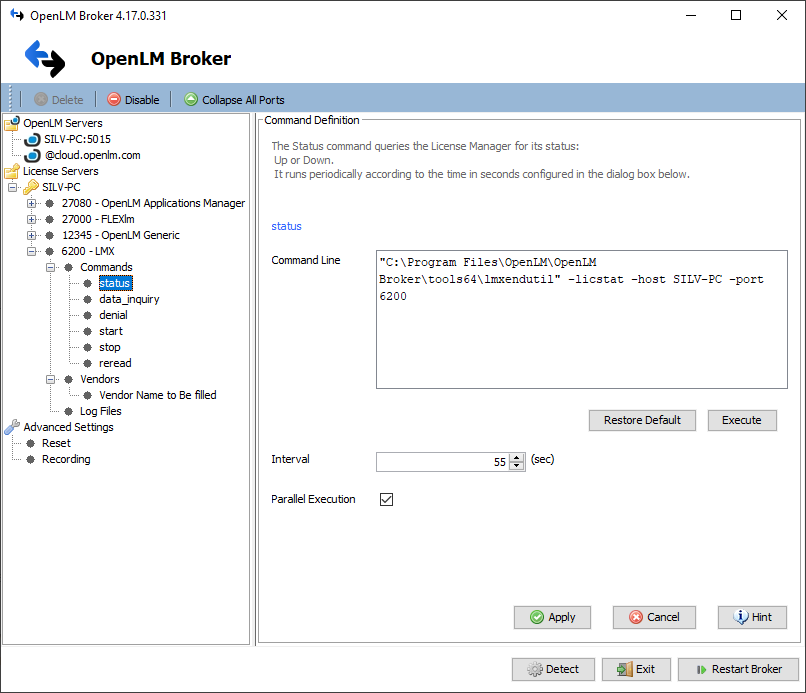
Configuring OpenLM Broker
- Install the latest version of OpenLM Broker on the LM-X server.
- Configure Broker to monitor LM-X on the same port defined in EasyAdmin (default: 6200).
- In the status, data_inquiry, and denial fields, set the full path to
lmxendutil.exe. You can also configure the path under Commands and apply it globally with Update. - Select Apply and then Restart Broker.
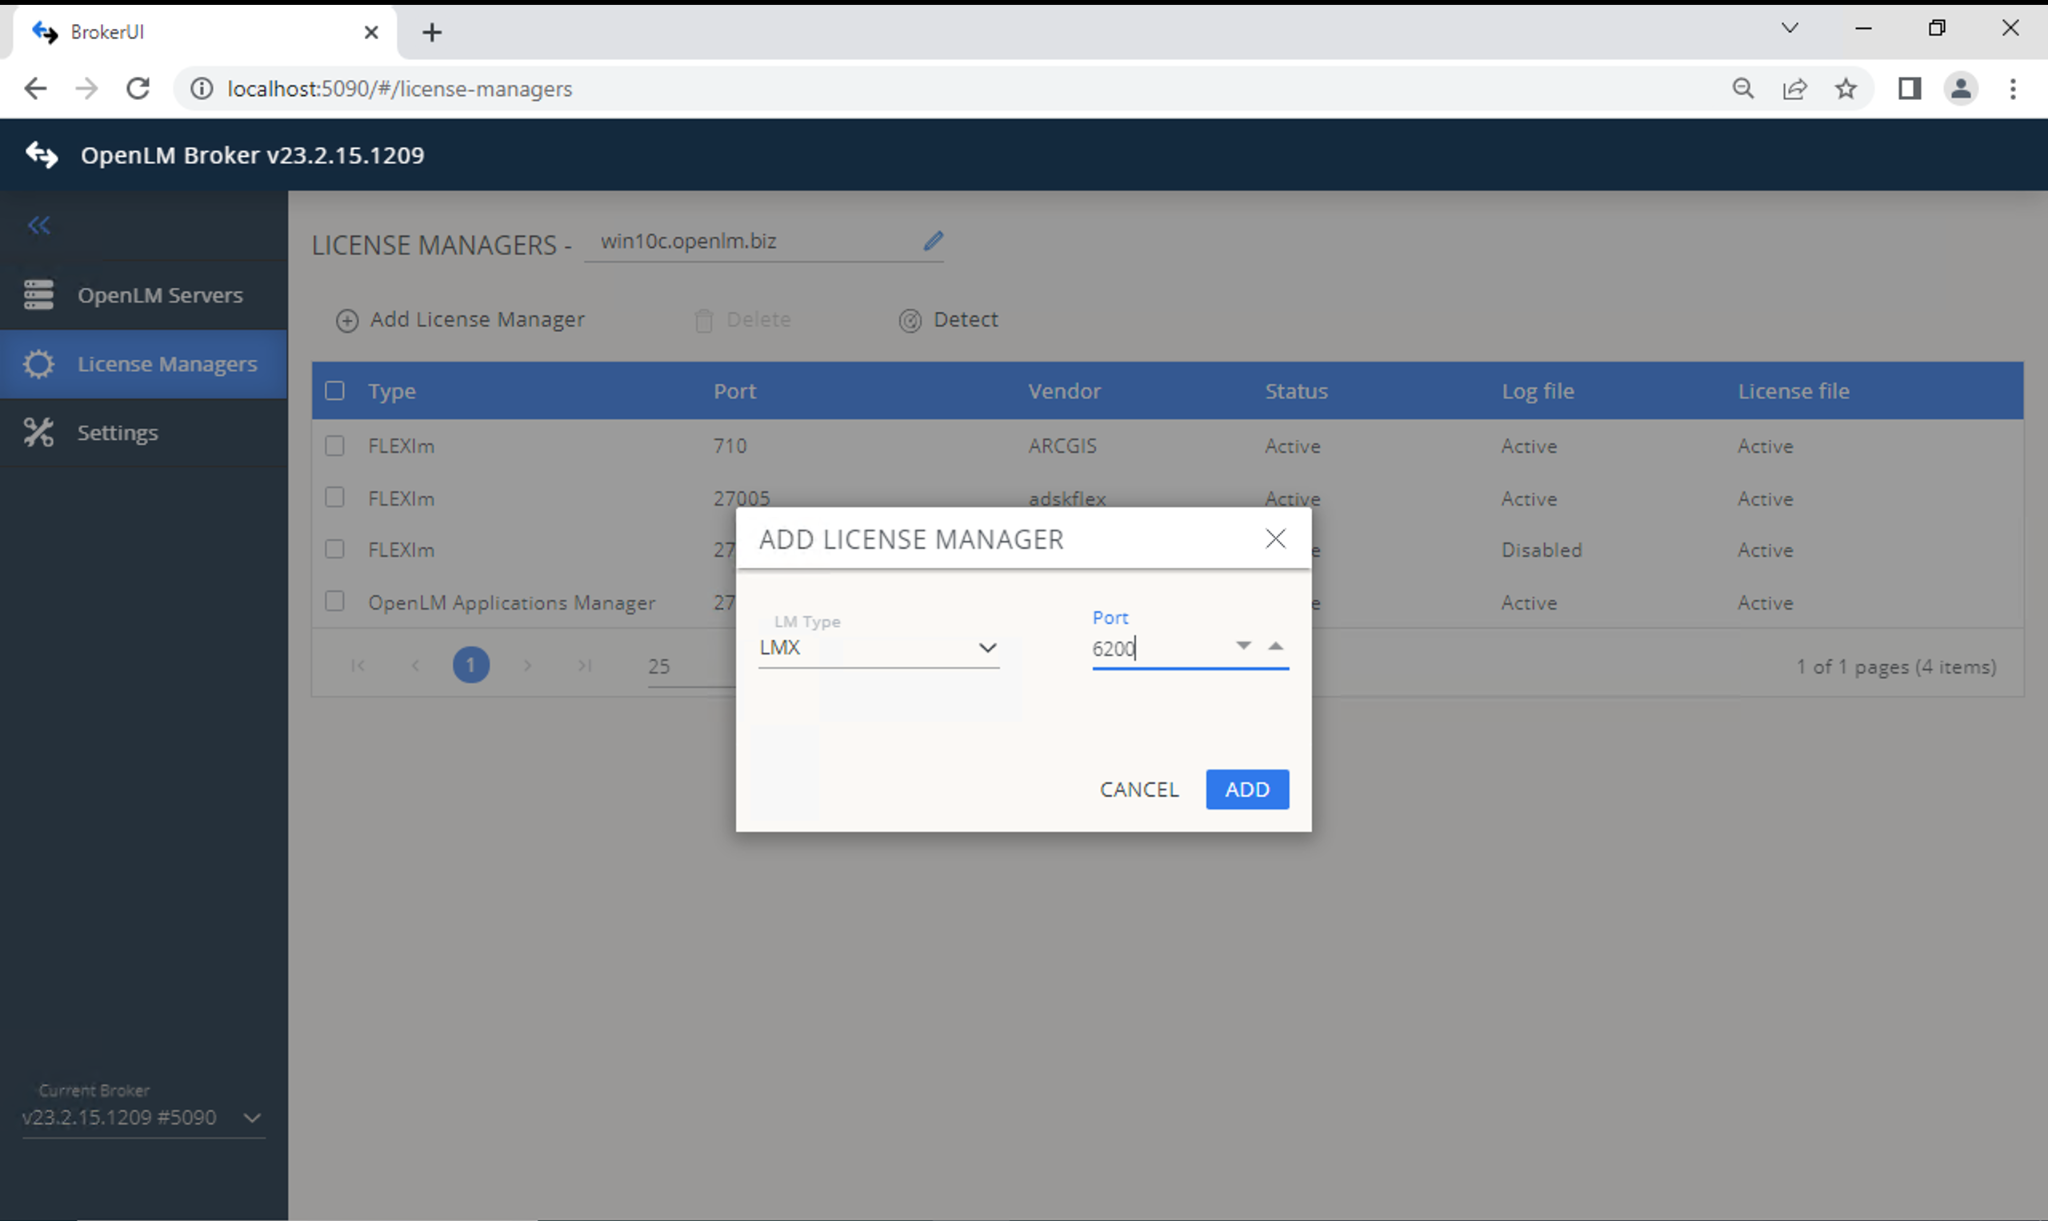
Configuring through Broker web UI
- Open the Broker Web UI at
http://localhost:5090/#/license-managers. - Under License Managers, select LM Type LMX and input the port. Select Add.
- Add the vendor: switch to the Vendors tab → Add Vendor → enter a name → Continue.
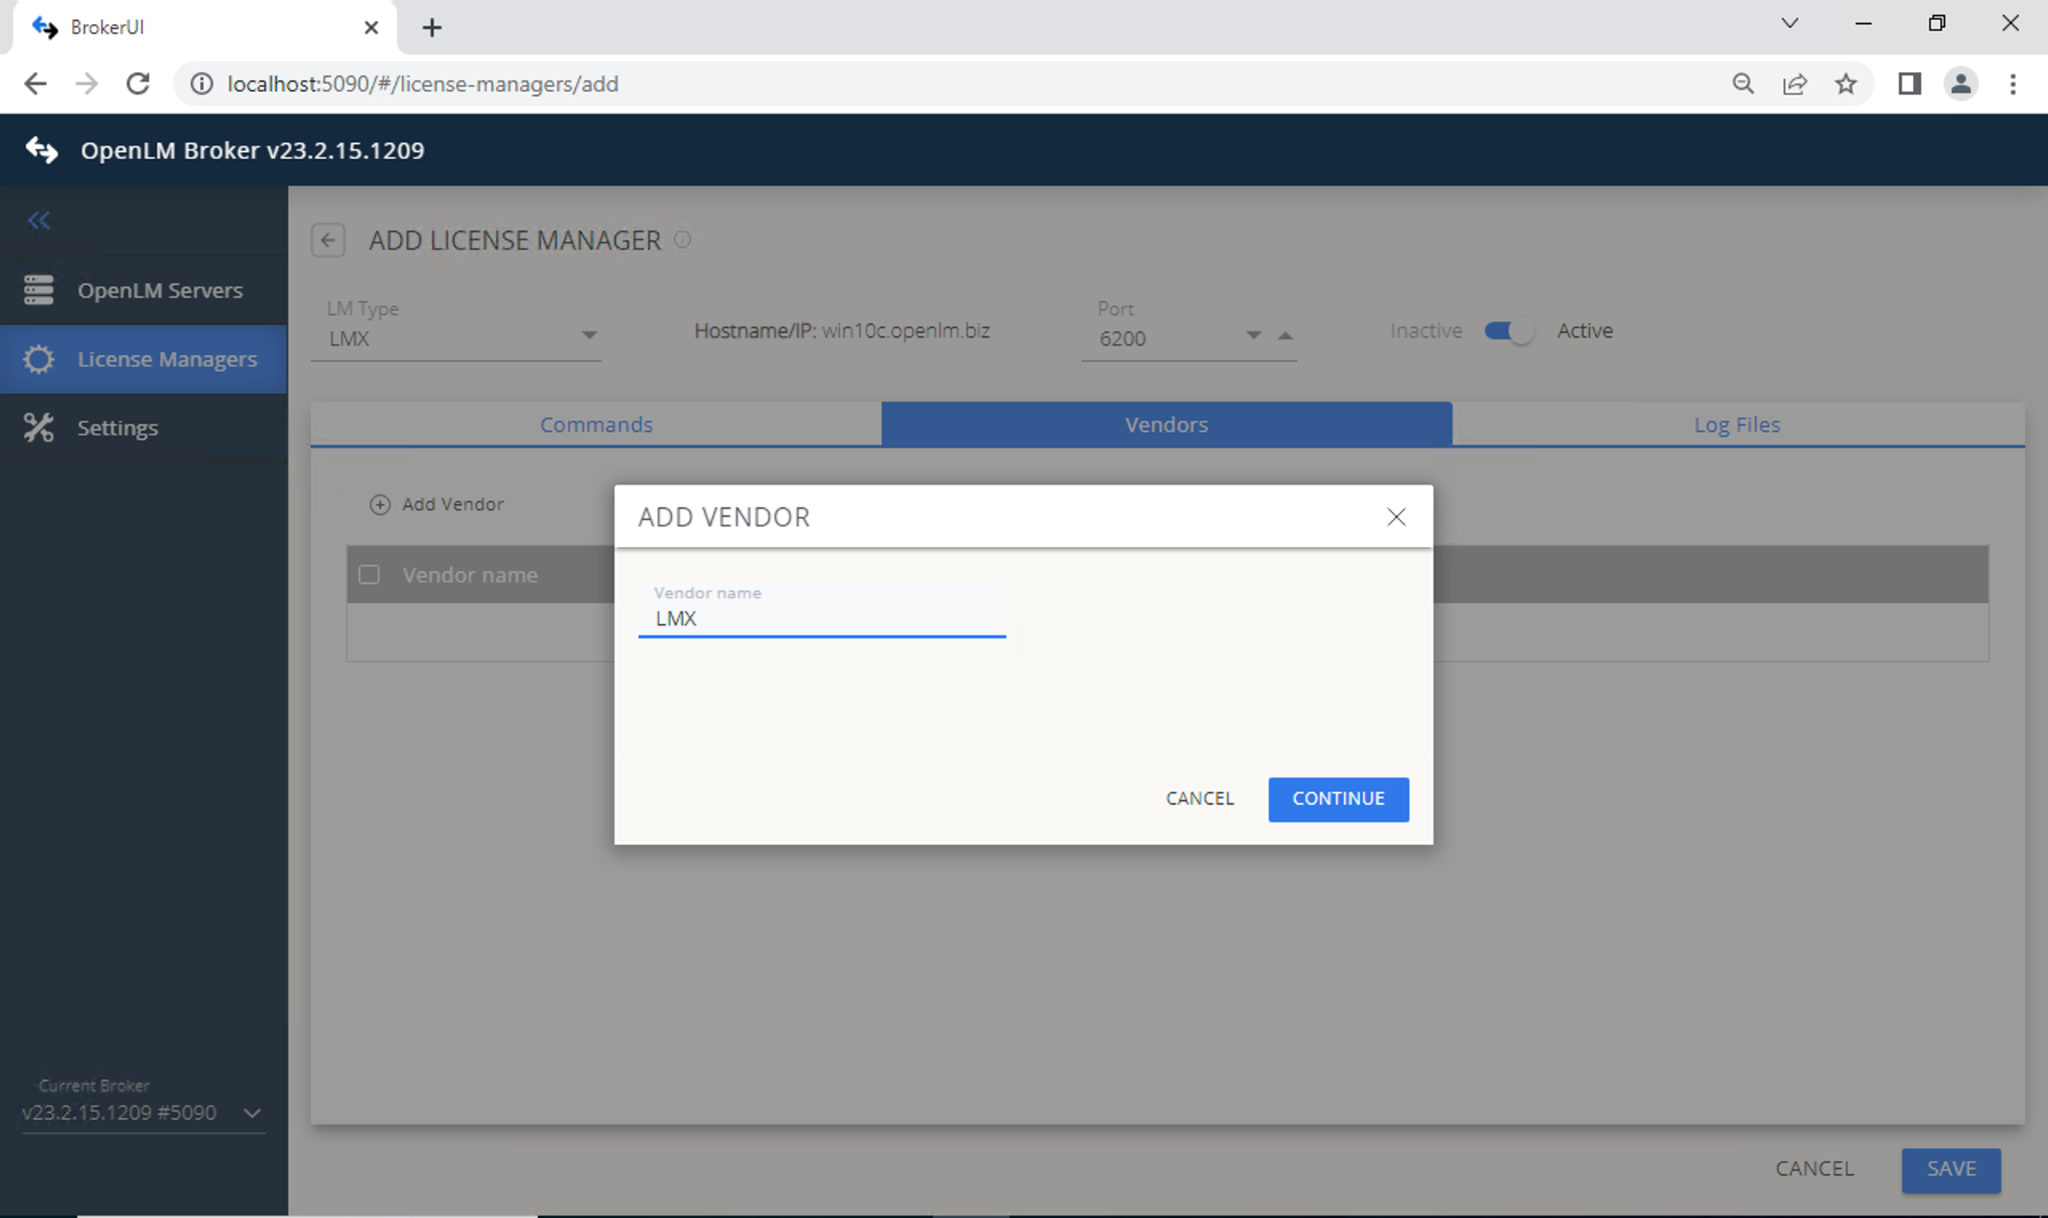
- Select Save.
Verify the LM-X configuration
- Open EasyAdmin (
http://<OpenLM Server hostname>:5015). - Go to Start → Widgets → License Servers.
- Confirm that LM-X appears in the list. A green circle indicates an active connection.
Allow up to 3 minutes for the status indicator to update when setting up a new connection.