Moldex3D
This guide explains how to monitor the Moldex3D License Manager with OpenLM to obtain license usage and statistics.
Requirements
Install the following:
- OpenLM Server v5.6 or higher, or an OpenLM Cloud account
- OpenLM Broker v4.12 or higher on the same machine as the Moldex3D License Manager
Monitoring capabilities
The following table shows the monitoring capabilities available through OpenLM Broker:
| Feature | Resolution | License totals | License usage | Denials | Borrowed licenses | Expiration dates | Redundancy |
|---|---|---|---|---|---|---|---|
| Supported | By second | ✔ | ✔ | ✔ | ✔ | ✔ | ❌ |
Using Broker also allows:
- Buffered communication with OpenLM Server
- Remote start/stop of the license manager service
OpenLM Broker configuration
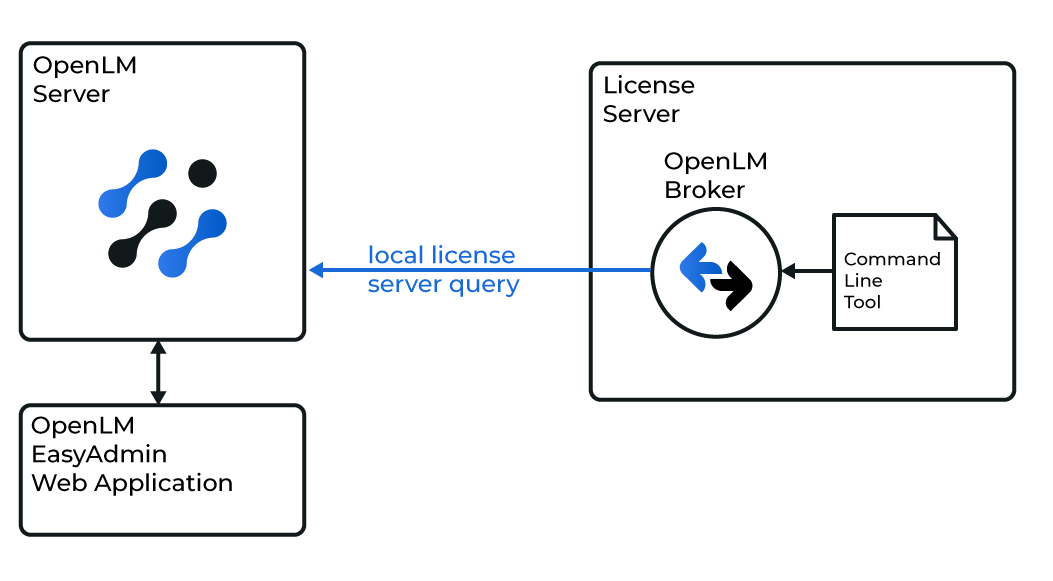
Broker queries Moldex3D License Manager locally using the MDX3DLMUtil utility. Data is then sent to OpenLM Server for processing.
note
Ensure Broker is installed and configured to report to OpenLM Server before proceeding.
Automatic Broker configuration
- In Broker, select Detect.

- If the Moldex3D service (for example, Moldex3D-LM Service) is running, Broker detects and configures it automatically.
- After configuration, select Restart Broker.
- Also run data_inquiry → Execute to confirm valid output.
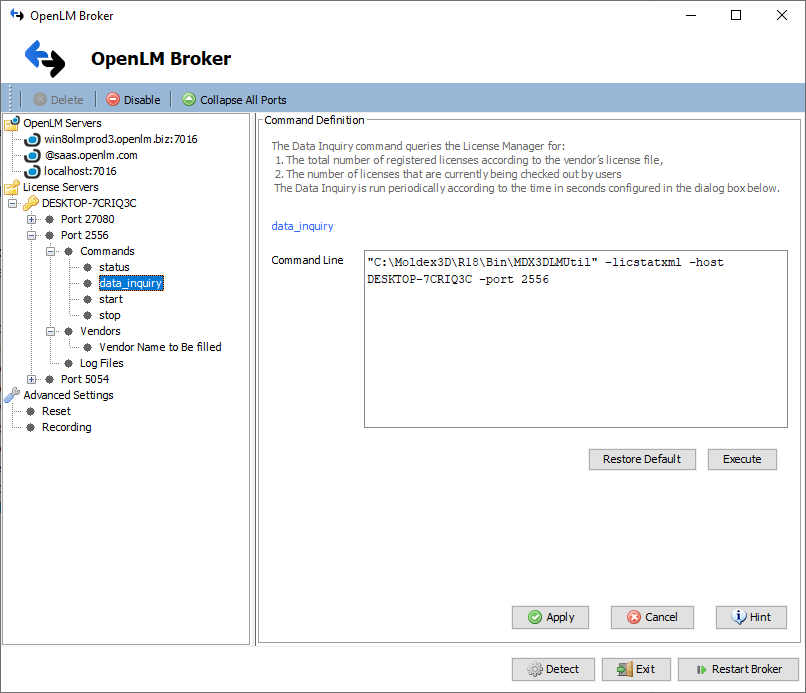
Manual Broker configuration
If autodetect fails:
- Select Add Port.
- Enter the Moldex3D port (default: 2556).
- From Type, select Moldex3D. Select Apply.
- In Commands, browse to the folder containing
MDX3DLMUtil.exe(for example:C:\Moldex3D\LMSR\Tools\MDX3DLMUtil). Select Update → Apply. - Under data_inquiry, select Execute. Confirm valid output (no errors).
- Select Restart Broker.
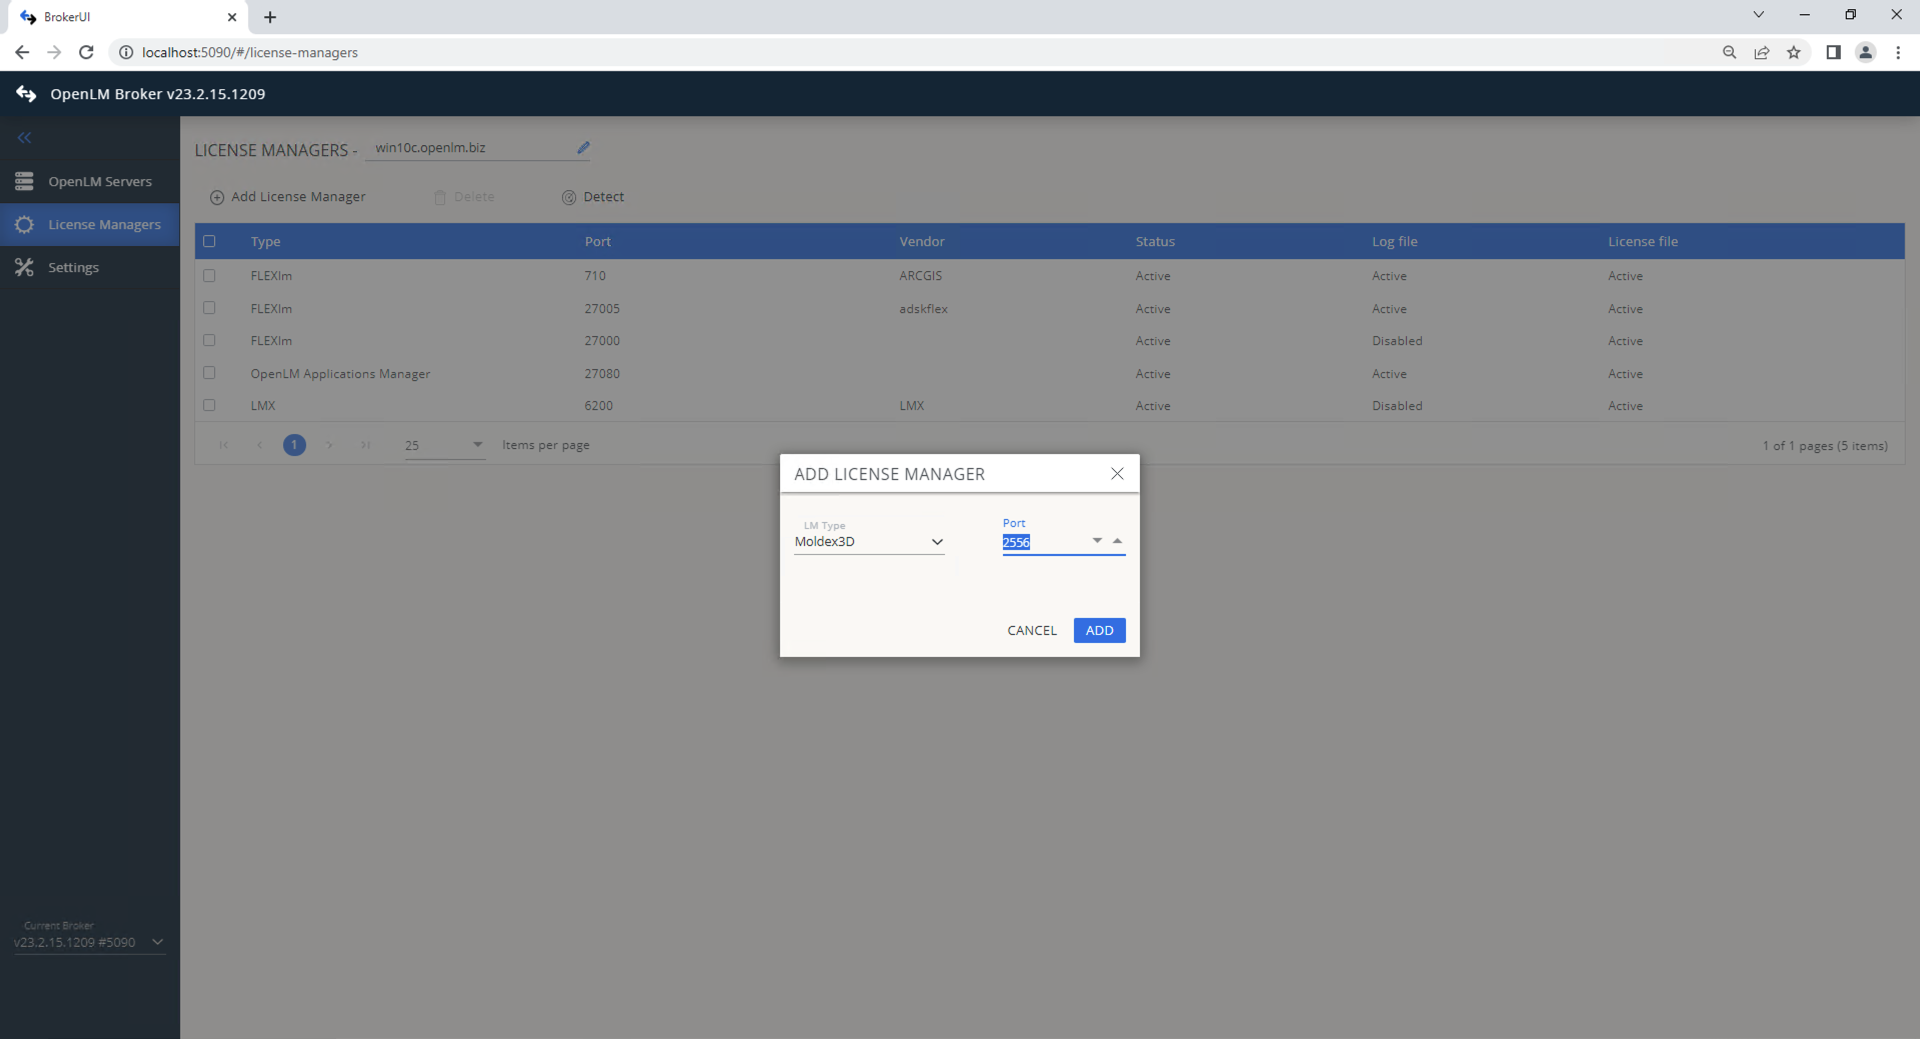
Broker web UI configuration
- Install the latest Broker.
- Open http://localhost:5090/.
- Go to License Managers.
- If the Moldex3D service is running, select Detect.
- If autodetect fails, select Add License Manager. From Type, select Moldex3D. Enter the port and select Add.
- In Commands, set the path to
MDX3DLMUtil.exe. Select Execute to confirm. - In Vendors, select Add Vendor, enter
Moldex3D, and select Continue.
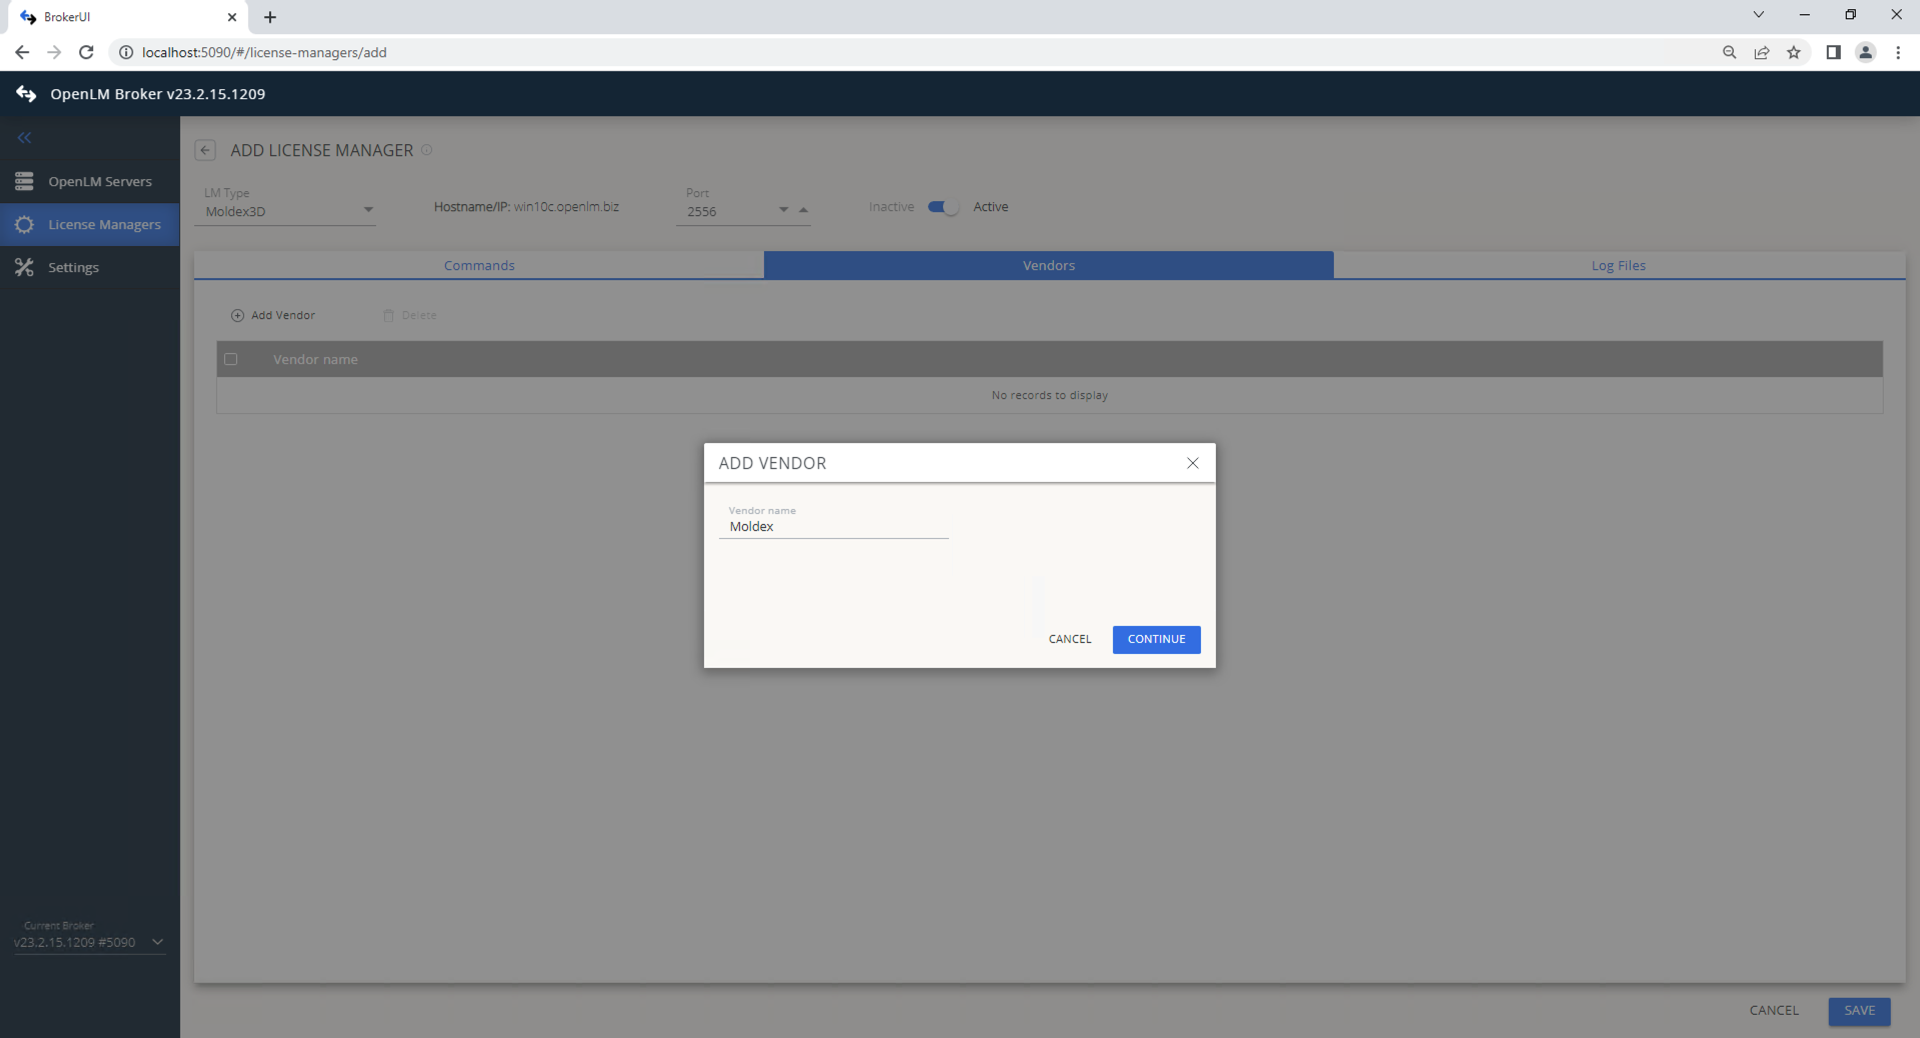
- Select Save.
OpenLM Server configuration
Automatic through EasyAdmin
If Broker is configured correctly, it will send data to Server. Approve the new server in EasyAdmin:
- Open EasyAdmin (
http://<OpenLM Server>:5015or through Windows Start → OpenLM → EasyAdmin). - In License Manager Servers, select There are # servers pending approval.

- Edit the pending LM entry (double-click or use the pencil icon).

- Update the Display name if desired.
- Select Approve.
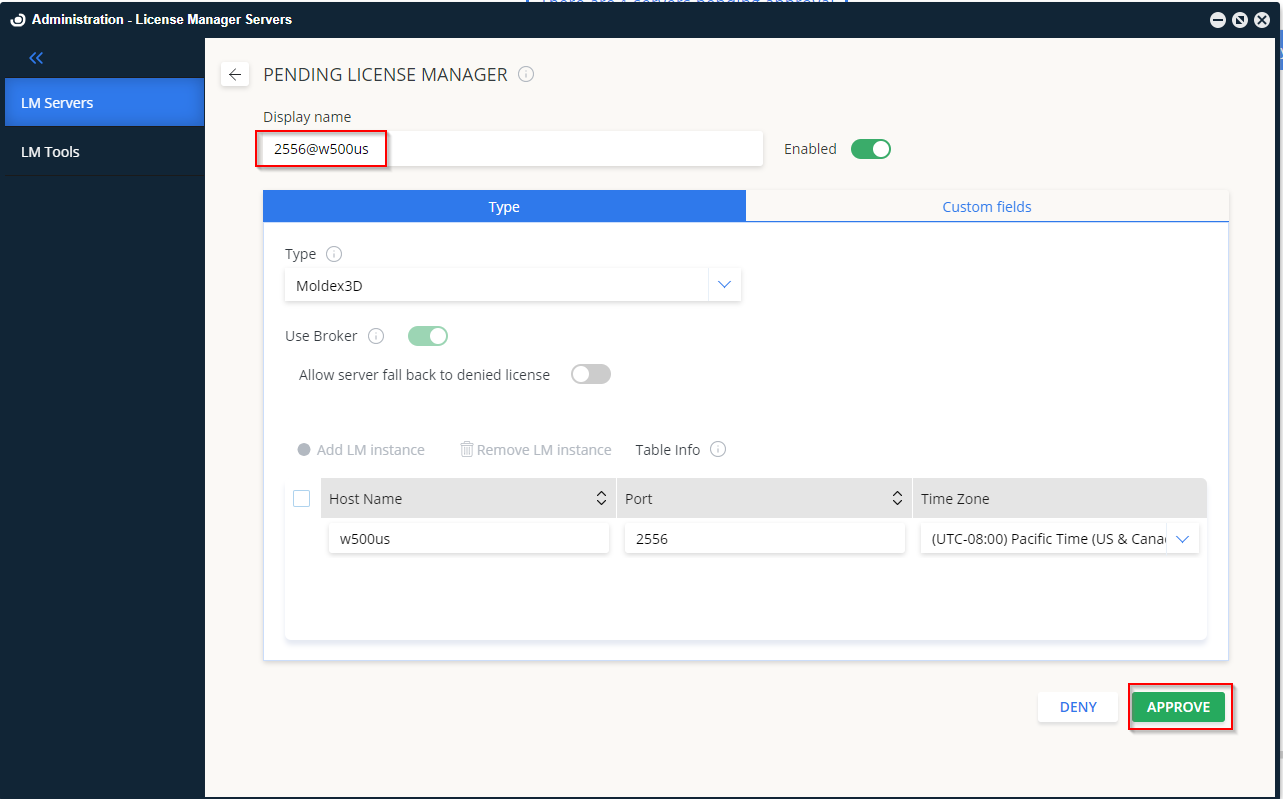
- The Moldex3D License Manager is now added.

Manual configuration
If automatic approval fails:
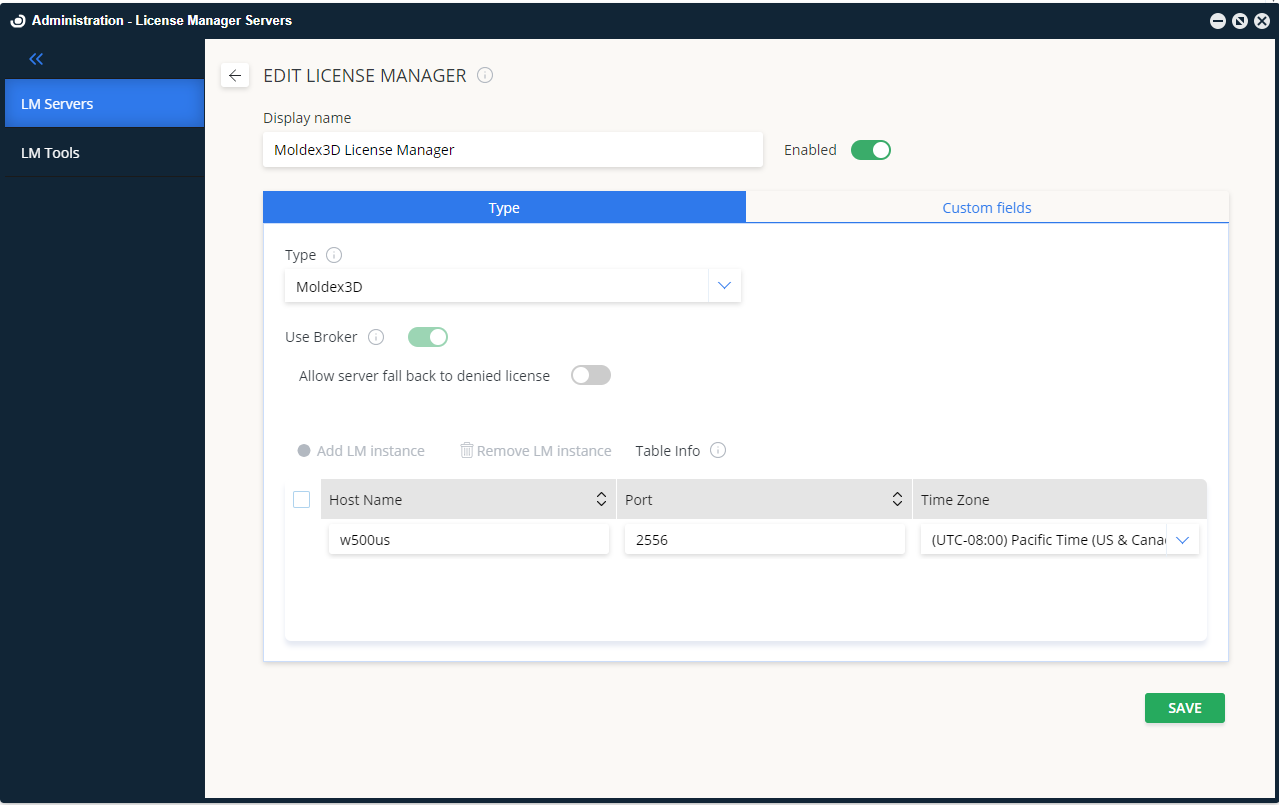
- In EasyAdmin, go to Start → Administration → License Manager Servers.
- Select Add LM.
- From Type, select Moldex3D.
- Enter a Description (for example,
Moldex3D License Manager). - Set the correct Time Zone.
- Enter the Hostname and Port (must match Broker configuration).
- Leave Is Triad Configuration unchecked.
- Check Use Broker.
- Select Save.
Verify the configuration
- Open EasyAdmin at
http://<OpenLM Server hostname>:5015. - Go to Start → Widgets → License Manager Servers.
- Verify Moldex3D appears in the list.
- A green Up to date icon indicates an active connection.

note
It may take up to 3 minutes for the status indicator to update after a new connection is added.