Integration between AD FS and OpenLM
Requirements
- ADFS service configured
- OpenLM Identity Service installed and running with HTTPS (SSL)
This document describes the steps required to configure AD FS as an external Identity provider for the OpenLM Identity Service.
Creating an application group
- In AD FS Management, open the context menu of Application Groups and select Add Application Group.
- On the Application Group Wizard, type a name, and under Standalone applications select the Server application template. Select Next.
- Copy the Client Identifier value. It will be used later in the Identity Service configuration
- Enter the Identity Service URL for Redirect URI (https://server.domain). Select Add. Select Next.
- On the Configure Application Credentials screen, place the check Generate a shared secret and copy the secret. Select Next.
- On the Summary screen, select Next.
- On the Complete screen, select Close.
- Open the context menu of the newly added Application Group and select Properties.
- On the Properties window select Add application.
- On the Add a new application to... select Web API and select Next.
- On the Configure Web API screen, enter the same URL for Identifier (https://server.domain). Select Add. Select Next.
- In the Apply Access Control Policy screen, select Permit everyone and select Next.
- On the Configure Application Permissions screen, make sure openid and profile are checked and select Next.
- On the Summary screen, select Next.
- On the Complete screen, select Close.
- On the Properties window select OK.
Adding an external provider (AD FS) in OpenLM Identity Service
To add the external provider (AD FS) to the OpenLM Identity Service, perform the following steps:
- Select on the External Providers
 icon then navigate to Add Provider.
 - Select the provider type ADFS from the drop-down options.
- Fill in the ID Client in the Client ID field. Client ID is "Application (client) ID" from AD FS settings, as in step 3 of the section above.
- Fill in the Client Secret in the Client Secret field. Client Secret is "Value" (from AD FS settings, as in step 5 of the section above.
- Fill in the value none in the Account ID field.
- Enter the authority URL ( AD FS Server address) in the Authority field. Example: https://fqdn.domain.com/adfs.)
- Enter the button display name, for example, AD FS.
- Select Save.
- The newly added provider will appear on the next screen. Copy the Sign in and Sign out redirect URL.
- Go back to the AD FS Server. Select on Tools→AD FS Management→Application Groups.
- Open the application.
- Select the application and select Edit.
- In the redirect URI field paste the copied in step 9 Sign in and Sign out URL, then select Add, then OK→Apply.
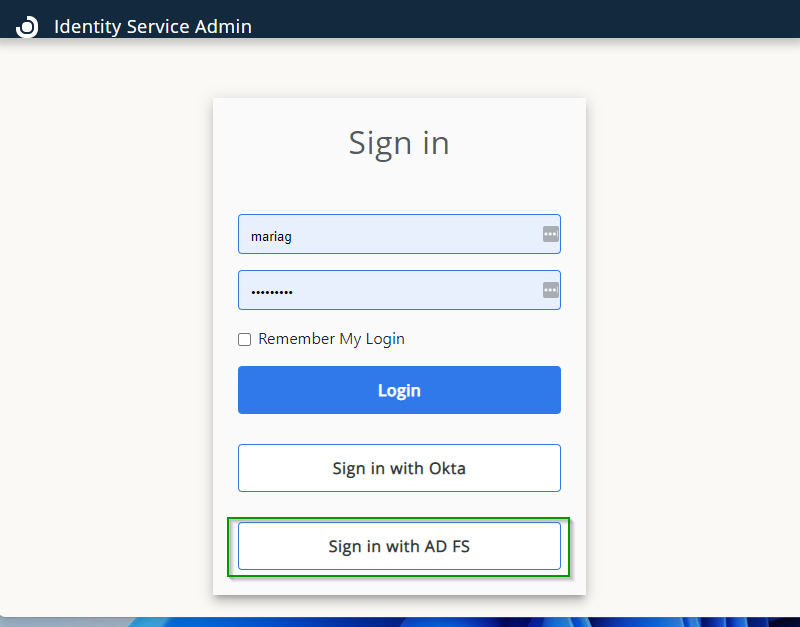
Now, when trying to sign in, there will be the AD FS button: