Integration between OKTA SSO and OpenLM
This is a short guide on configuring OKTA SSO and OpenLM integration.
Requirements
- An existing OKTA account
- OpenLM SLM&Identity Service v21 and higher configured with SSL or an OpenLM SLMC
Adding OpenLM application in Okta admin interface
-
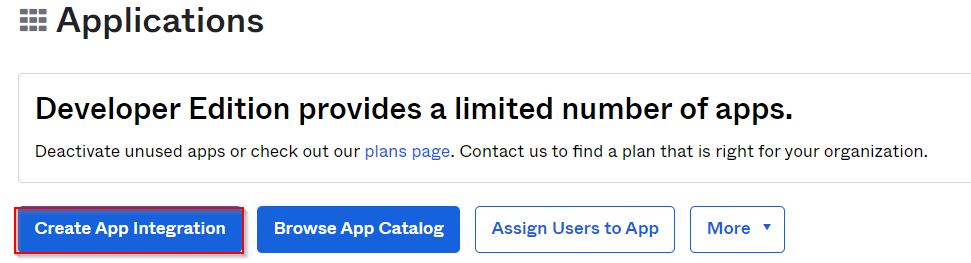
On the left side menu, select on Applications:

-
Select on Create App Integration:
-
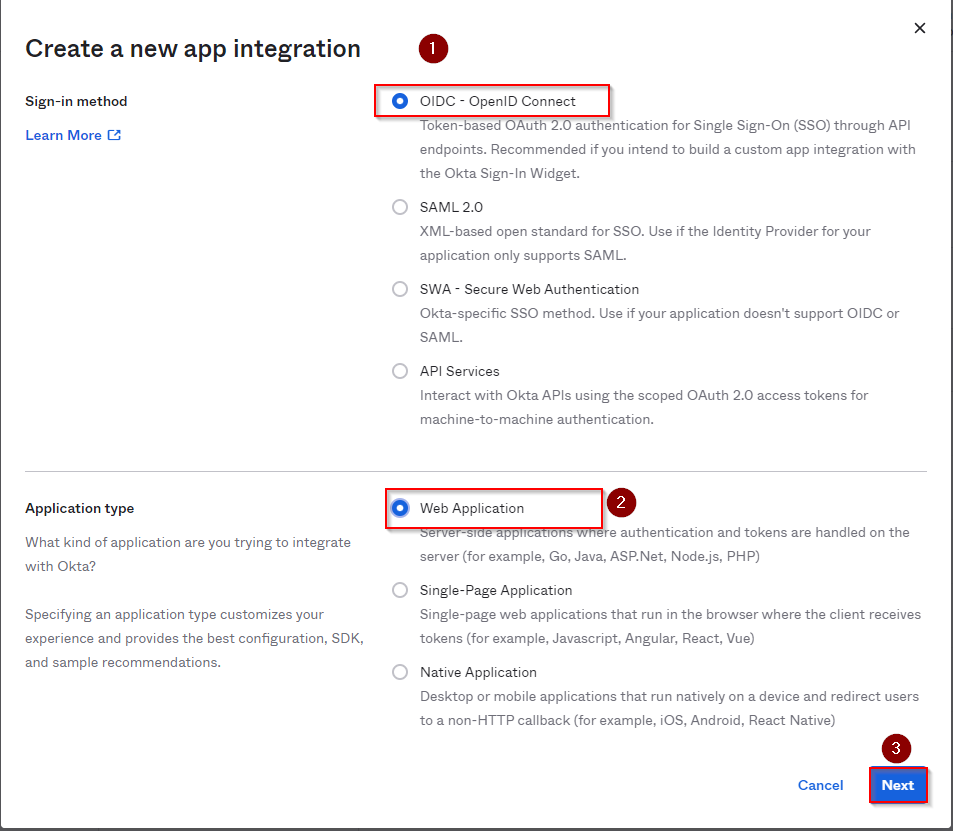
In the newly opened pop-up window, select the Sign-in method - OIDC - OpenID Connect and Application Type - Web Application. Select Next.
-
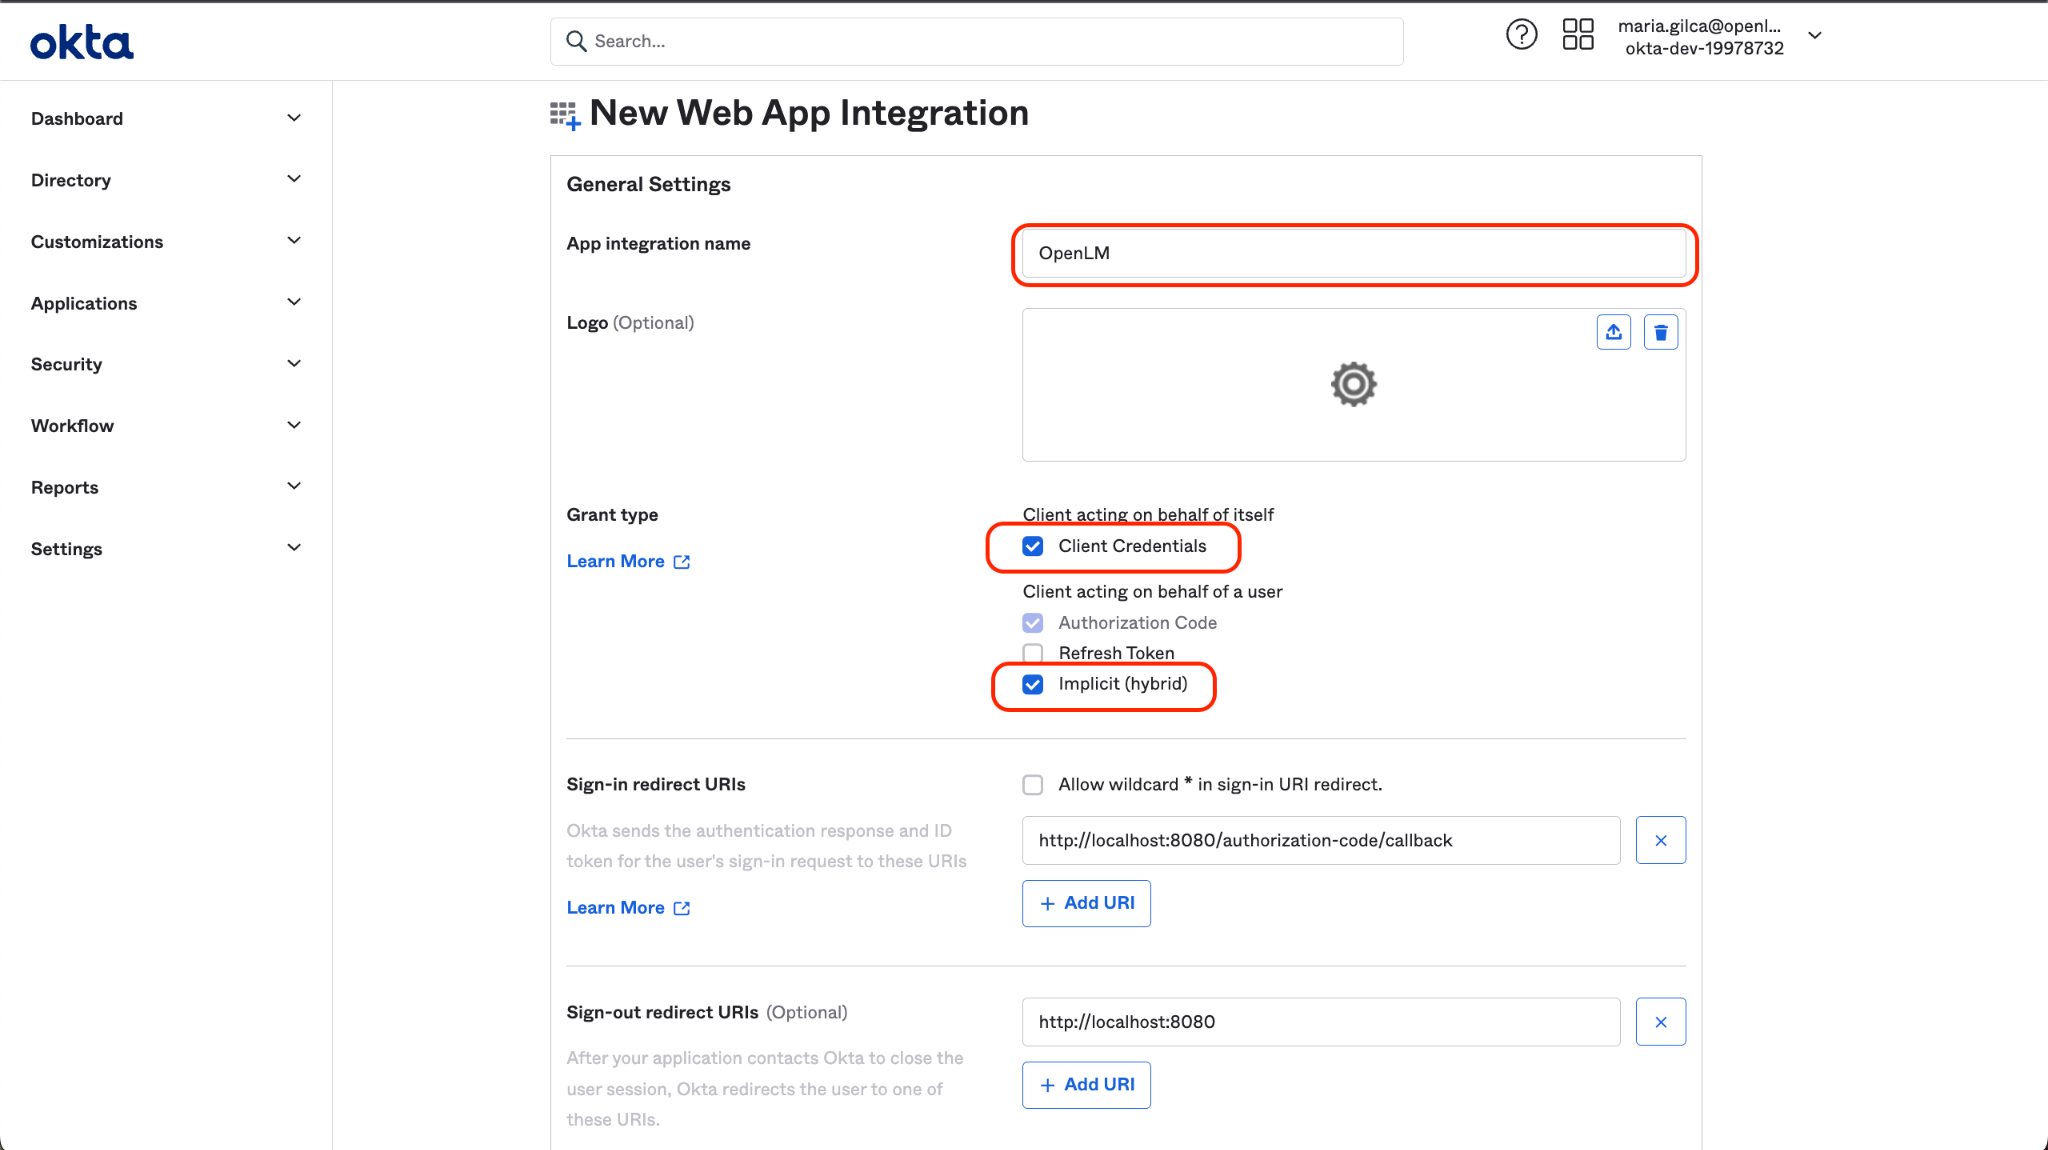
Name the application and check the following boxes:
- A. Client Credentials
- B. Authorization Code
- C. Implicit (Hybrid)
-
Leave the URIs unchanged; the correct URIs will be provided by OpenLM after the integration is imported on the side of OpenLM at a later stage. Scroll down and select Save. (Step 9). After selecting Save, this prompt will appear:

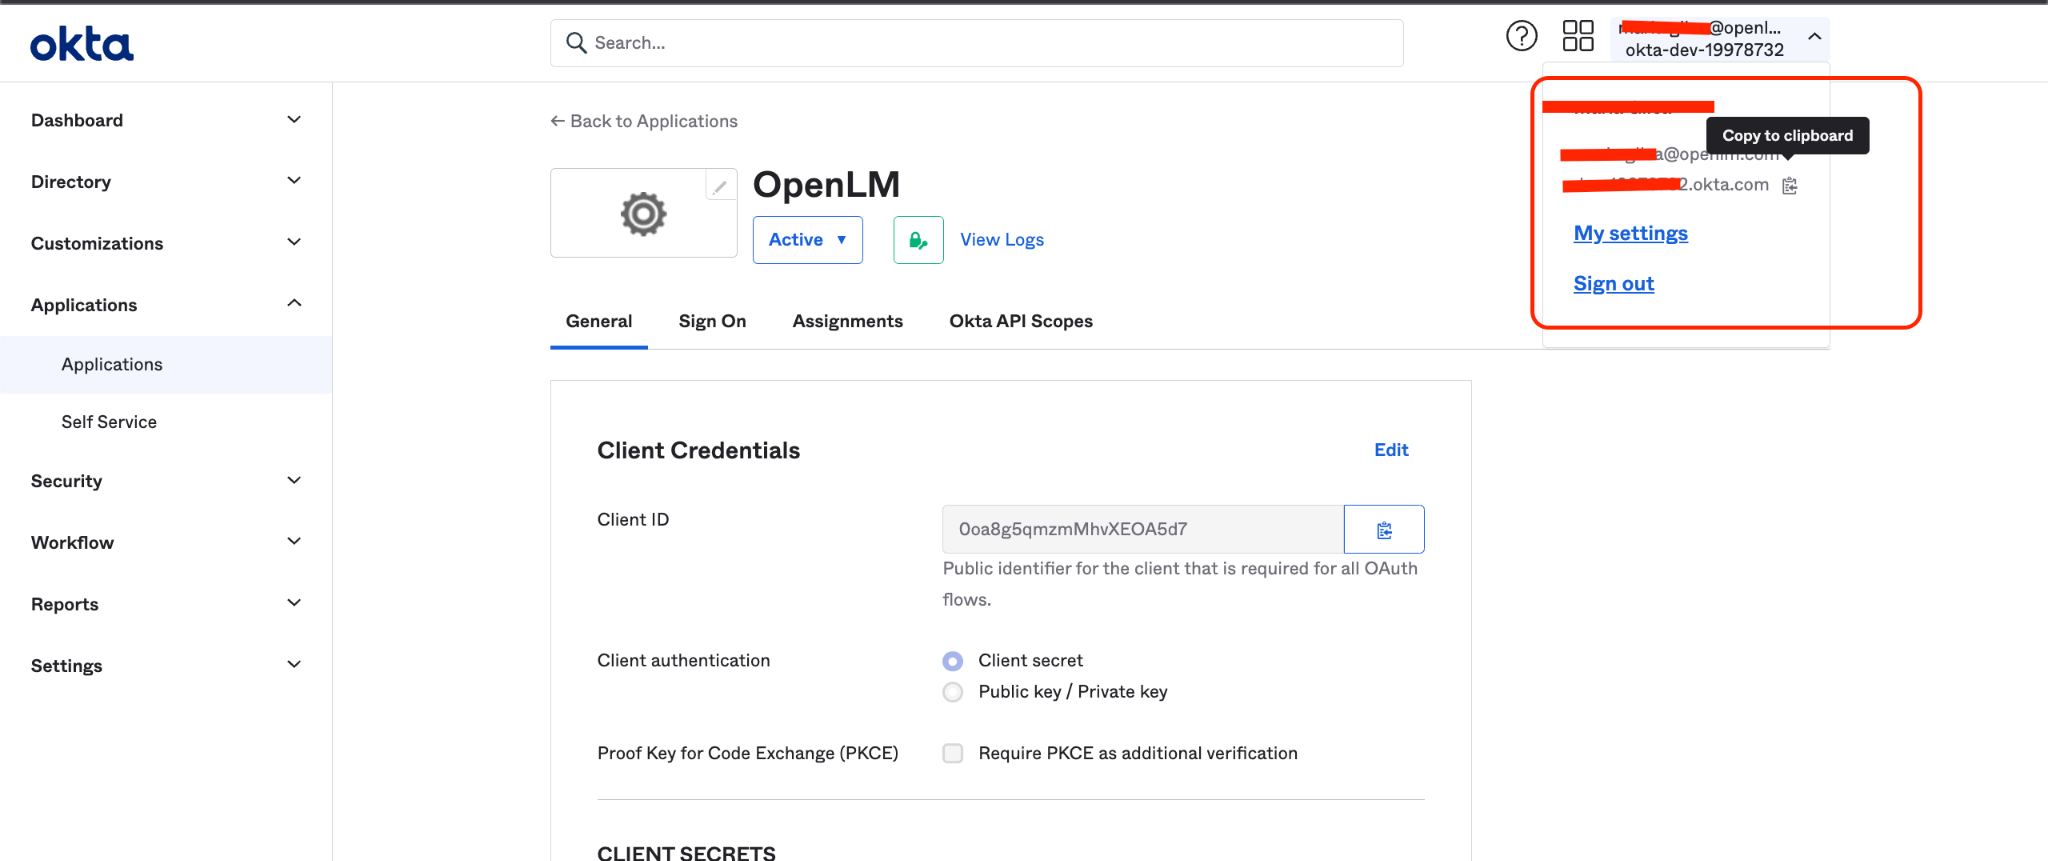
Note the Client ID and Client and Client Secret. Leave this window open for a while; we will return to collect the Client ID and Client Secret.
OpenLM on-premise configuration
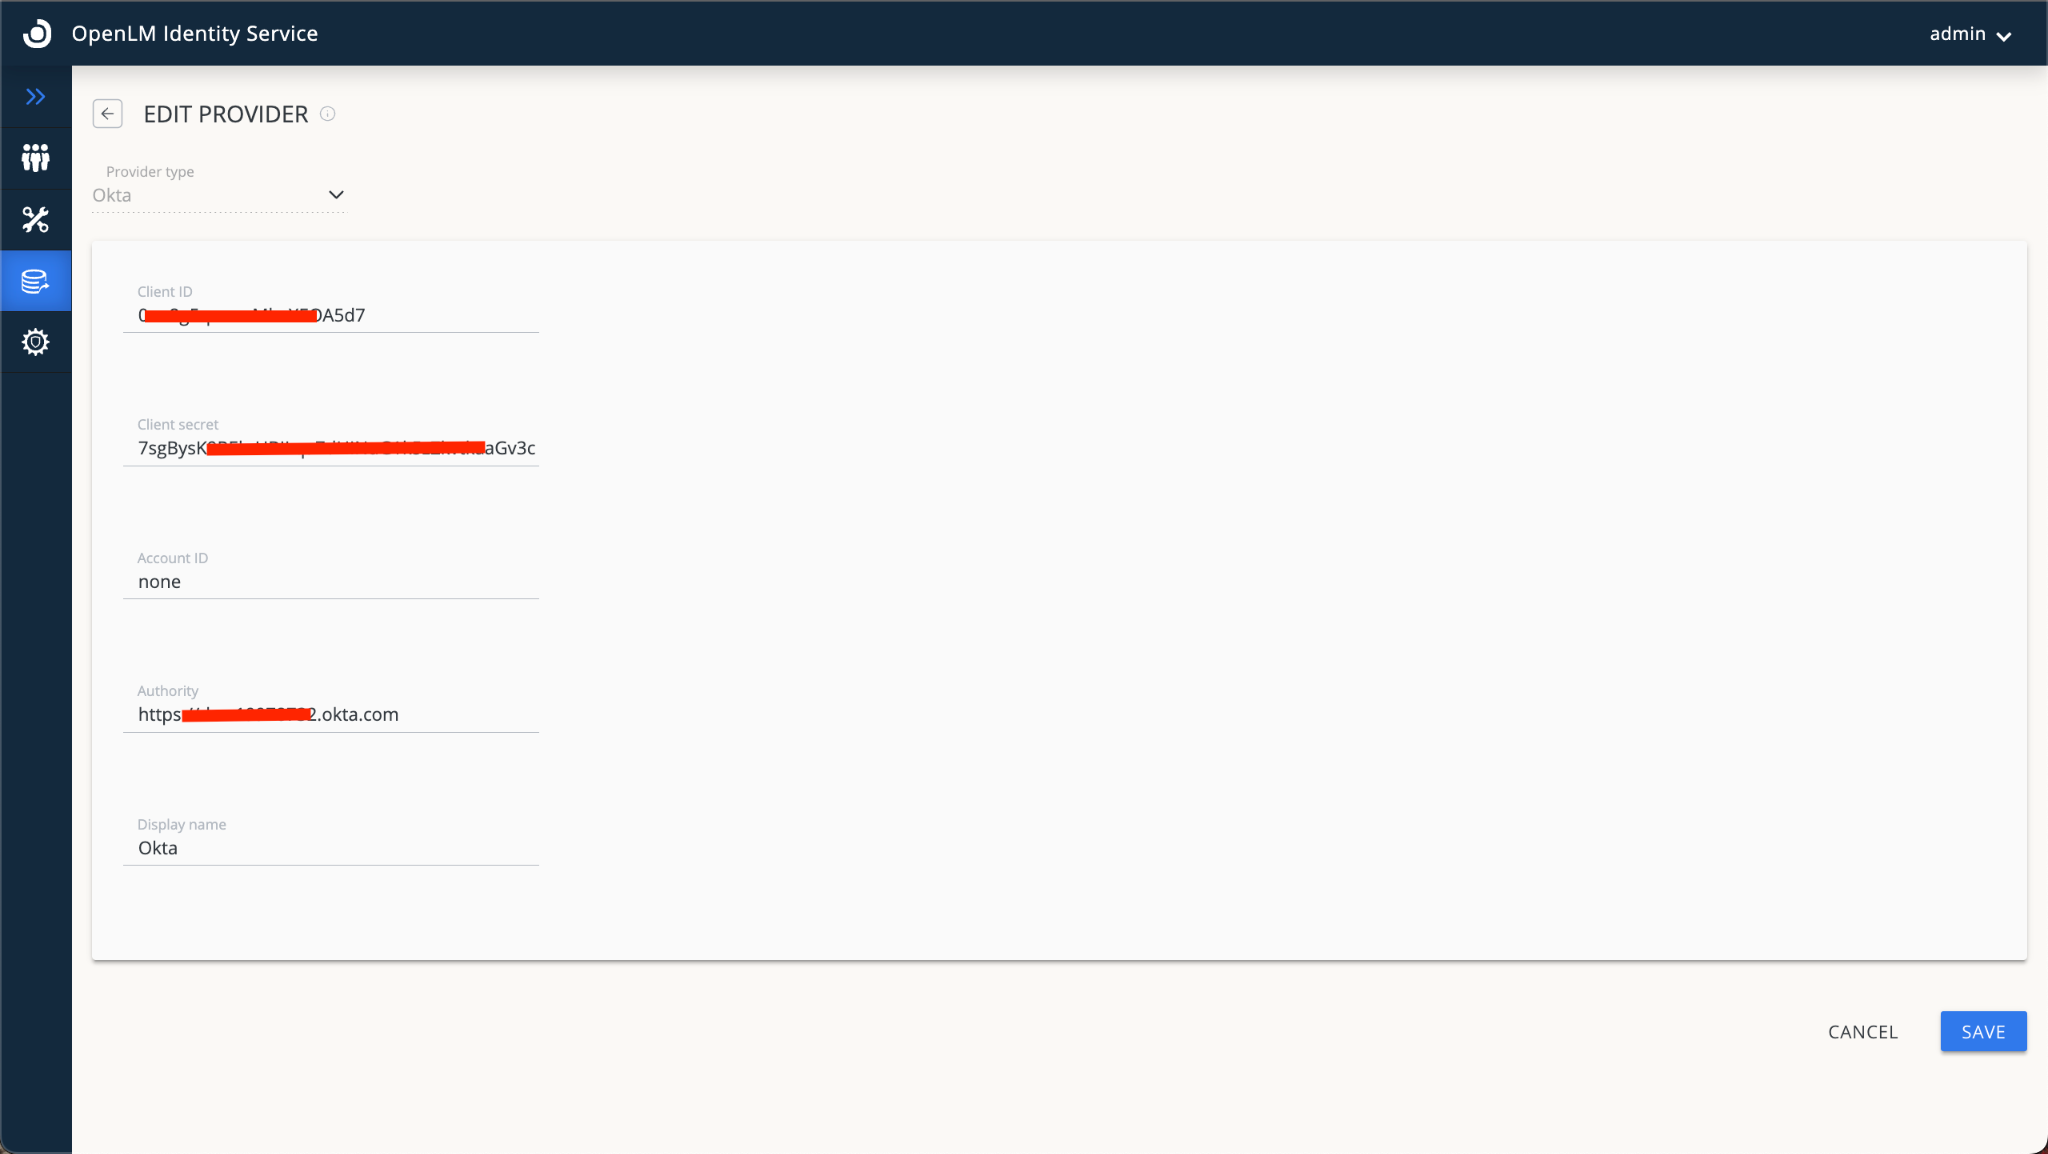
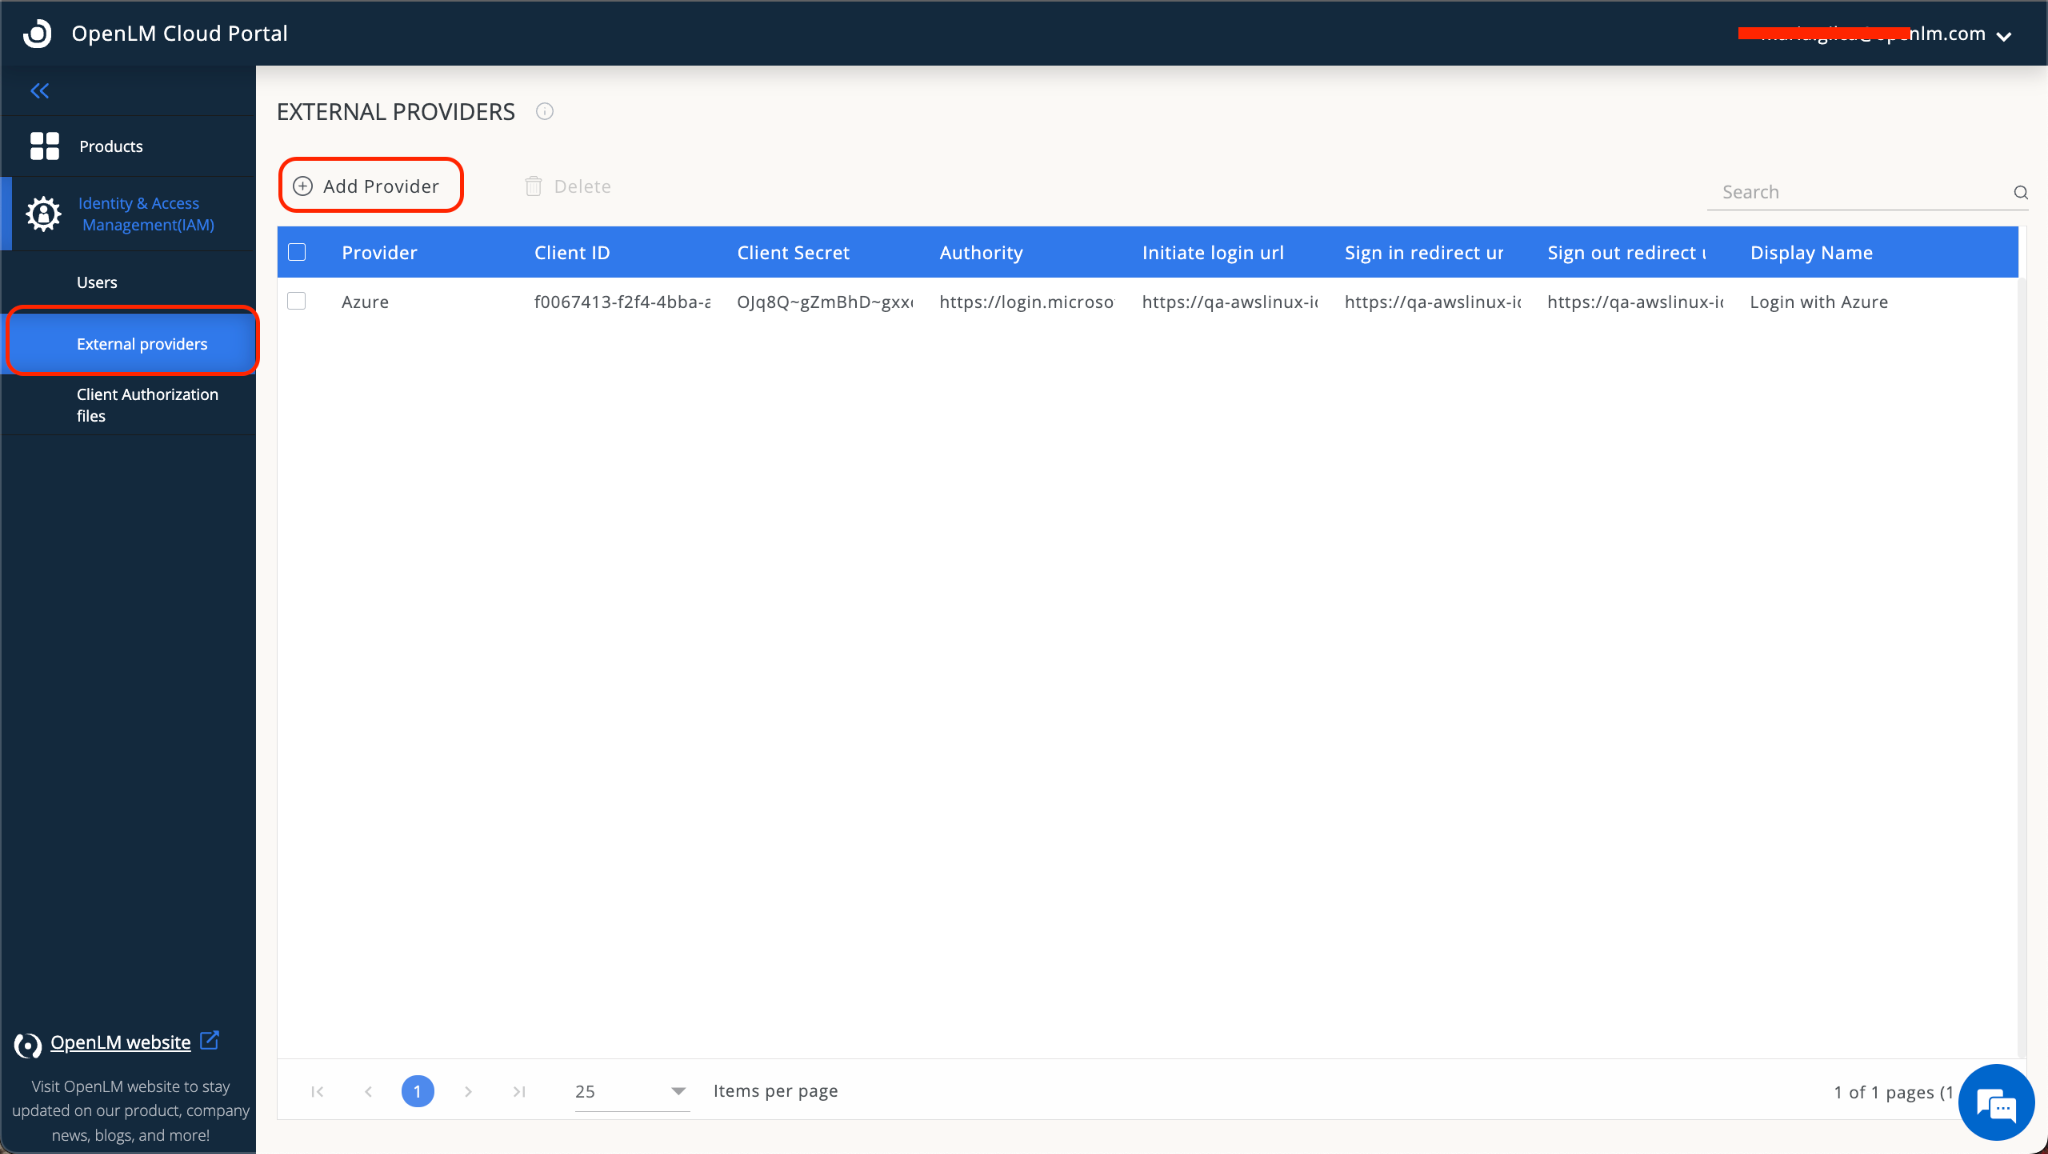
- Go to the OpenLM Identity Service →External Providers tab.
- Select Add Provider. From the Provider type drop-down list, select Okta.
- Fill in the following fields with the information from your Okta Account:
- Provide a name at your convenience, for example, Okta.
A. Client IDClient Secret
B. Account ID - none (case sensitive)C. Authority - your Okta ID as depicted below:
- Select Save.
- After the import is completed on the OpenLM Identity Service side, the correct URIs tied to your account will be generated.
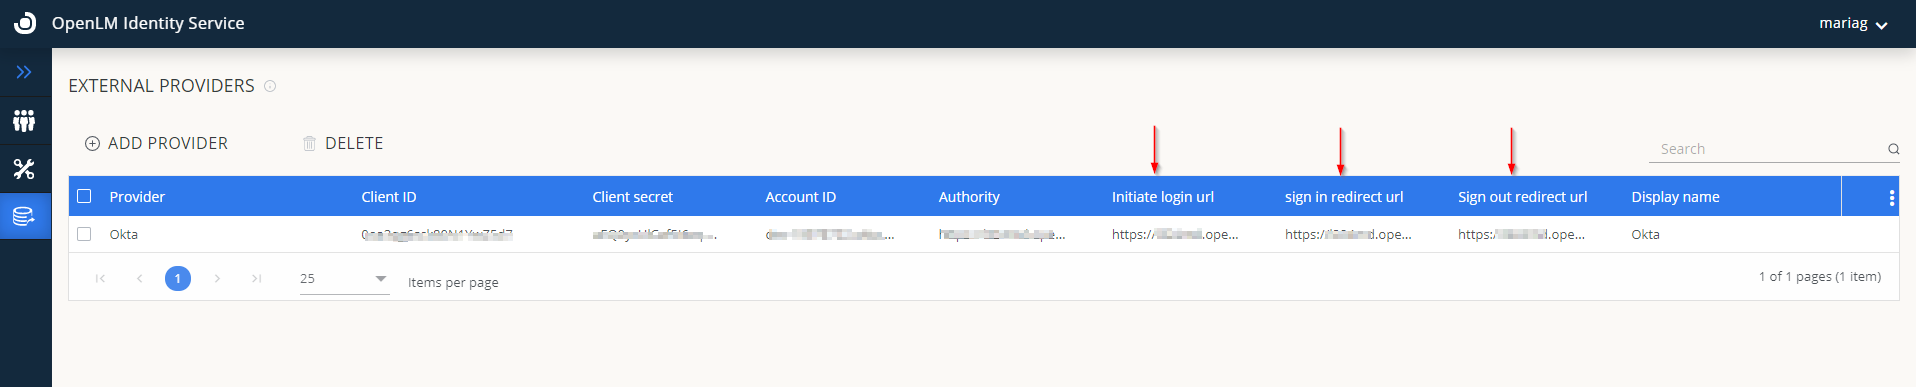
- Go back to your OKTA account. Select Edit on General setting Section:

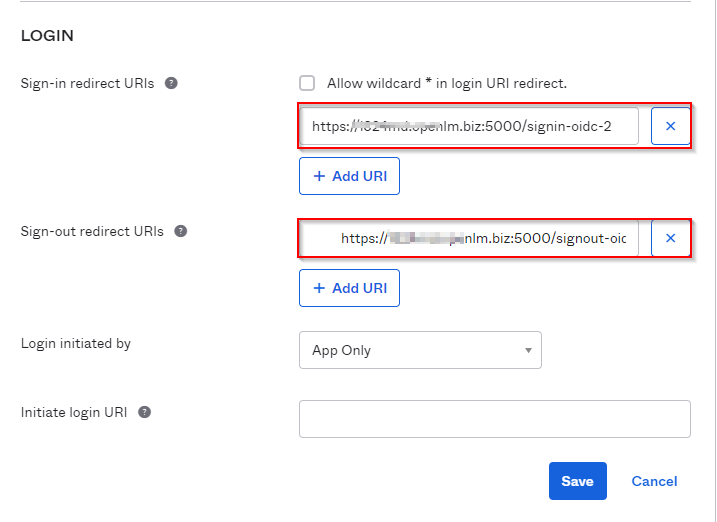
- Scroll down to the Login Section. Input data from OpenLM Identity Service, including the sign-in and sign-out redirect URLs**.** Select Save.
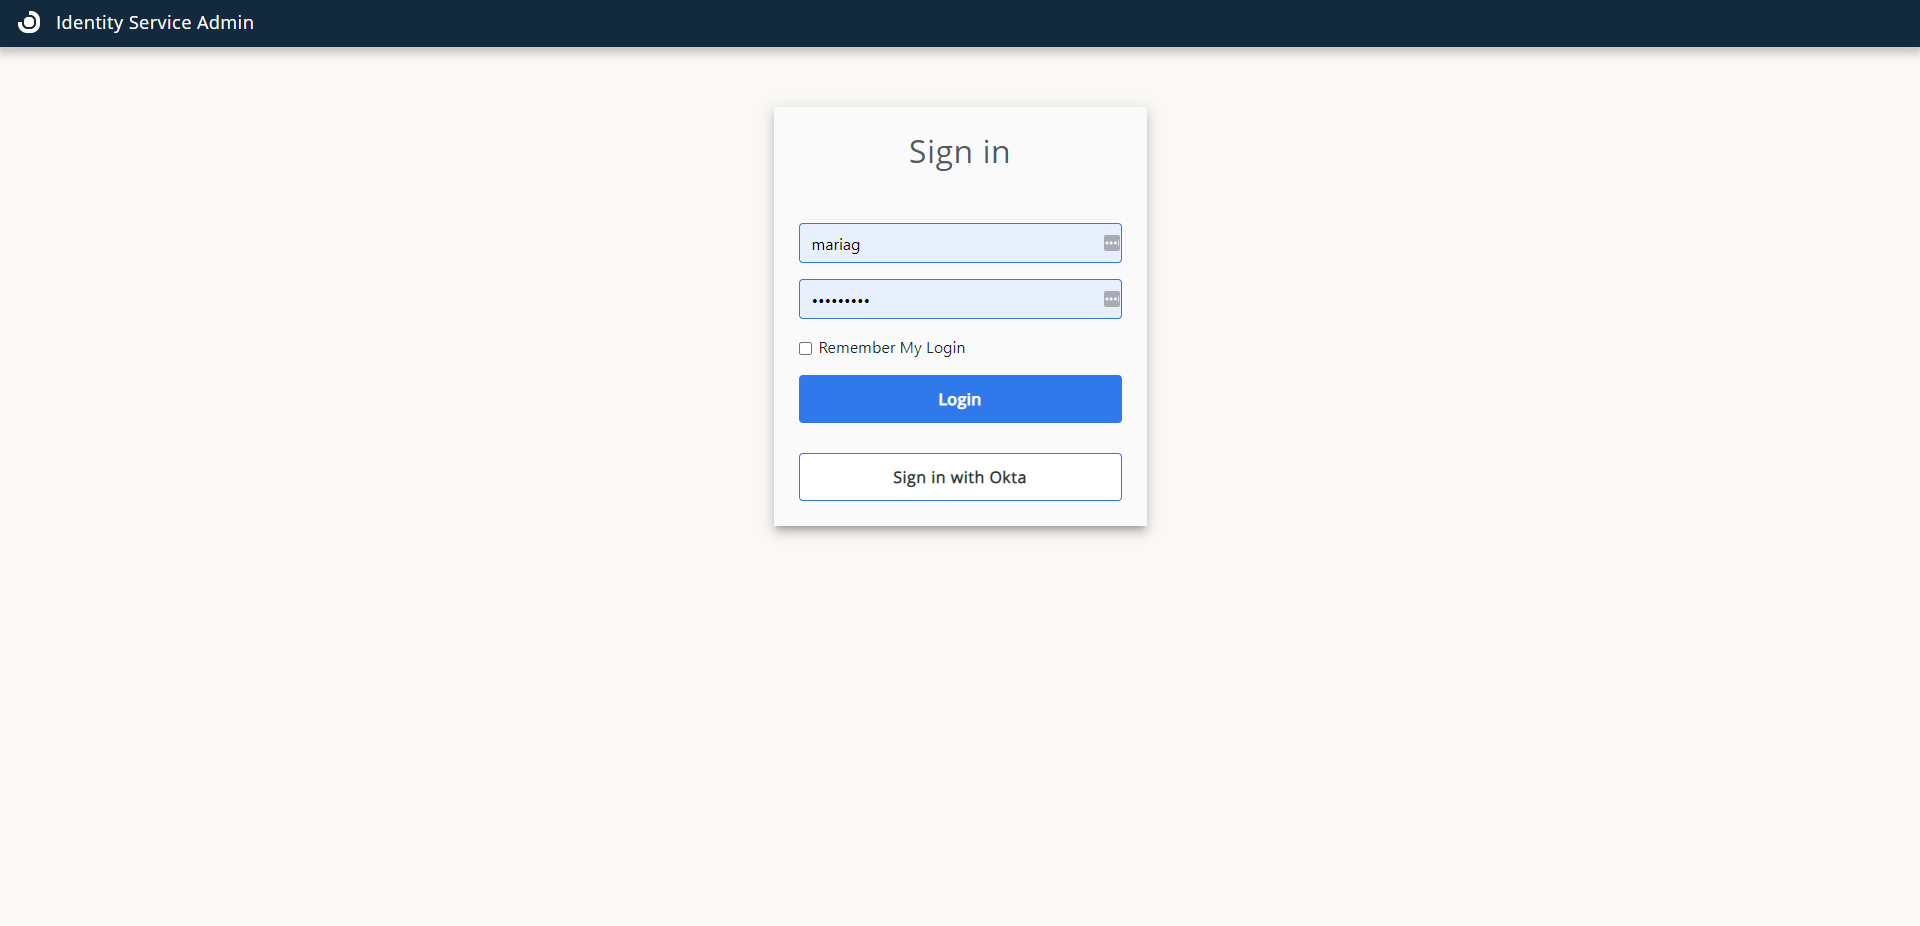
- Go to the Identity Service webpage. Log out. Now you will be able to log in with OKTA:
OpenLM SLMC
If you are an OpenLM SLMC, follow these steps to configure OKTA as an external Identity provider:
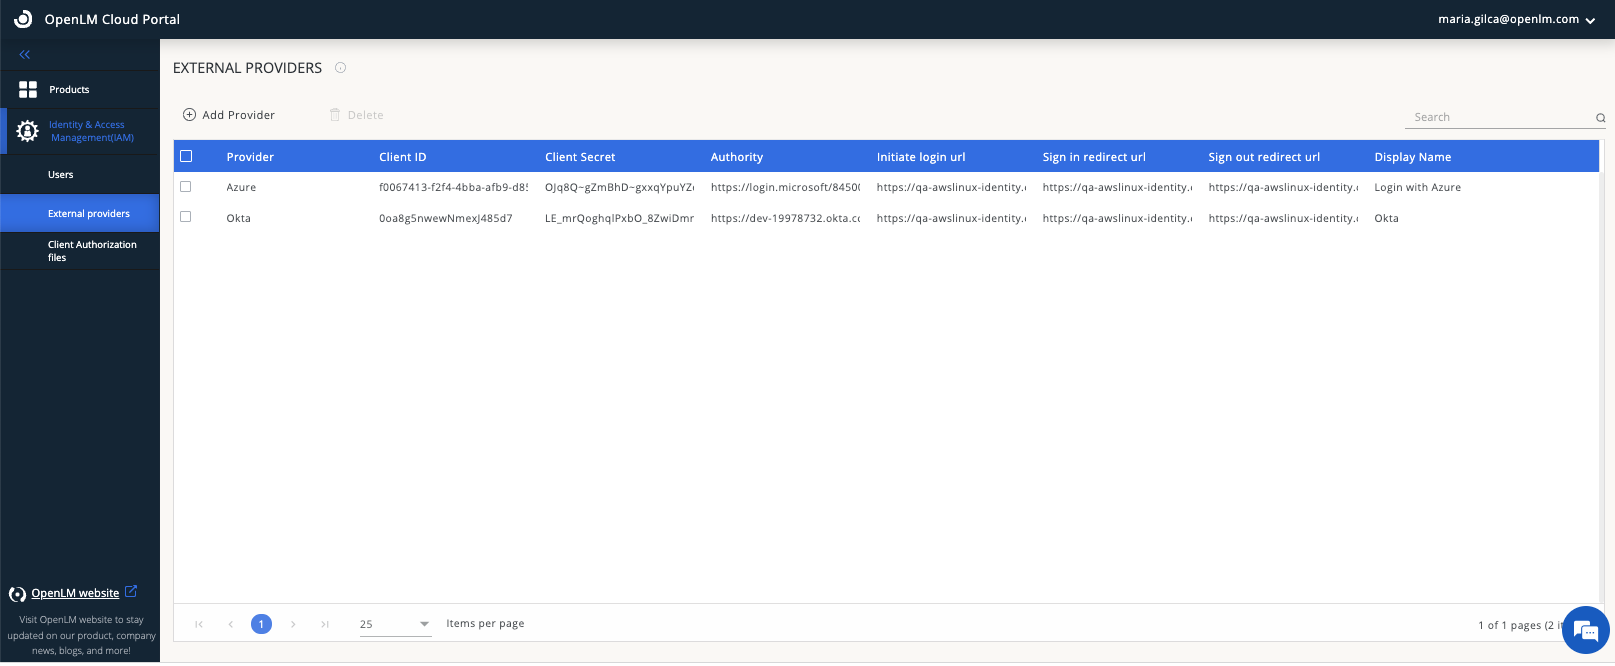
- Navigate to your Cloud Portal instance→Identity&Access Management (IAM)→External Providers→Add Provider.
- Input the following details from your Okta account:
A. Client ID
B. Client Secret
C. Authority (example: dev-12345678.okta.com). - Provide a public button name (example: Okta).

- Switch to the Products and Roles tab. For the following products:
A. Virtual License Manager
B. Software License Management Cloud
C. Dongle Monitoring
D. OneDirectorySync - Select either an Admin or Manager role.
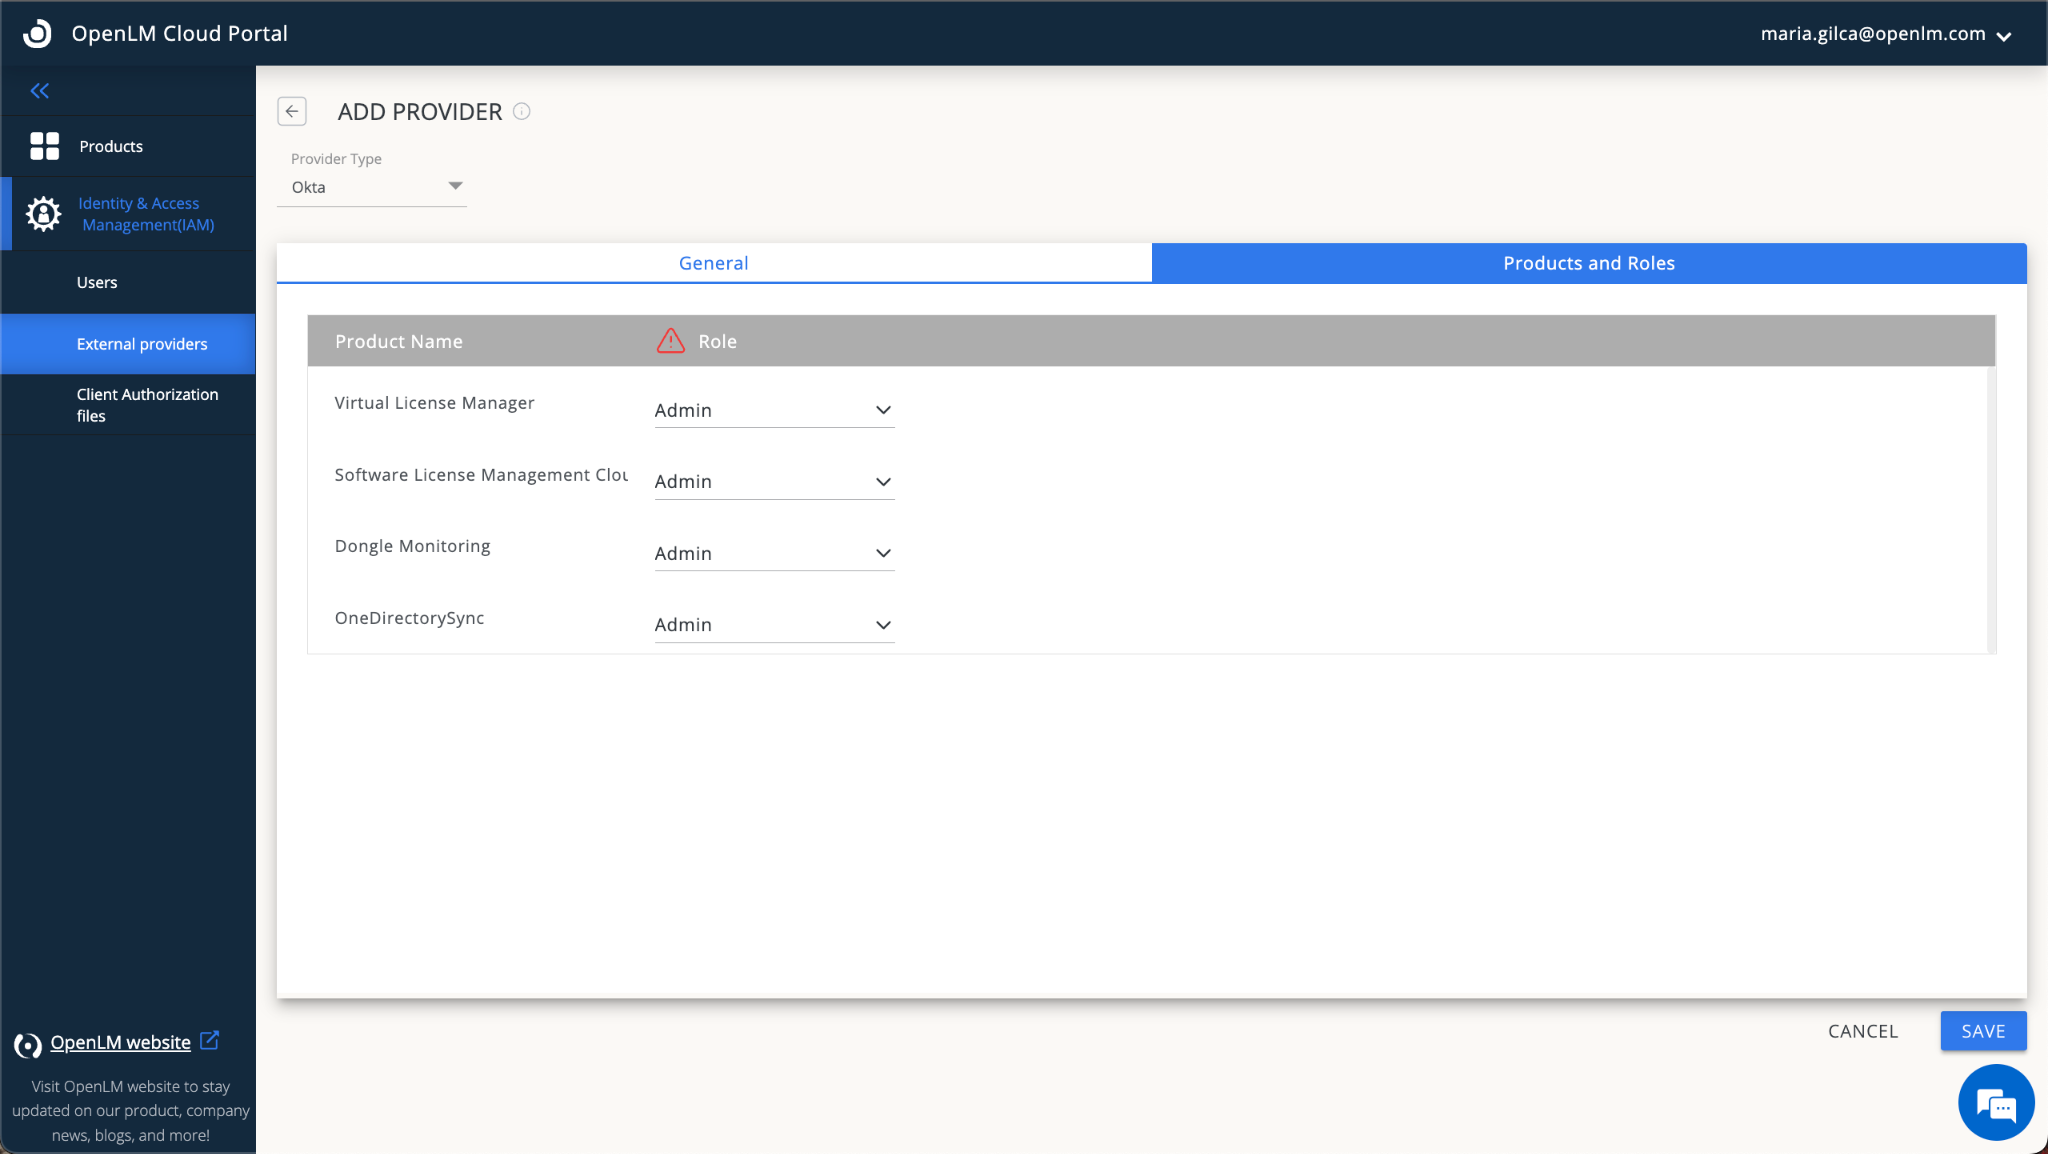
- Select SAVE. After the import is completed on the OpenLM Identity&Access Management side, the correct URIs tied to your account will be generated.
- Go back to your OKTA account. Select Edit on the General setting Section.
- Scroll down to the Login Section. Input data from the OpenLM Portal, including the sign-in and signout redirect URLs**.** Select Save.
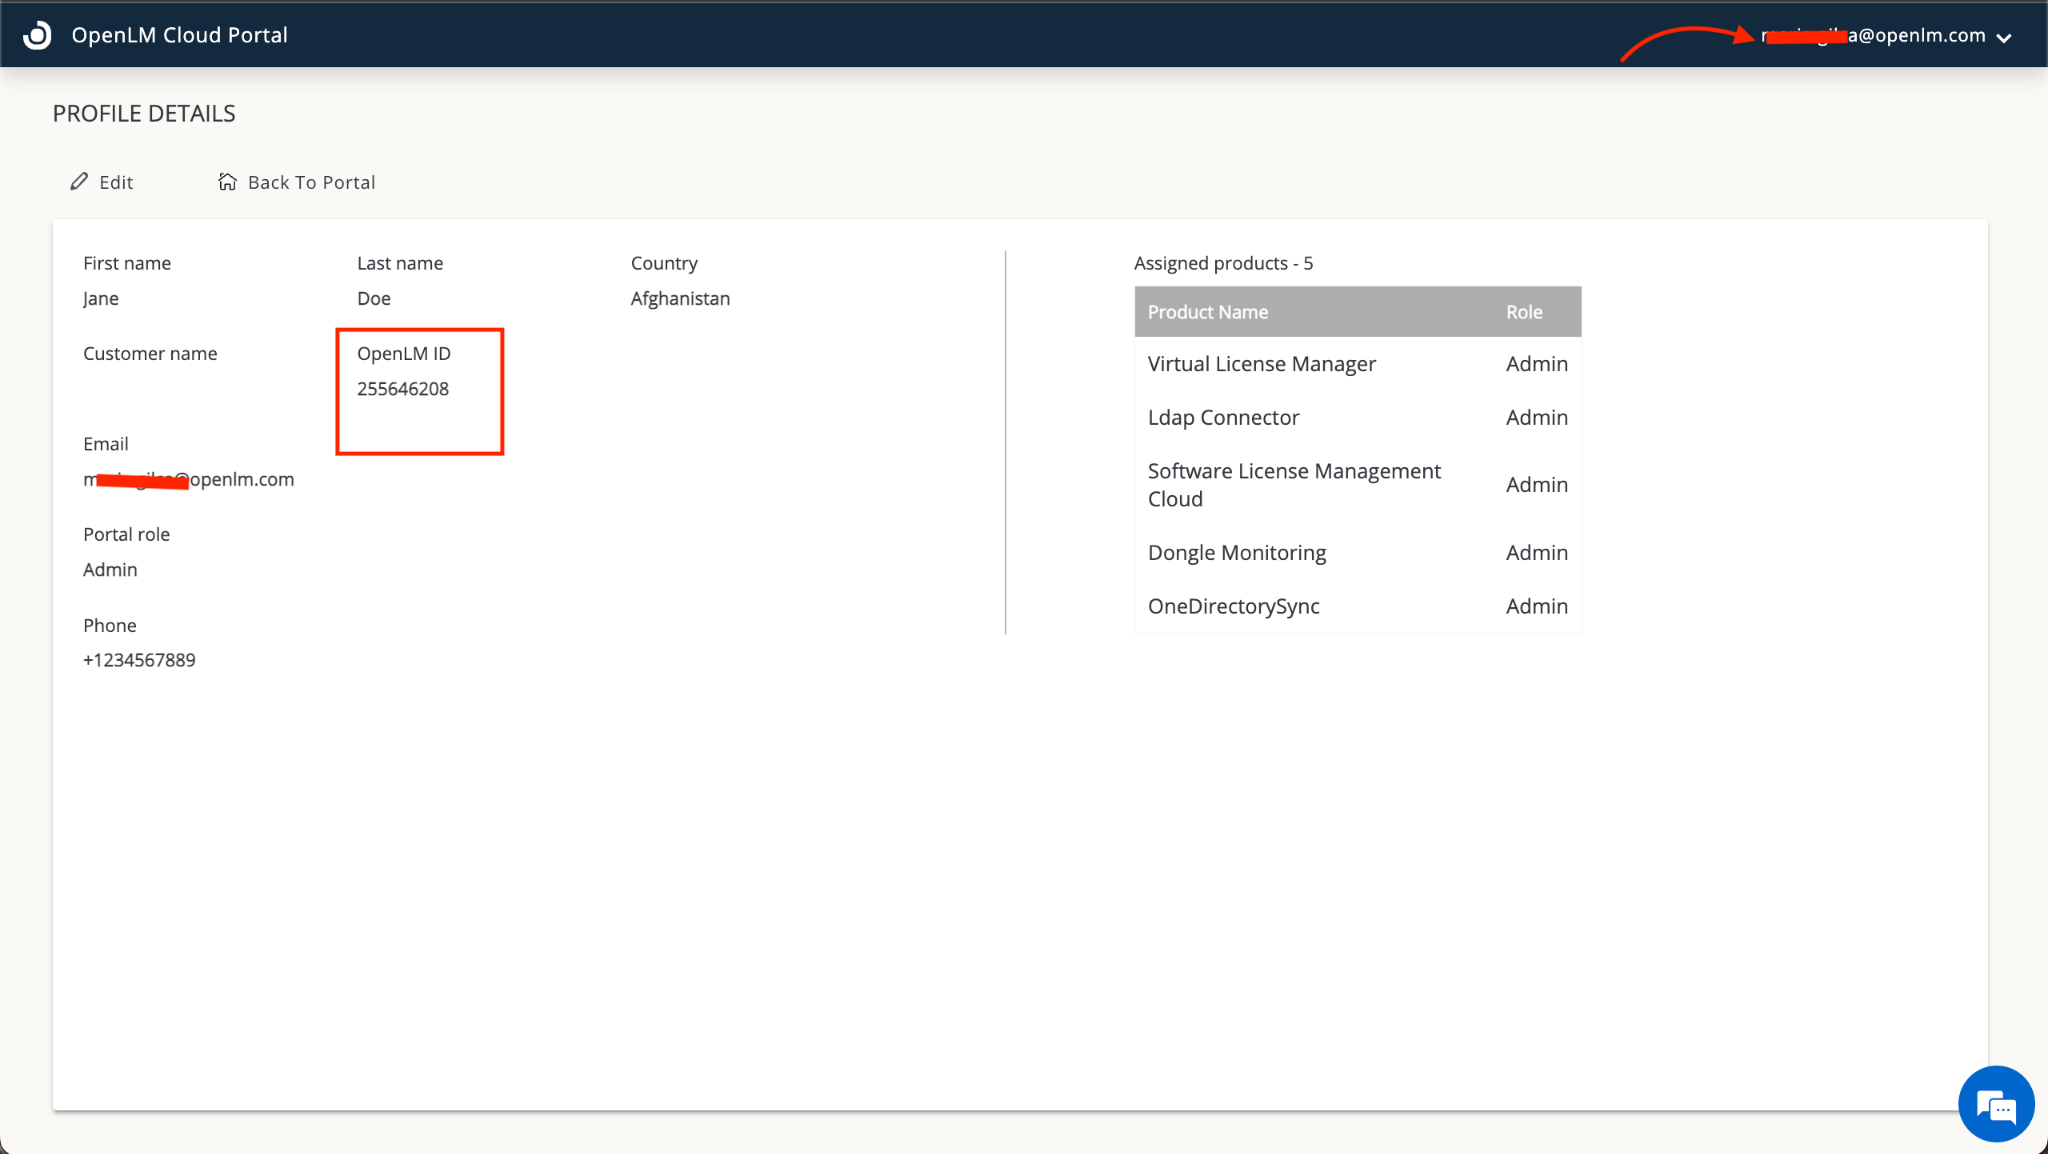
- Go back to your Cloud Portal and Sign out. Sign - in again using this pattern:
https://cloud.openlm.com/portal?loginAccountId=123456789
Note: The OpenLM Account ID is taken by clinking on the drop-down arrow in the upper right corner next to your user name: