OLicense
OLicense is one of the license managers supported by OpenLM.
This guide explains how to configure OpenLM to interface with OLicense-Server to monitor license usage and obtain license statistics.
There are two ways to query OLicense-Server:
- Direct method: OpenLM Server queries the license server remotely.
- Broker method: OpenLM Broker is installed on the OLicense-Server machine, queries locally, and sends data to OpenLM Server.
Query using OpenLM Server only (direct method)
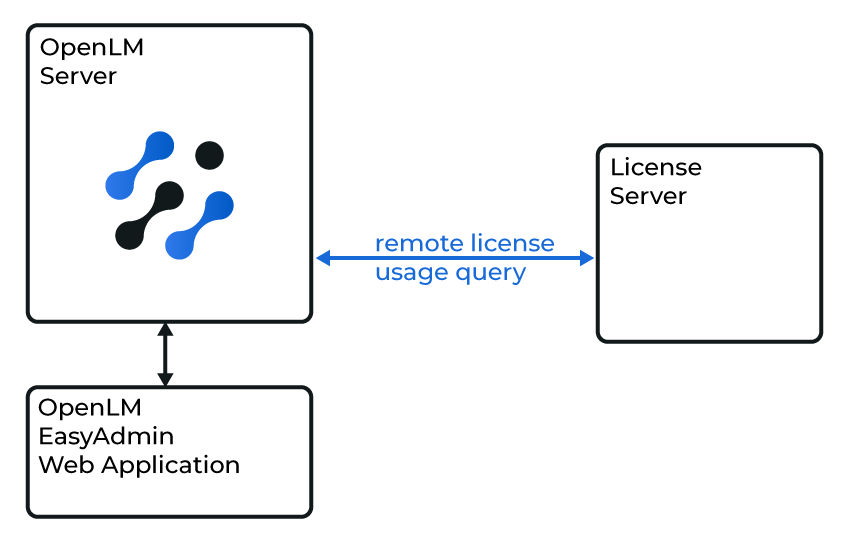
Direct query between OpenLM Server and OLicense
Configure EasyAdmin
- Install OpenLM Server.
- Open EasyAdmin → Start → Administration → License Manager Servers.
- From LM Tools, select OLicense from the LM type drop-down.
- Copy
olixtool.exefrom the machine where OLicense is installed- Default path:
C:\Program Files\optimum\olicense - Paste it to the OpenLM Server LM folder
- Default path:
C:\Program Files\OpenLM\OpenLM Server\LM
- Default path:
- In EasyAdmin, set the Full path to the OLicense executable to the location of the copied
olixtool.exe. - Select SAVE.
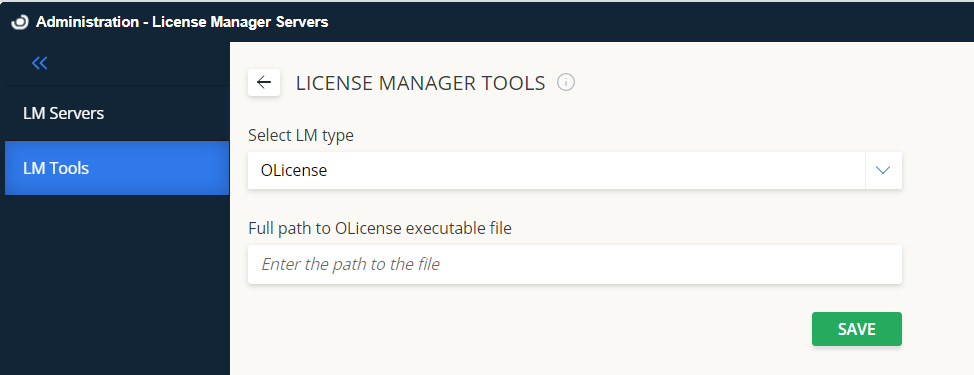
EasyAdmin configuration for OLicense
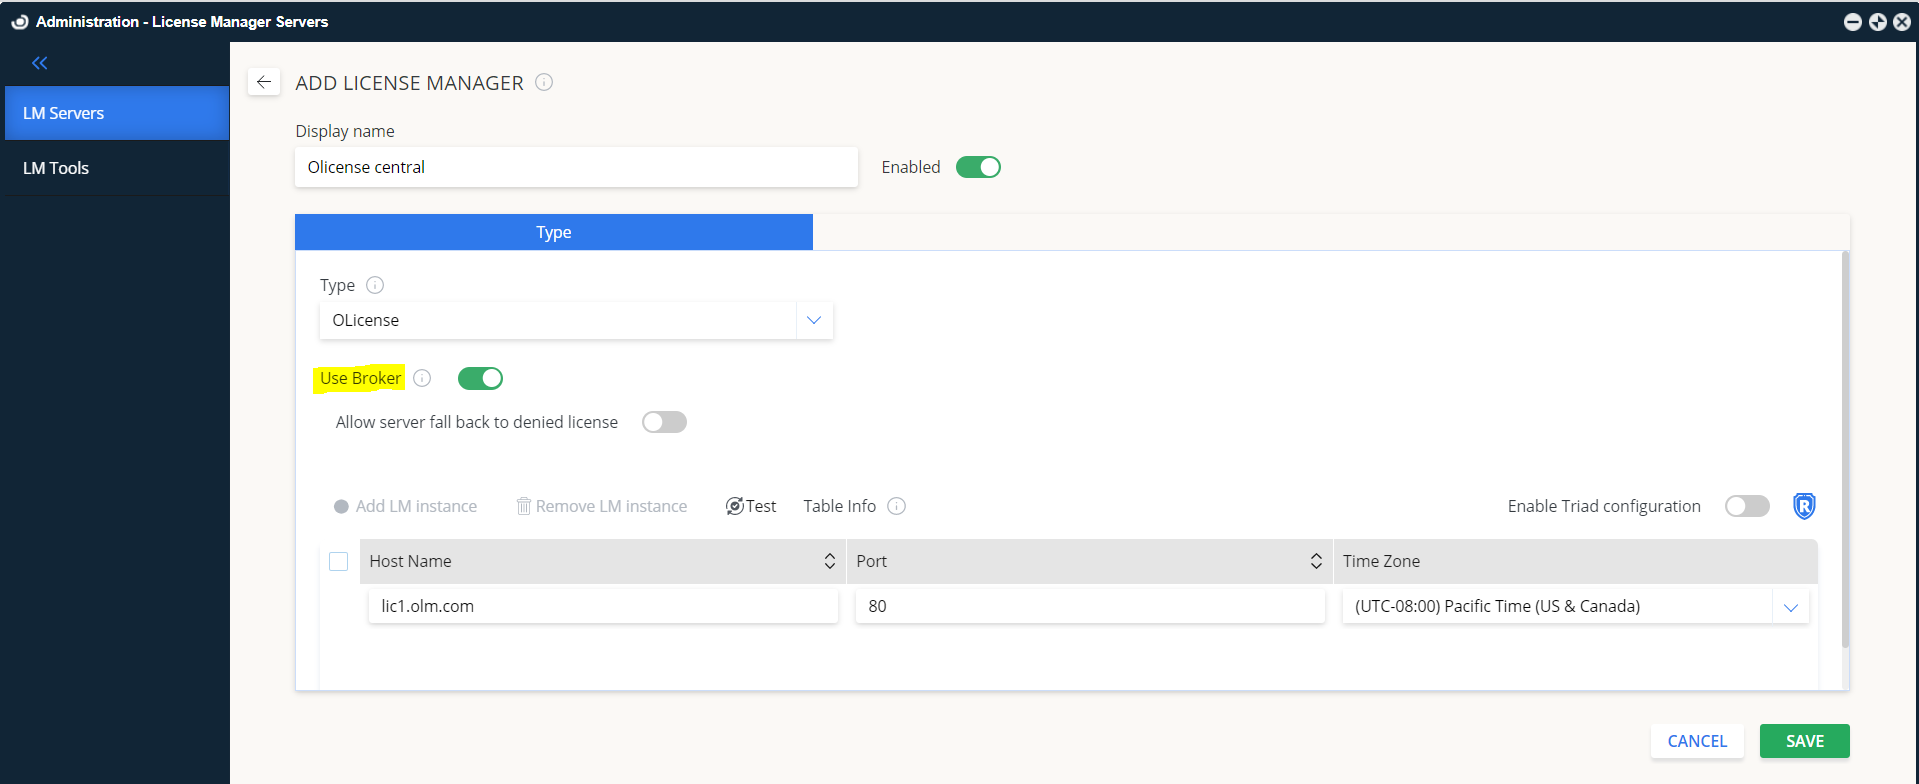
Add OLicense server
- In EasyAdmin, go to Start → Administration → License Manager Servers.
- Select Add LM.
- Enter a descriptive Display name (for example, OLicense central).
- From Type, select OLicense.
- Configure toggles:
- Use Broker:
- Off (default): OpenLM Server queries OLicense directly.
- On: OpenLM Broker supplies usage information.
- Is Triad Configuration: leave Off.
- Use Broker:
- Enter the Hostname and Port of the OLicense-Server. Default port: 80.
- Select the appropriate Time Zone.
- Select SAVE.

Adding OLicense server in EasyAdmin
Query through OpenLM Broker
OpenLM Broker is optional but recommended. It queries OLicense locally and sends data to OpenLM Server, ensuring buffered communication during network outages.
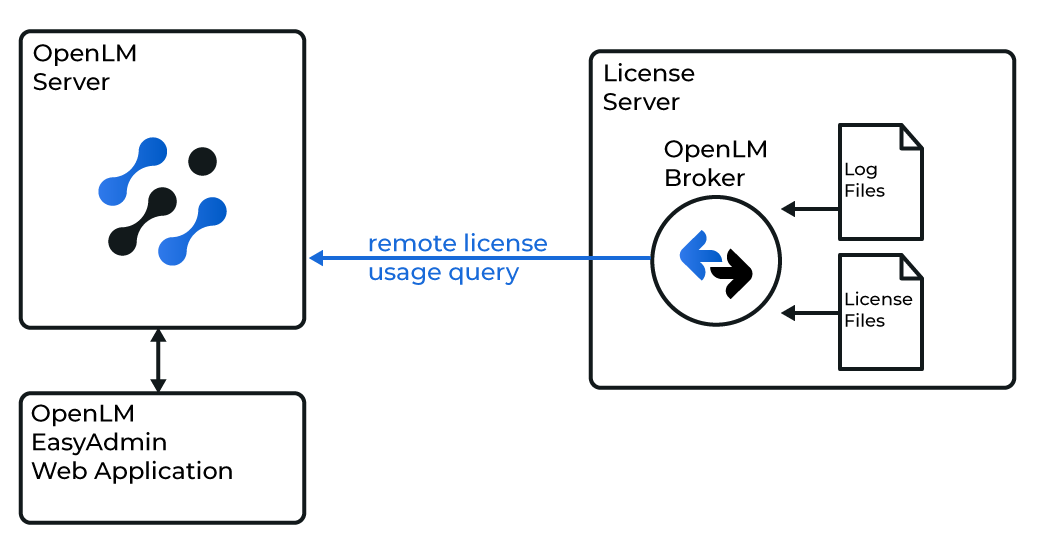
OpenLM Broker setup with OLicense
OpenLM Server configuration (with Broker)
Repeat the server configuration steps above, but toggle Use Broker = On.
EasyAdmin setup with Broker enabled
OpenLM Broker configuration
- Download and install the latest OpenLM Broker.
- Configure Broker to monitor OLicense on the correct port (default: 80).
Port setup for OLicense in Broker - Match all Broker fields with your EasyAdmin configuration.
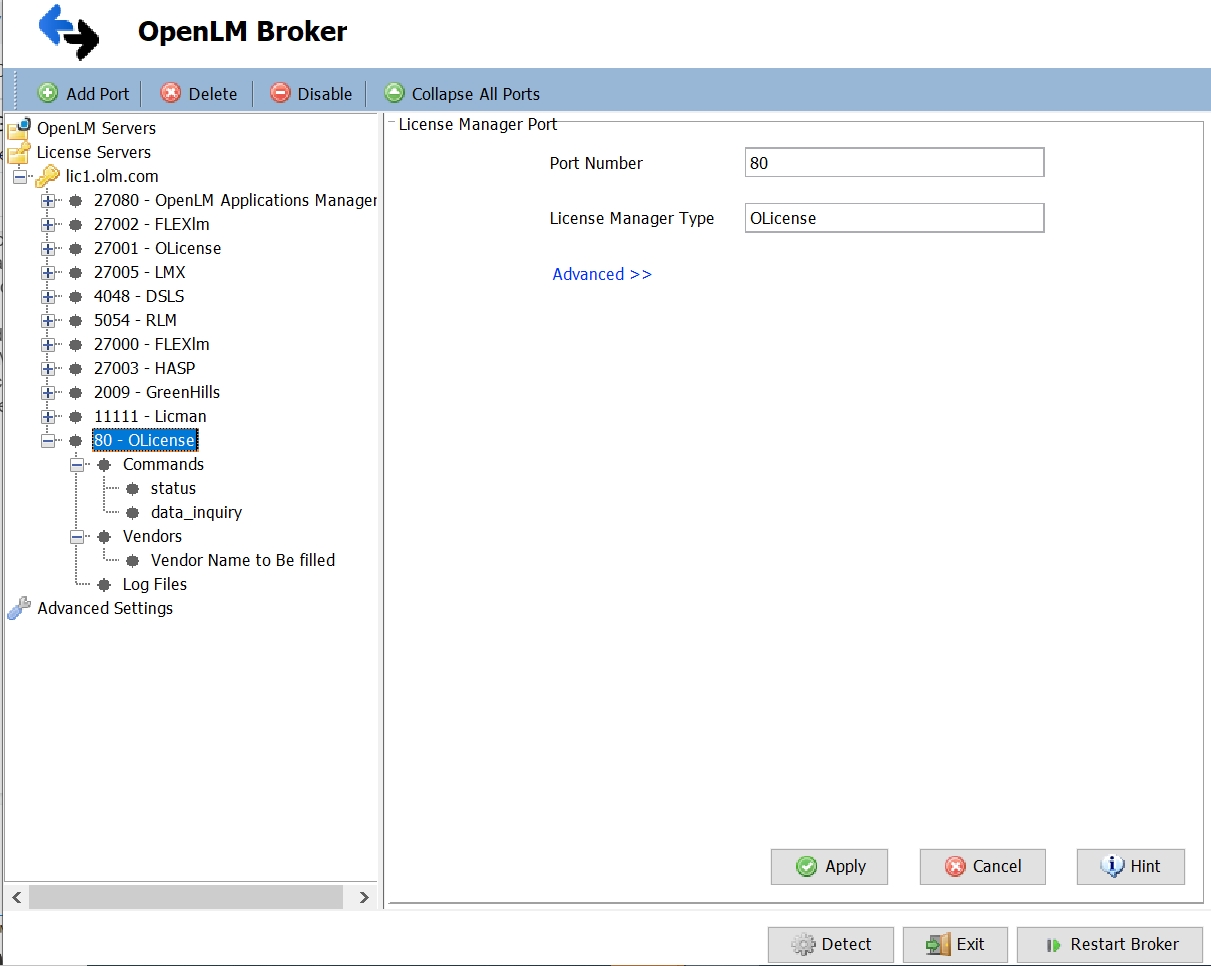
- In the Commands node, set the path to
olixtool.exe.

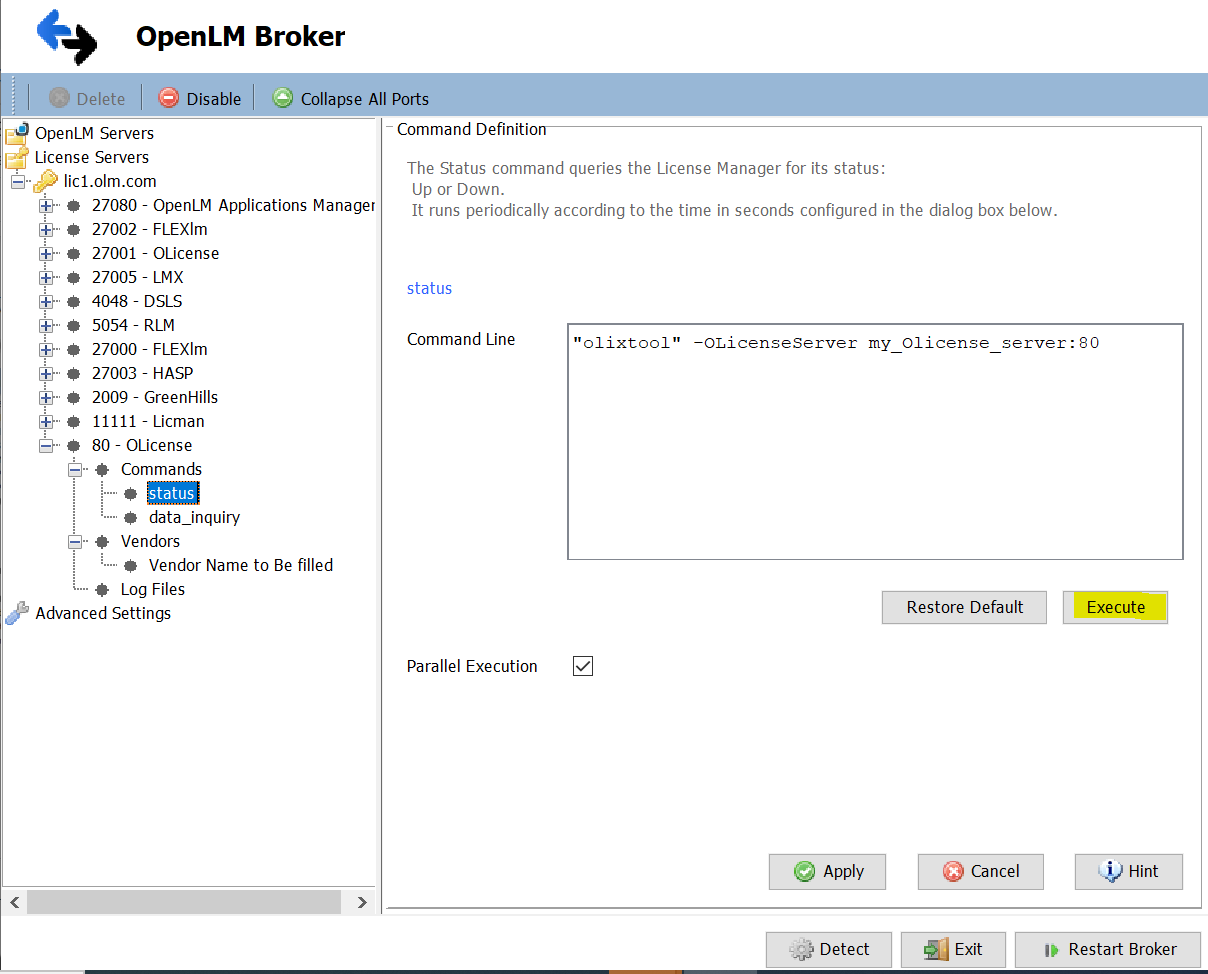
Setting the command path in Broker - Test the configuration under status and data_inquiry by selecting Execute.
- Select Apply and restart Broker.
Restarting Broker after configuration
Alternative: Manual Broker web UI configuration
- Install the latest OpenLM Broker.
- Open the Broker Web UI.
- Go to License Managers.
- If OLicense is detected automatically, confirm and save.
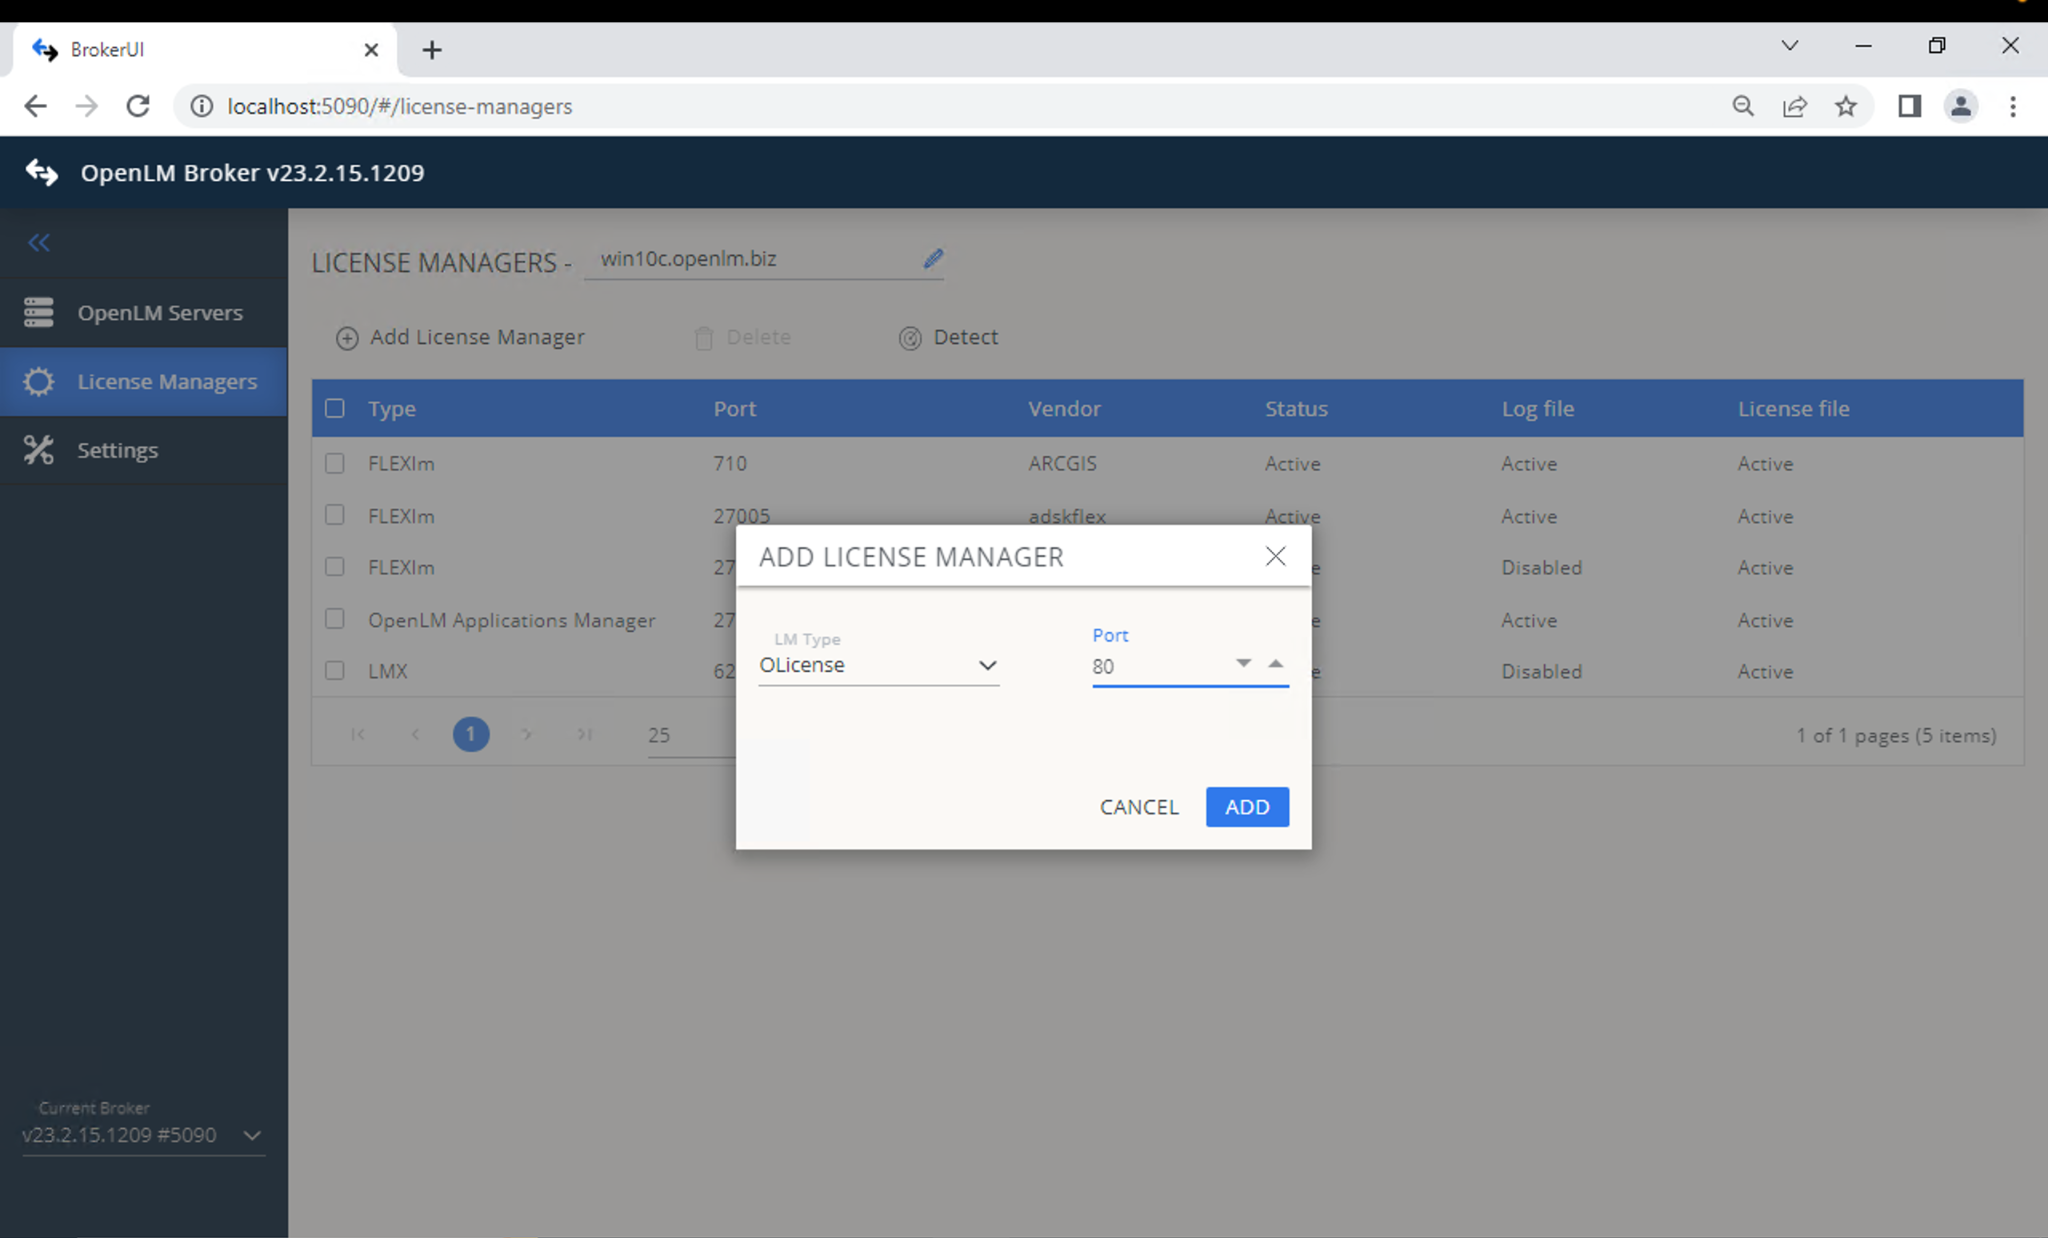
- If not, select Add License Manager → Select OLicense → Enter port (default: 80) → Select ADD.
Adding OLicense manually in Broker
- In Commands, set the path to
olixtool.exe. Execute to confirm output.
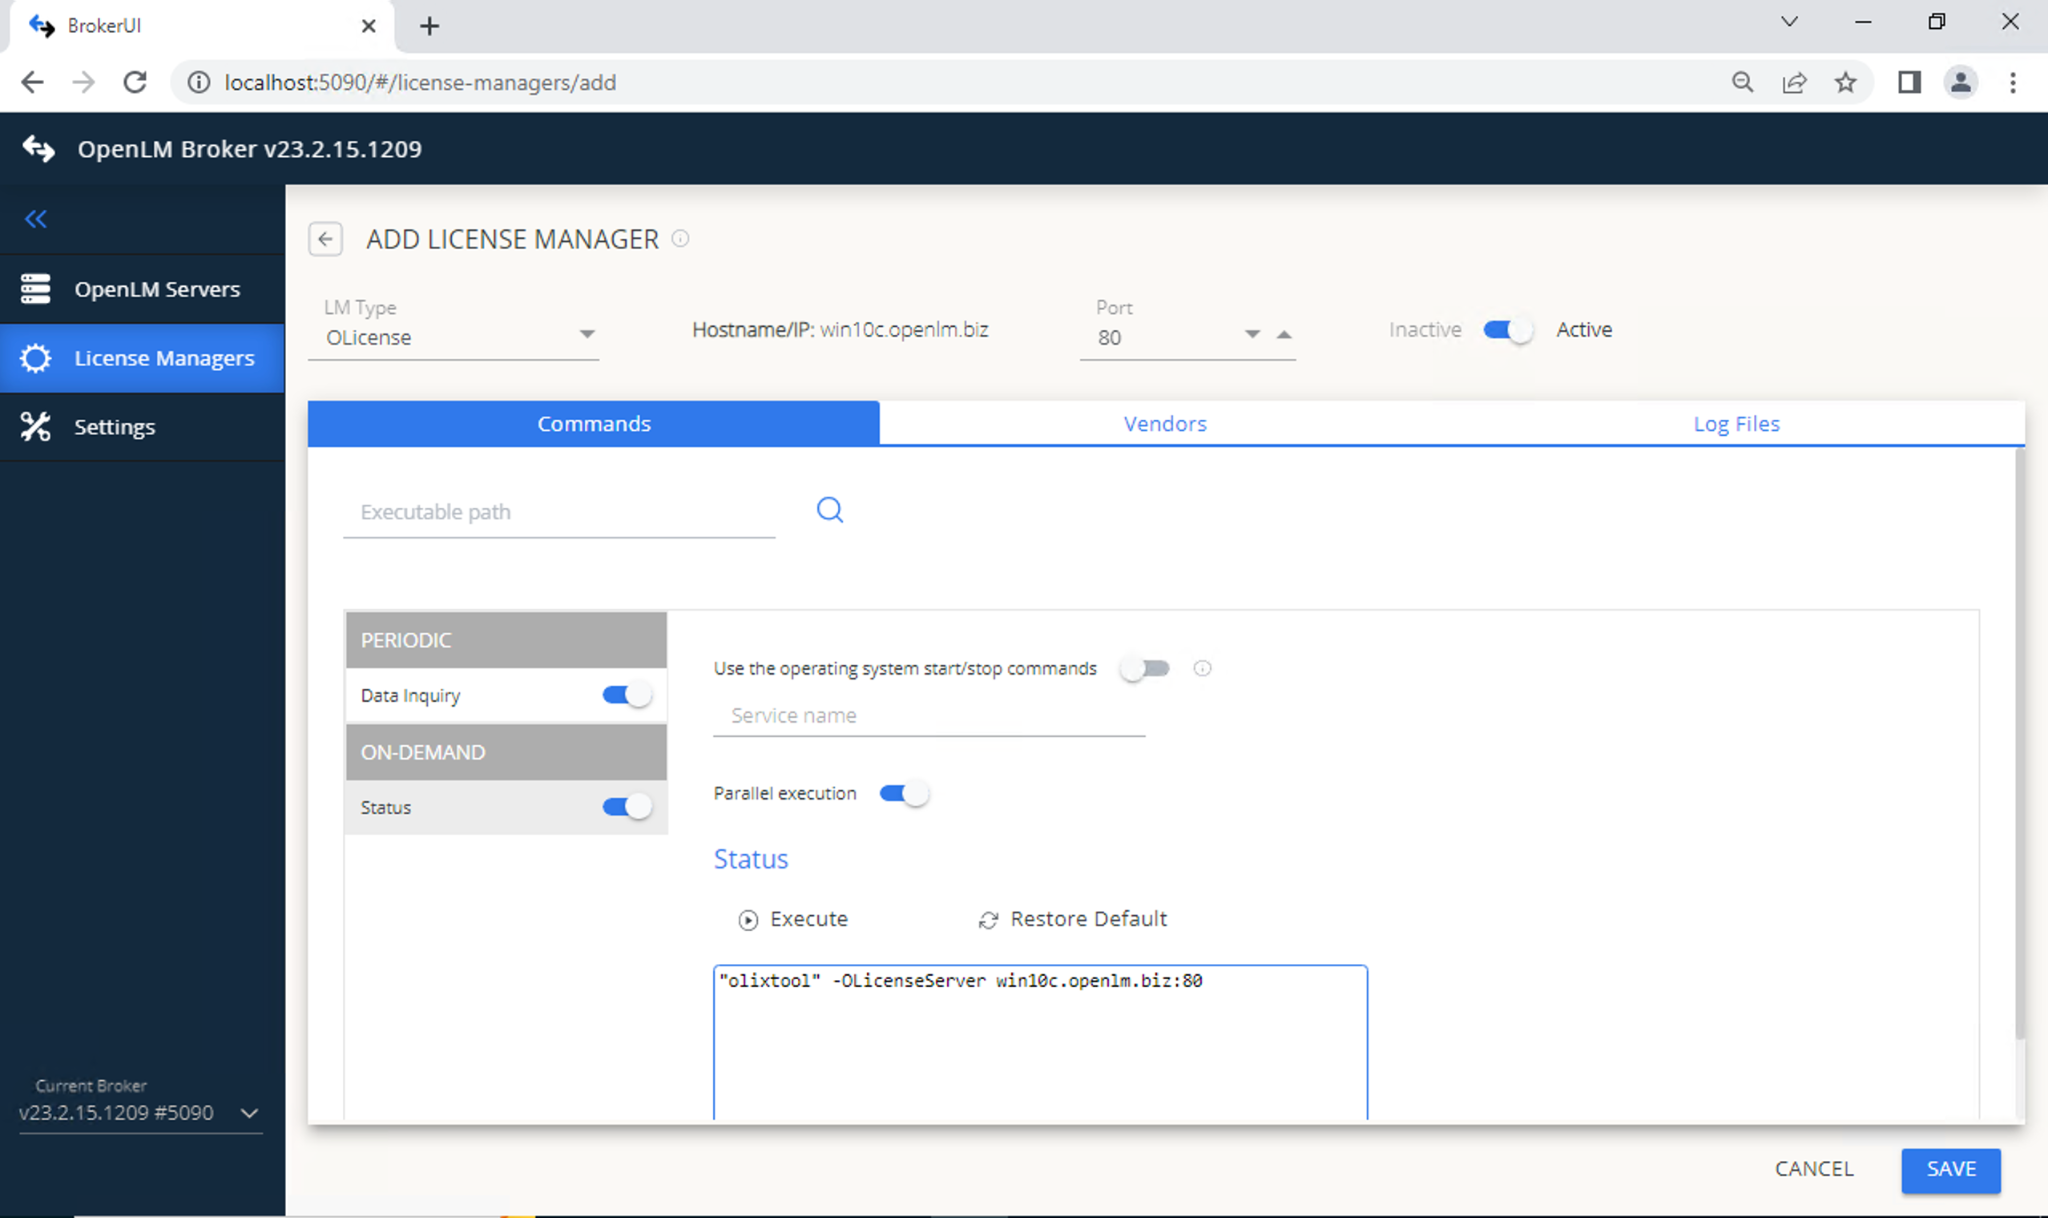
Defining command path in Broker Web UI - In Vendors, select Add Vendor → Enter "OLicense" → Continue.
- Select SAVE.
- Configure OpenLM Server as described earlier.
Verify OLicense configuration in EasyAdmin
- Open EasyAdmin (
http://<OpenLM Server>:5015). - Go to Start → Widgets → License Servers.
- Verify OLicense appears in the list.
- A green circle means the connection is active.