ASH WARE
Follow these steps to configure OpenLM to monitor license usage and retrieve license statistics from ASH WARE.
Requirements
Before you query the license manager, install:
- OpenLM SLM on your premises (or an OpenLM Cloud account)
- OpenLM Broker v25.5 or higher on the same machine as the ASH WARE license manager
Monitoring capabilities
| LM Type in the Broker | Commands | Logs | Quantity | Expiration date | Denied | Borrowing | Allocations | Report resolution |
|---|---|---|---|---|---|---|---|---|
| ASH WARE | Yes | No | Yes | Yes | No | No | No | Seconds |
Using the Broker also allows buffered communication and allows remote start and stop of the license manager service.
OpenLM Broker configuration
OpenLM Broker configured to connect to the ASH WARE license manager
OpenLM Broker must be installed and configured to report to OpenLM SLM before proceeding.
-
Open the Broker web UI at
http://localhost:5090.
If you want to access it from another machine on the same network, generate a token by visiting:
http://localhost:5090/api/new-token -
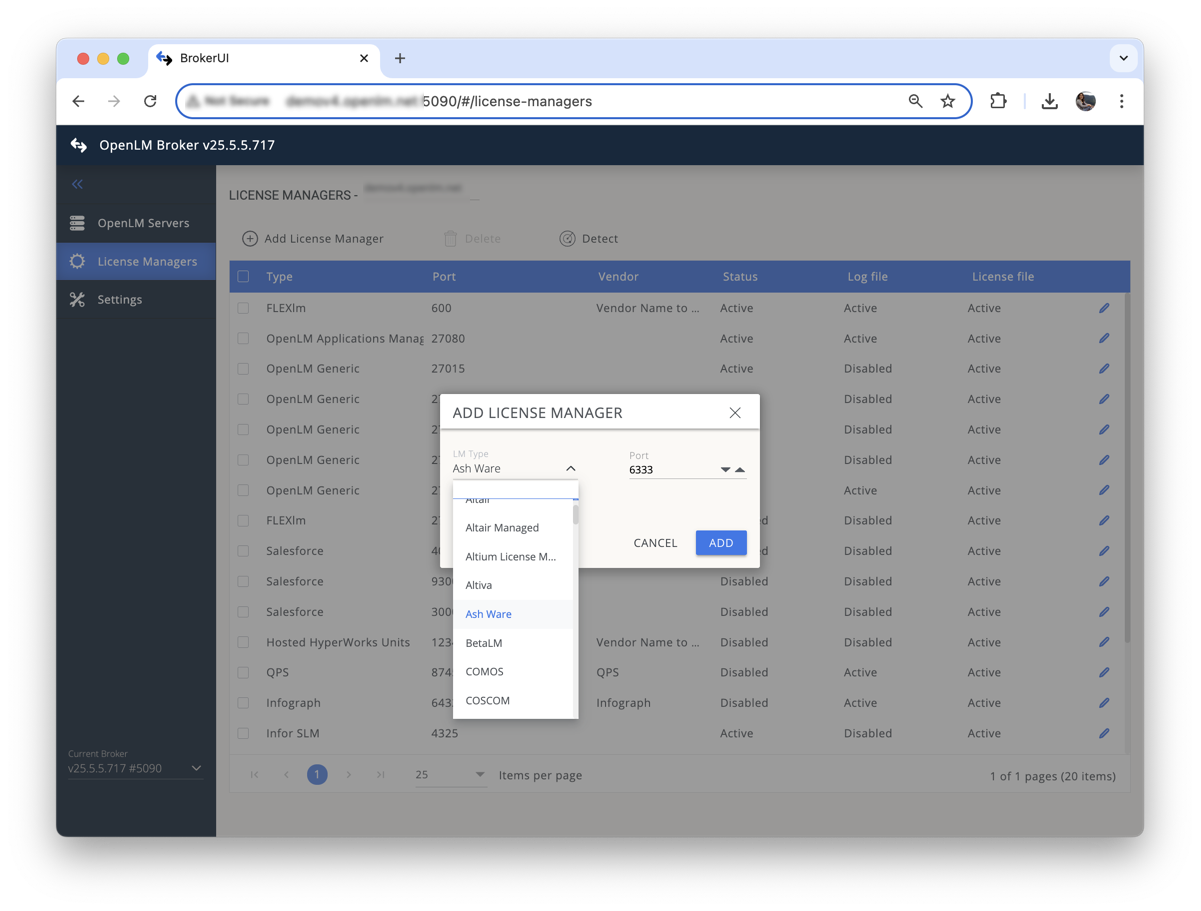
Go to License Managers → Add License Manager.
-
From the LM Type drop-down list, select ASH WARE.
-
Enter the port number (default:
6333) and select Add.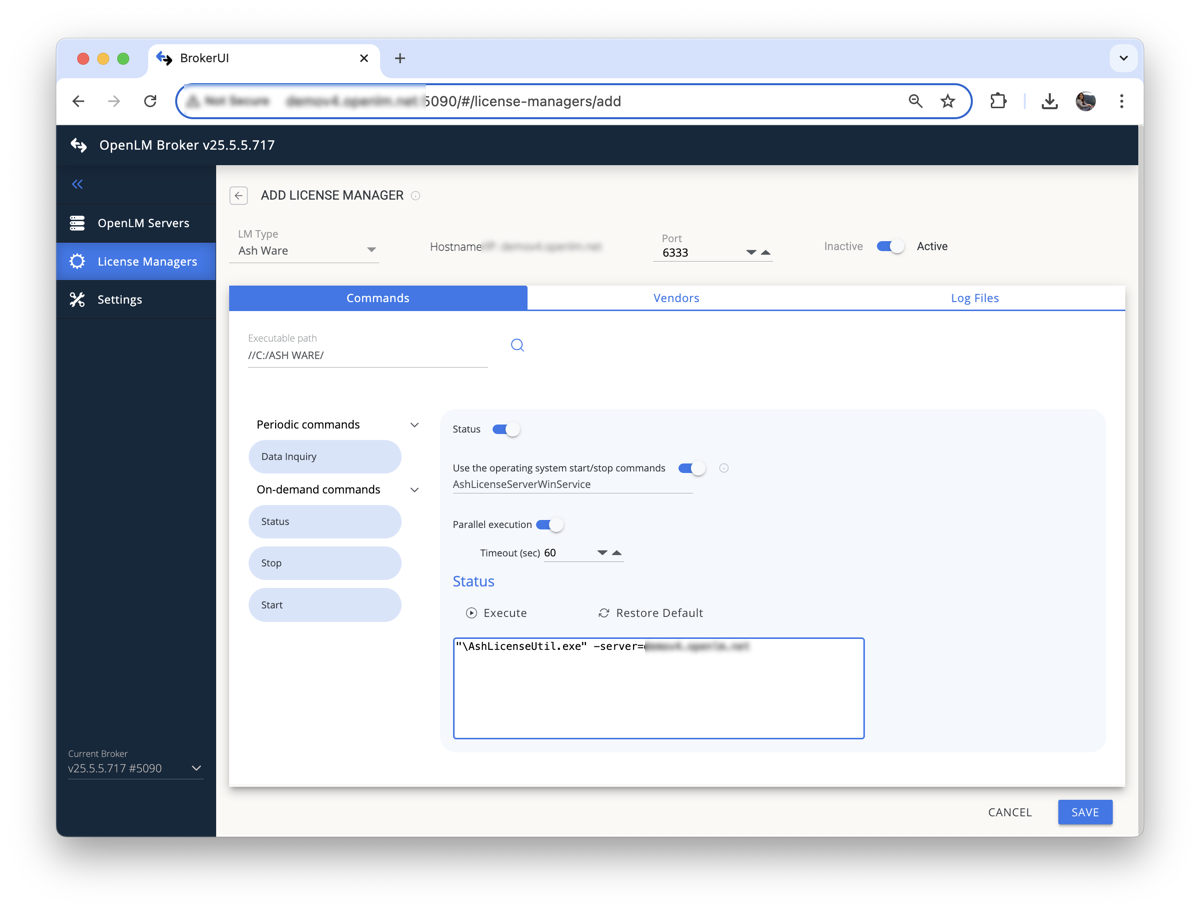
Setting executable path for ASH WARE in OpenLM Broker -
In the Executable Path field, browse to the installation directory of the ASH WARE
.exefile. -
Select Save.
-
To verify the configuration, select Execute in the Commands tab.
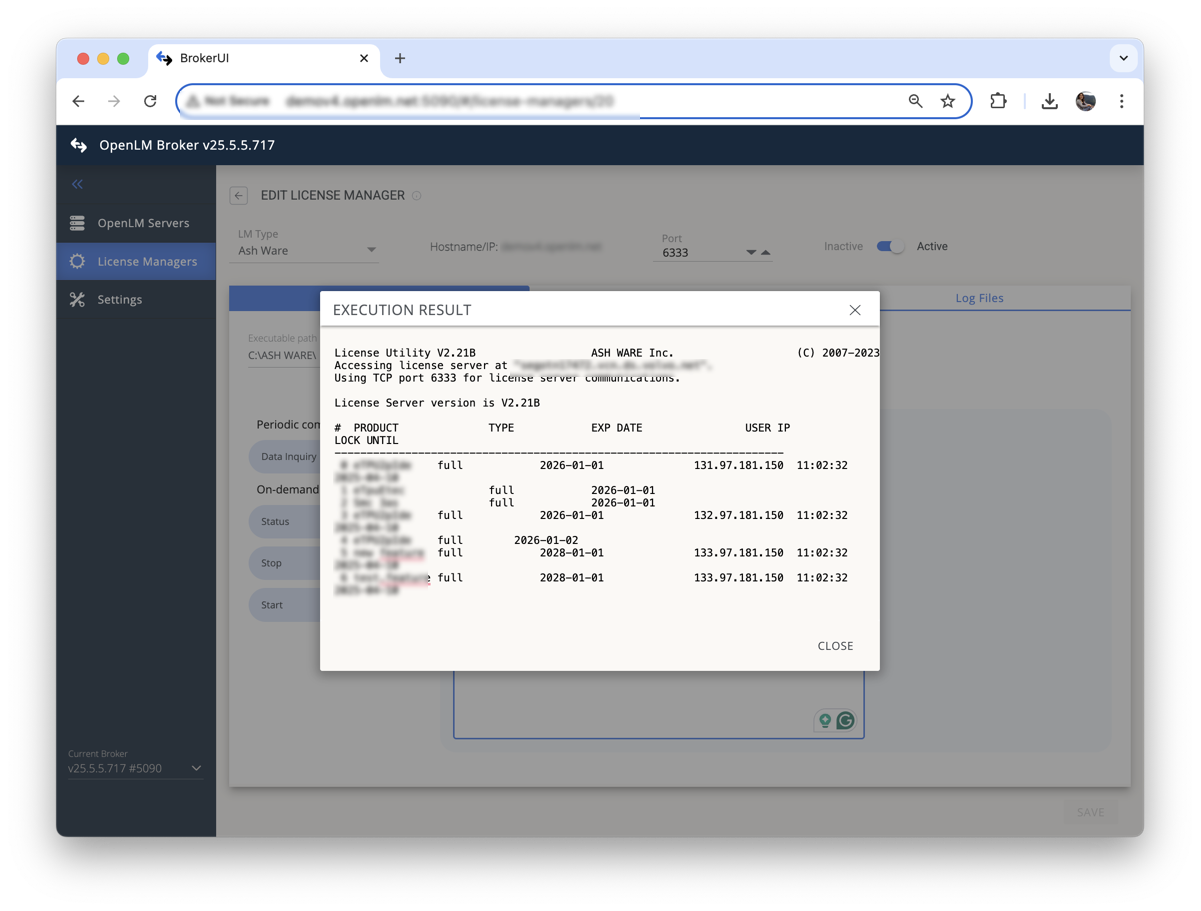
Example of a successful execution result -
Go to the Vendors tab. Select Add Vendor, enter
ASH WARE, and select Continue.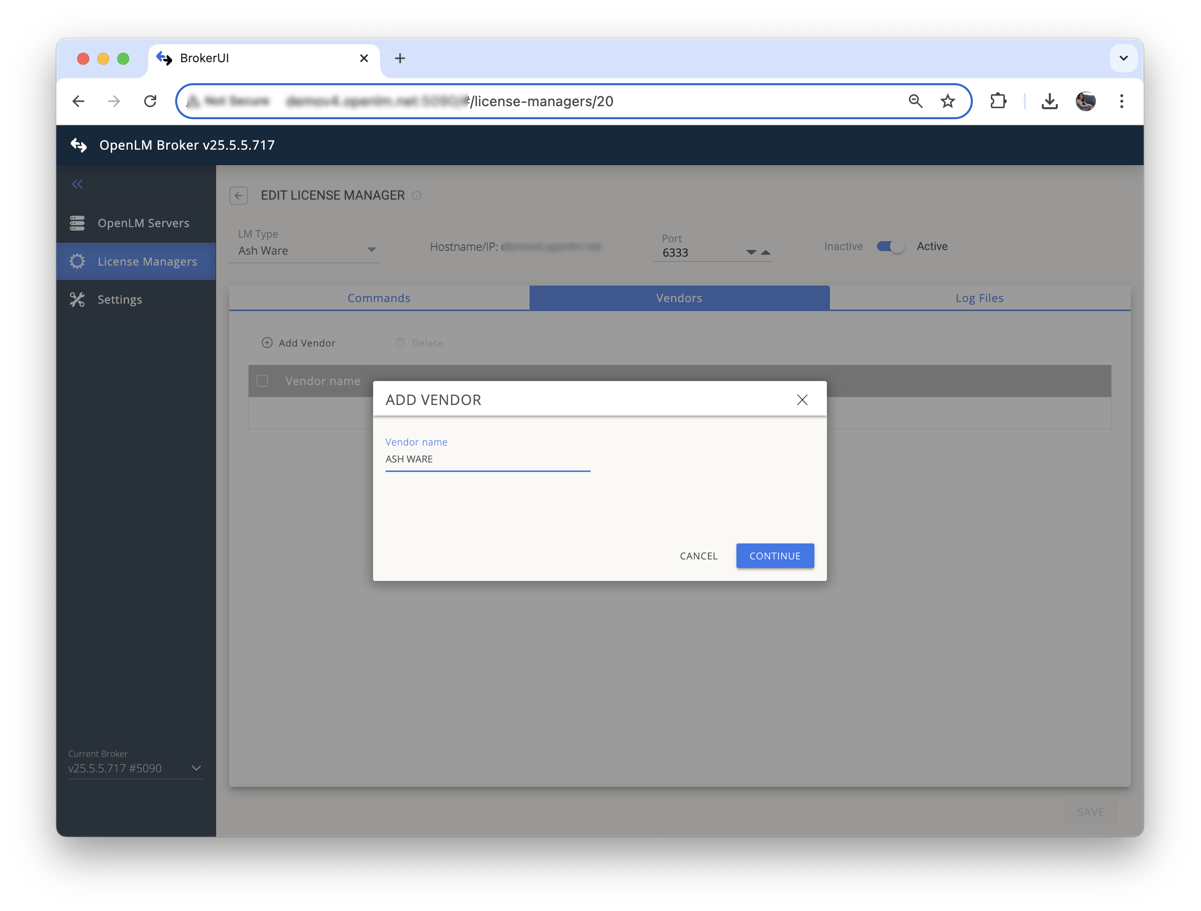
Adding ASH WARE vendor in OpenLM Broker -
Select Save.
OpenLM configuration
If the preceding steps are complete, Broker should be transmitting data to OpenLM SLM.
Approve the configuration in the EasyAdmin UI:
-
Open EasyAdmin.
-
Go to Start → Widgets → License Manager Servers.
-
Select the Servers Pending Approval link.
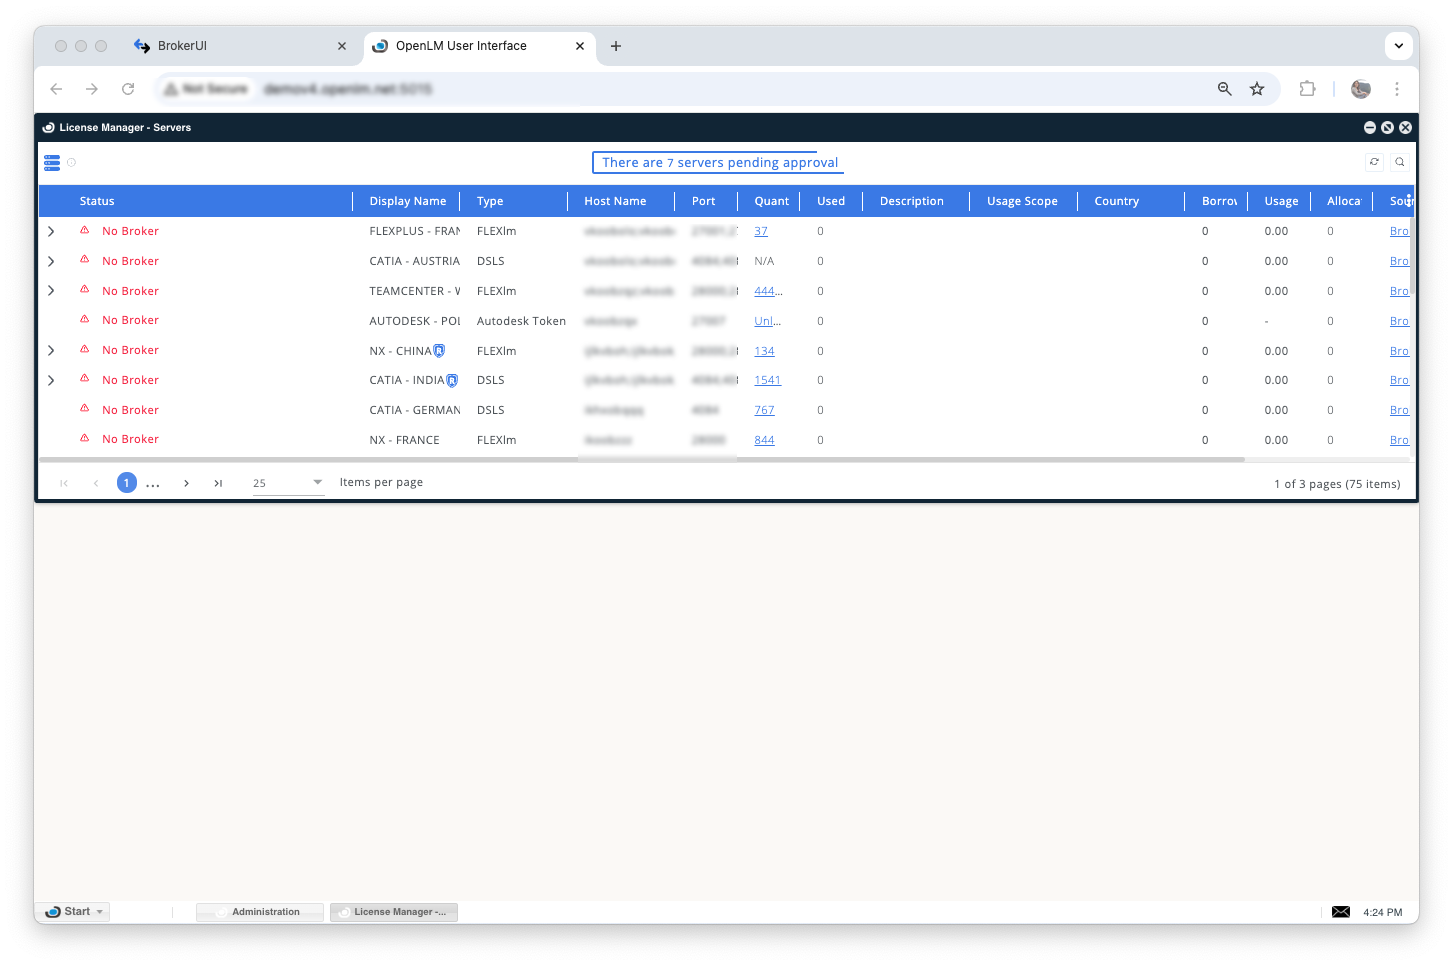
Pending license managers in EasyAdmin -
Select the edit icon for the ASH WARE entry.
In the Display Name field, enter a preferred name (for example,ASH WARE).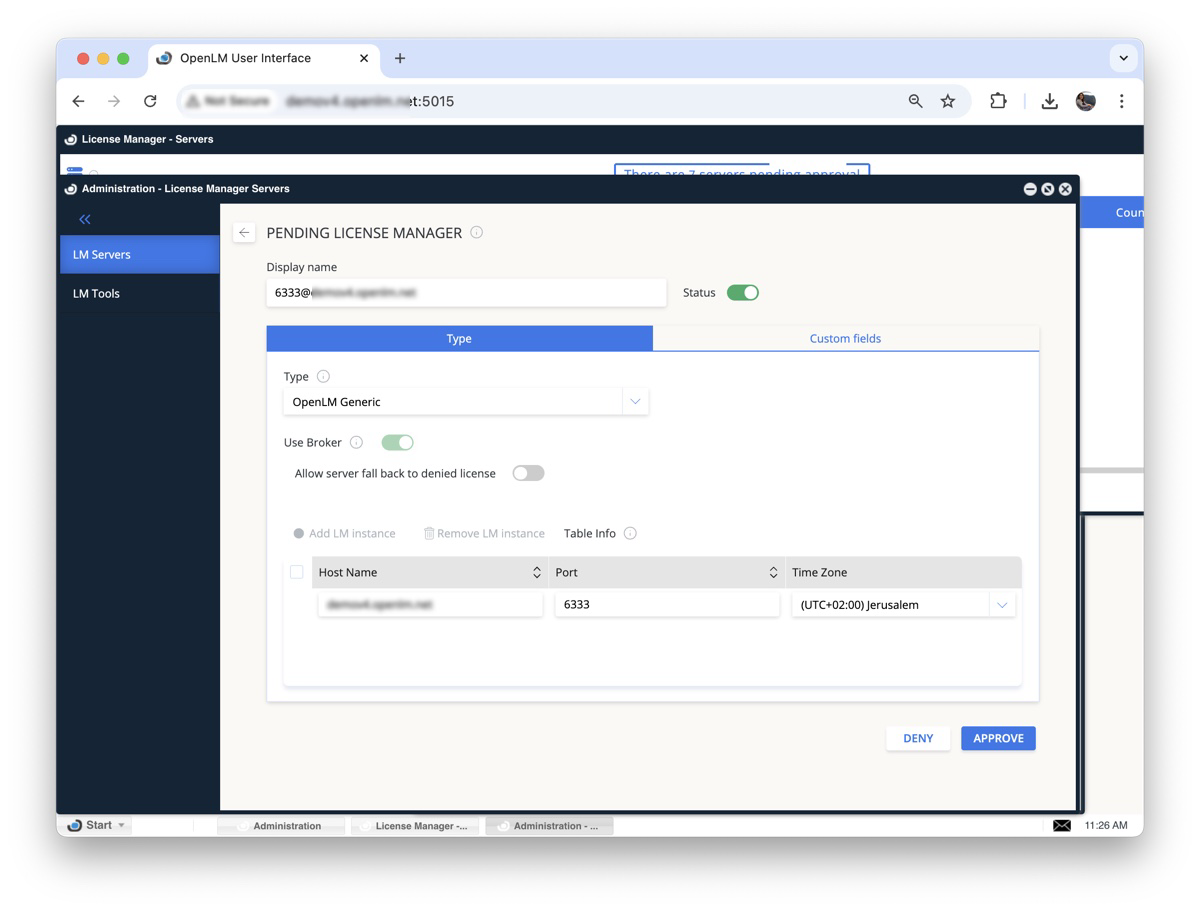
Editing display name for ASH WARE license manager -
(Optional) Go to the Custom Fields tab to add details such as country, usage scope, and description.
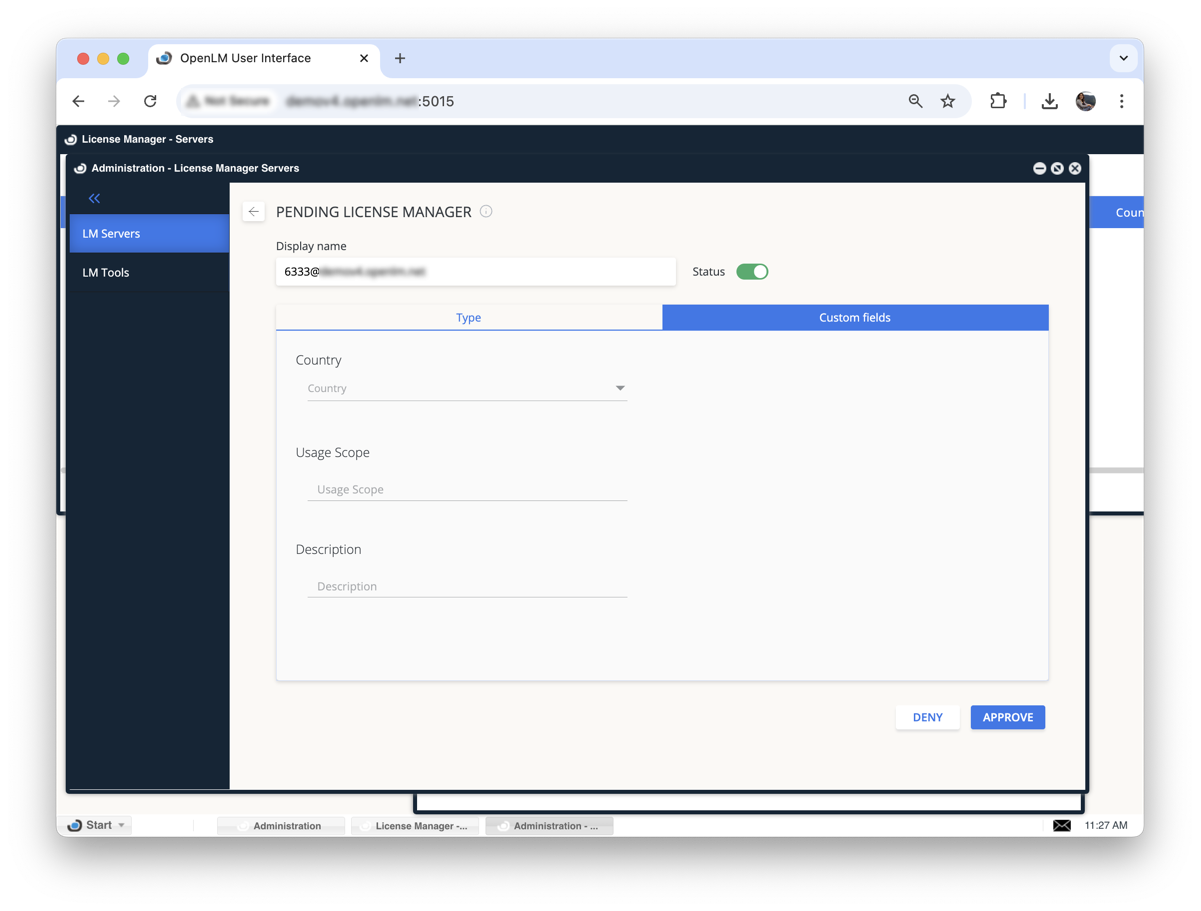
Adding custom fields for ASH WARE license manager -
Select Approve.
Verify your configuration
- Open EasyAdmin.
- Go to Start → Widgets → License Manager Servers.
- Confirm that the ASH WARE license manager appears in the list with a green circle icon.
It may take up to 3 minutes for the status to update after a new connection.