Cloud Directory Sync
This is a short guide on setting up Cloud Directory Sync.
For a full, in‑depth explanation, see the Directory Synchronization comprehensive guide (v21 and higher).
Prerequisites
- Account in Software License Management Cloud (SLMC)
- Contact Support (support@openlm.com) to create a DSS database for your account.
Generate the DSA authorization file and connect DSA and DSS (part one)
To allow the Directory Synchronization Agent (DSA) to interact with the Directory Synchronization Service (DSS), generate an authorization file from the EasyAdmin interface:
- Log into your Software License Management Cloud account.
- Go to System & Security → Security → Authorization.
- Select Add and select DSA from the dropdown list to download the Authorization JSON file. Provide a meaningful description and select SAVE. The Secret Key will be displayed only once—store it securely before closing the window.
Install Directory Synchronization Agent (DSA)
- Download the latest DSA installer from the OpenLM Downloads page and run it.
- Check the "I agree to the license terms and conditions" box and select Next.
- Enter a descriptive name (no spaces) for the Agent instance, confirm or change the port (default
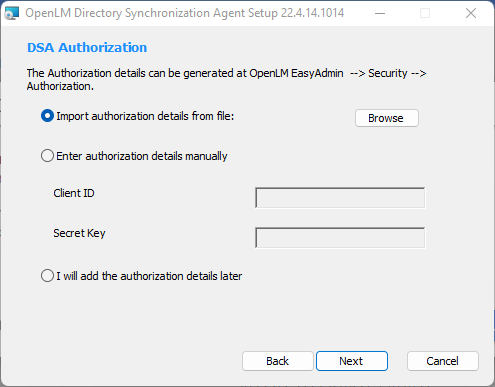
8081), select Cloud as the Server version, then select Next. - Import the authorization file using one of the options:
- Browse to import the Authorization JSON file.
- Enter the authorization details manually.
- Add authorization details later (DSA will not function until authorization details are added). After providing authorization details, select Next.
- Select the installation folder (default:
C:\Program Files\OpenLM\OpenLM Directory Synchronization Agent). You may select Browse to select a different folder, then select Next. - Select Finish to close the installation wizard.
Approve the connection between DSA and DSS (part two)
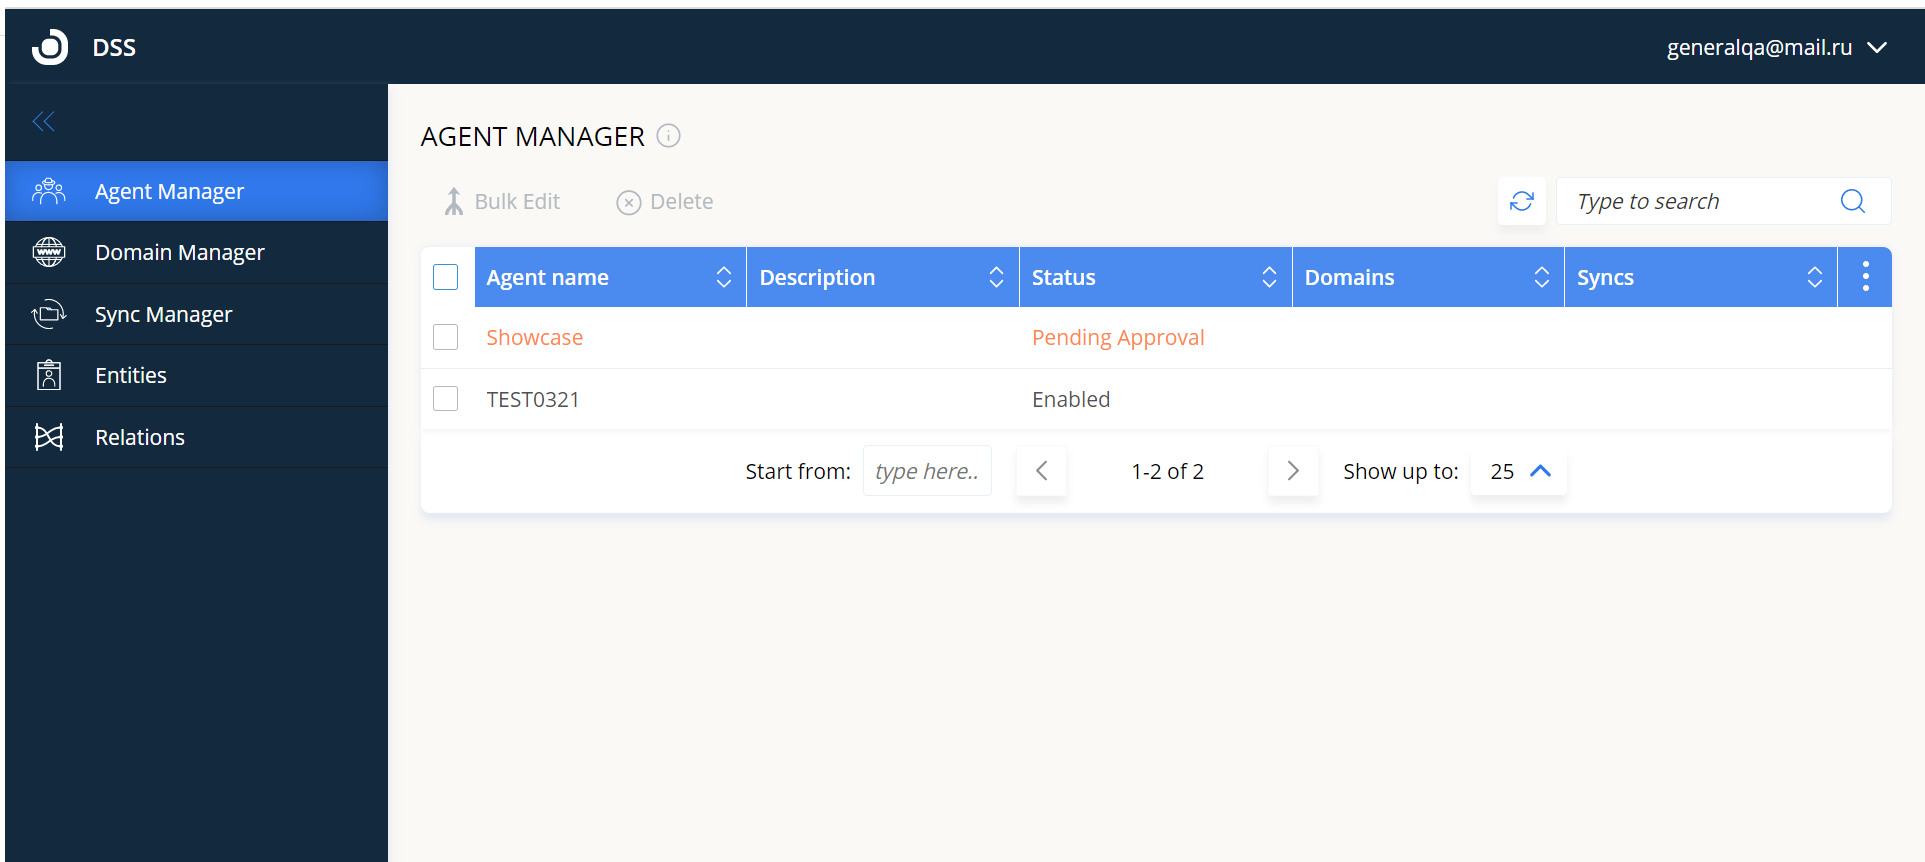
After installation, approve the DSA in the Agent Manager so it can operate with DSS:
- Log into your OpenLM Cloud account. Go to Start → Administration → Directory Synchronization (opens in a new tab).
- Newly installed DSAs configured to report to DSS must be approved before becoming operational.
- Select the Agent Manager tab.
- Double-click the agent row with status Pending approval (or select the Edit Agent icon).
- On the Approve Agent screen, set Status to Enabled and select Approve.
Read more comprehensive insights in this guide.