Identity Service configuration
When Identity Service is not installed, everyone can access every OpenLM component without any security. When installing the Identity Service and setting up the Security Configuration, every component needs Client ID and Secret Key to be accessed.
There are 2 types of Security Configuration:
a. URL settings in Identity Service
- OpenLM Software License Management (SLM)
- Directory Sync
- Reports Scheduler
- ServiceNow
b. By setting the URL, when the user tries to open a URL in the Browser, Login Credentials will be asked. Client ID and Secret Key will be inserted into configuration files such as appsettings.json or property file. Once secured, every component connected to OpenLM SLM should be set up in security mode:
- Authorization JSON file from EasyAdmin User Interface:
- Broker
- DSA
- Workstation Agent
- End User Services (Personal Dashboard)
- Applications Manager
- OpenLM SLM API
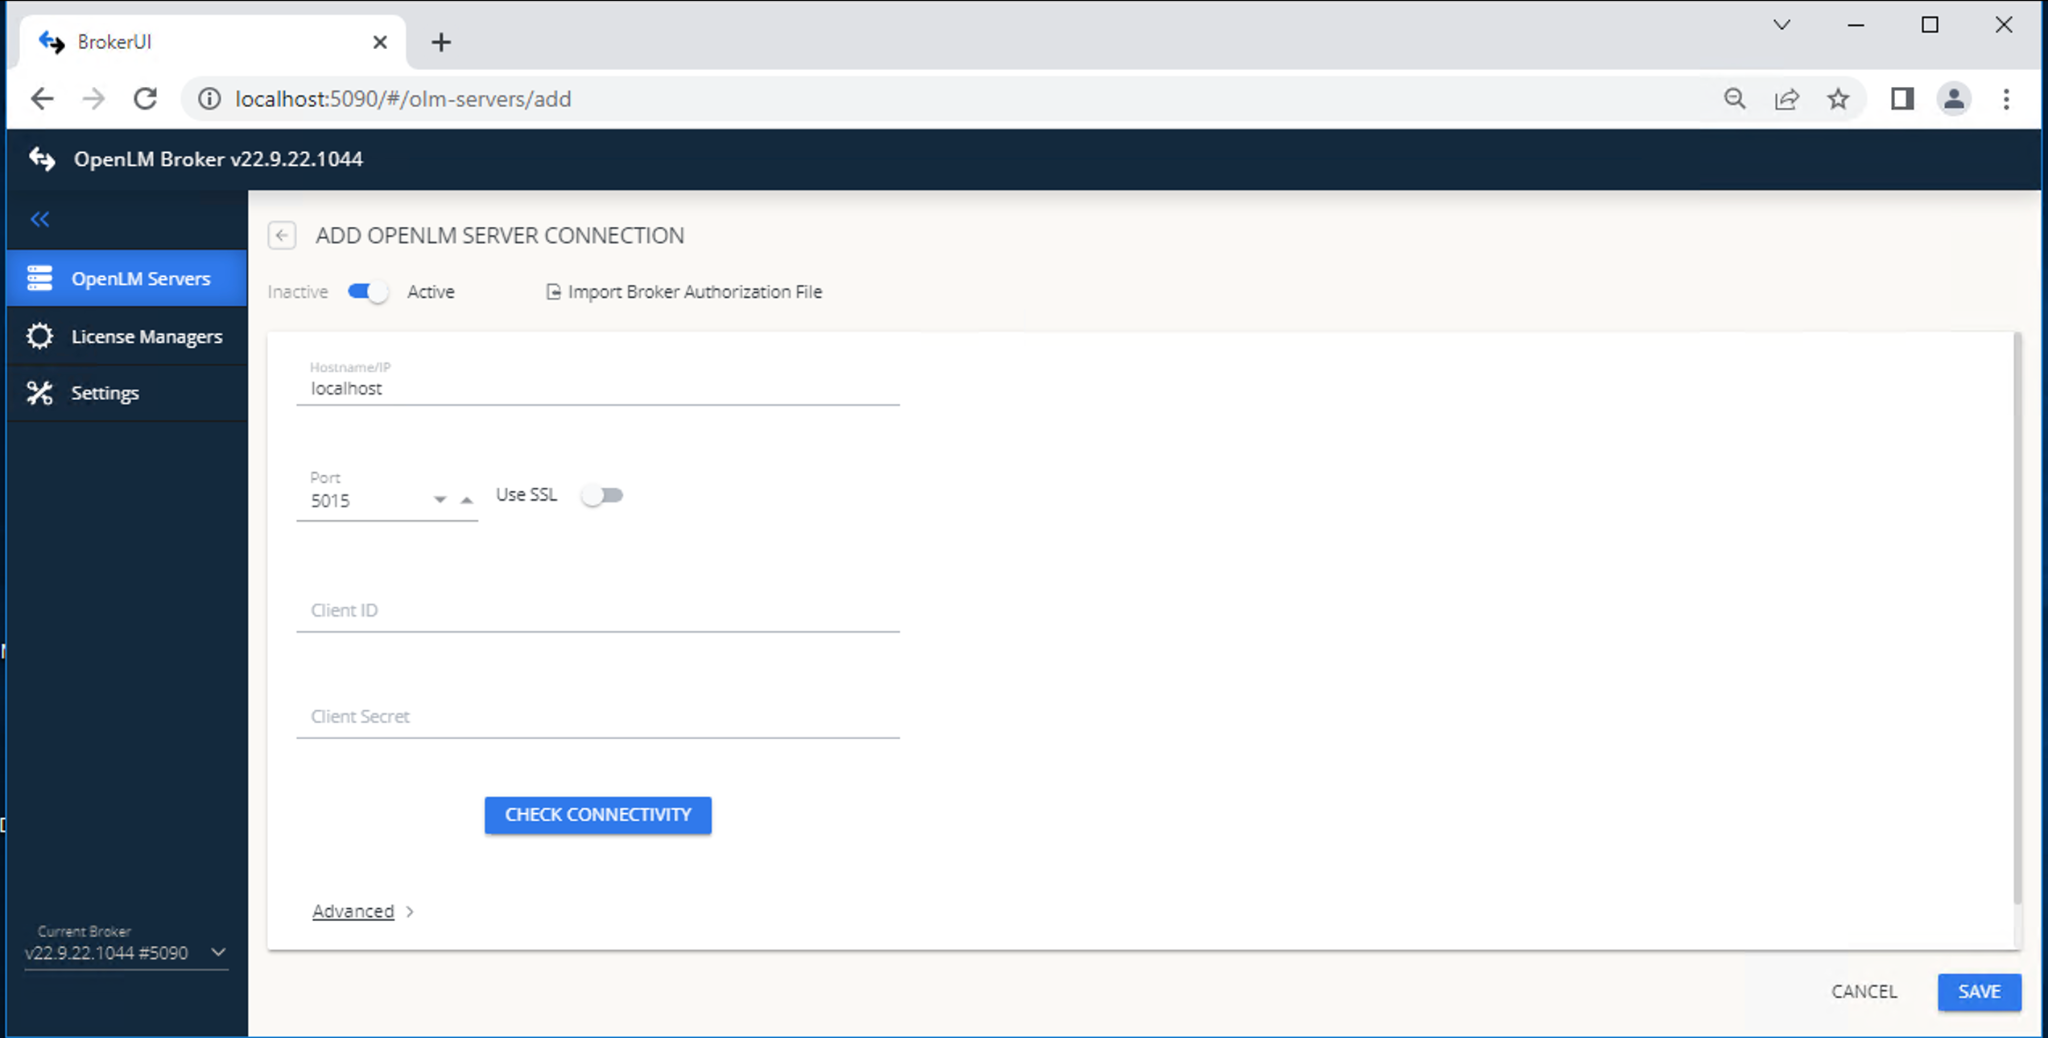
Once OpenLM SLM is configured to work in secure mode in Identity Service, issue the Authorization JSON file from EasyAdmin User Interface and import it into each component.
To configure the OpenLM components to work in a secure environment, select the Security Configuration tab in the Identity Service:
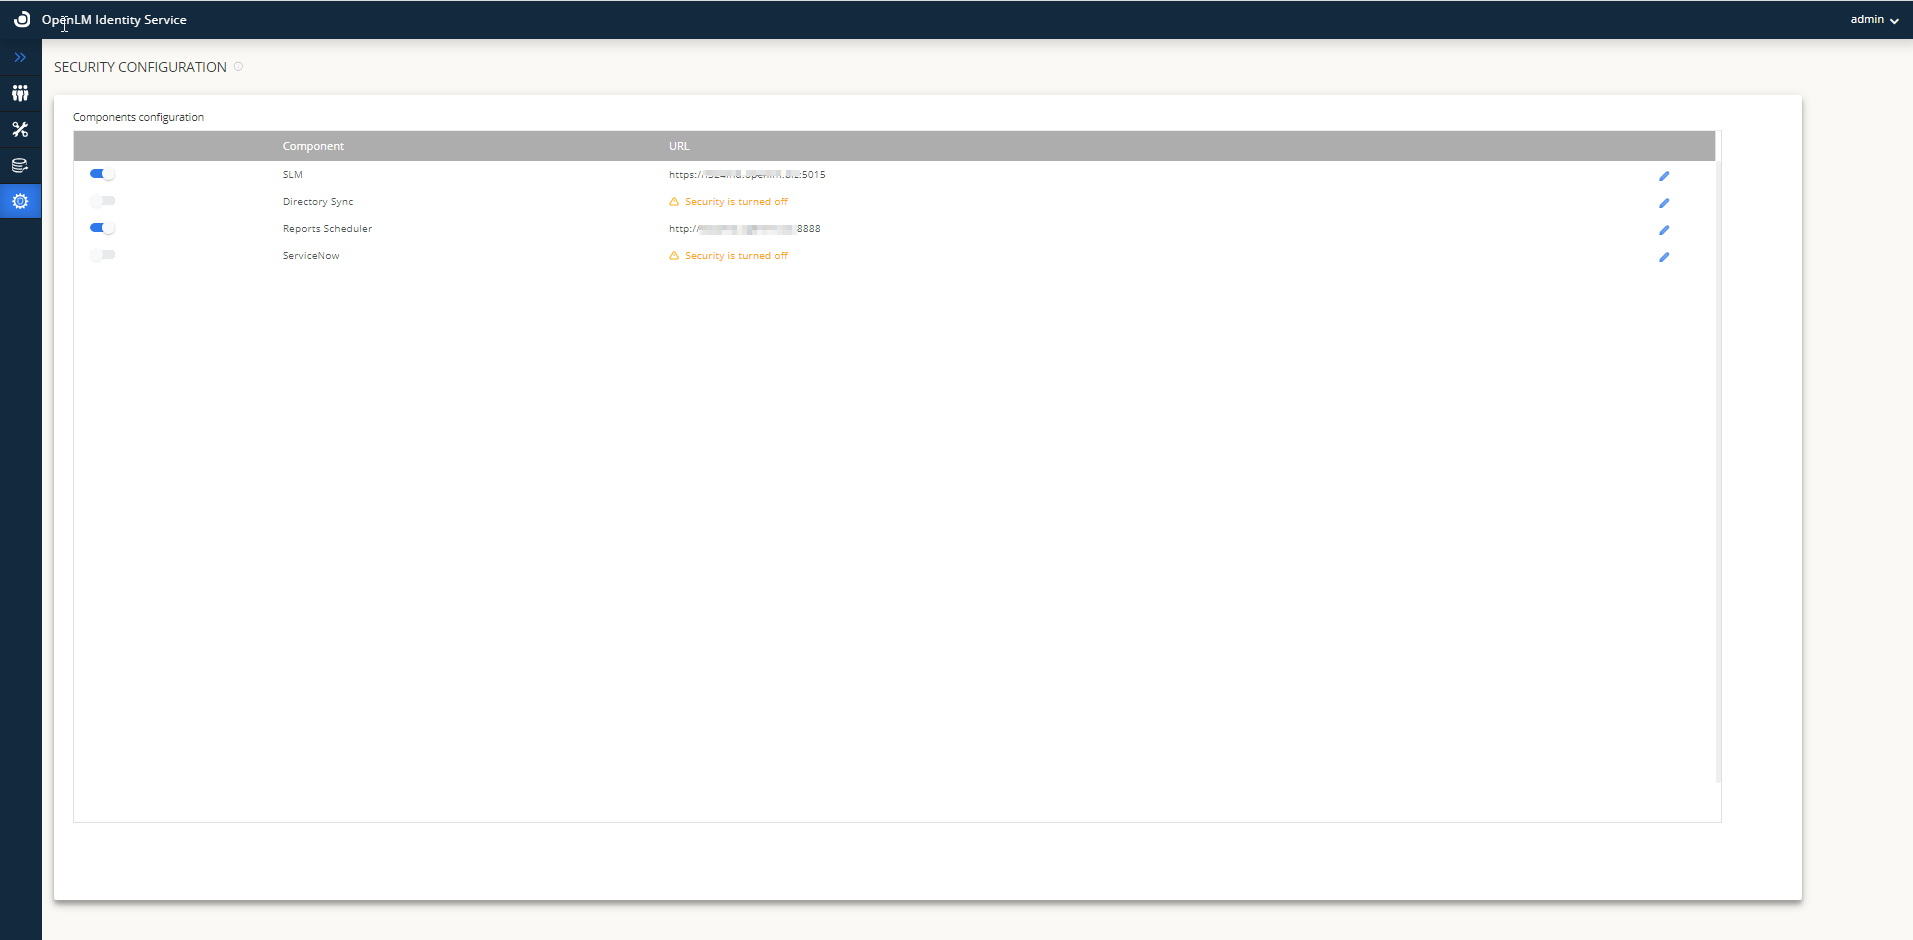
Configure OpenLM SLM to work in a secure environment
- In the Identity Service UI, select the Security Configuration tab.
- Proceed with turning on the SLM toggle switch.
- Provide the Fully Qualified Domain Name for OpenLM SLM Machine (Ex: http://FQDN:5015).
- Type in the username (Admin by default)
- Click Save.
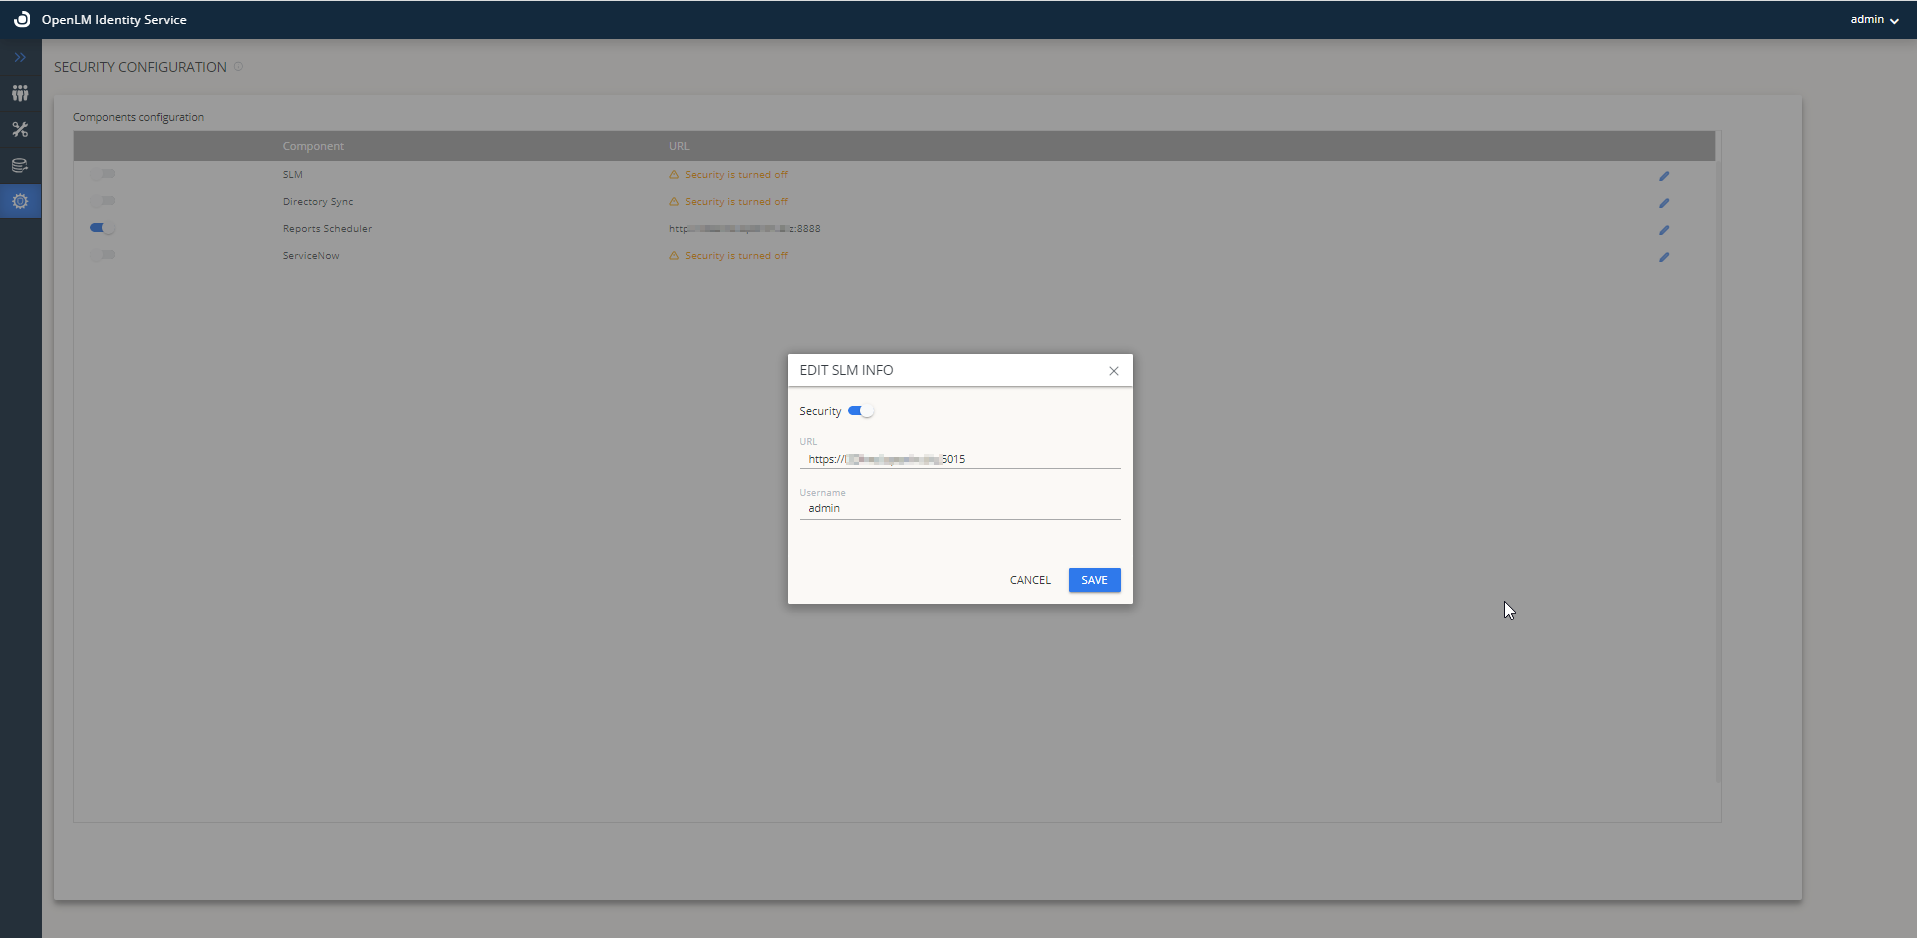
Note: this will enable Security, Client ID, and Secret Key in the appsettings.json file located at "C:\Program Files\OpenLM\OpenLM SLM\bin\appsettings.json"
"Auth": {

"EnableSecurity": true,

"Authority": "https://fqdn:5009",

"Audience": "openlm.server.api",

"AuthProvider": "",

"ClientId": "openlm.server.client",

"ClientSecret": "c0936471-0f6a-44af-9078-99d150683cad",

"ClientScope": "openlm.cloud.scope openlm.ugs.read.scope IdentityServerApi openlm.dss.scope openlm.etlmanager.scope",

"TokenEndpoint": "/connect/token"

}
- Go to Services and restart both Identity Service and OpenLM SLM.
Restarting Services is mandatory to get a new Client ID and Secret Key.
In the EasyAdmin User Interface Dashboard, we can now see the logout button with the account:
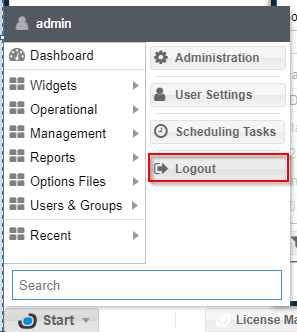
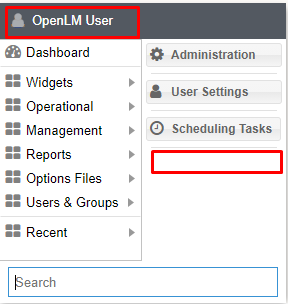
Instead, if we turn off the Server's toggle switch (Non-Security Mode), the logout/in button will disappear. Everyone can access the EasyAdmin User Interface.
Note: the second time you decide to turn off the Security for the OpenLM SLM, this will be done by changing the appsetings.json→EnableSecurity parameter to False (file located at "C:\Program Files\OpenLM\OpenLM SLM\bin\appsettings.json").
"Auth": {

"EnableSecurity": "False",

"Authority": "https://fqdn:5009",

"Audience": "openlm.server.api",

"AuthProvider": "",

"ClientId": "openlm.server.client",

"ClientSecret": "c0936471-0f6a-44af-9078-99d150683cad",

"ClientScope": "openlm.cloud.scope openlm.ugs.read.scope IdentityServerApi openlm.dss.scope openlm.etlmanager.scope",

"TokenEndpoint": "/connect/token"
Warning: Restart OpenLM SLM Service every time you turn on/off Security Mode to reflect the changes.
Configure Directory Sync to work in a secure environment
- In the Identity Service UI, select the Security Configuration tab.
- Proceed with turning on the DSS toggle switch.
- Provide the Fully Qualified Domain Name for OpenLM SLM Machine (Ex: http://FQDN:7026).
- Click Save.
Note: this will enable Security, Client ID, and Secret Key in the appsettings.json file. C:Program FilesOpenLMOpenLM Directory Synchronization Service
- Navigate to Services and DSS Service.
Restarting Services is mandatory to get a new Client ID and Secret Key.
Configure Reports Scheduler to work in a secure environment
- In the Identity Service UI, select the Settings tab, then Security Configuration.
- Turn on the Reports Scheduler toggle switch.
- Provide the Fully Qualified Domain Name for OpenLM SLM Machine (Ex: http://FQDN:8888).
- Click Save.
Note: this will enable Security, Client ID, and Secret Key in the report_scheduler.properties file. C:*Program Files***OpenLM****OpenLM Reports Scheduler**\
- Go to Windows Services and restart Reports Scheduler Service.
Restarting Services is mandatory to get a new Client ID and Secret Key.
Configure ServiceNow Adapter to work in a secure environment
- In the Identity Service UI, select the Security Configuration tab.
- Turn on the ServiceNow toggle switch.
- Provide the Fully Qualified Domain Name for OpenLM SLM Machine (Ex: http://FQDN:5005).
- Click Save.
Note: this will enable Security, Client ID, and Secret Key in the appsettings.json file. C:/Program Files/OpenLM/OpenLM External Platforms/Service
- Go to Services and restart ExternalPlatformServices Service.
Restarting Services is mandatory to get a new Client ID and Secret Key.
Account in Identity Service and Role&Permissions
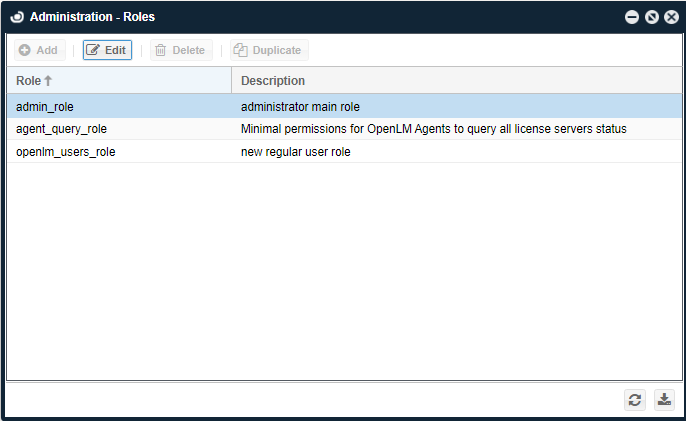
If your license file doesn't have Role&Permission, Identity Service still has basic Roles to assign users. It is presented in edit-only mode (No Adding, Deleting, Duplicating).
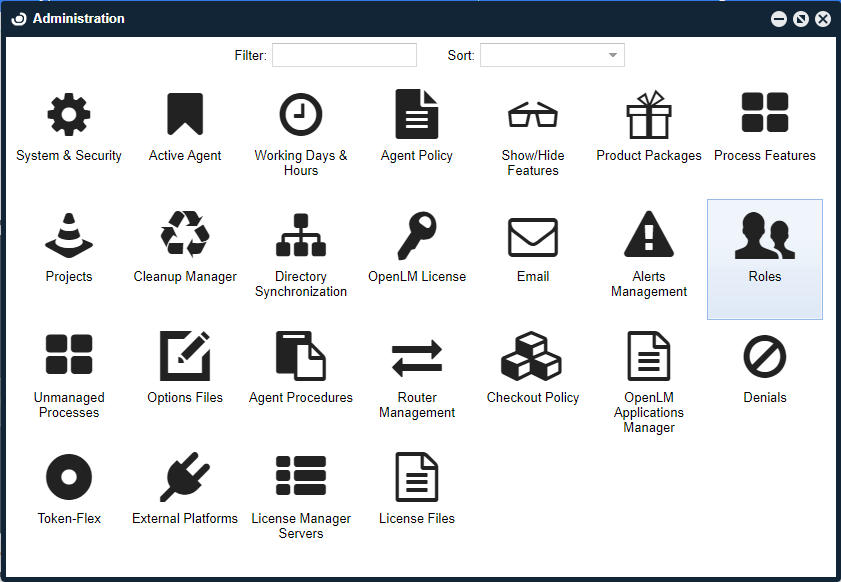
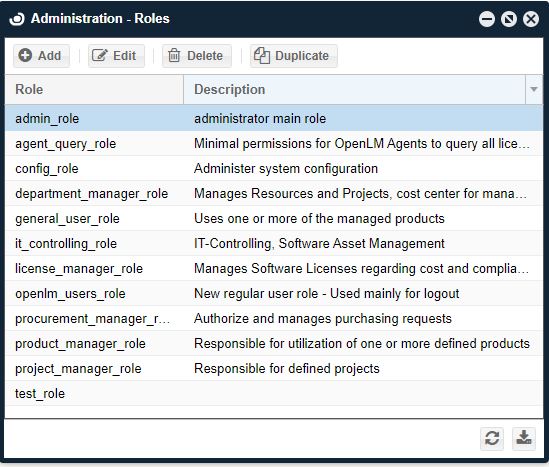
But if your license file has Role&Permission, it can give you full range and functionality of Roles like the below.
Please consult with our Sales at sales@openlm.com if you want full functionalities.
The first default account is Admin in Identity Service. But if you want to create a new user, please follow the below steps.
- Create a User Account in Easyadmin User Interface: navigate to EasyAdmin User Interface→Start→Users&Groups→Users→Add User→Input the User's data→Save.
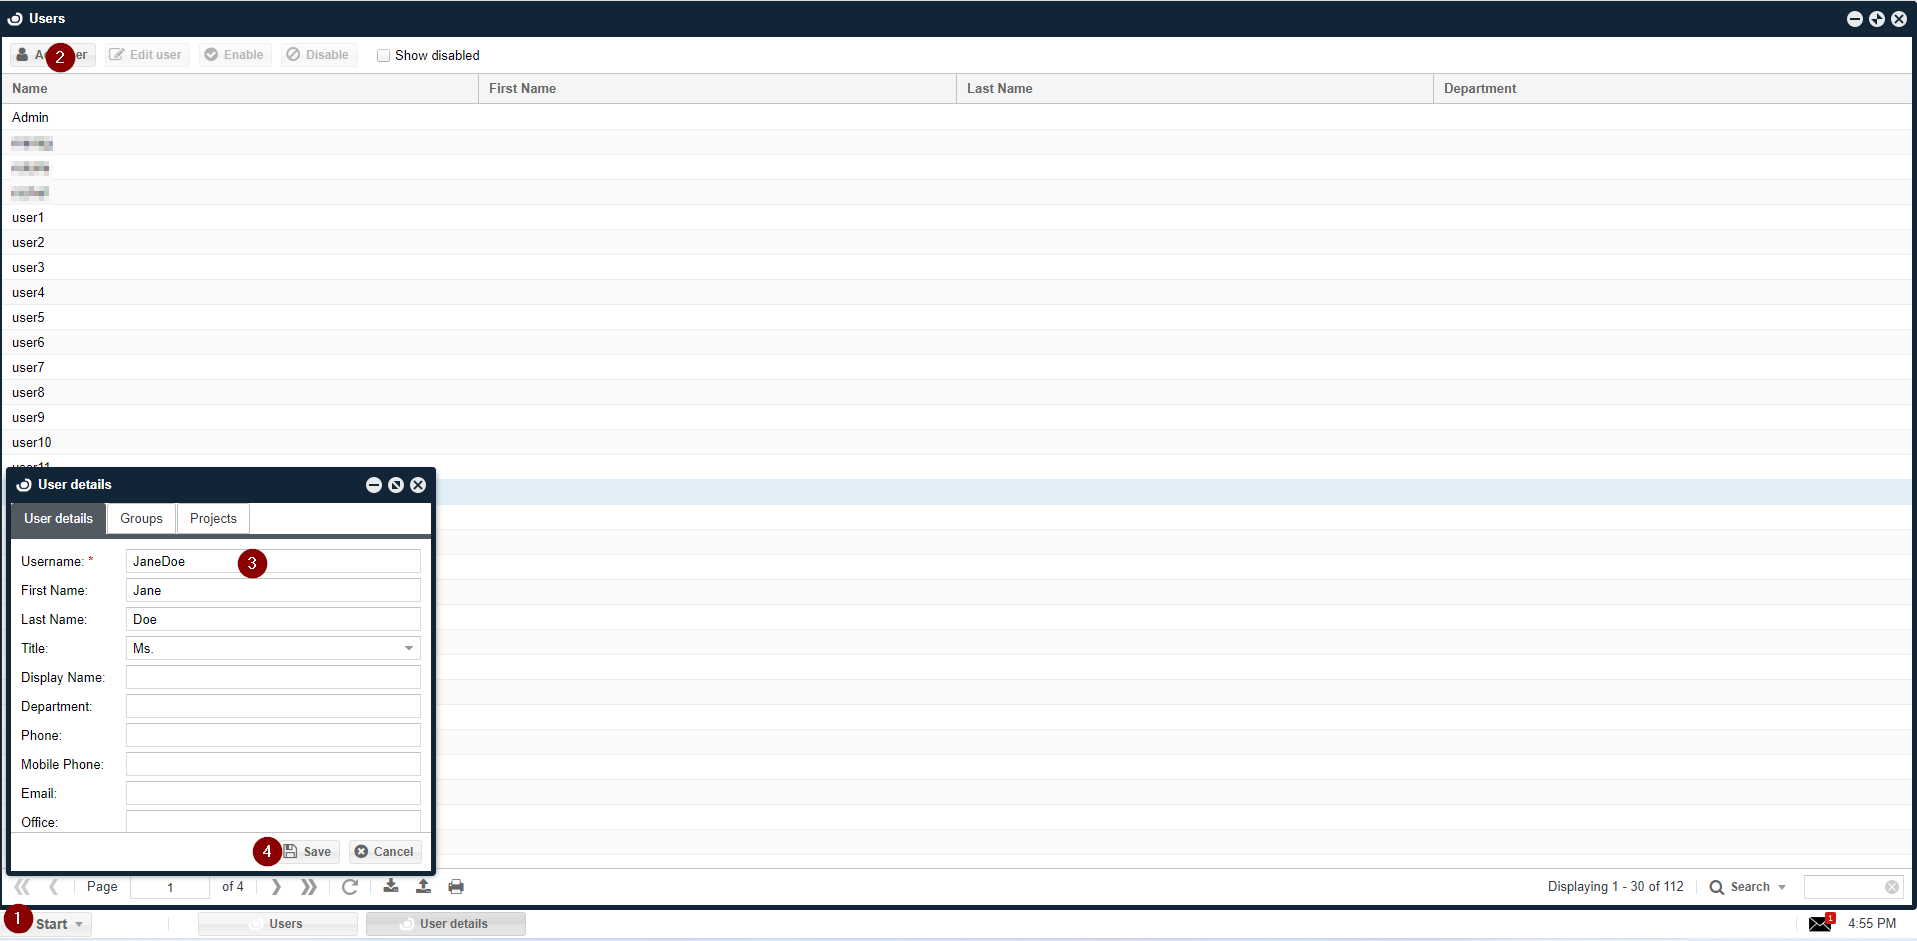
- Assign the Role to the user to login in EasyAdmin User Interface. (for more insights, please see the full Roles&Permissions document.
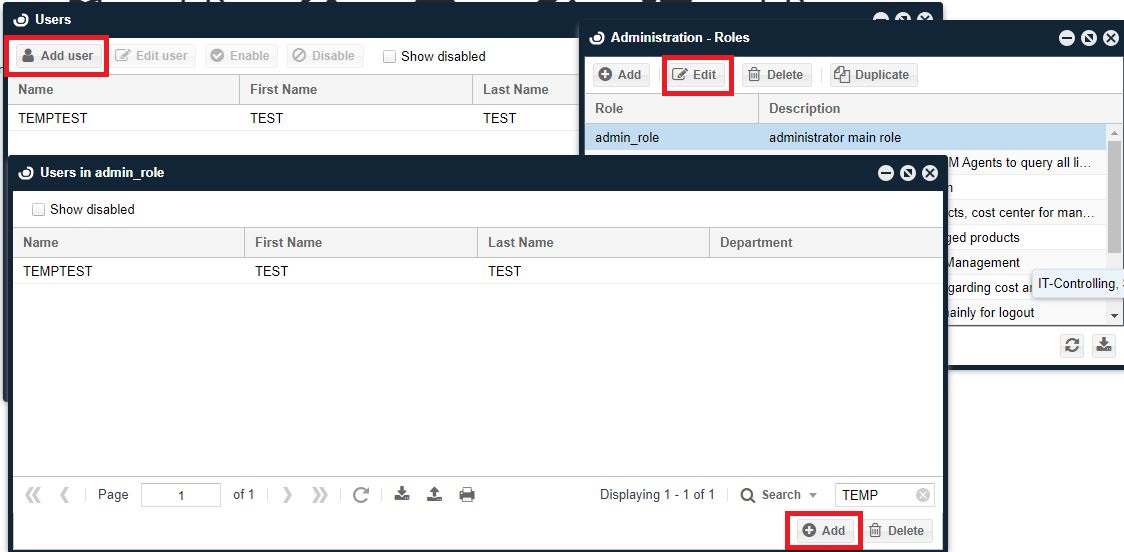
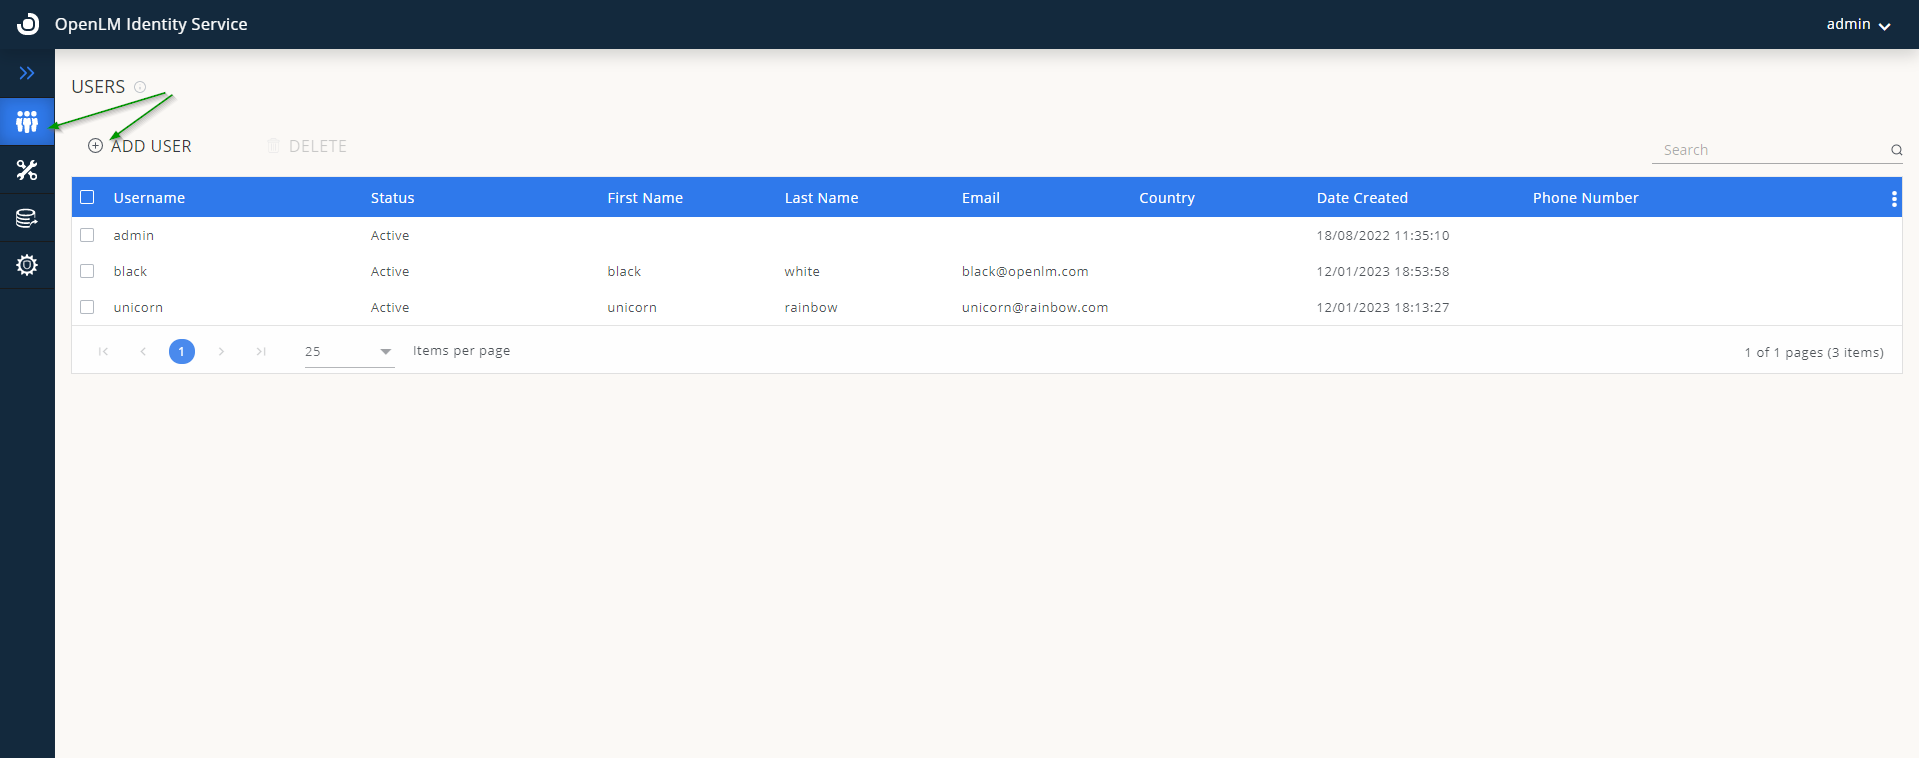
- Navigate to your Identity Service instance→ Users tab→click Add User and create the same user as in the EasyAdmin User Interface→Click Save.
→
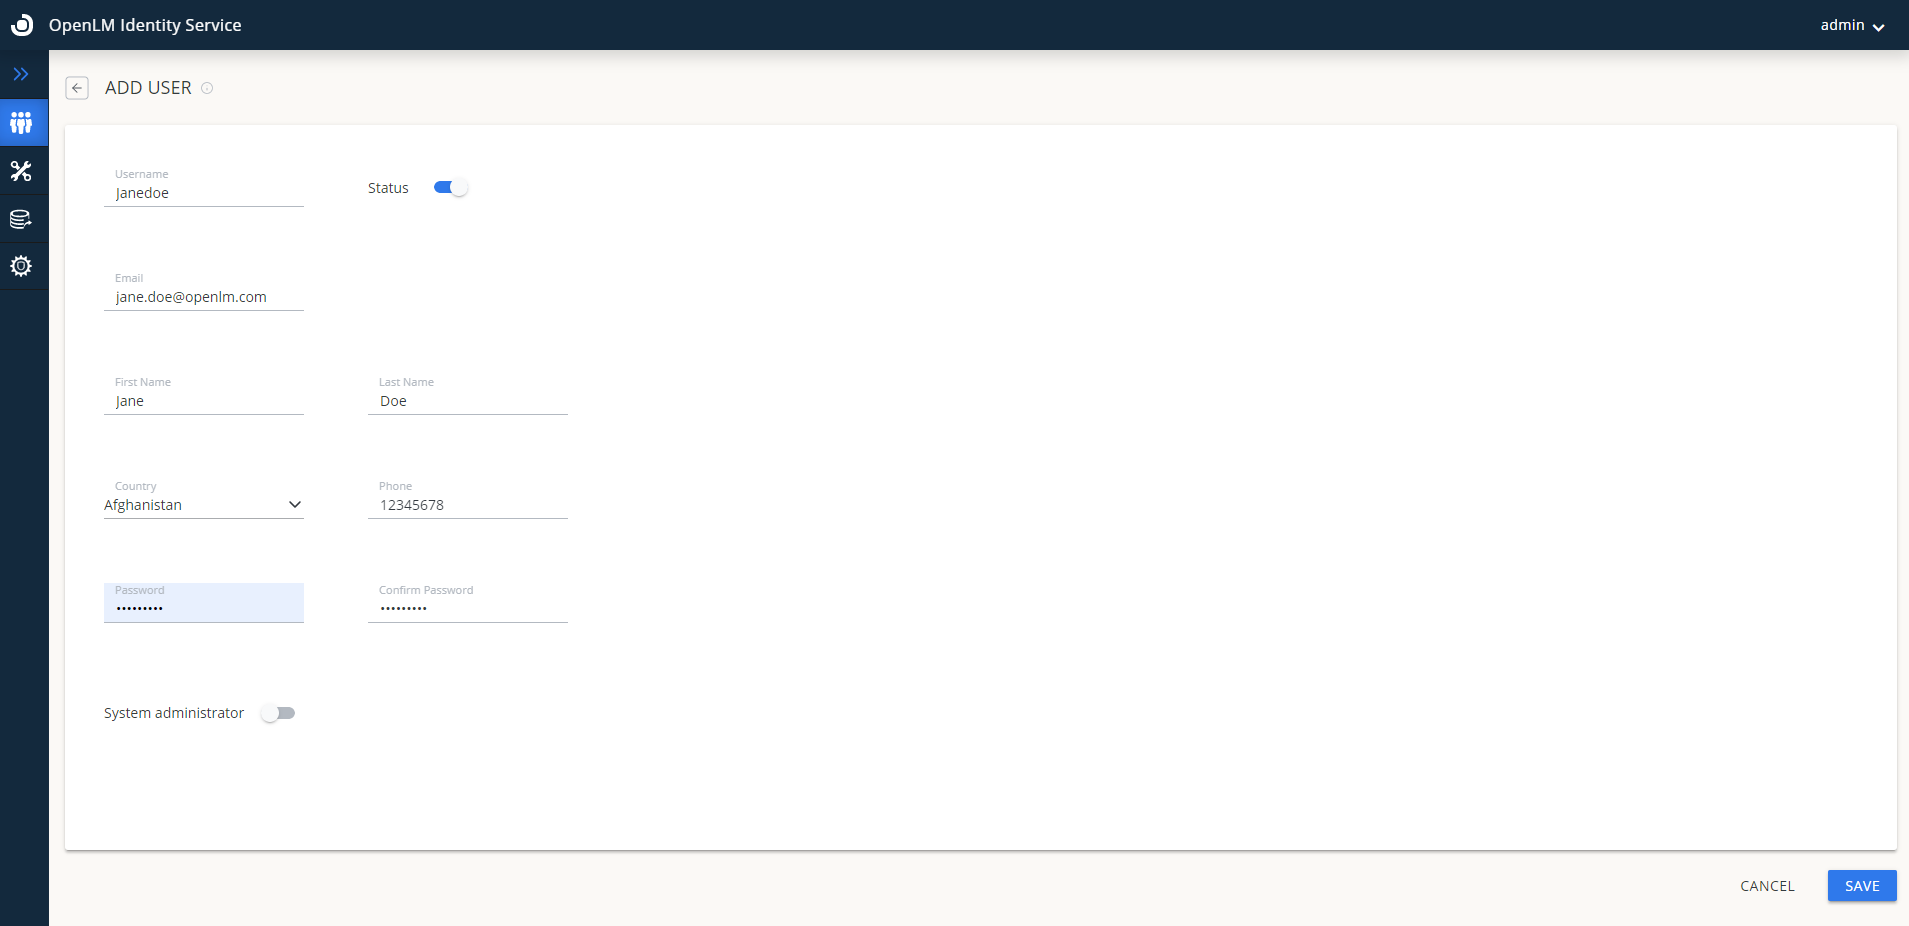
Note: If you want the user to be able to edit Identity Service settings, enable the System Administrator toggle button.
- Login to the EasyAdmin User Interface with the user account.
Right now, we have to manually add the same user in each EasyAdmin User Interface and Identity Service UI. Only the system administrator of Identity Service UI can change the passwords.
Configuring each component in Security Mode
Please note that, after you enable OpenLM SLM Security mode in Identity Service, each connected component needs Client ID and Secret Key (Authorization Json file).
Navigate to EasyAdmin User Interface → Security&Service→Security Tab→Authorization Tab.
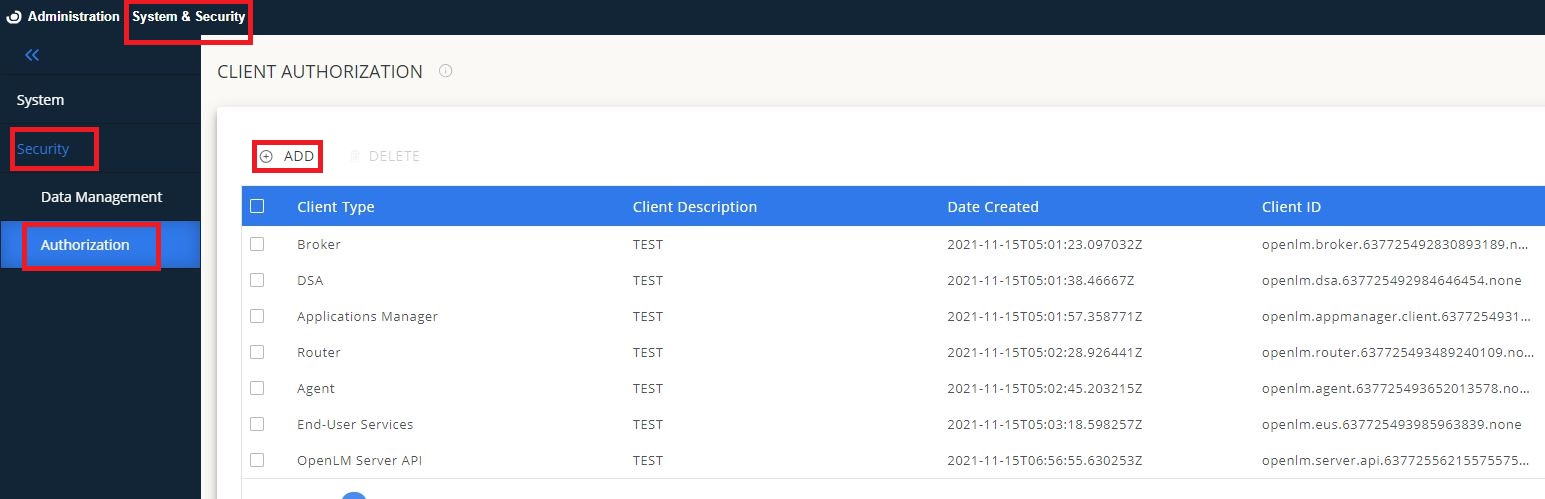
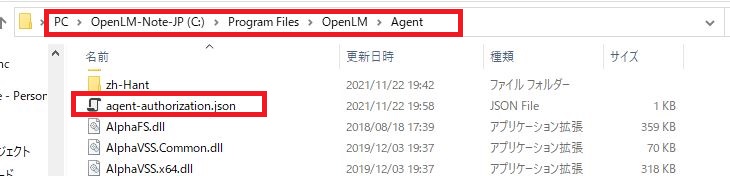
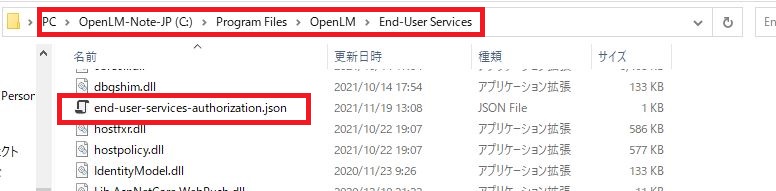
Add each component you are using and download the Authorization Json file.
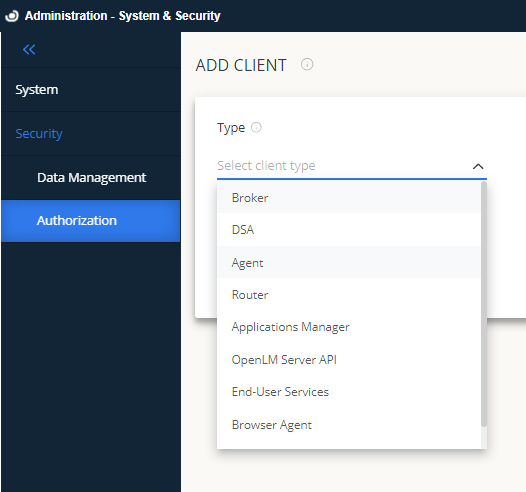
Import the Json file while installing each component or put it under the installation folder.
(This depends on each component)

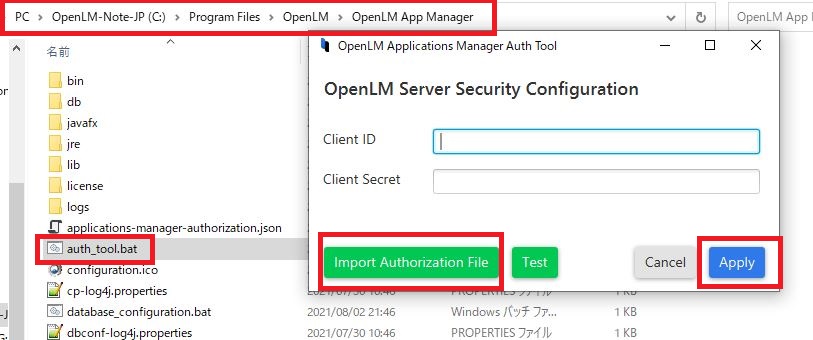
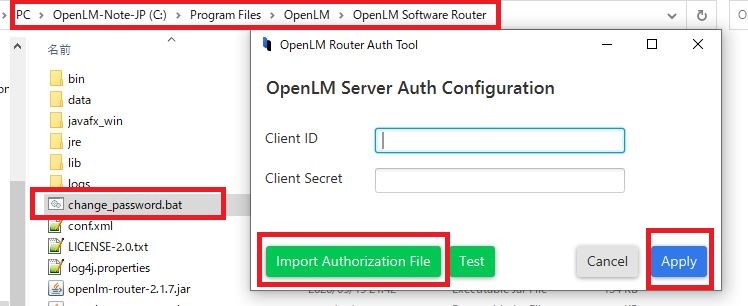
Restart each service in Windows Service with OpenLM SLM & Identity Service services running.
Please note that the OpenLM SLM needs to read the Client ID and Secret Key info from each component.
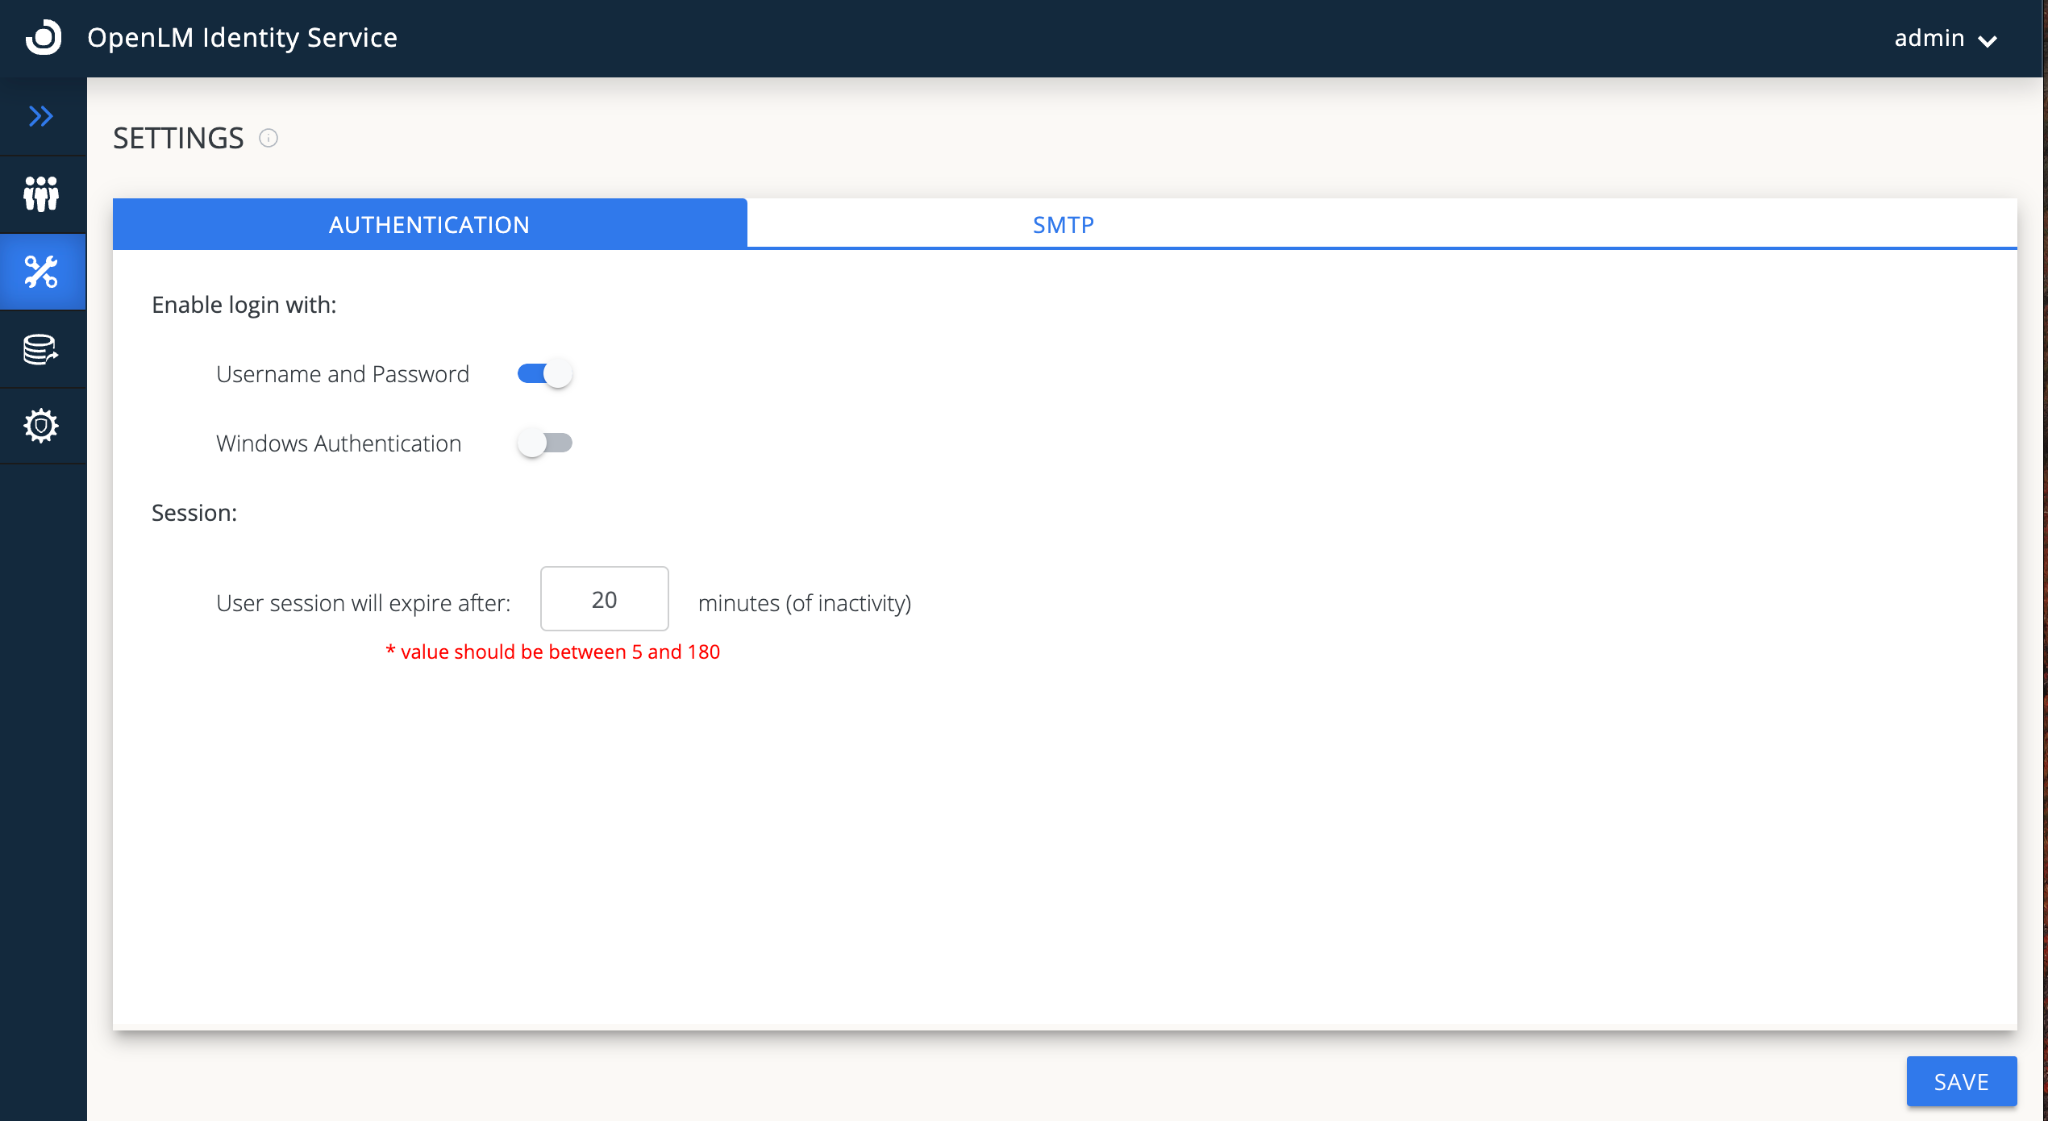
Configuring username and password
Do not turn off the username and password toggle button unless desired to deactivate security.
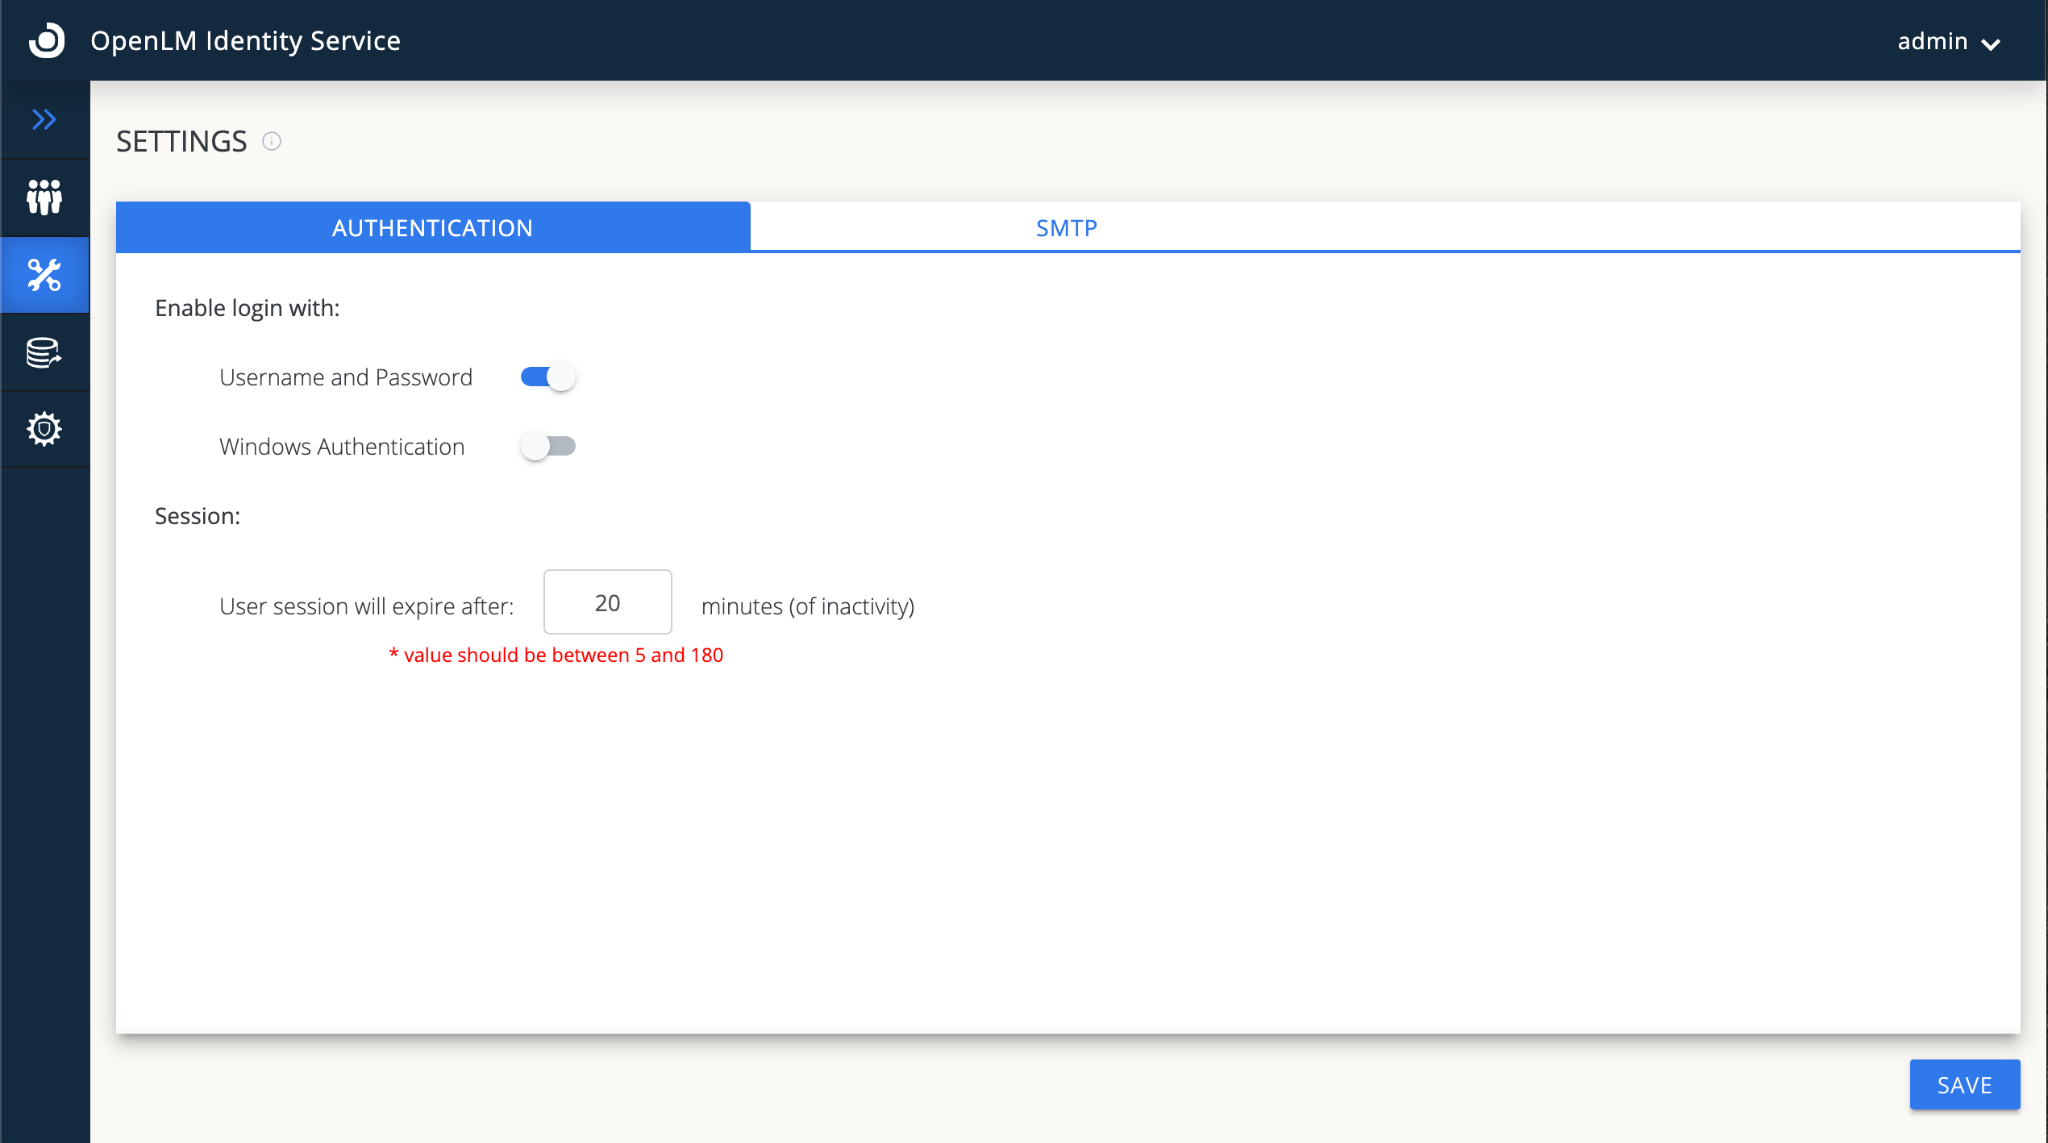
Configuring Windows Authentication
Please refer to this document.
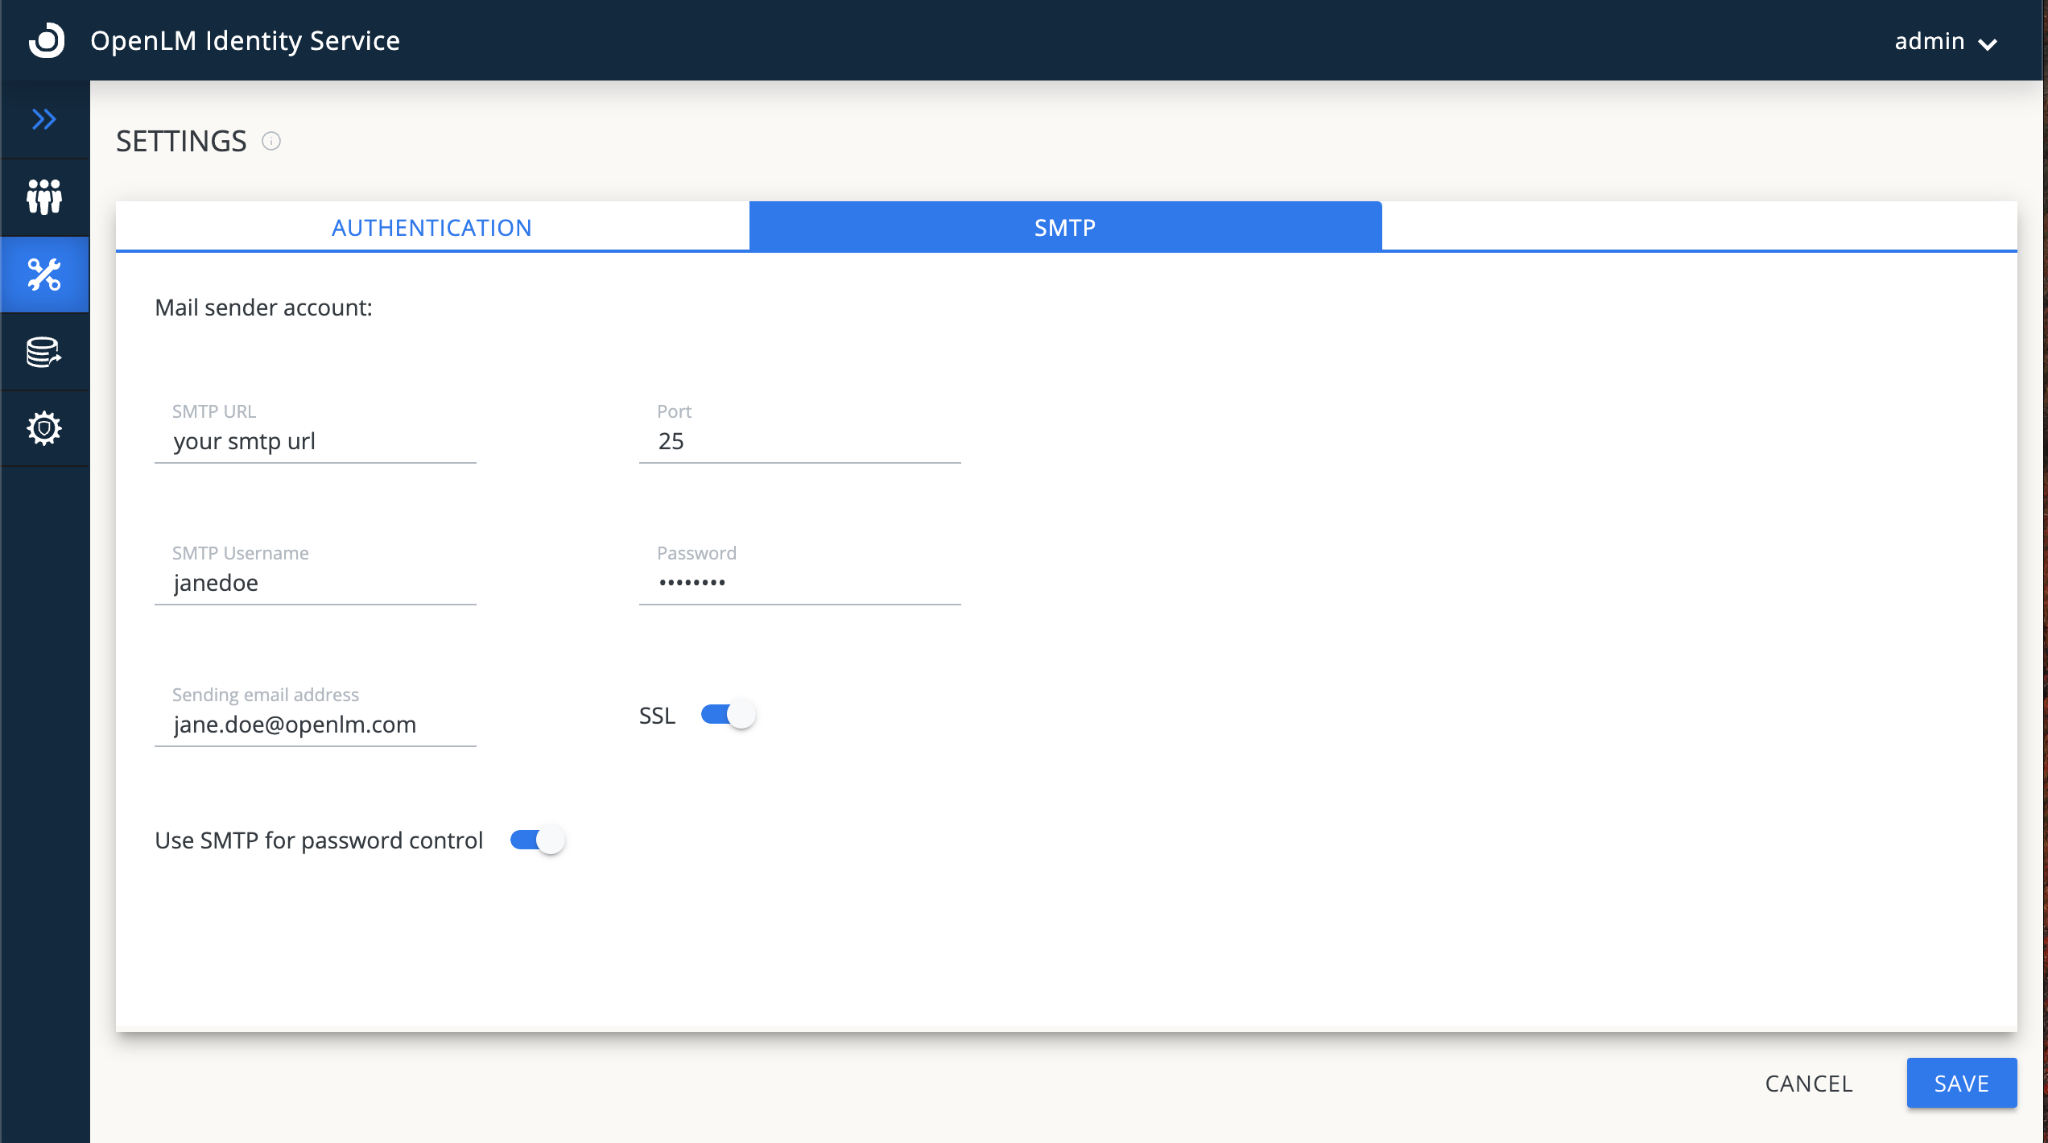
Configuring SMTP
When resetting the password if you forget your account, this button lets you set it back through your email address.

Configuring session time
You can configure the Screen time in this tab and then use your credentials to log in.
Configuring External Providers:
Okta SSO.
Azure Active Directory.
AD FS.
Troubleshooting
1 thought on "Identity Service Configuration"
-

Mathias says:
Hello OpenLM Support, can you please explain the session timeout and its effects on the OpenLM modules in more detail? I have played around a bit, but in both the OpenLM Identity Service Browser tab and OpenLM EasyAdmin browser tab, setting a timeout of 5 minutes has no effect after nearly 6 min. Greetings, M.
June 12, 2024 at 1:37 pm