

About End-User Services (Personal Dashboard) and Workstation Agent
This document covers the OpenLM End User Services and Workstation Agent installation process. The Workstation Agent is a component that can be installed on any number of workstations to enhance the end-user experience and control it. The goal is to allow administrators to obtain additional information regarding license usage on individual workstations which can be used for more effective resource management.
The capabilities include, but are not limited to:
- Providing administrators with the capability of monitoring end-user application idle times, and releasing idle licenses as a result.
- Providing end-users with a license availability interface.
- Reporting on IP, project information, and workstation availability.
The OpenLM Personal Dashboard is an additional OpenLM interface that comes to educate engineering application users and raise their awareness of the way the licenses in the organization are consumed.
The user will be able to see different information on his or her license usage, get tips to improve consumption habits, and have a benchmark against the average license consumption in his or her default group/of the –organization.
The following is a comprehensive guide on how to install and configure the Personal Dashboard and the Agent.
Please follow the installation order:
1. End-User Services
2.Workstation Agent (Old Name->OpenLM Agent)
Installing the Personal Dashboard
- Obtain the installer from our website: https://www.openlm.com/download/. Double-click on it to launch the installation. A welcome screen for the OpenLM End-User Services Installation Wizard will appear. Click Next.
- Read the license agreement and choose one of the following options (A, B, or C):
A. If you do not want to continue the installation, click Cancel. A confirmation screen will appear with a warning that you will be exiting the installer without completing the installation. Click Yes to exit the installer.B. Click Back to return to the Setup Wizard window.C. In order to continue with the installation, check the “I Agree” box. This will make the Next button active. Click Next to advance to the OpenLM Extensions screen (see Figure 4).
- Select a folder you wish to install the OpenLM End-User Services to. Click Next to continue with the default path (which is recommended).
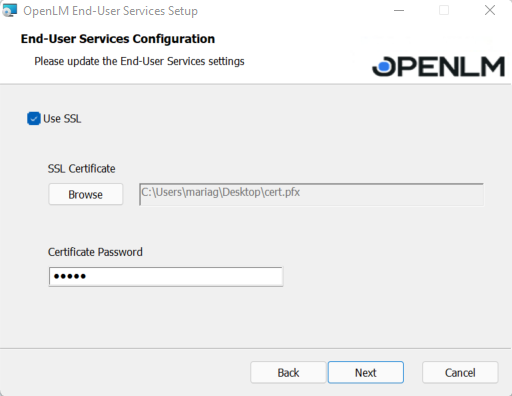
- If you want to connect an SSL certificate, check the box, click Browse to import the SSL certificate then provide the certificate’s password. If no SSL certificate is used, simply click Next.
- Enter the OpenLM SLM address and port number. If an SSL connection is used, check the box. Also, to assure the input data is correct, click the Check Connectivity button. If successful, a pop-up will appear:
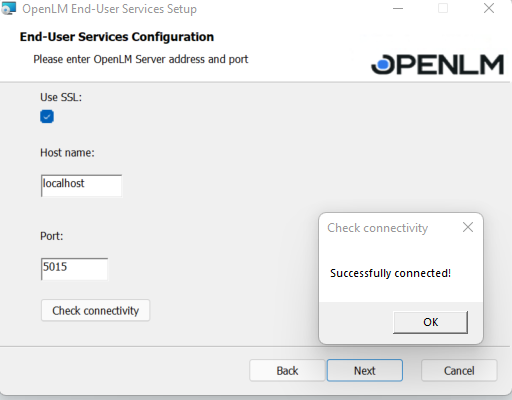
Test connectivity successful - Click OK to close the pop-up, then click Next.
If any of the input data is wrong, this pop-up will appear:
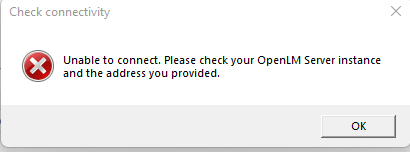
Failed connection to the OpenLM SLM - The next screen will require you to authorize. If you do not use security, select “I am not using Security” and proceed to step 8. Otherwise, follow step 13.
- Open up the EasyAdmin then click on the Start →Administration:
- In the Administration Panel, select System&Security:
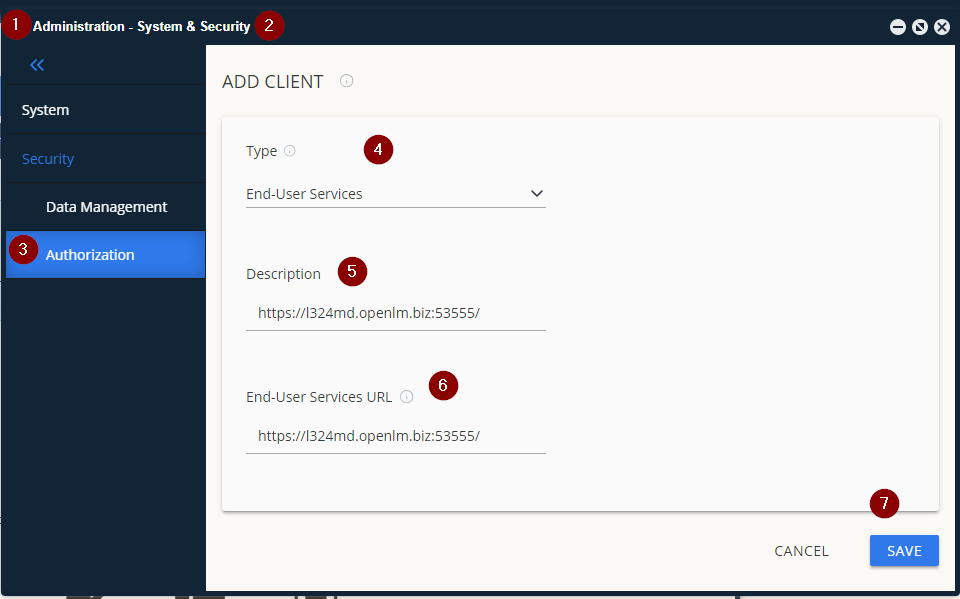
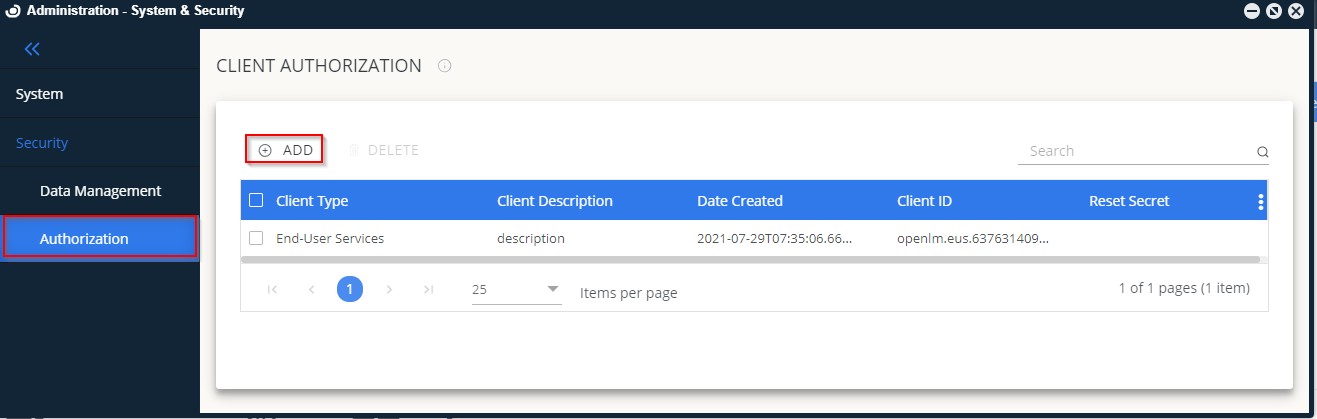
- Click on the Authorization tab →ADD CLIENT. Then, from the drop-down list select End-User Services. Fill in a description and provide the End-User Services URL (for security and authorization purposes, it should be in the following format: protocol://hostmane:port). Click Save:
- In the next step, the authorization file will be generated. Download the JSON file or copy the Client ID and the Secret Key. Go back to the installation, click Next to browse to the downloaded JSON authorization file or input them manually:
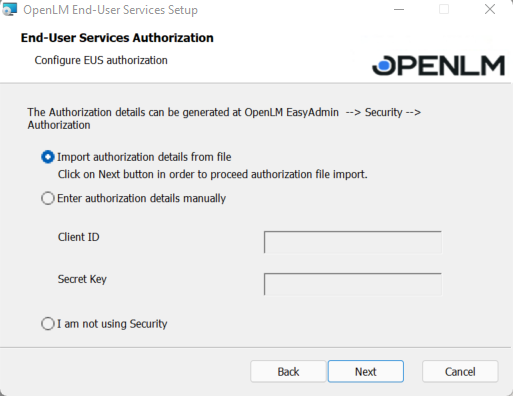
- Click Next.
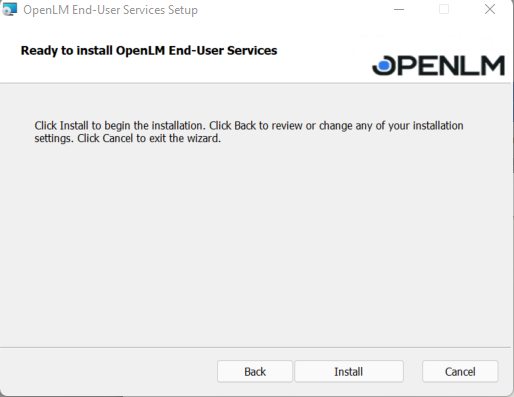
- All the configuration steps have been passed; now click the Install button:
In case you missed any configuration, select the Back button.
- When the installation is completed, hit the Finish button.
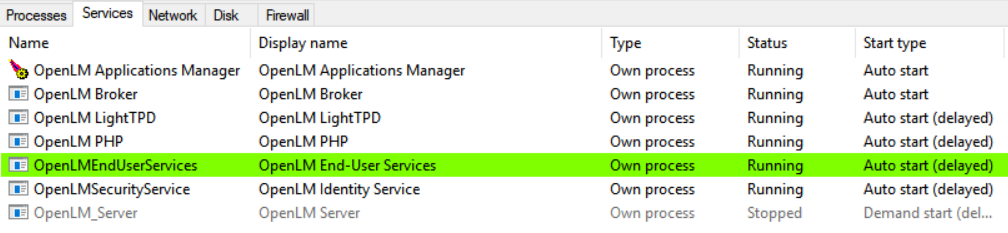
OpenLM End-User Services has been installed as a Windows Service:
Silent End User Services installation
- Open a command prompt with administrative privileges. The command prompt can be run in several ways:
A. Type ‘cmd’ in the taskbar search field and press RETURN on the keyboard. Right-click “Command Prompt” in the results list and choose “Run as administrator” from the popup menu.B. Launch the EXE directly by right-clicking and choosing “Run as administrator” from the popup window.C. Navigate through the Start menu. Right-click on Start then choose Windows PowerShell (Admin). This will open the Windows PowerShell in administration mode.
- At the command prompt, enter the desired parameters for the installation. This will be in the format as follows:
msiexec /i "a path to msi packageOpenLM.EndUserServices.Setup.msi" SERVER_USE_SSL=true SERVER_ADDRESS=some_address SERVER_PORT=5015 EUS_USE_SSL=true SSL_CERTIFICATE_PATH="a path to ssl certificatecertificate.pfx" SSL_CERTIFICATE_PASSWORD=some_password /q
Example: Install End-User Services with a Server address, port, SSL; End-User Services SSL:
msiexec /i "C:Program FilesOpenLMOpenLM.EndUserServices_dev_xxx.msi" SERVER_USE_SSL=true SERVER_ADDRESS=localhost SERVER_PORT=5015 EUS_USE_SSL=true SSL_CERTIFICATE_PATH="C:Program Filesssl-certificate.pfx" SSL_CERTIFICATE_PASSWORD=SSL123. /q
Installing the Agent using Setup Wizard
- Obtain the installer from our website: https://www.openlm.com/download/. Double-click on it to launch the installation.
- Read the license agreement and choose one of the following options (A, B, or C):
A. If you do not want to continue the installation, click Cancel. A confirmation screen will appear with a warning that you will be exiting the installer without completing the installation. Click Yes to exit the installer.B. Click Back to return to the Setup Wizard window.C. Check the “I Agree” box to continue with the installation. This will make the Next button active. Click Next to advance to the OpenLM Extensions screen.
- The installer automatically checks for the presence of licensed software packages. If applications from the OpenLM Extensions list on the screen are installed, they will be detected automatically, and checkboxes will be activated and checked by default. Review the options and uncheck only if it is not required to monitor the packages. Click Next.
- Click Next to see the Select Installation Folder screen. This will be populated with a default path for the installation. If you wish to change the path, click the Change… button and select a new folder. Click Next.
- Select the Operation mode: Cloud or On-Premise. Click Next.
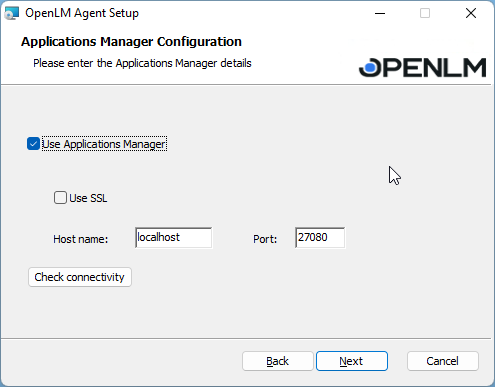
- If Application Manager is used, check the box, otherwise leave it empty.a If SSL protocol is used, check the box, otherwise leave it empty.
b Provide the Application Manager hostname and port then Check Connectivity.
- Click Next.
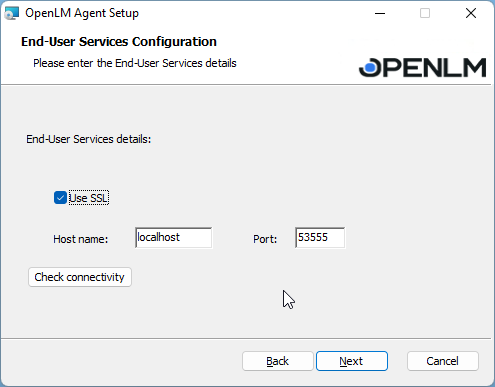
- Configure End-User Services’ address and port. Check the Use SSL if needed. If the detected by default do not match your needs, make the changes accordingly, then click Next:
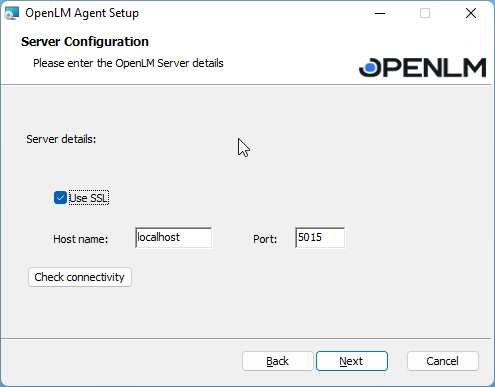
- In the next prompt, configure the Server’s address and port. Check the Use SSL if needed. If the detected by default do not match your needs, make the changes accordingly, then click Next:
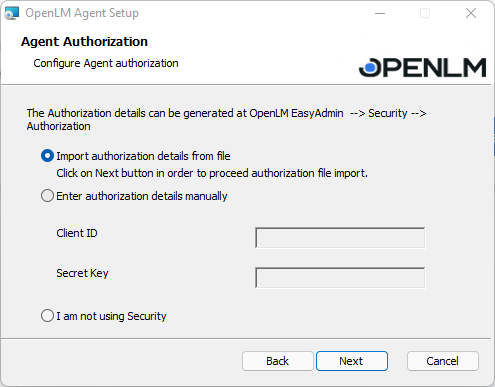
- The next step is to define the authorization method. In case you do not use the Identity Service, select the I am not using Security radio button and proceed to step 12. Otherwise, choose to import or input manually the JSON Authorization file (step 11).
- The Identity Service users will open up the EasyAdmin → System&Security→ Authorization→ ADD.
From the drop-down list, select Agent to generate the Authorization file and import the data.
- The configuration is ready, hit the Install button.
- Once the installation is completed, hit the Finish button.
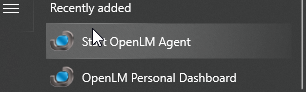
- When the Agent’s installation is completed, the Personal Dashboard will open up automatically (otherwise, find the icon in the Start Menu).
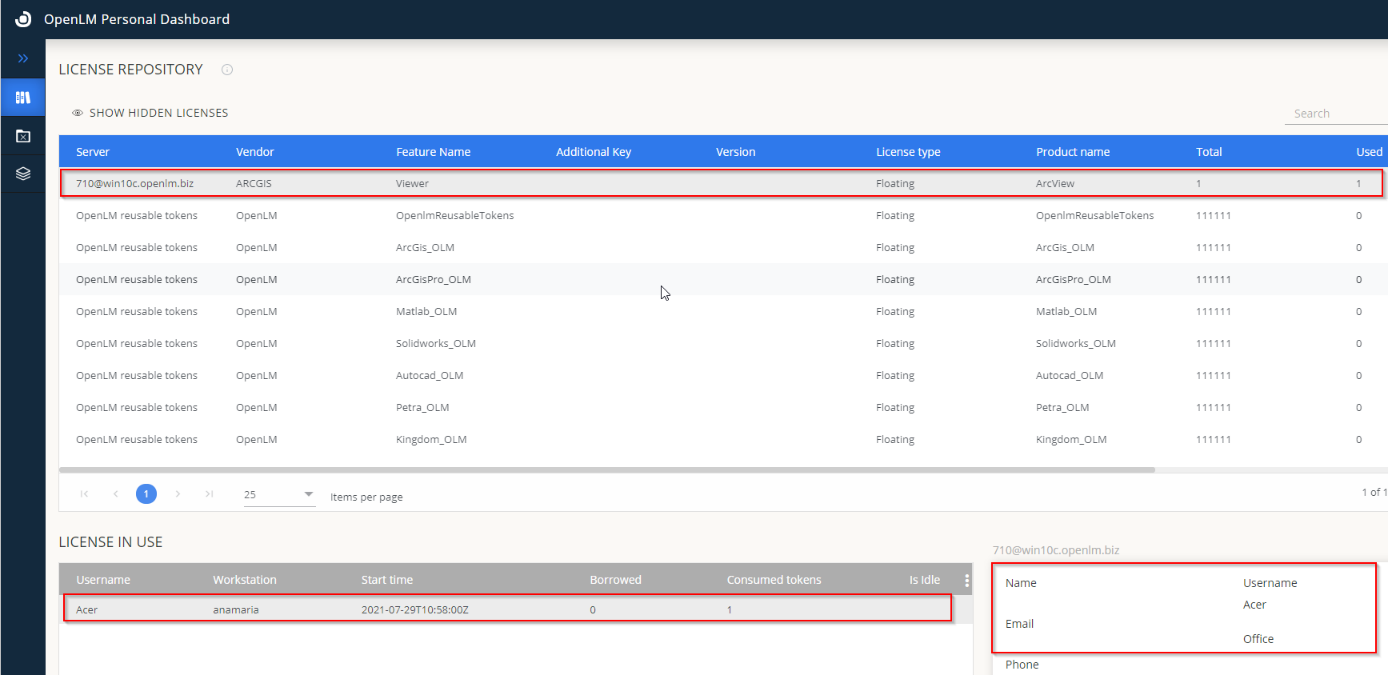
There is access to the license repository, with information about the currently consumed licenses, the person using them, what features, idle time, and contact details.
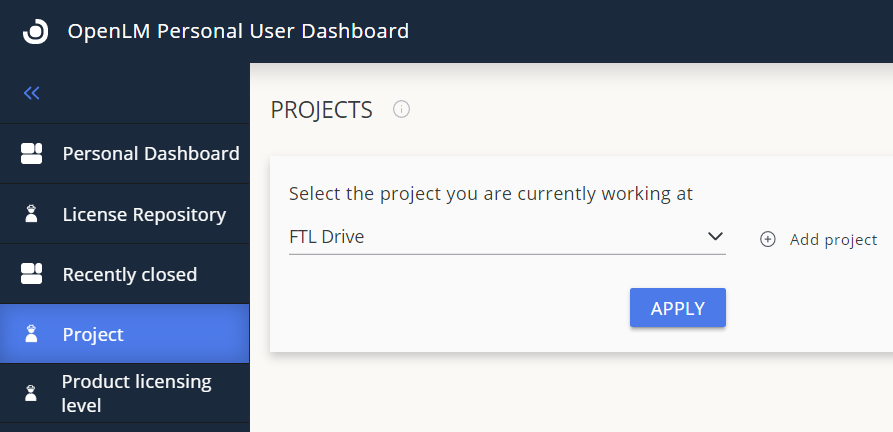
Also Recently closed processes, Project management, and Product licensing level (ArcGIS):
Troubleshooting
If you get the following error when trying to install the ArcGIS extension:

add the NETFRAMEWORK35=”1″ param to the command line arguments line when starting the installer, like this:
msiexec /i "C:\OpenLM.NewAgent.Setup.22.2.1.1912.msi" AUTHORIZATION_TYPE="1" AUTHORIZATION_FILE_PATH="C:\agent-authorization.json" INSTALL_ARCGIS=1 NETFRAMEWORK35="1" /q
Silent Agent installation
- Open a command prompt with administrative privileges. The command prompt can be run in several ways:
A. Type ‘cmd’ in the taskbar search field and press RETURN on the keyboard. Right-click “Command Prompt” in the results list and choose “Run as administrator” from the popup menu.B. Launch the EXE directly by right-clicking and choosing “Run as administrator” from the popup window.C. Navigate through the Start menu. Right-click on Start then choose Windows PowerShell (Admin). This will open the Windows PowerShell in administration mode.
- At the command prompt, enter the desired parameters for the installation. This will be in the format as follows:
Install with import authorization:
msiexec /i "a path to msi packageOpenLM.NewAgent.Setup.msi" AUTHORIZATION_TYPE="1" AUTHORIZATION_FILE_PATH="a path to security settings json filesetting json file" /q
Example:
msiexec / i "C:Program FilesOpenLM OpenLM.NewAgent.Setup.22.1.11.1010.msi" AUTHORIZATION_TYPE = "1" AUTHORIZATION_FILE_PATH = "C:Program FilesOpenLM agent-authorization.json" / q
Install without security:
msiexec /i "a path to msi packageOpenLM.NewAgent.Setup.msi" AUTHORIZATION_TYPE="3" /q
Additional parameters:
USE_APP_MANAGER=true/false
APP_MANAGER_USE_SSL=true/false
APPMANAGER_ADDRESS=FQDN
APPMANAGER_PORT=27080
ENDUSERS_SERVICES_USE_SSL=true/false
ENDUSERS_SERVICES_ADDRESS=FQDN
ENDUSERS_SERVICES_PORT=53555
SERVER_USE_SSL=true/false
SERVER_ADDRESS=FQDN
SERVER_PORT=5015
INSTALLFOLDER
INSTALL_ARCGIS=”1″
INSTALL_ARCGISPRO="1"
INSTALL_AUTOCAD="1"
INSTALL_MATLAB="1"
INSTALL_SOLIDWORKS="1"
CREATE_AGENT_PROGRAM_MENU_SHORTCUT=false
AppManager and SSL connection
msiexec /i "a path to msi packageOpenLM.NewAgent.Setup.msi" USE_APP_MANAGER=true APP_MANAGER_USE_SSL=true APPMANAGER_ADDRESS=FQDN APPMANAGER_PORT=27080 /q
Example:
msiexec /i “C:Program FilesOpenLMOpenLM.NewAgent.Setup.22.1.11.1010.msi” USE_APP_MANAGER=true APP_MANAGER_USE_SSL=true APPMANAGER_ADDRESS=FQDN APPMANAGER_PORT=27080 /q
Example:
Server Address, port, EUS address, AppManager Address, port, SSL
msiexec /i "a path to msi packageOpenLM.NewAgent.Setup.msi" SERVER_ADDRESS=localhost SERVER_PORT=5015 SERVER_USE_SSL=true ENDUSERS_SERVICES_ADDRESS=localhost ENDUSERS_SERVICES_PORT=53555 ENDUSERS_SERVICES_USE_SSL=true USE_APP_MANAGER=true APPMANAGER_ADDRESS=localhost APPMANAGER_PORT=27080 APP_MANAGER_USE_SSL=true INSTALL_ARCGIS="1" INSTALL_AUTOCAD="1" INSTALL_MATLAB="1" /q
End-User Services (Personal Dashboard) on Linux
The End-User Services is delivered as DEB, RPM or .tar.gz packages.
Choose the one you require and follow the instructions below:
Installing End-User Services using the .deb package:
sudo apt install openlm-eus_xxxx_amd64.deb
On CentOS, install the End-User Services using the provided .rpm:
sudo yum install openlm_eus-xxxxx.x86_64.rpm
Installation using .tar.gz:
Unpack the .tar.gz:
mkdir eus
tar -xf openlm_eus_xxxxx.tar.gz -C eus
Give execute permission and run the script:
cd eus
sudo chmod +x install.sh
sudo ./install.sh
Mandatory steps to perform after any of the installations:
Edit End-User Services’ settings. You need to specify your OpenLM SLM hostname and port:
sudo nano /opt/openlmeus/settings.json
If you are using OpenLM SLM with Identity, security also must be enabled in settings.json.
Also, you need to replace /opt/openlmeus/end-user-services-authorization.json file with the one you have downloaded in EasyAdmin or edit clientId and clientSecret manually.
Restart the End-User Services’ service for the changes to take effect and check its status:
sudo systemctl restart openlmeus
sudo systemctl status openlmeus
Installing the Agent on Linux
! It is mandatory to install End-User Services first.
The Agent can be installed using the provided DEB, RPM or .tar.gz packages.
Install the Agent using the .deb package:
sudo apt install openlm-agent_xxx_amd64.deb
On CentOS, install the Agent using the provided .rpm:
sudo yum install openlm_agent-xxxx.x86_64.rpm
Or install using .tar.gz:
Unpack the .tar.gz:
mkdir agent
tar -xf openlm_agent_dev_xxxx.tar.gz -C agent
Give execute permission and run the script:
cd agent
sudo chmod +x install.sh
sudo ./install.sh
Mandatory steps to perform after any of the installations:
Edit Agent’s settings:
sudo nano /opt/openlmagent/settings.json
It is necessary to specify your OpenLM SLM, End-User Services and Applications Manager hostnames and ports.
If you are using OpenLM SLM with Identity: security must be enabled also in settings.json. Also, you need to replace /opt/openlmagent/agent-authorization.json file with the one you have downloaded in EasyAdmin or edit clientId and clientSecret manually.
Restart the Agent’s service for the changes to take effect and check Agent’s status:
systemctl --user restart openlmagent
systemctl --user status openlmagent