Reprise RLM
This guide explains how to configure OpenLM to interface with the Reprise License Manager (RLM), monitor license usage, and obtain license statistics.
Requirements
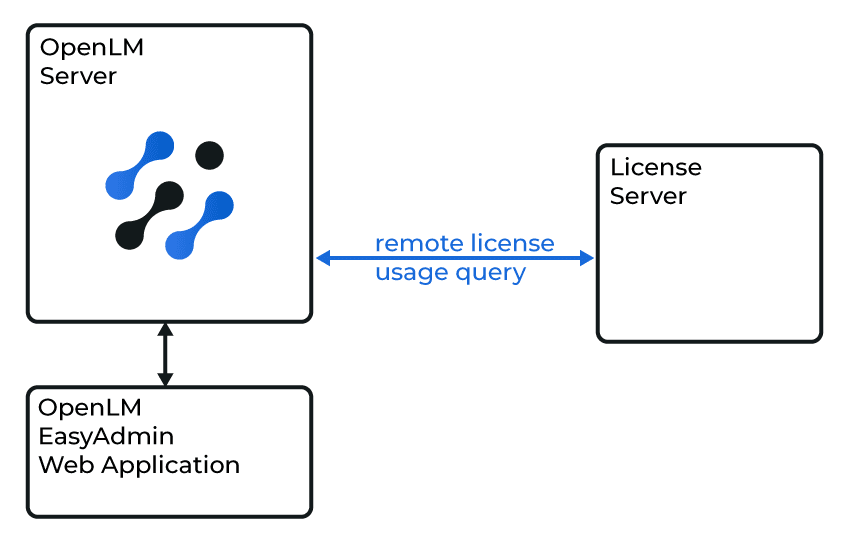
- OpenLM Server must be installed on a machine in your organization.
- OpenLM Broker on the RLM license server is optional but recommended. The Broker adds advanced monitoring and control features.
Monitoring capabilities
Capabilities depend on how you query the RLM license server:
-
Through OpenLM Server only
- License totals
- License usage data
-
Through OpenLM Broker
- Everything above, plus:
- Buffered communication to handle network failures
- Remote start/stop of the license manager service
- License denial information
- 1-second resolution for usage reports
- Read RLM license and log files
- View RLM license file content in EasyAdmin
Interface RLM using OpenLM Server only
OpenLM Server configuration
- Open EasyAdmin:
- From Windows Start → OpenLM → EasyAdmin, or
- In a browser:
http(s)://<FullyQualifiedDomainName>:5015.
- Go to Start → Administration → License Manager Servers.
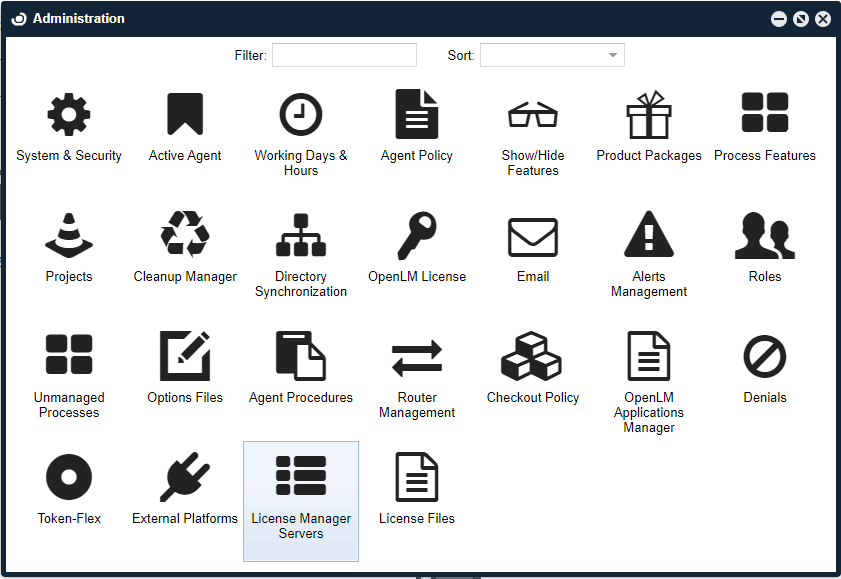
- The License Manager Servers window opens.
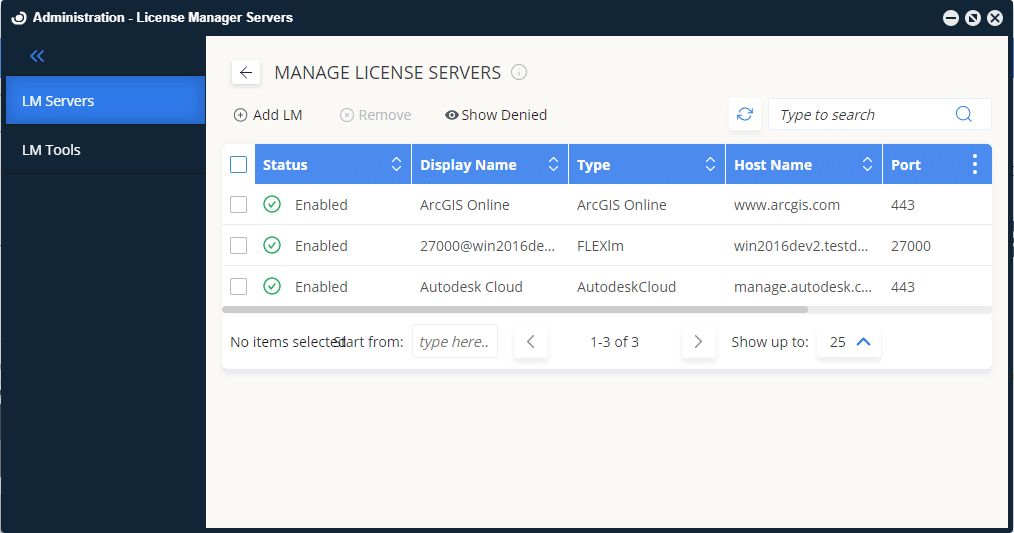
- Click Add LM.
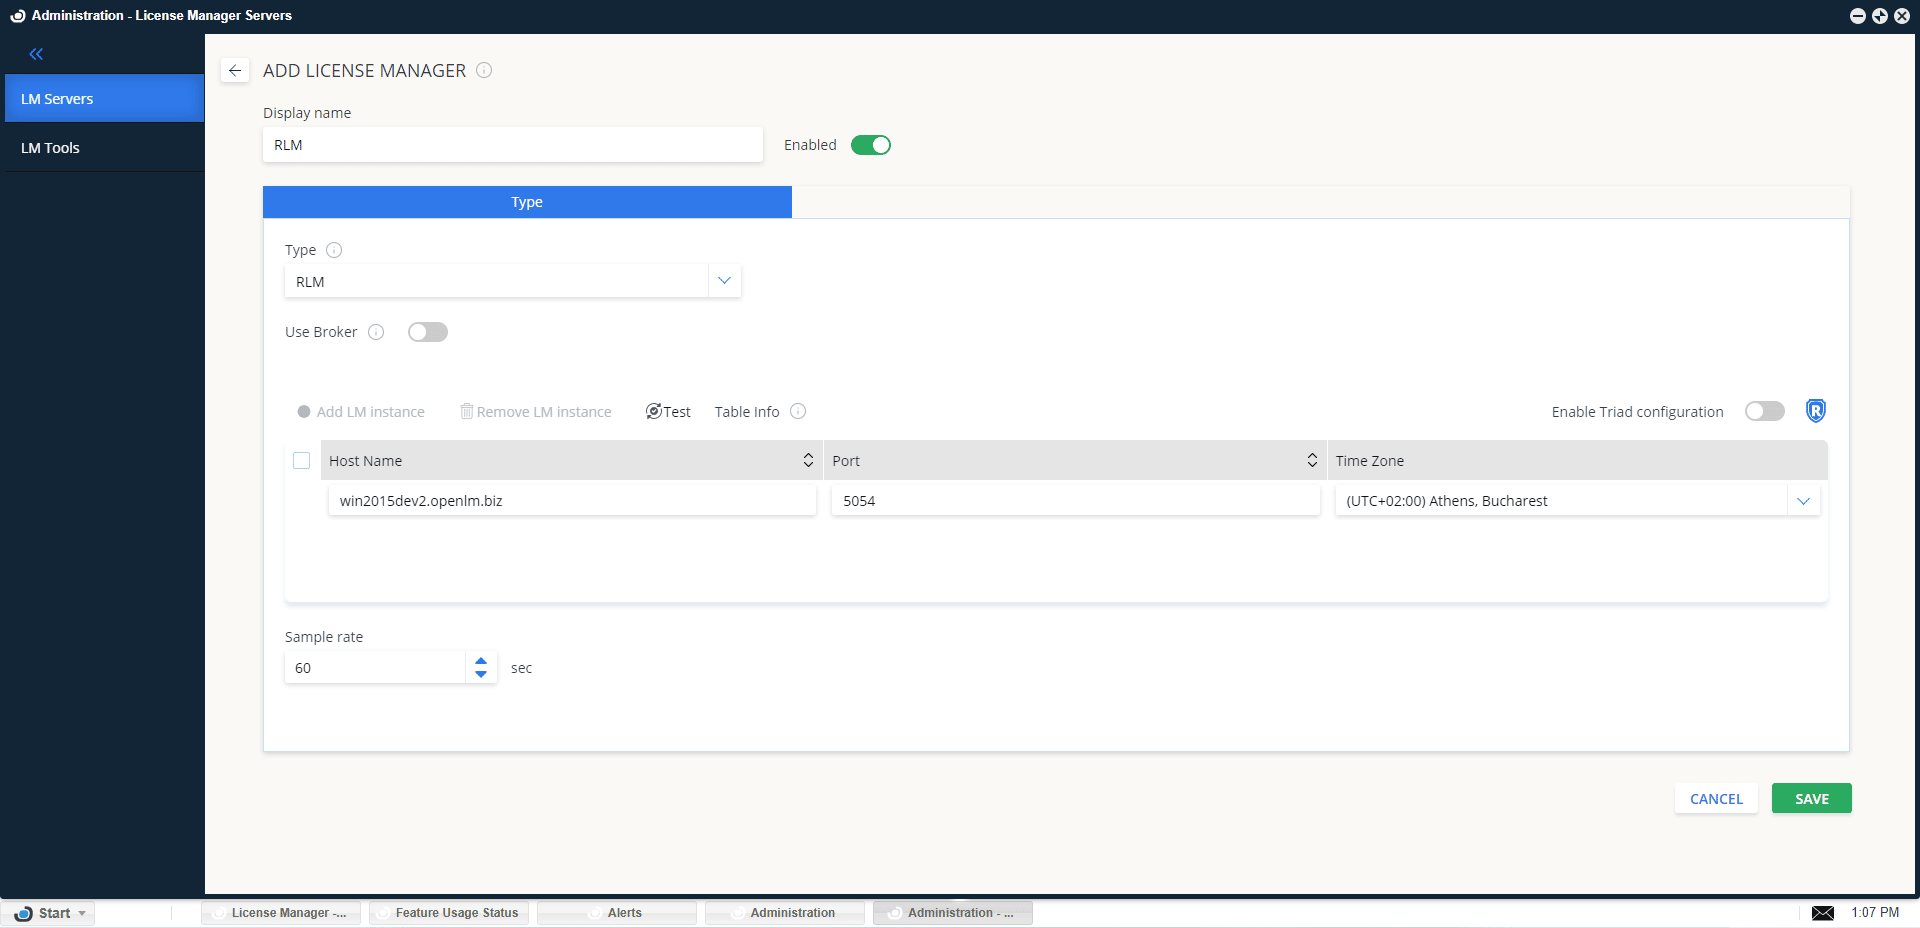
- In Display name, enter a descriptive name (for example,
RLM). Make sure Enabled is on. - From Type, select RLM.
- Configure Use Broker:
- Off (default): Server queries RLM directly.
- On: Server relies on Broker (covered in the next section).
- Leave Triad Configuration off.
- Optionally enable Allow server fallback to denied license.
- Enter the Hostname and Port. Default port is 5054 (before version 6: 9000).
- Select the correct Time Zone.
- Click Save.
Interface RLM using OpenLM Broker
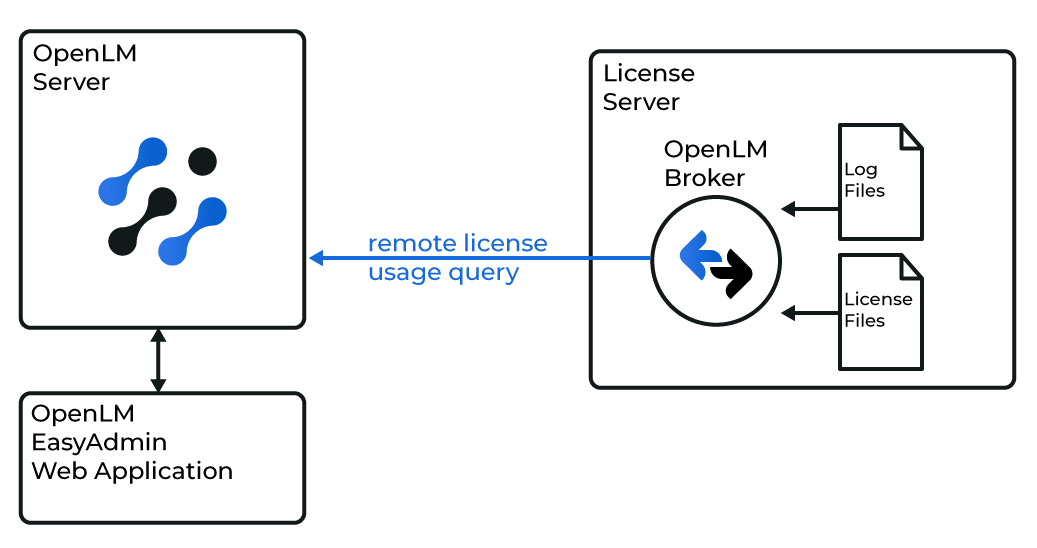
Install OpenLM Broker on the RLM license server machine. Broker reads RLM logs and license files locally, then sends the data to OpenLM Server.
Enable RLM report log functionality
By default, RLM does not record report log files. These must be enabled for full monitoring.
-
See how to enable report logs or refer to the RLM manual, under The ISV Options File → REPORTLOG.
-
Include the std argument.
-
Once enabled, locate the log file (usually
.txt). The first lines should read:RLM Report Log Format 0, version 11.0, authenticated
ISV: ssi, RLM version 11.1 BL2
Report log location is defined in the ISV options file. Without it, denial and detailed usage data will not be available.
OpenLM Broker configuration
Automatic detection
- Open Broker on the RLM license server.
- Go to the License Managers tab.
- Click Detect.
If the RLM service is running, Broker configures itself automatically.

Manual configuration
If detection fails:
- Go to License Managers → Add License Manager.
- Select RLM, enter the port (for example, 5054), and click Add.
- Open the Settings tab.
- Enable Set Path Manually → Add License File Manually. Enter the license file path.
- Toggle Watch license file on.
- In Commands, set the path to
rlmutil.exe(typicallyC:\RLMServer). Click Execute to test.tipIf RLM uses a password, add the
-z <password>parameter to status and data inquiry commands.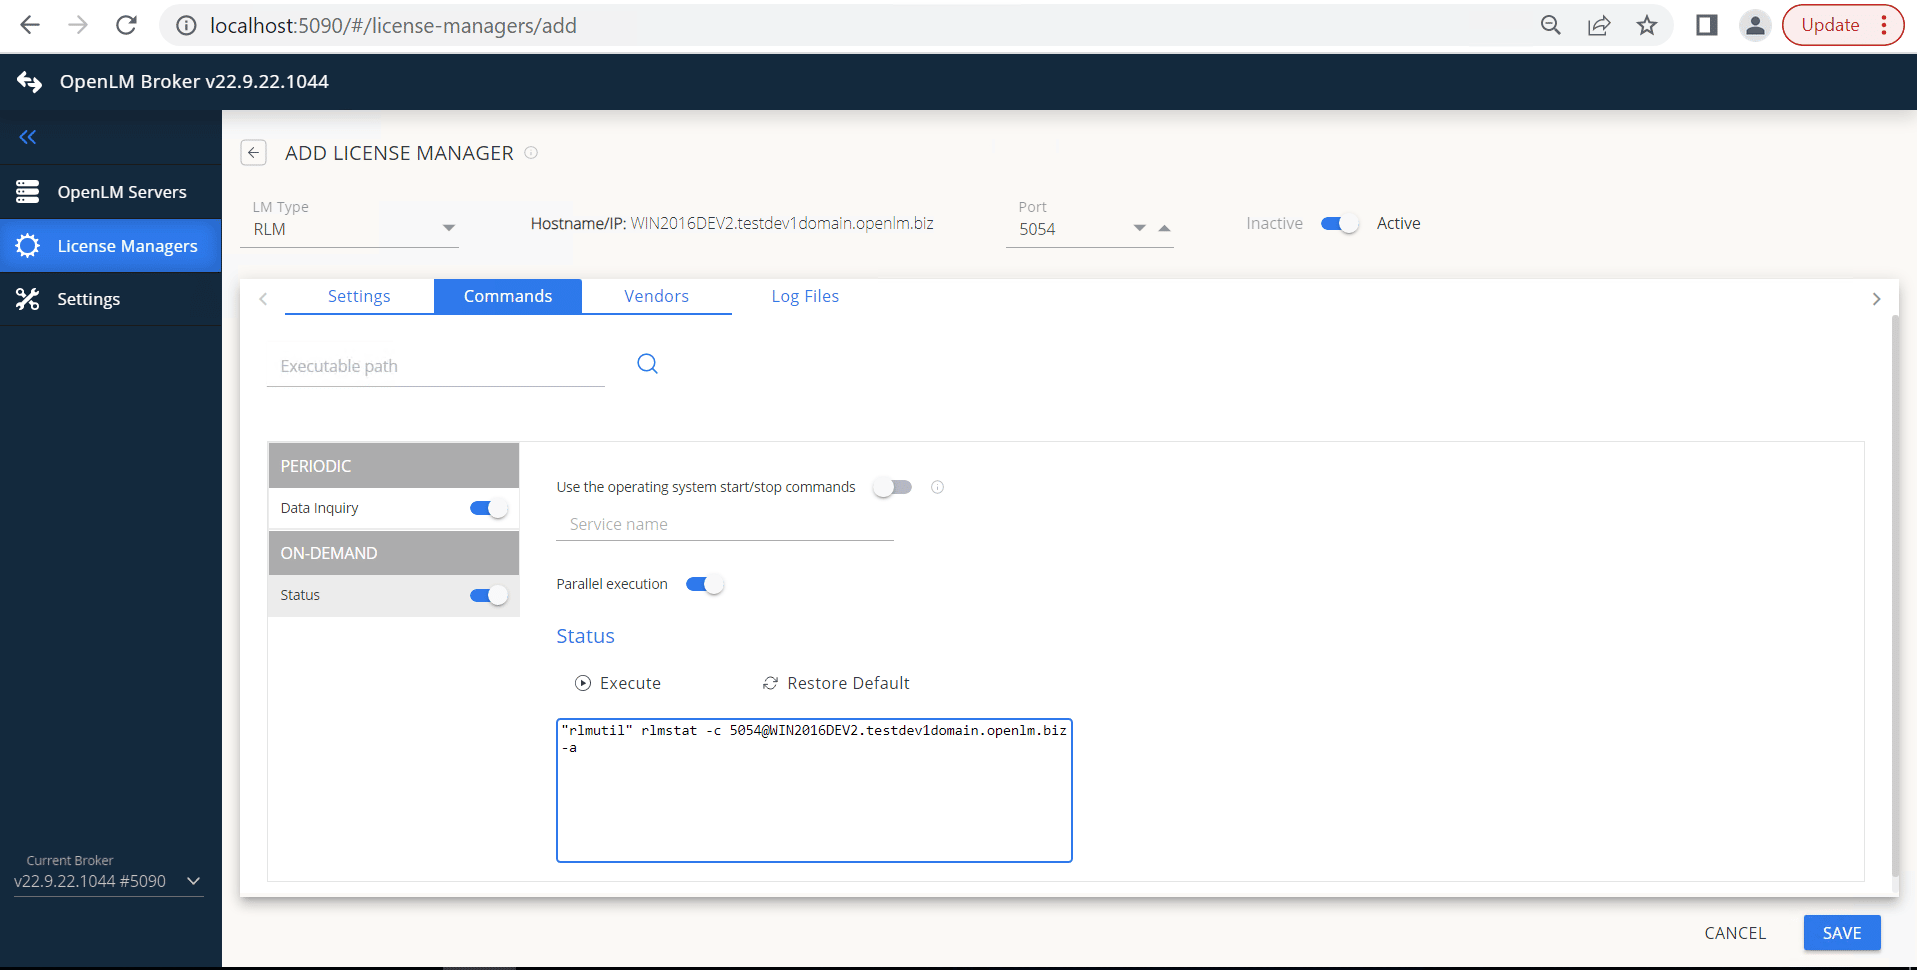
- (Optional) If RLM runs as a service, enable Use operating system start/stop commands and enter the Service Name.
- In Vendors, click Add Vendor and enter the RLM vendor name.
- In Log Files, click Add Log File, enter the path, and link it to the vendor.
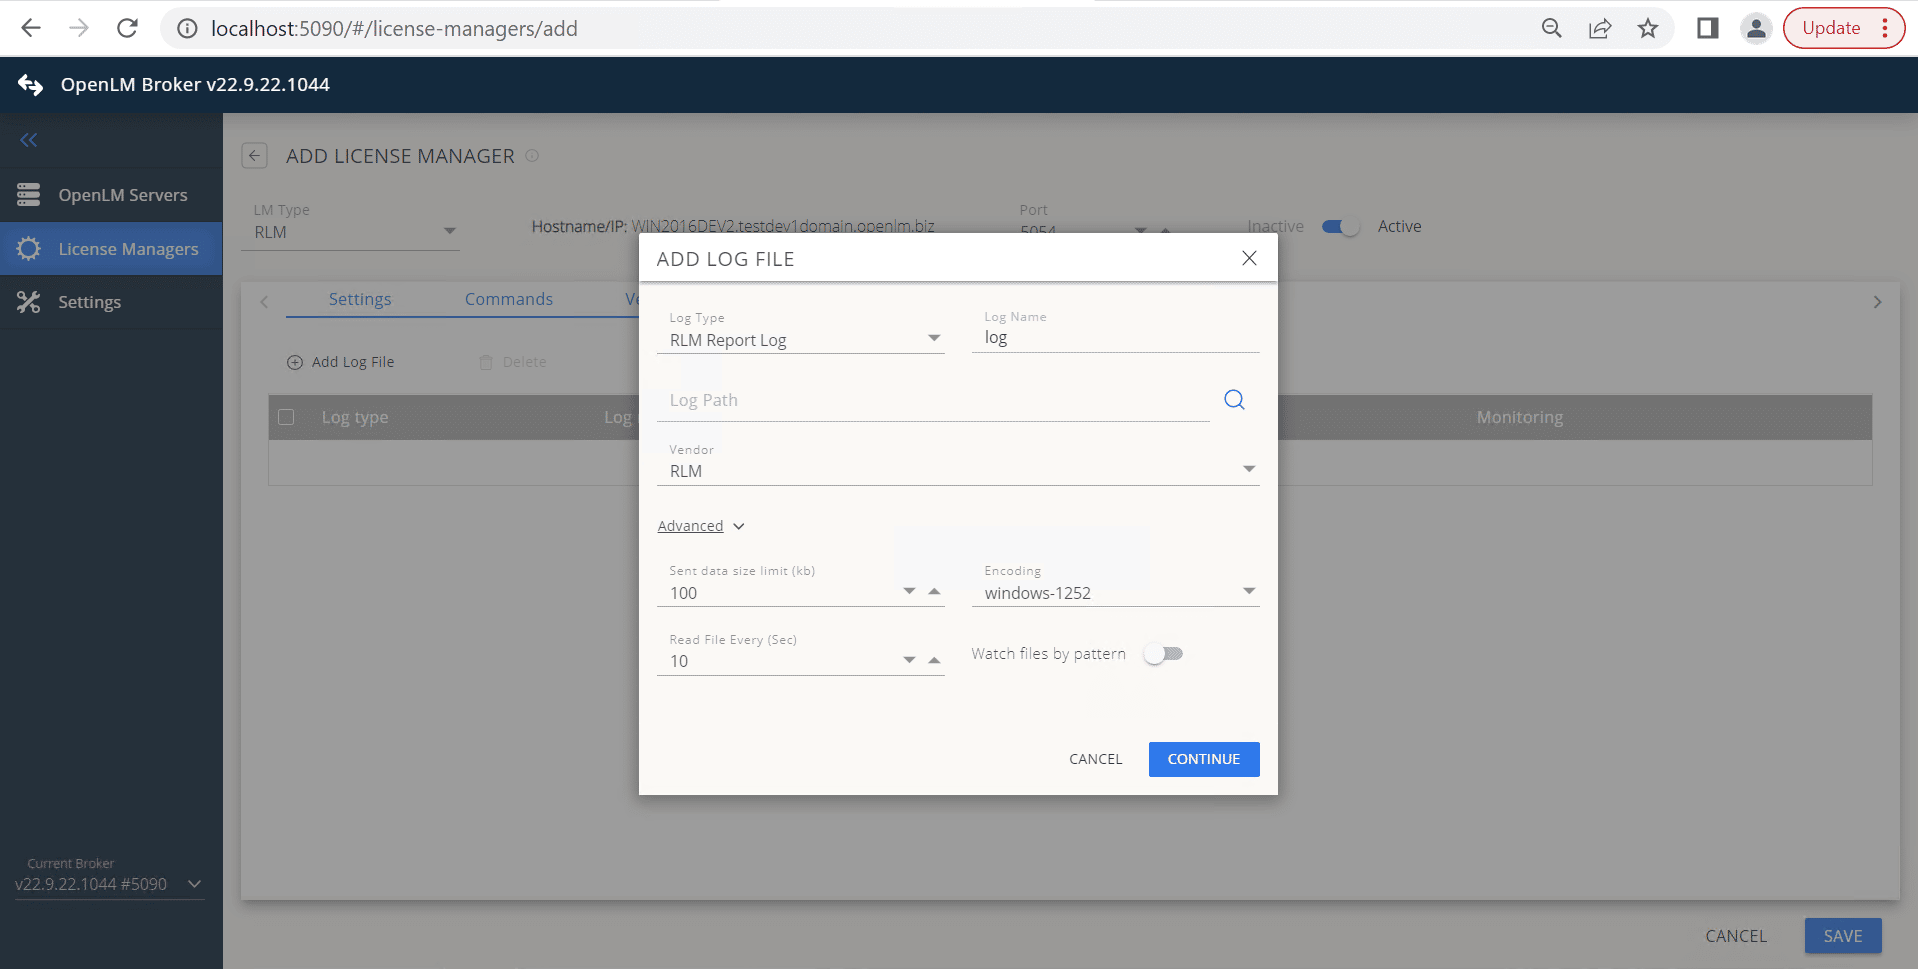
- Click Save.
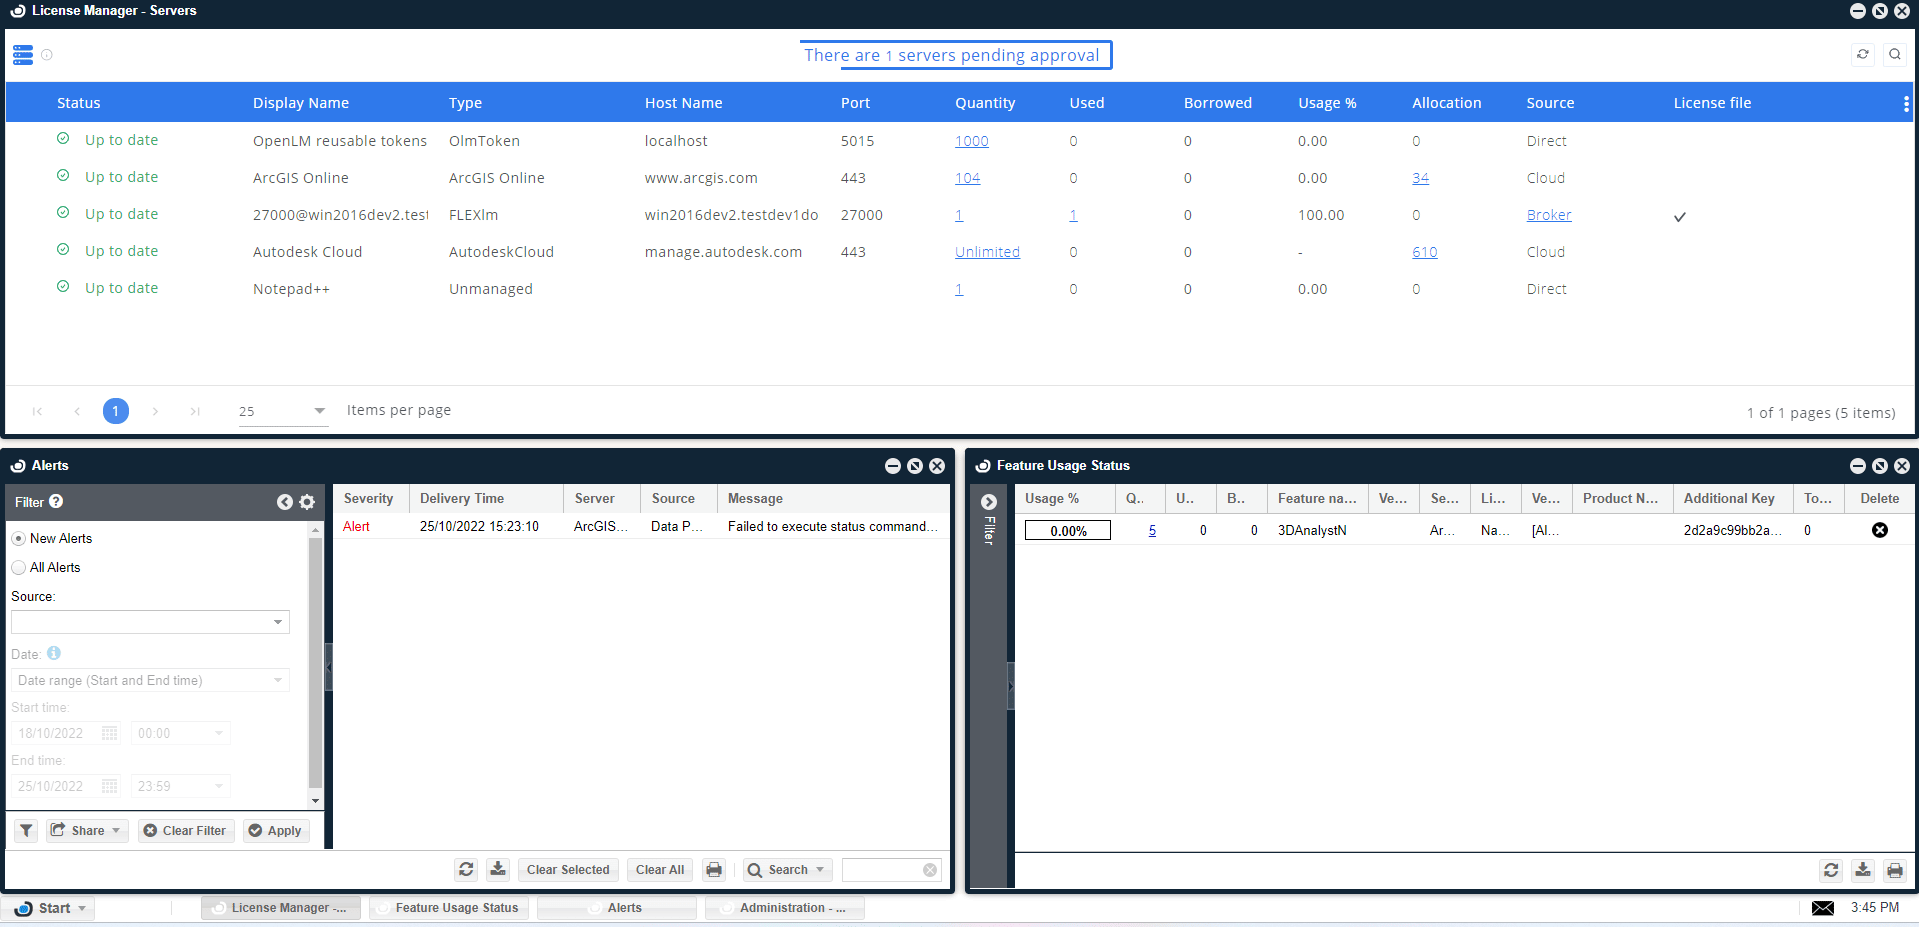
OpenLM Server configuration
- Open EasyAdmin.
- In the License Servers window, approve the pending RLM license manager.
RLM failover configuration
Prerequisites: RLM must already be configured with failover support.
- Add the RLM primary port in Broker.
- Add the primary license file.
- Add the failover port.
- Open EasyAdmin and view the candidate servers.
- Approve the primary host.
- Enable Failover Configuration.
- Add the hostname and port of the failover RLM.
- Mark the primary RLM server.
- Click Apply.
Verify your RLM configuration
- Open EasyAdmin.
- Go to Start → Widgets → License Servers.
- Verify that RLM appears in the list. A green circle means an active connection.
Status may take up to 3 minutes to update when a new connection is added.