OpenText
OpenLM は OpenText と連携し、ライセンス使用状況の監視と統計情報の取得が可能です。
本ガイドは OpenLM Broker v4.8.8 以降での連携に基づいています。
EventLog Monitor ツールを使用する古い Broker 版については、この KB を参照してください。
要件
- 組織内のマシンに OpenLM SLM v4.3 以降をインストール済み
- OpenText と同じマシンに OpenLM Broker v4.8.8 以降をインストール済み
監視機能と特徴
| 機能 | 粒度 | ライセンス総数 | ライセンス使用状況 | 拒否レポート | 借用ライセンスのレポート | 有効期限のレポート | 冗長化(複数サーバー) |
|---|---|---|---|---|---|---|---|
| 対応 | 秒 | ✔ | ✔ | ✔ | ❌ | ✔ | ❌ |
Broker を使用すると、バッファ付き通信とライセンスマネージャーサービスのリモート起動・停止も可能になります。
OpenText のログ設定
- OpenText サーバーの
ImgLM.iniファイルを開きます。 - Event log message IDs で、ログに記録したいイベントは
1、記録しないイベントは0に設定します。
例:これは成功したライセンスチェックアウトを記録します。257=1 - Event Log File の設定:
- Max Size: 十分大きい値(MB)に設定します。
- Max Duration: 365 日に設定します。
OpenLM Broker の設定
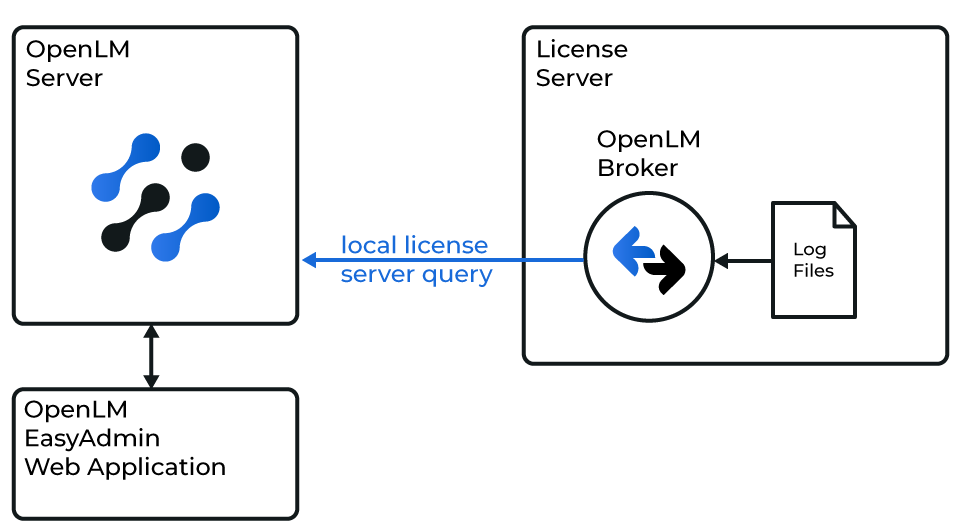
OpenLM と OpenText の連携図
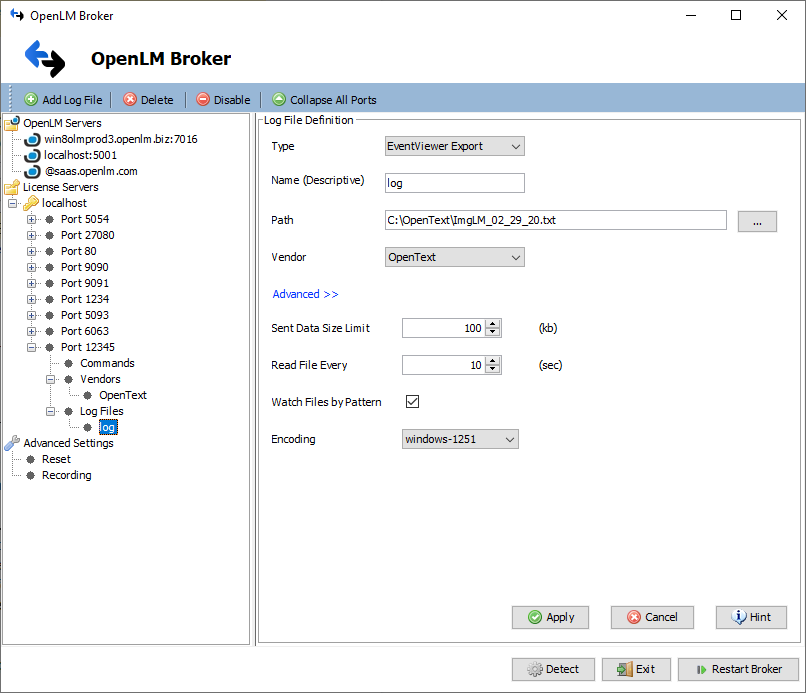
- Broker で Add Port をクリックします。
- 任意のポート番号を入力します(OpenText はログファイルのみ、例:
12345)。 - License Manager Type で OpenText を選択し、Apply をクリックします。
- Vendors でレポートに表示する名前(例:
OpenText)を入力します。 - Log Files で Add Log File をクリックし、OpenText のログファイルパス(例:
C:\OpenText\ImgLM_##_##_##.txt)を参照します。 - Advanced を開き、Watch Files by Pattern を有効にします。
- Apply をクリックします。
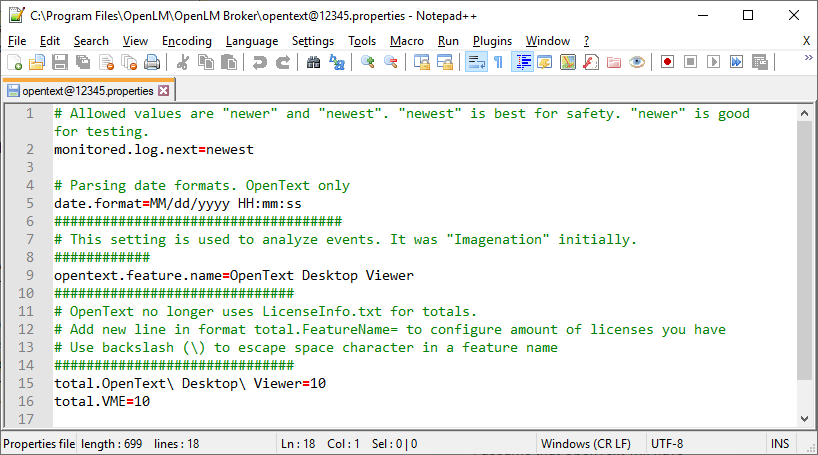
- Broker のインストールフォルダにある
opentext@PORT.propertiesを開き、次の設定を調整します:monitored.log.next:newest(既定)または検証用にnewerdate.format: 既定MM/dd/yyyy HH:mm:ssopentext.feature.name: 監視対象の機能(例:OpenText Desktop Viewer)total.<FeatureName>: 該当機能の総ライセンス数(例:total.OpenText Desktop Viewer=10)
- 保存して Restart Broker をクリックします。
OpenLM SLM の設定
自動(EasyAdmin)
- EasyAdmin を開きます(オンプレミスまたは cloud)。
- Servers pending approval で保留中の OpenText ライセンスマネージャーを承認します。
手動
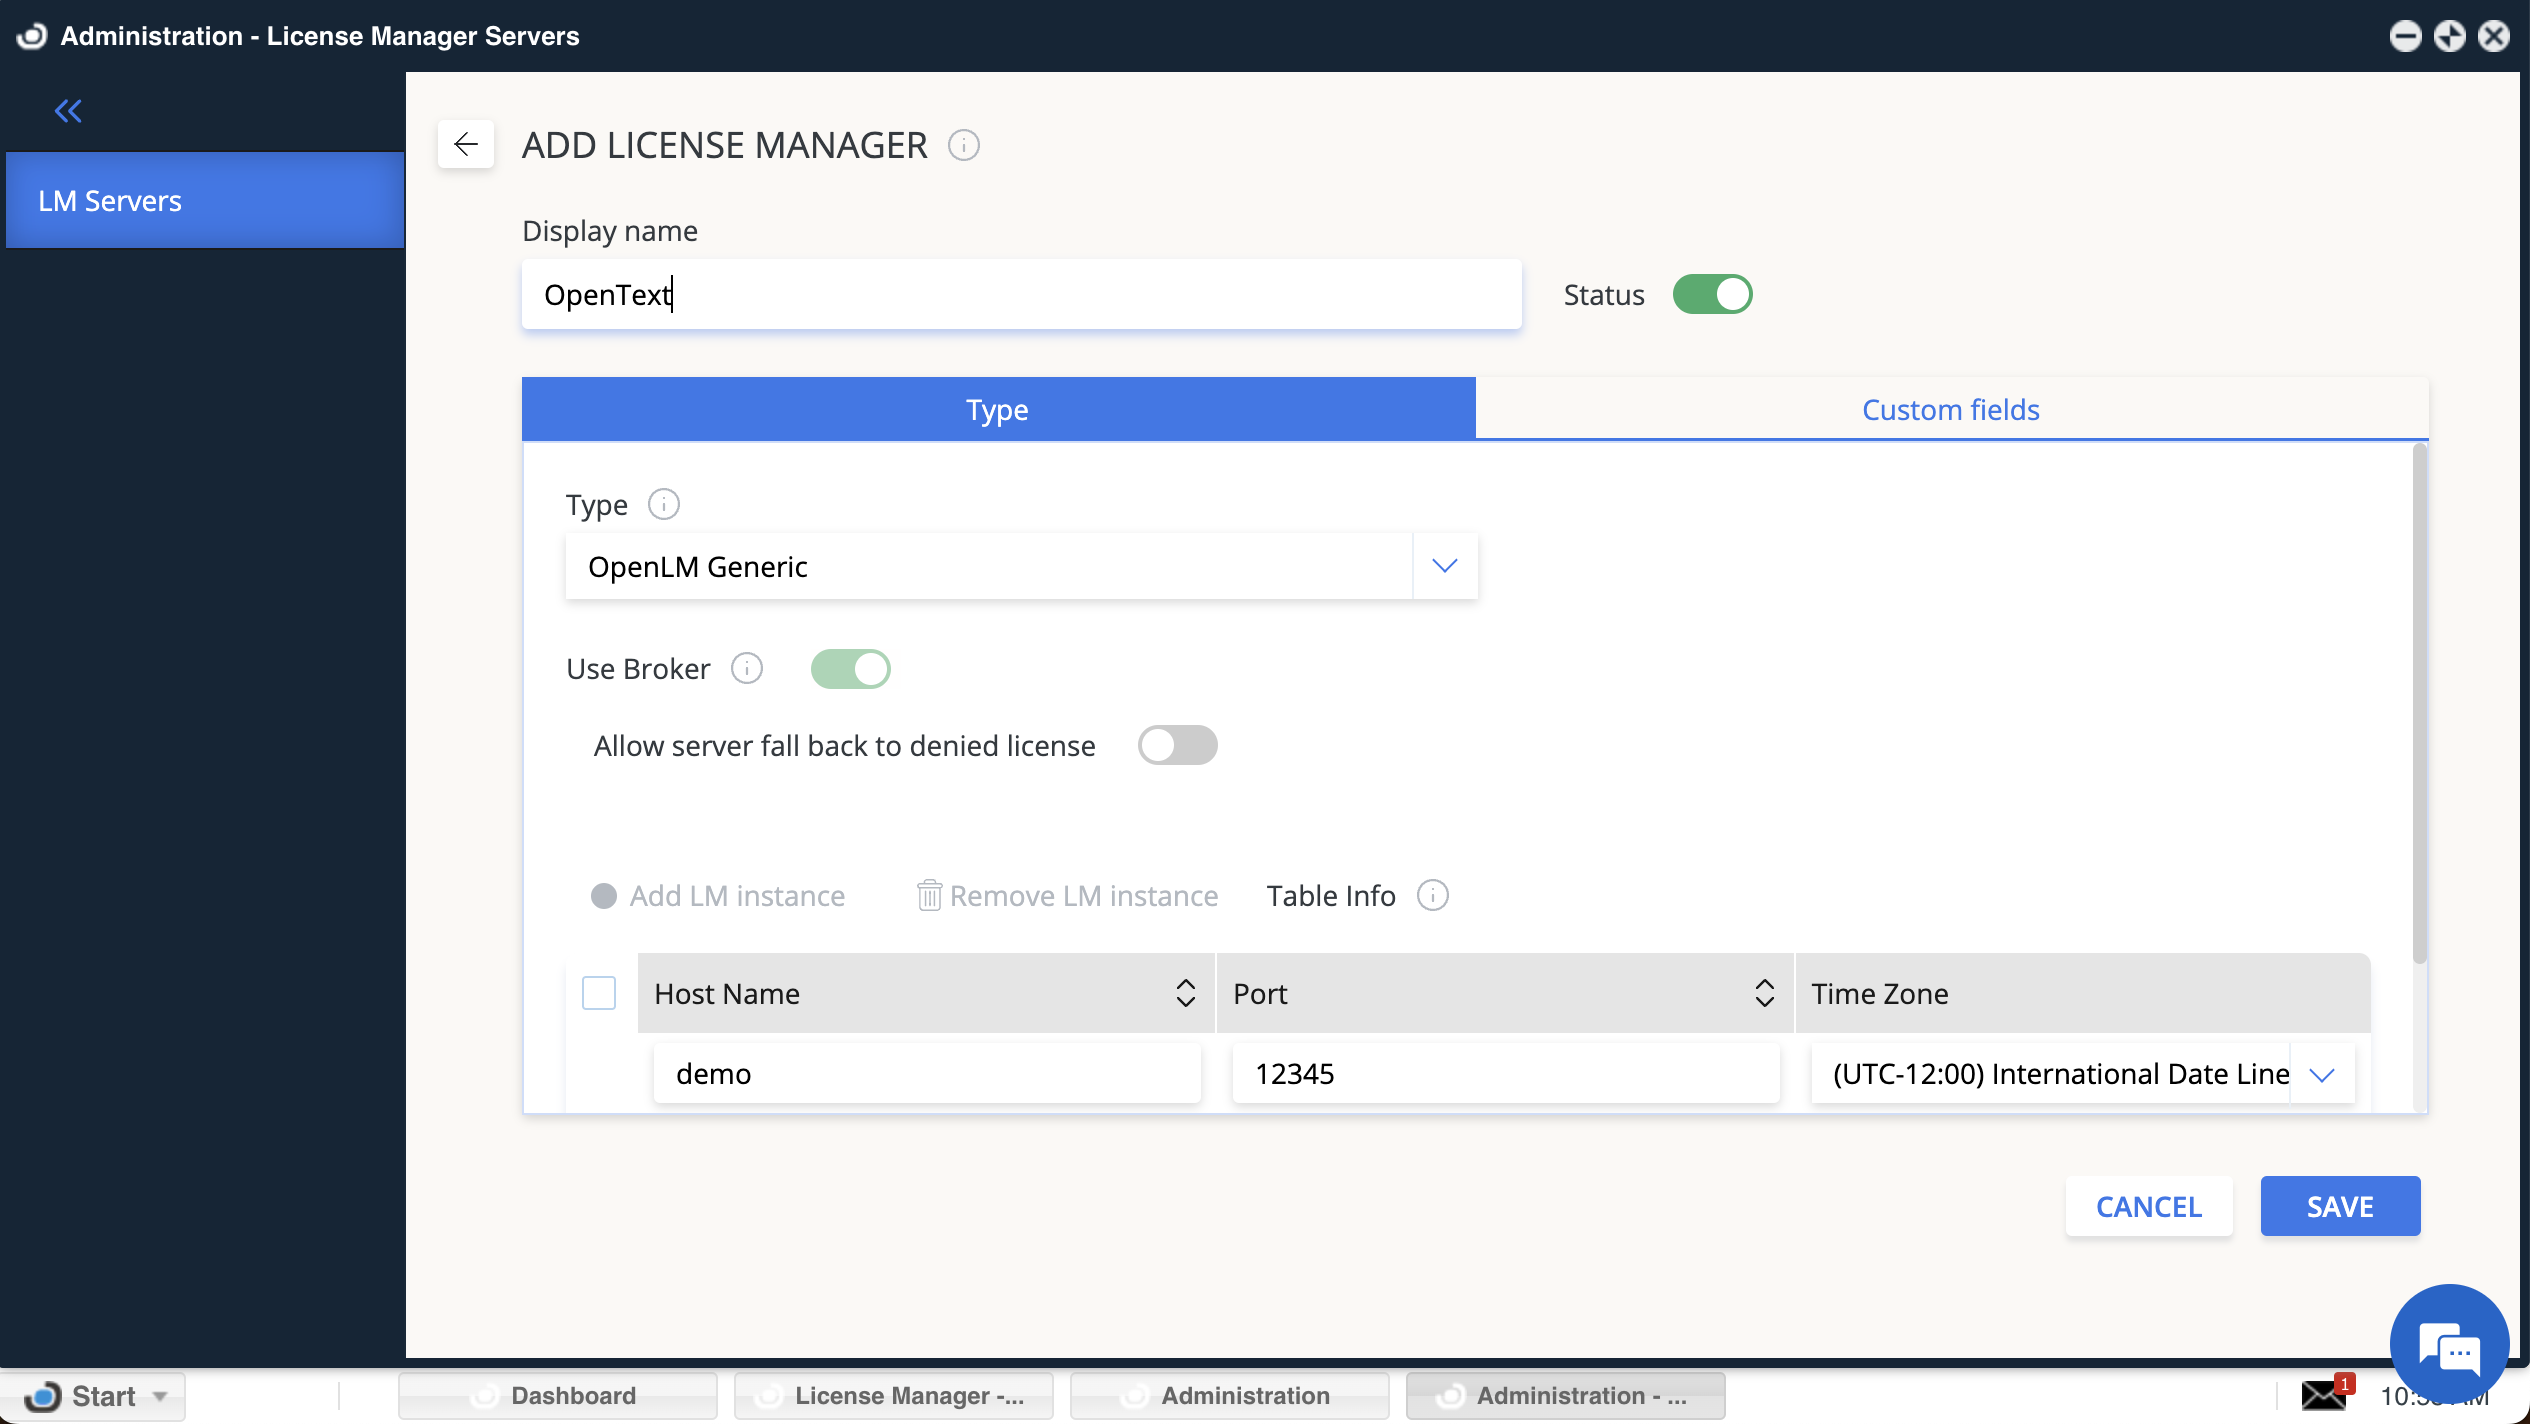
- EasyAdmin で Start → Administration → License Manager Servers に移動し、Add LM をクリックします。
- Type:
OpenLM Generic - Display Name: 例
OpenText license manager - Time Zone を設定します。
- Hostname と Port(Broker 設定と一致)を入力します。
- Use Broker をオンにします。
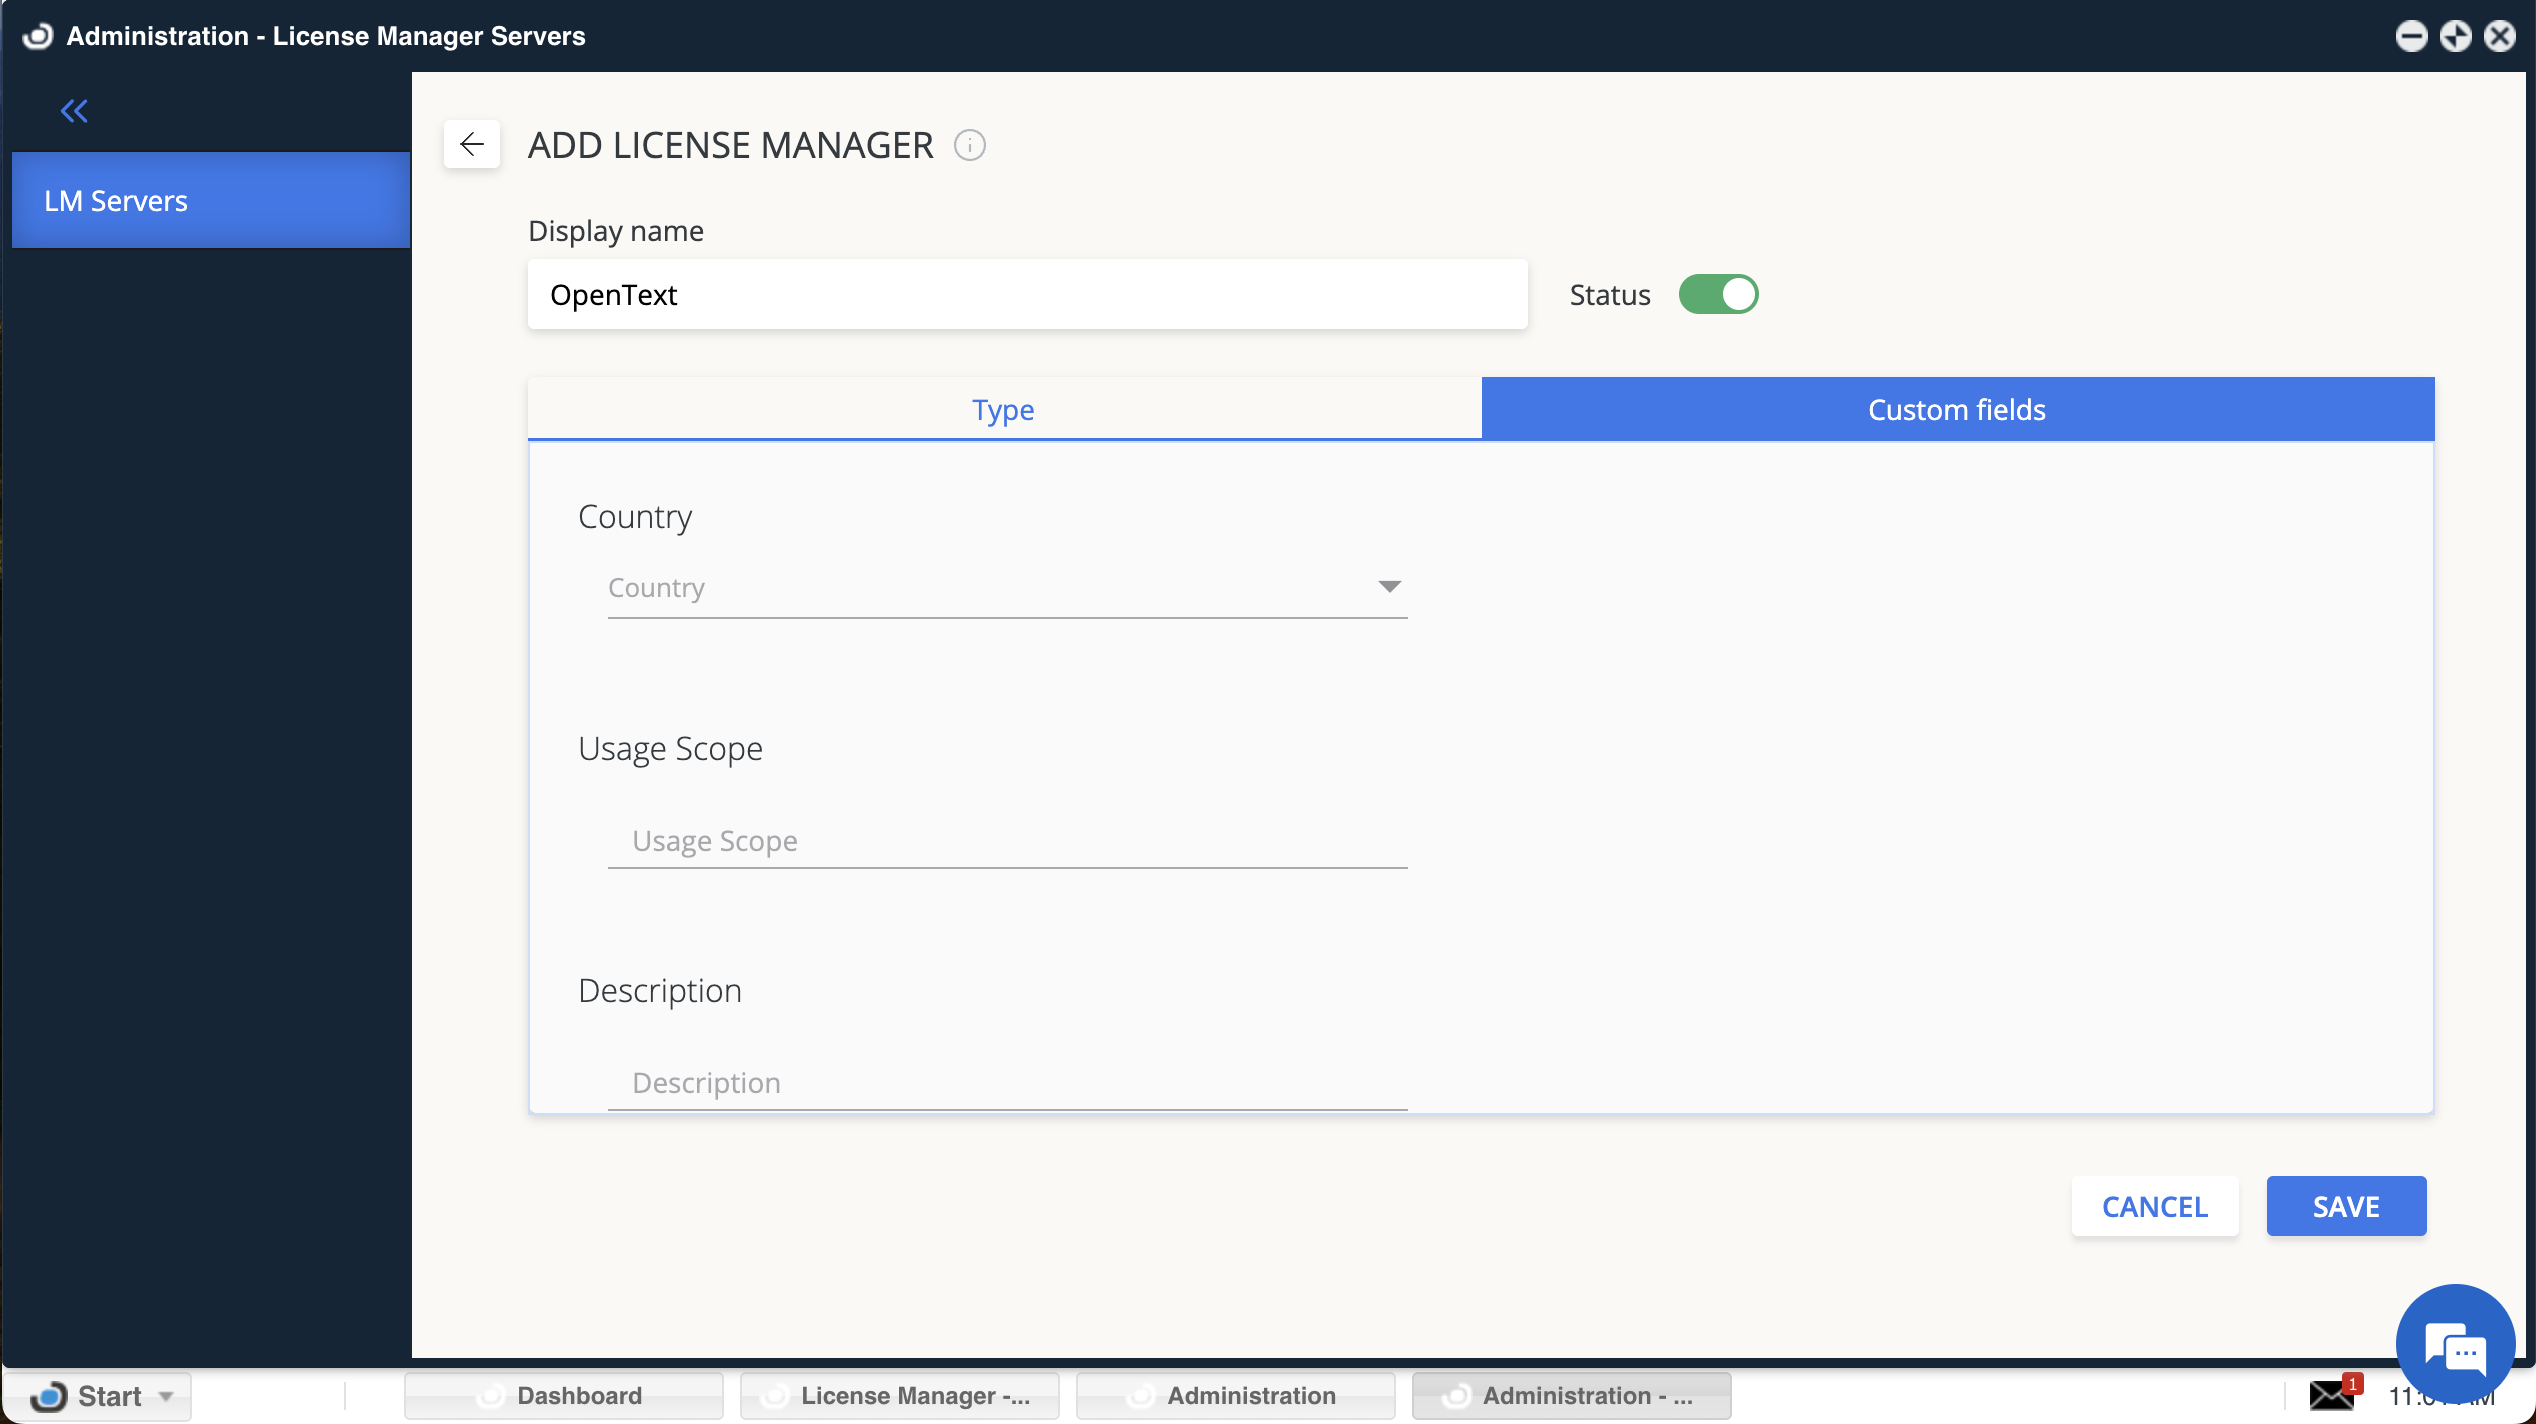
- (任意)Custom Fields に国、使用範囲、説明を追加します。
- Save をクリックします。
EasyAdmin での確認
- EasyAdmin で Start → Widgets → License Servers に移動します。
- 一覧に OpenText ライセンスマネージャーが表示されることを確認します。
- 緑色の丸アイコンは接続が有効であることを示します。
新しい接続の場合、アクティブ表示まで最大 3 分かかることがあります。