Altair
このガイドでは、Altair License Server (ALS) と OpenLM を連携し、ライセンス使用状況の監視と統計情報の収集を行う方法を説明します。
要件
Altair License Server を問い合わせるには次を用意してください:
- 組織内のマシンまたは Cloud アカウントに OpenLM Server v21.x 以降 をインストール済み。
- Altair License Server と同じマシンに OpenLM Broker v21.x 以降 をインストール済み。
監視機能
OpenLM Broker 経由で利用できる監視機能:
- ライセンス使用状況の監視
- 拒否レポート
- ログベースのアクティビティデータ
- Broker/Server 間のバッファ付き通信
- ライセンスサービスのリモート起動・停止
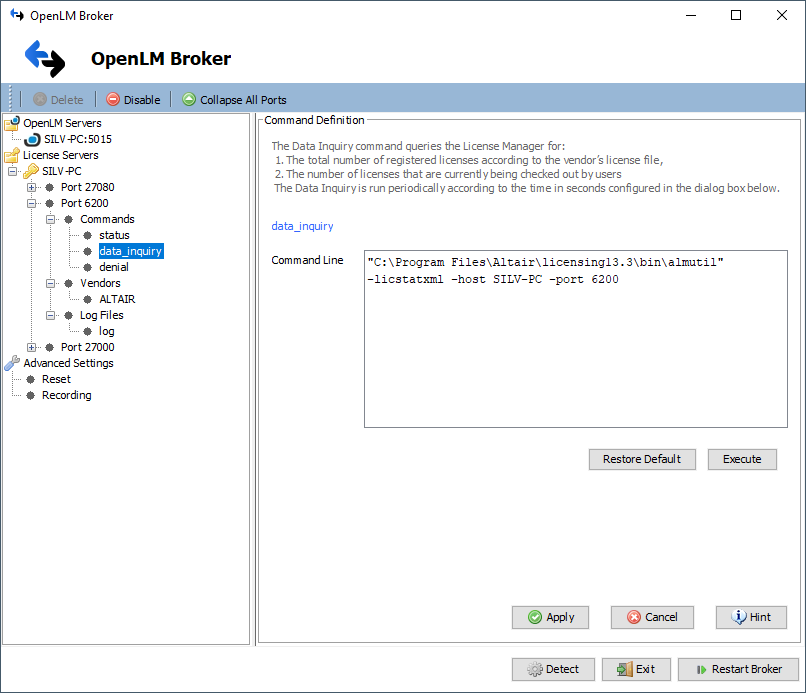
OpenLM Broker の設定
OpenLM と ALS の連携は LMX と類似していますが、使用状況の問い合わせに almutil ユーティリティを使用する点が異なります。
続行する前に、OpenLM Broker がインストールされ、OpenLM Server へレポートするよう設定されていることを確認してください。
Broker の自動設定
- Broker 設定ツールで Detect をクリックします。

ALS サービスが稼働していれば、Broker が必要な設定でポートノードを自動作成します。 - Apply をクリックして変更を反映します。
- Restart Broker をクリックします。
設定確認: Commands → data_inquiry に移動して Execute をクリックします。
Broker の手動設定
自動検出が失敗した場合:
- Add Port をクリックし、ALS のポート(既定: 6200)を入力します。
- License Manager Type から Altair を選択して Apply をクリックします。
- Commands で
almutil.exeを含むフォルダのパス(例:C:\Program Files\Altair\licensing13.3\bin)を設定し、Update → Apply をクリックします。 - Vendors で “Vendor Name to Be Filled” を選択し、わかりやすい名前(例: “Altair”)を入力して Apply をクリックします。
- Restart Broker をクリックします。
- 続けて OpenLM Server の設定を行います。
OpenLM Server の設定
EasyAdmin による自動設定
Broker が設定済みであれば、Server に自動でデータが送信されます。承認するには:
- EasyAdmin を開きます(ブラウザ:
http://<OpenLM Server FQDN>:5015または Windows Start → OpenLM → EasyAdmin)。 - License Manager Servers で Pending approval のサーバーを見つけます。
- ALS サーバーを承認します。

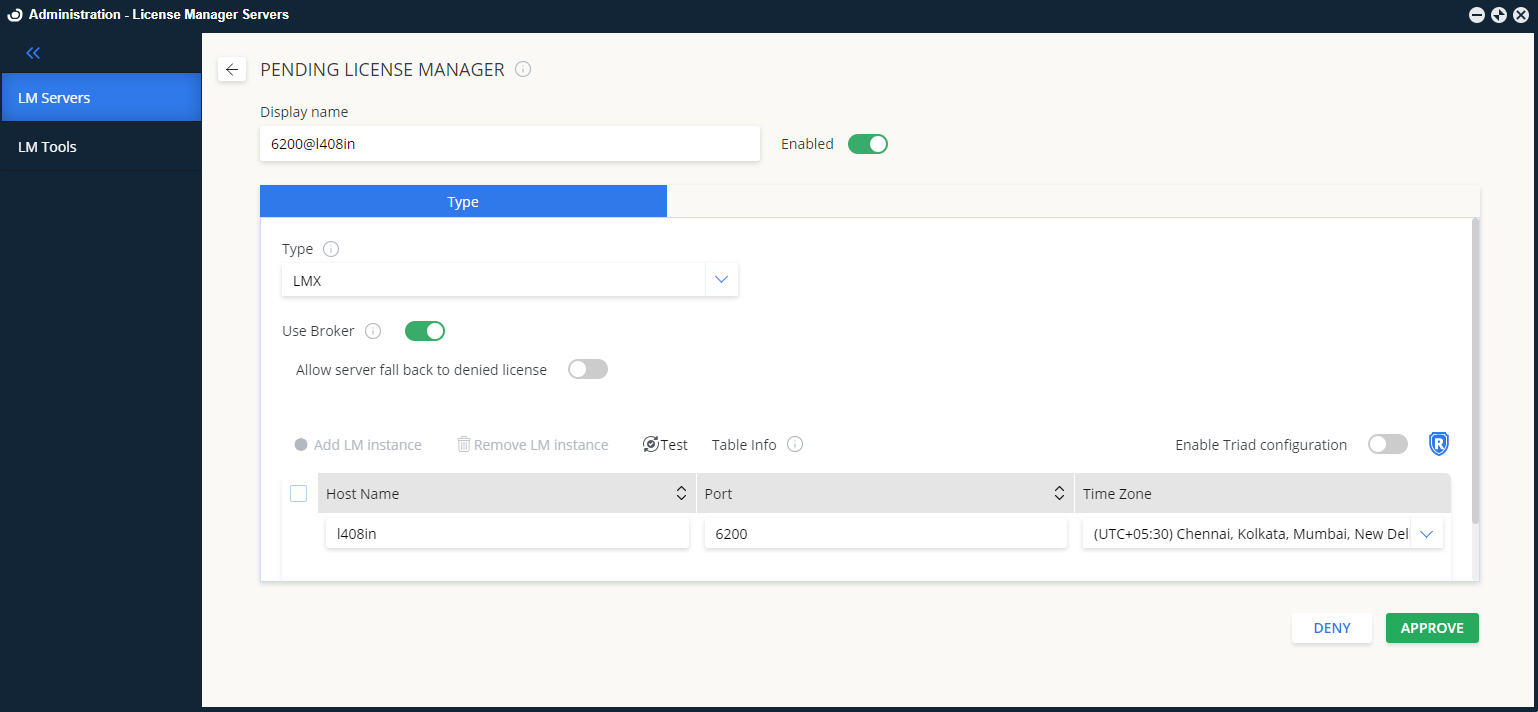
EasyAdmin による手動設定
自動承認が失敗した場合は、ALS を手動で追加します:
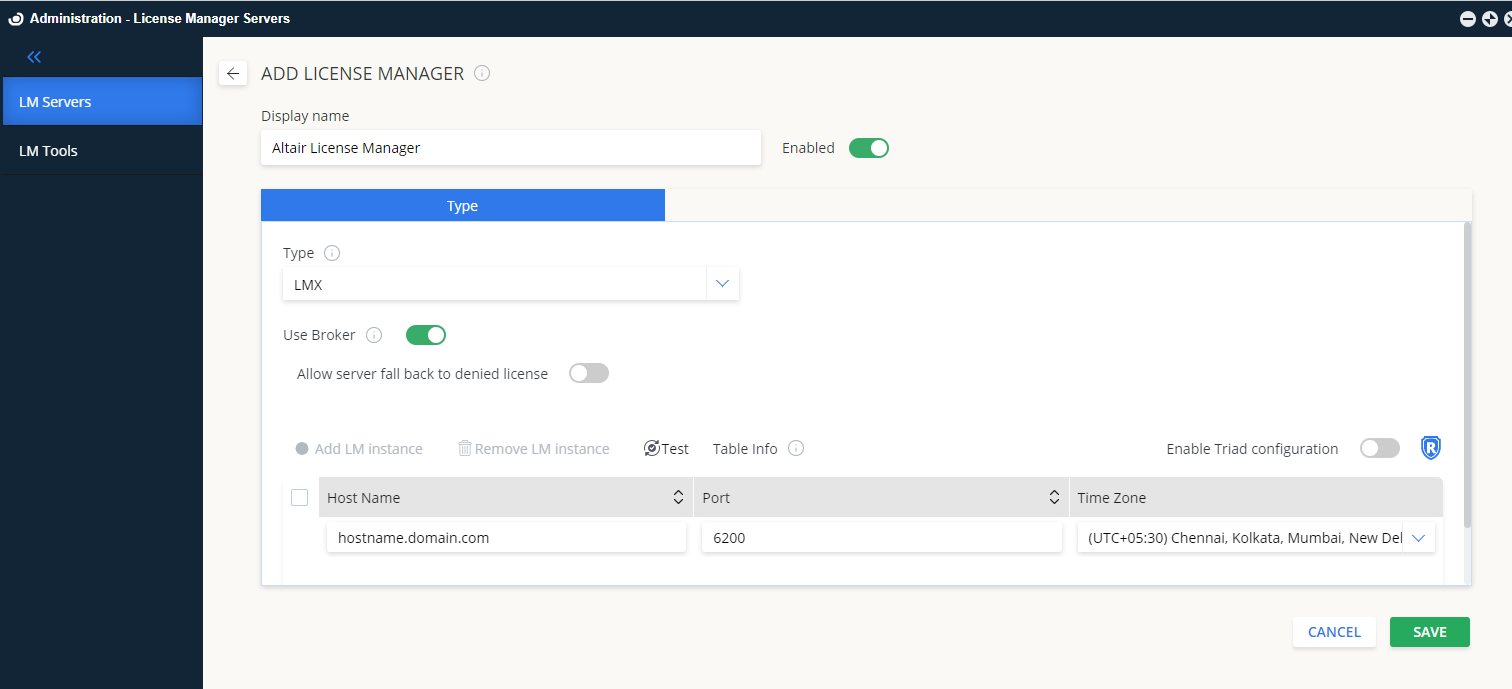
- Administration → License Manager Servers → Add LM に移動します。
- Display name を入力します。
- Type から LMX を選択します。
- (任意)Description を入力します(例: “Altair License Server”)。
- サーバーの場所に合わせて Time Zone を設定します。
- Hostname と Port(既定: 6200)を入力します。
- 必要に応じて Triad configuration を有効にします。
- Use Broker をオンにします。
- Save をクリックします。
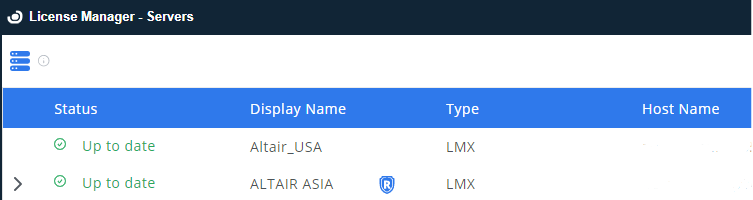
監視の確認
ALS の監視を確認するには:
- EasyAdmin → Start → Widgets → License Manager Servers を開きます。
- 一覧に ALS が表示されることを確認します。
- 接続されるとステータスが 緑色 で表示されます。
注: 新しい接続の場合、アクティブ表示まで最大 3 分かかることがあります。