JetBrains FLS
This guide describes how to monitor the JetBrains Floating License Server (FLS) with OpenLM to obtain license statistics.
Requirements
To query JetBrains FLS, install:
- OpenLM Server v5.6 or higher (or OpenLM Cloud)
- OpenLM Broker v4.10 or higher on the same machine as JetBrains FLS
Monitoring capabilities
The following table shows the monitoring capabilities available for JetBrains FLS through OpenLM Broker:
| Feature | Resolution | License totals | License usage | Denials | Borrowed licenses | Expiration dates | Redundancy |
|---|---|---|---|---|---|---|---|
| Supported | By minute | ✔ | ✔ | ❌ | ❌ | ❌ | ❌ |
Using Broker also allows:
- Buffered communication with OpenLM Server
- Remote start/stop of the license manager service
OpenLM Broker configuration
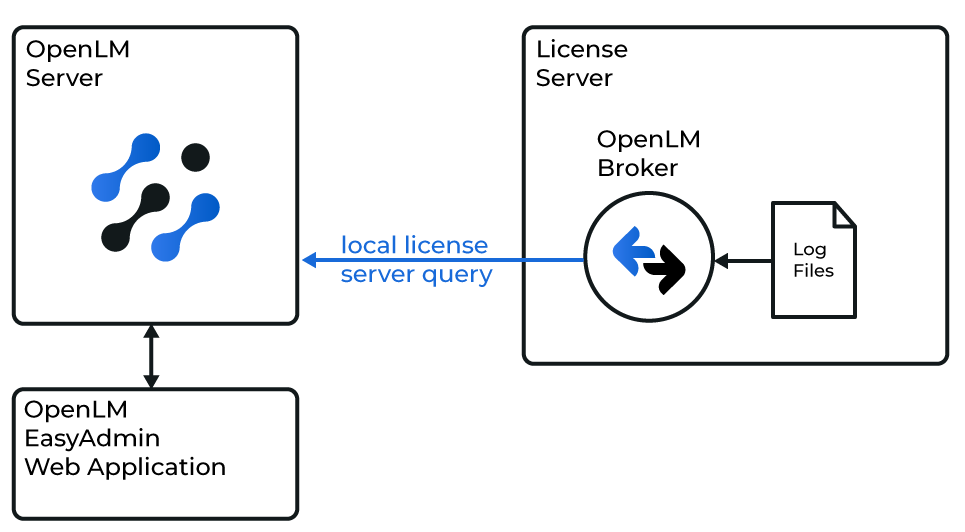
Broker queries JetBrains FLS locally over its HTTP port and sends the data to OpenLM Server.
Before continuing, ensure Broker is installed and configured to report to OpenLM Server.
Locate the JetBrains FLS token
Broker requires the JetBrains reporting token to read license usage data.
- If a token is already configured, Broker autodetect reads it from
service-config.properties. - If no token is configured, follow the JetBrains guide. Save the token—you'll need it for the data_inquiry command.
Automatic Broker configuration
- In Broker, select Detect.

- If JetBrains FLS is running, Broker detects and configures most settings automatically.
- Manually verify by going to Commands → data_query → Execute.
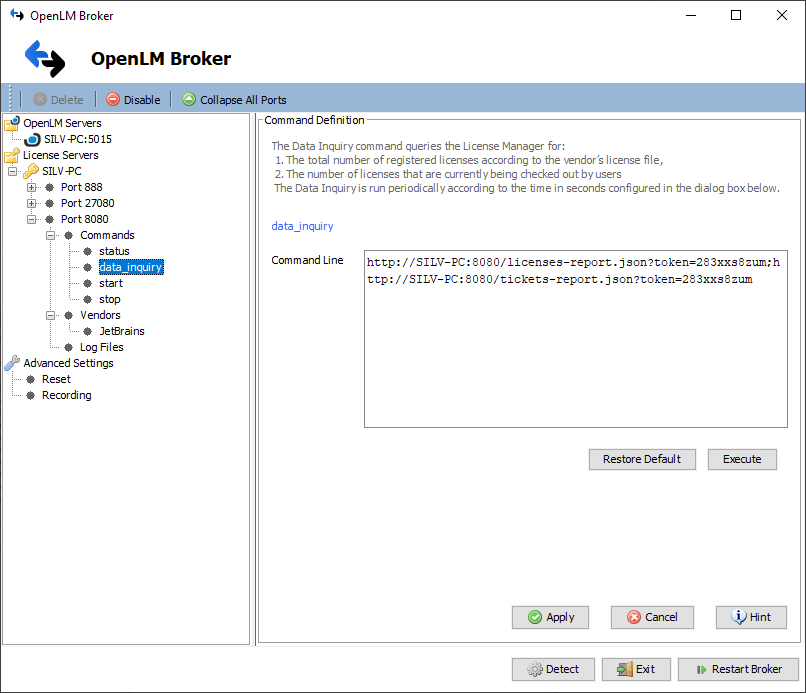
Manual Broker configuration
If autodetect fails:
-
Select Add Port.
-
Enter the JetBrains FLS port (default: 8080).
-
From Type, select JetBrains. Select Apply.
-
In Commands, set the Update path for commands to the JetBrains FLS root folder. Select Update → Apply.
-
Open data_inquiry. Replace
<TOKEN>with the JetBrains token. Example:http://localhost:8080/licenses-report.json?token=283xxs8zumhttp://localhost:8080/tickets-report.json?token=283xxs8zum
Select Execute → Apply.
- Under Vendors, set Vendor Name = JetBrains. Select Apply.
- Select Restart Broker.
OpenLM Server configuration
Automatic through EasyAdmin
If Broker is transmitting data, approve it in EasyAdmin:
- Open EasyAdmin:
- Browser:
http://<OpenLM Server>:5015 - Or Windows Start → OpenLM → EasyAdmin
- In License Manager Servers, select There are # servers pending approval.

- Edit the pending LM entry. Update the Display name if desired.

- Select Approve.
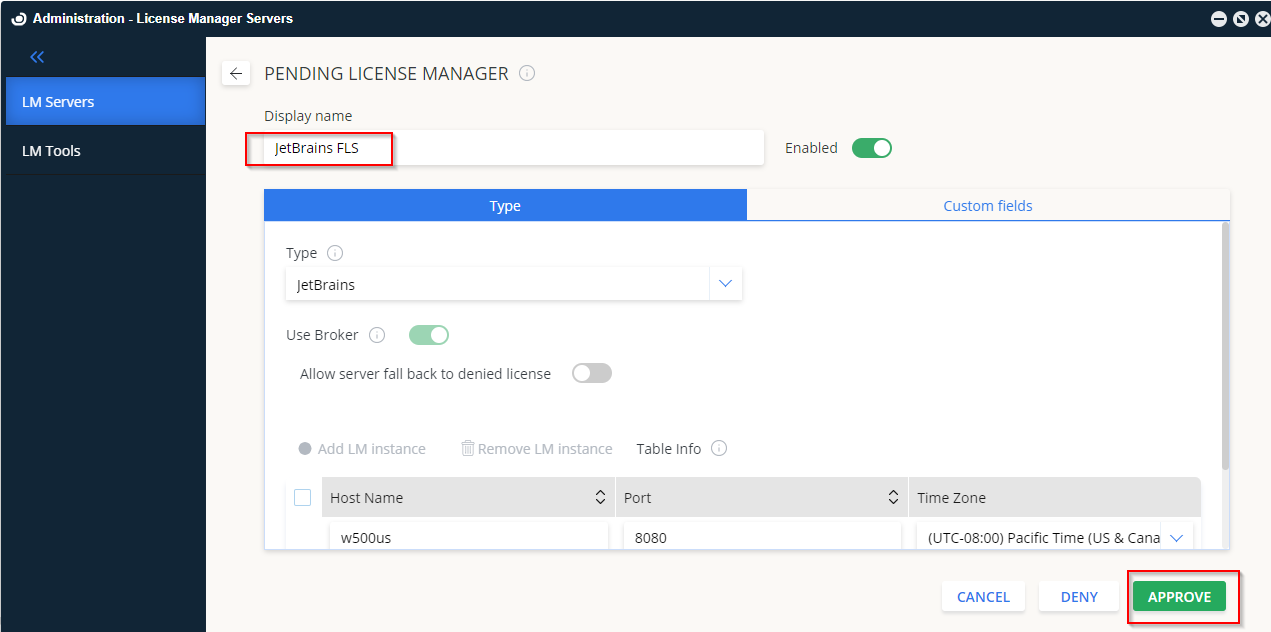
- JetBrains FLS is now added to OpenLM Server.

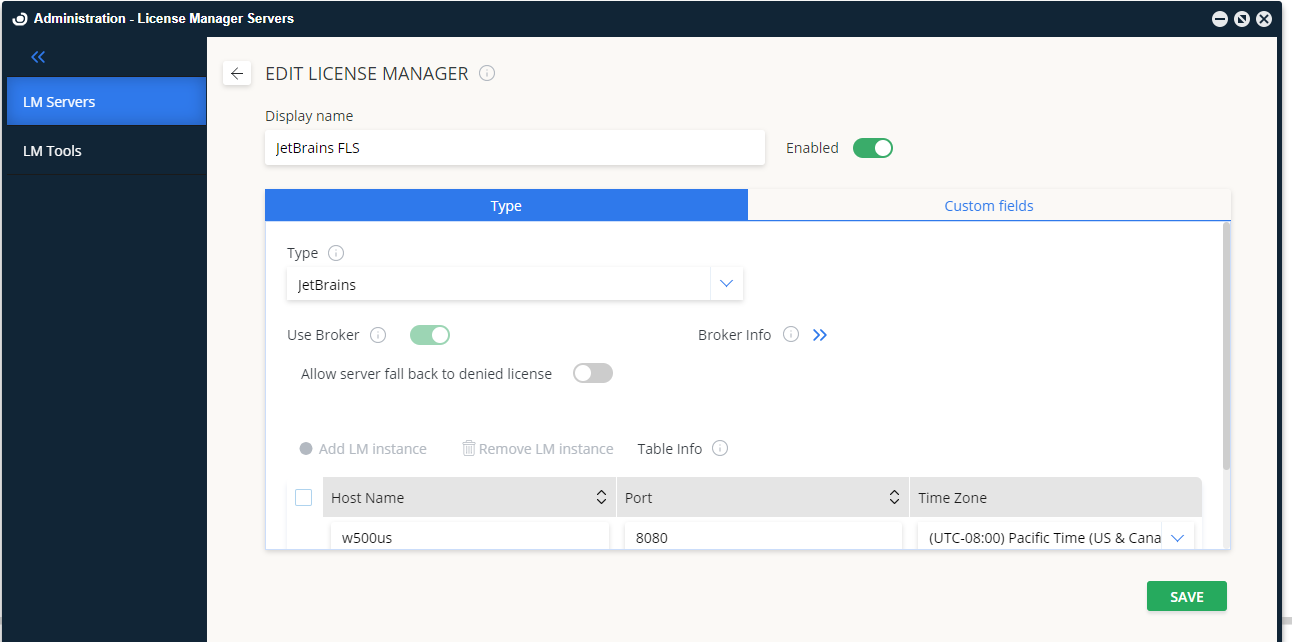
Manual configuration
If automatic approval fails:
- In Server Configuration → License Servers, select Add.
- From Type, select OpenLM Generic.
- In Description, enter a name (for example,
JetBrains FLS). - Set the correct Time Zone.
- Enter the JetBrains FLS Hostname and Port (default: 8080).
- Leave Is Triad Configuration unchecked.
- Check Use Broker.
- Select Save.
Verify the configuration
- Open EasyAdmin at
http://<OpenLM Server hostname>:5015. - Go to Start → Widgets → License Manager Servers.
- Confirm JetBrains FLS appears in the list.
- A green Up to date icon means the server is active.

When adding a new connection, the status indicator may take up to 3 minutes to update.