Autodesk Token Flex
How to configure the Autodesk Token Flex
The following document describes OpenLM's implementation and configuration of Token Flex license managers.
Token Flex is a cloud-based, pay-as-you-go licensing model from Autodesk where the customer buys several tokens (referred to as a "token pool") and pays with these tokens each time a user runs a product belonging to a certain product family within a specified amount of time (usually counted as 24-hour intervals).
The time is always taken from the Token Flex server side. If a user starts using a certain feature from a product family (for example, Autodesk AutoCAD) at 11:29 AM local user time but the timezone of the Token Flex server adjusts the time to be 11:29 PM, the moment a new day occurs (that is, 00:00) on the server-side, the license manager will log the current token as consumed and start monitoring usage for the next time interval.
With Token Flex, there are generally two token types:
- Annual tokens, which expire after 365 days if they have not been used.
- Contract-based tokens, which last for the term of the contract, for example, 3 years. As with annual tokens, any unused tokens will expire at the end of the contract term.
OpenLM supports tracking for both types of tokens.
Requirements for interfacing with a Token Flex server
Before you can interface OpenLM with a Token Flex server, you must check that your OpenLM license supports it.
To check if your license has support for Token Flex:
-
Open the EasyAdmin User Interface (Windows Start → OpenLM → OpenLM EasyAdmin User Interface)
-
Open the OpenLM License Window (EasyAdmin User Interface Start → Administration → OpenLM License)
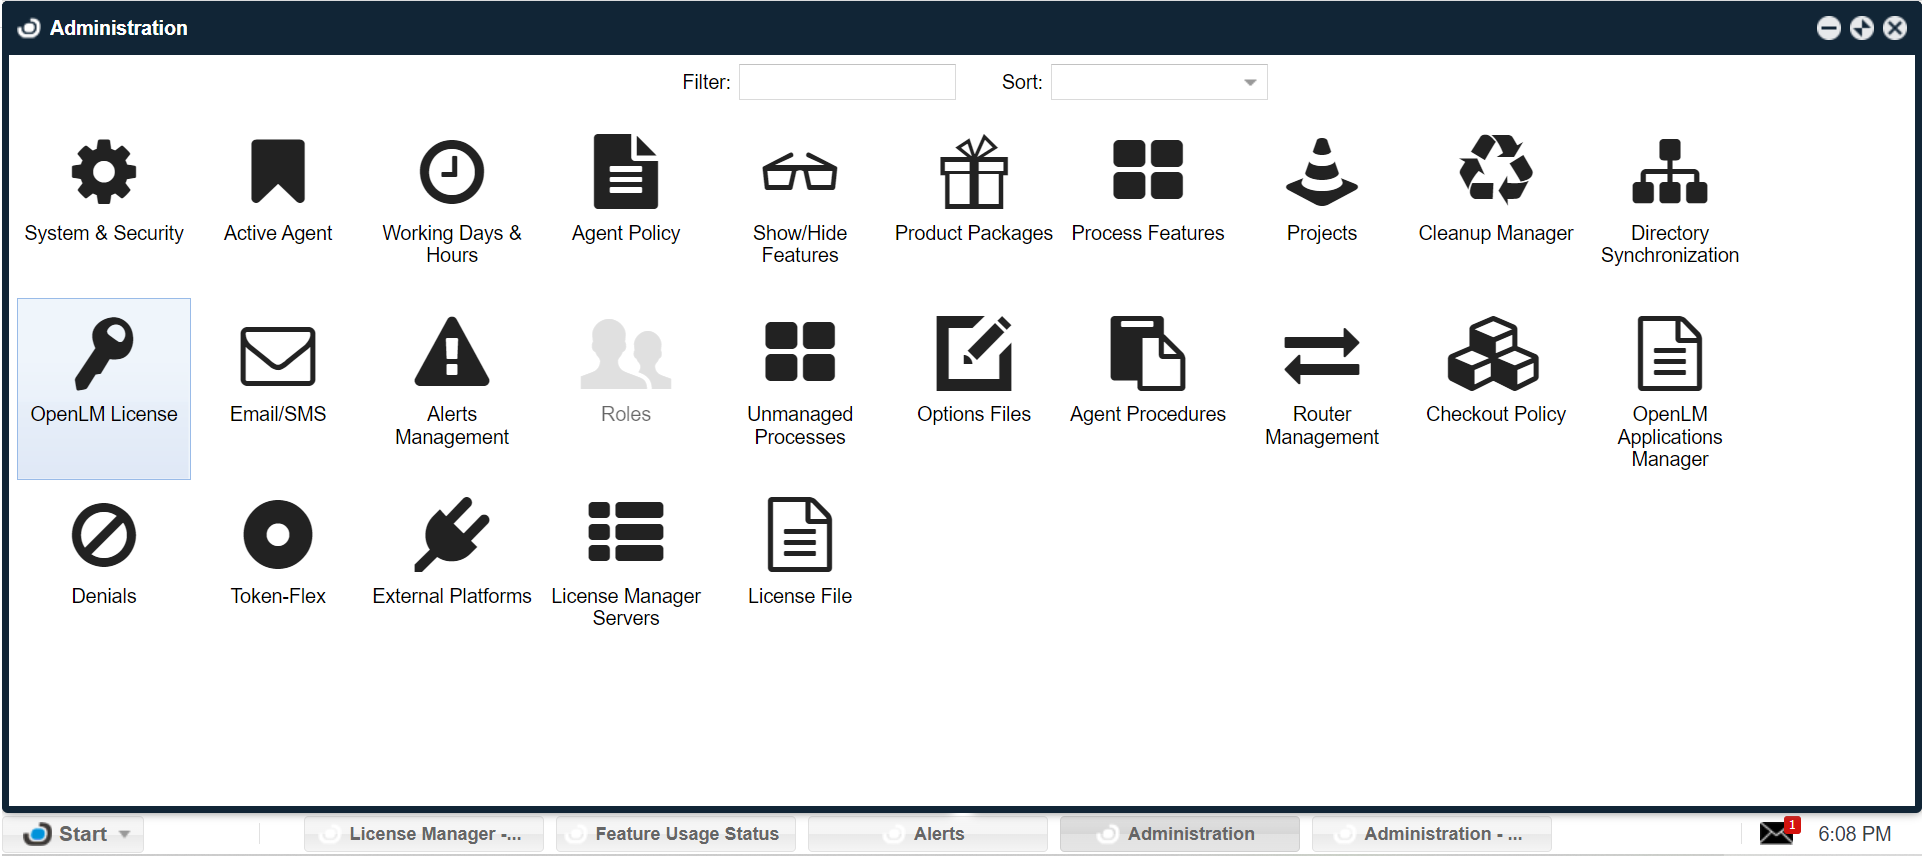
- Check that the Token Flex feature is present in the list.
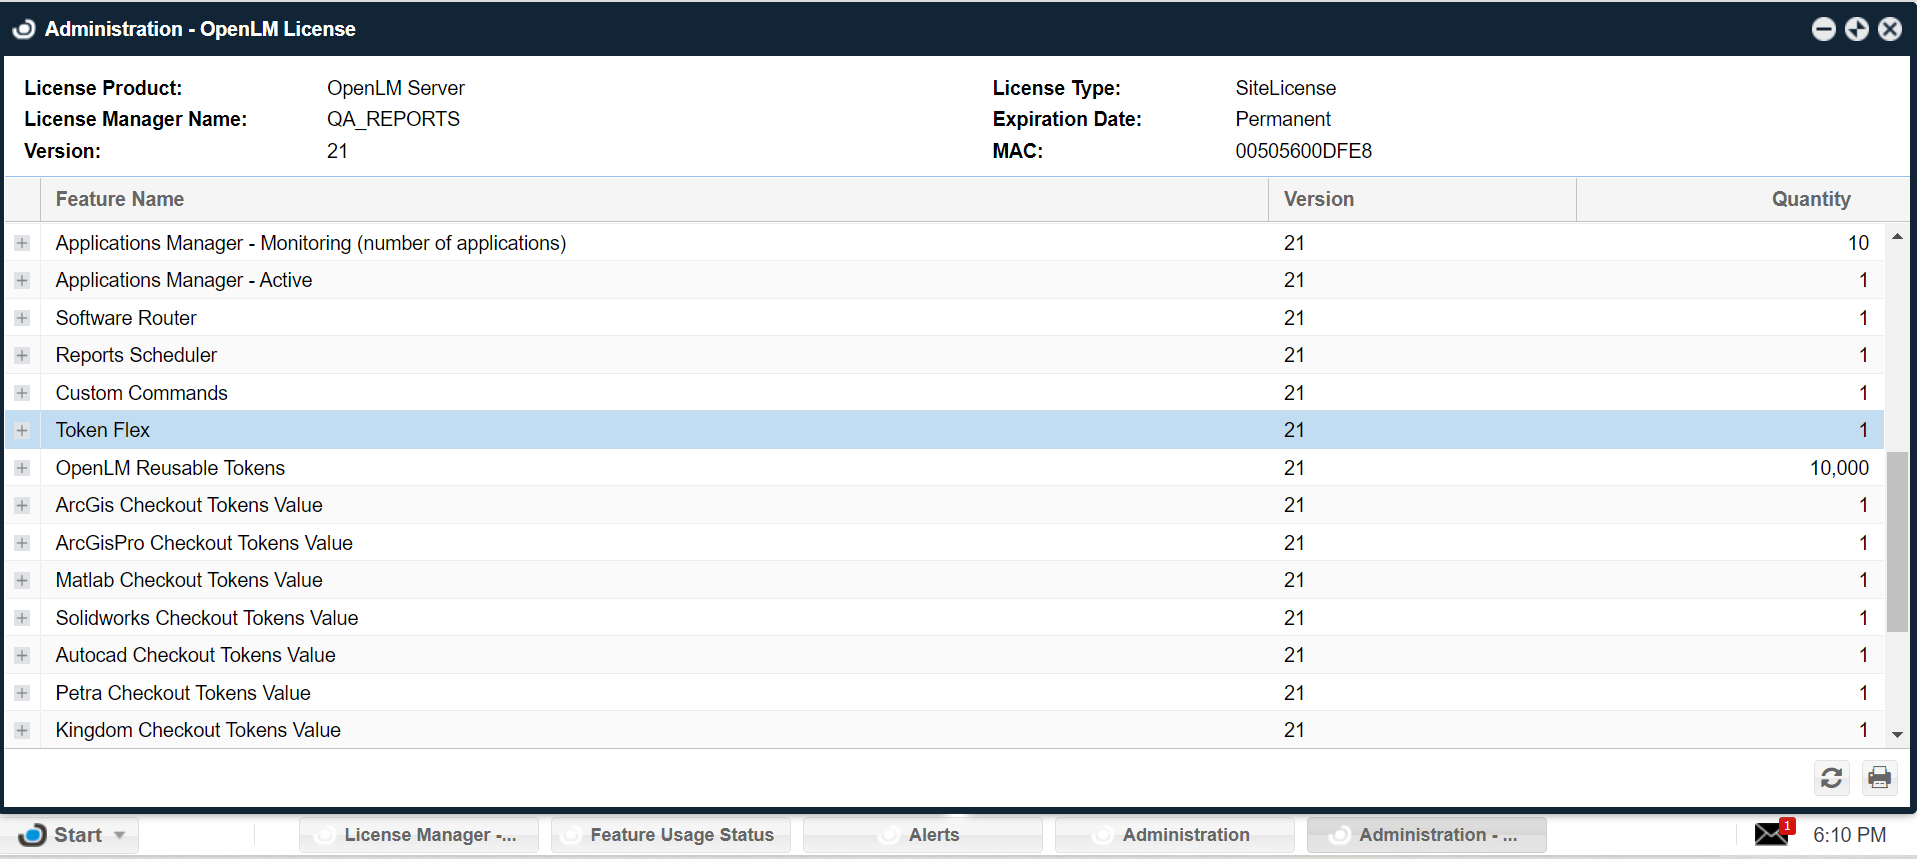
If your license does not have this feature, contact Sales (sales@openlm.com) to inquire about this extension.
Configuration
There are two types of configurations possible when interfacing with a Token Flex server: using OpenLM Server with OpenLM Broker or using the OpenLM Server directly. We recommend the first type of configuration as you will get added functionality such as managing license files, data buffering and other advanced features available only with the Broker.
Configuring Token Flex with OpenLM Broker
To interface a Token Flex server with OpenLM Broker you must:
-
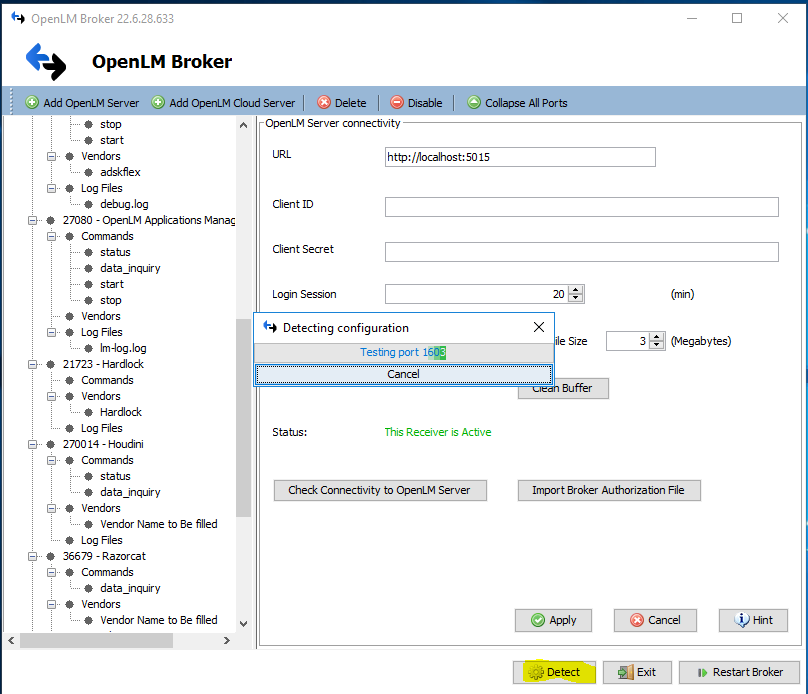
Open the OpenLM Broker configuration tool (Windows Start → OpenLM → OpenLM Broker Configuration Tool)
-
Select on Detect to search and auto-configure the FlexLM license servers
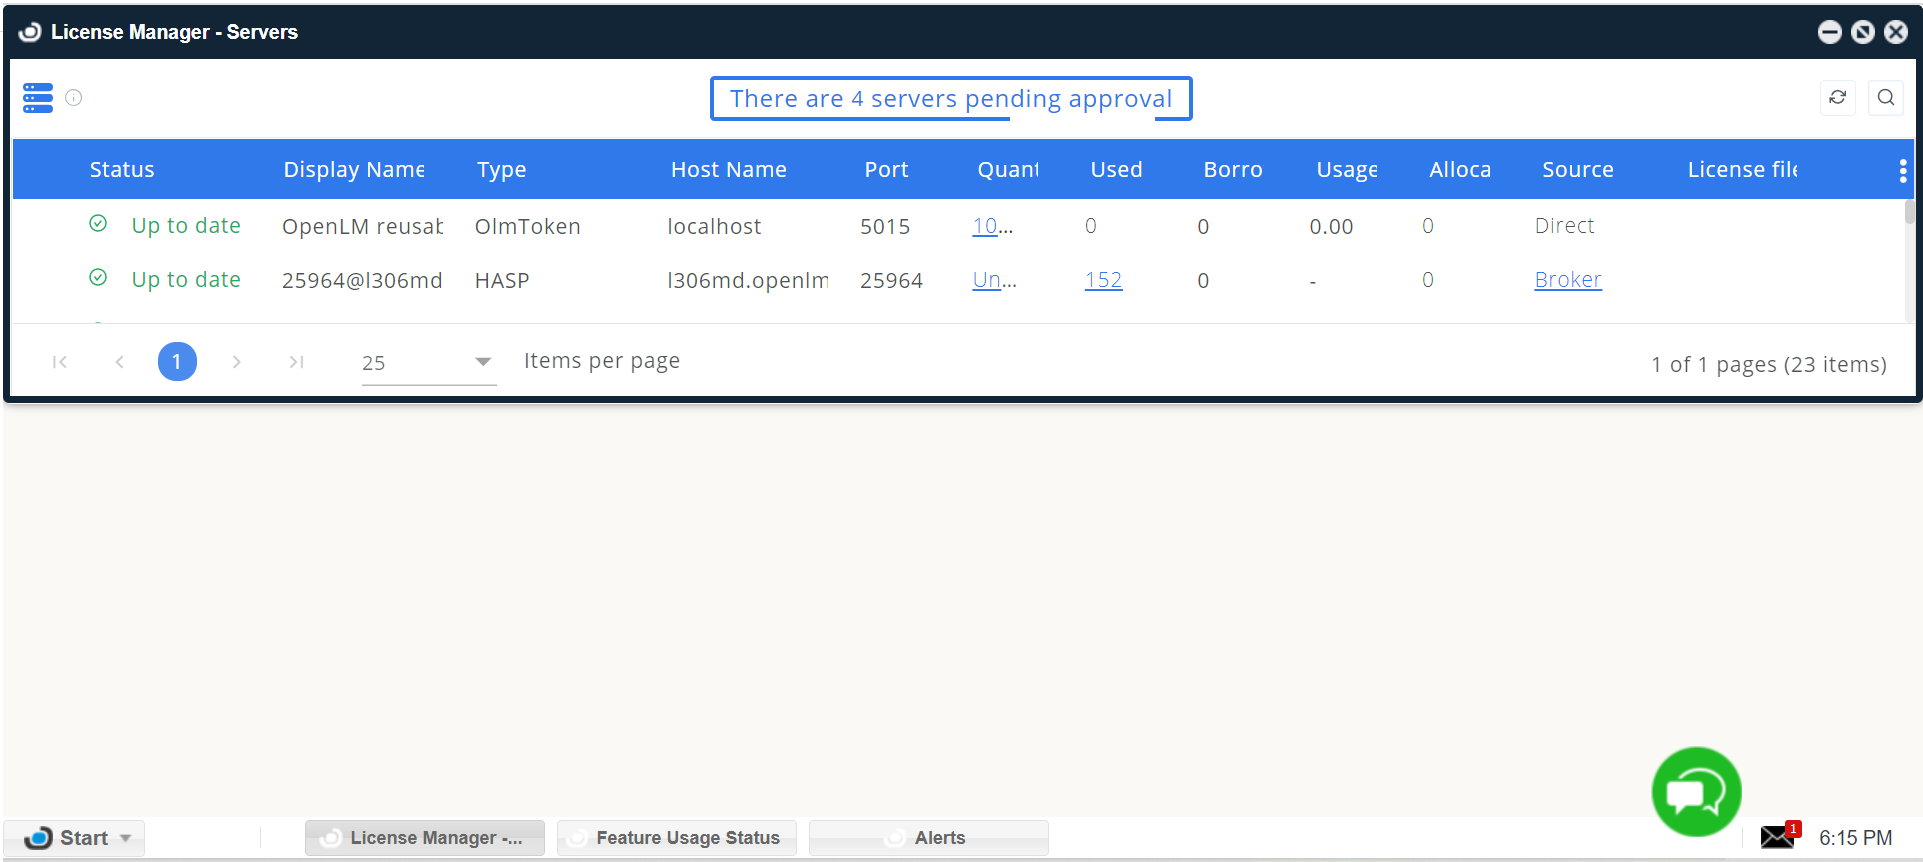
- Open the OpenLM EasyAdmin User Interface and accept the newly added license servers by selecting Approve in the License Servers window
-
Open the OpenLM Server Configuration tool (Windows Start → OpenLM → OpenLM Server)
-
Select Apply to save changes then close the configuration window.
-
Follow the steps in section 3 of this document ("EasyAdminUser Interface Token Flex Configuration") to launch the Token Flex wizard and finish the setup.
Configuring Token Flex with OpenLM Server directly
-
Navigate to the OpenLM EasyAdmin User Interface (Windows Start → OpenLM → OpenLM EasyAdmin User Interface→ Start→ Administration→ License Manager Servers)
-
Select the **Add **button on the upper left side of the window to add a new license manager server.
-
Configure the following fields:
- Display Name - enter a name to identify your Token Flex server
- Enabled - Toggle on
- Type - Autodesk TokenFlex
- **Use Broker Toggle **- Activate OpenLM Server to work with OpenLM Broker. If Broker reported the LM server, this switch would be on automatically.
If the used Broker was switched on by you, make sure the LM server is configured at the Broker side as well . Broker toggle on - Switch ON to activate OpenLM Server to work with OpenLM Broker to locally query the license server. To support this feature install OpenLM Broker on the LM server.
When switched OFF, OpenLM Server remotely queries the license manager output file, without Broker involvement.
- **Read License File - **The LM license file includes additional licensing information, such as Expiration dates, Asset info, and Packaging information.
By switching the Read license file ON, the Broker report will include the additional information.
- **Reset license file - **Use this to refresh the LM server License file on OpenLM. When read license file switched on OpenLM is samples the license file reported by the Broker, on the first time it scans all license files, and on the next time only searching for delta, by selecting the reset button OpenLM will scan the all files again on the next Broker transmission.
- **Allow server to fall back to denied - **Not counting as denial when granting a license from another server after being denied by this server.
- Enable Triad Configuration - check if you want to employ multiple license servers in a cluster to assure a fault-free license management solution
- Hostname - the IP address or hostname of the Token Flex server
- Port - the FLEXlm port of the Token Flex server
- **Time Zone - **the time zone of the Token Flex license server
-
Select Save to save the settings.
-
Follow the steps in section 3 of this document ("OpenLM EasyAdmin User Interface Token Flex Configuration") to launch the Token Flex wizard and finish the setup.
EasyAdmin User Interface Token Flex configuration
Once you have configured OpenLM Broker and Server, it's time to finish the Token Flex configuration. There are 3 possible actions, depending on which stage of the setup you're at.
Wizard configuration
If this is the first time you're configuring token usage, you will be presented with a wizard in EasyAdmin User Interface.
To start the token server configuration wizard:
- Open EasyAdmin User Interface Start → Administration → Token-Flex
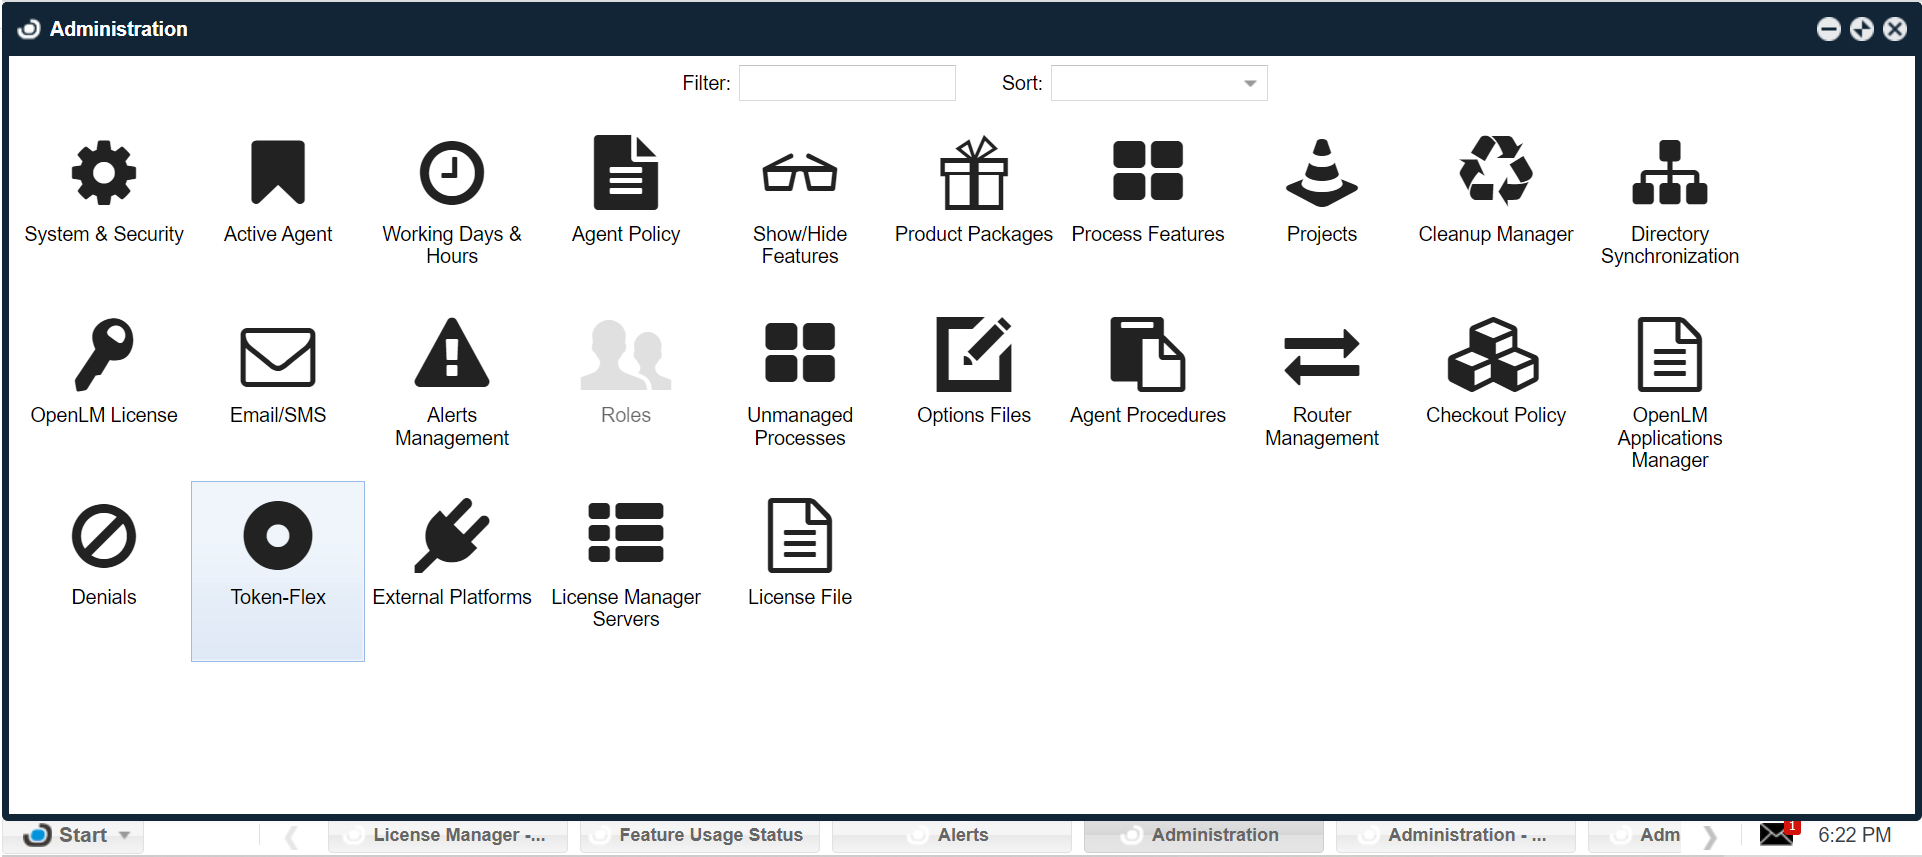
- The Token Flex configuration wizard screen will open. Check to see that all the token servers you have configured in section 2 are present on this screen. Note that sometimes it may take up to 10 minutes before OpenLM starts reporting the Token Flex server status.
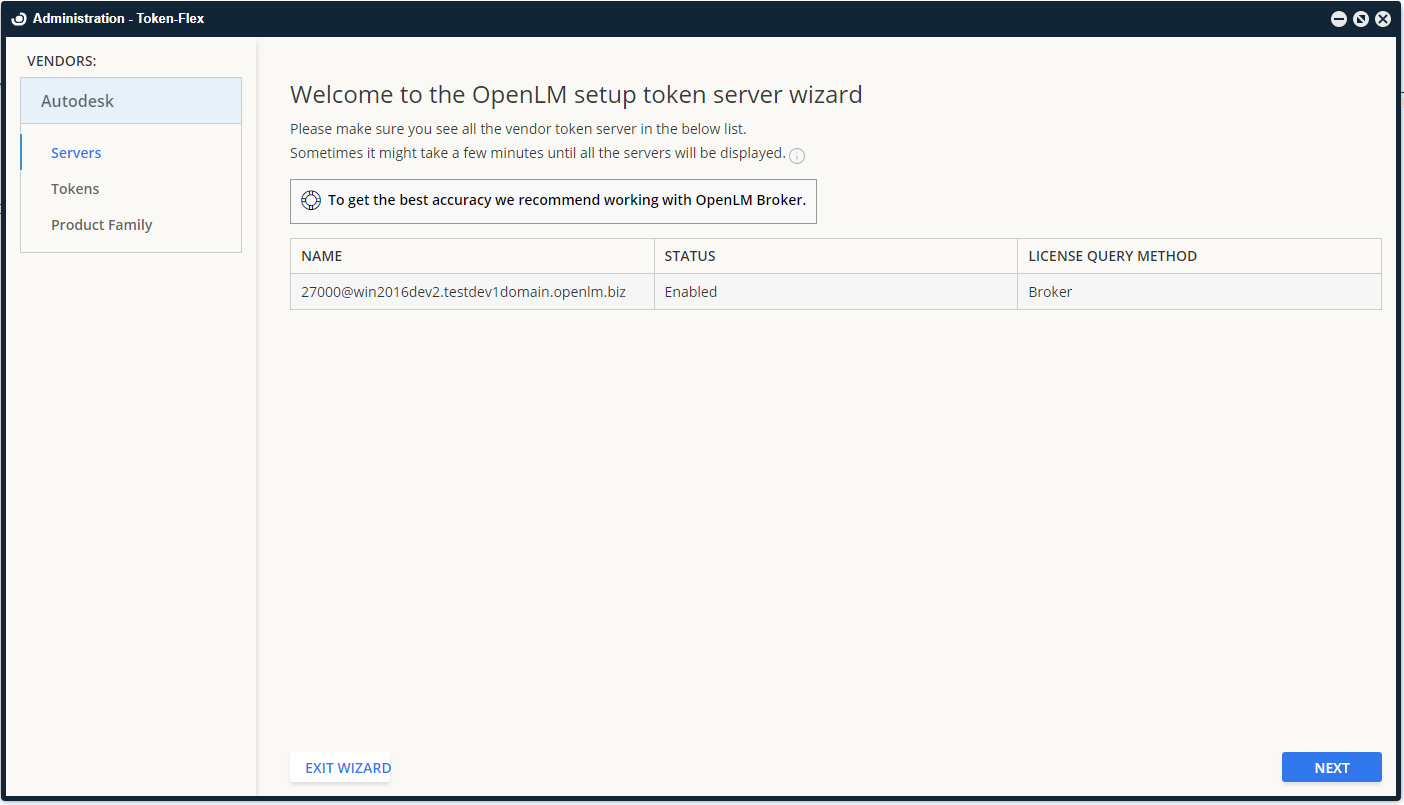
- Select "Next" to proceed to the "Tokens" configuration tab.

The options on this screen work as follows:
Session length - this is a non-configurable default set to 24 hours as per the Token Flex specification. This is the token lifetime. Once this amount of time has passed, the license manager counts several tokens (the specific amount defined in the token mapping definition file) as being consumed. As mentioned previously, the time is based on the license server's time zone, not the user's time zone.
Session grace time - (default: 5 min) some providers allow grace time for token usage. Grace time is a short period during which license usage is not accounted for and thus no token is counted as "consumed". The maximum value that can be configured is 20 minutes.
- Select "Next" to proceed to the "Product Family → Families Token Rates" tab.
Here the wizard will scan the token license servers and detect which features have token support. If the wizard finds a feature that it recognizes, it will automatically assign it to the default feature/product family mapping that is provided with OpenLM.
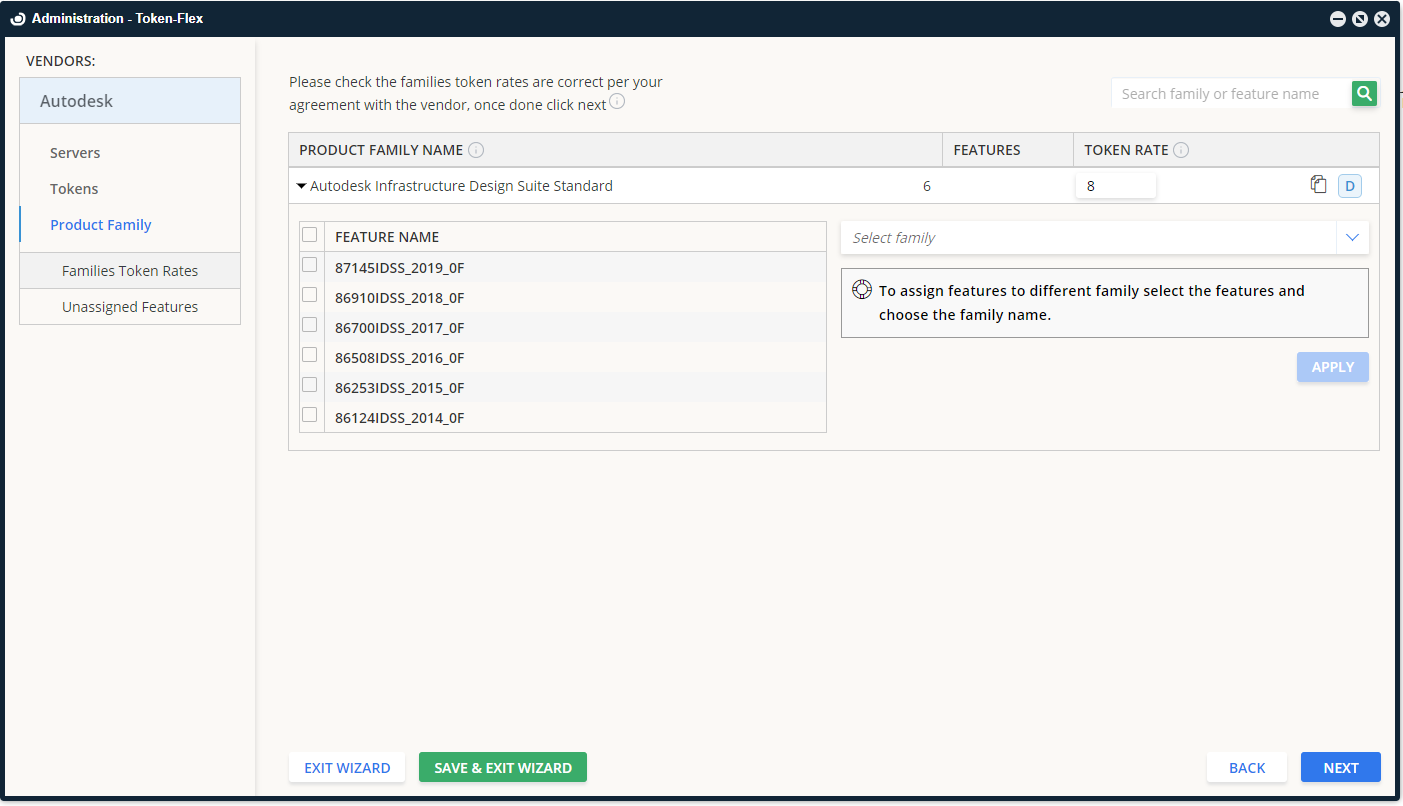
On this screen, you can specify the token rate for each product family that you will be using. The token rate is the "value" of a single token. The product family is either one or more applications (sometimes referred to as features) that belong to the same group.
When one of the applications in the product family is used by a user during the predetermined session length (that is, 24 hours), a token is considered as being consumed. Each family can have a different token rate which is specified in the "Token Rate" field. Using any other application from the same product family during this time will still be counted as the utilization of the same token.
The fields and their values are as follows:
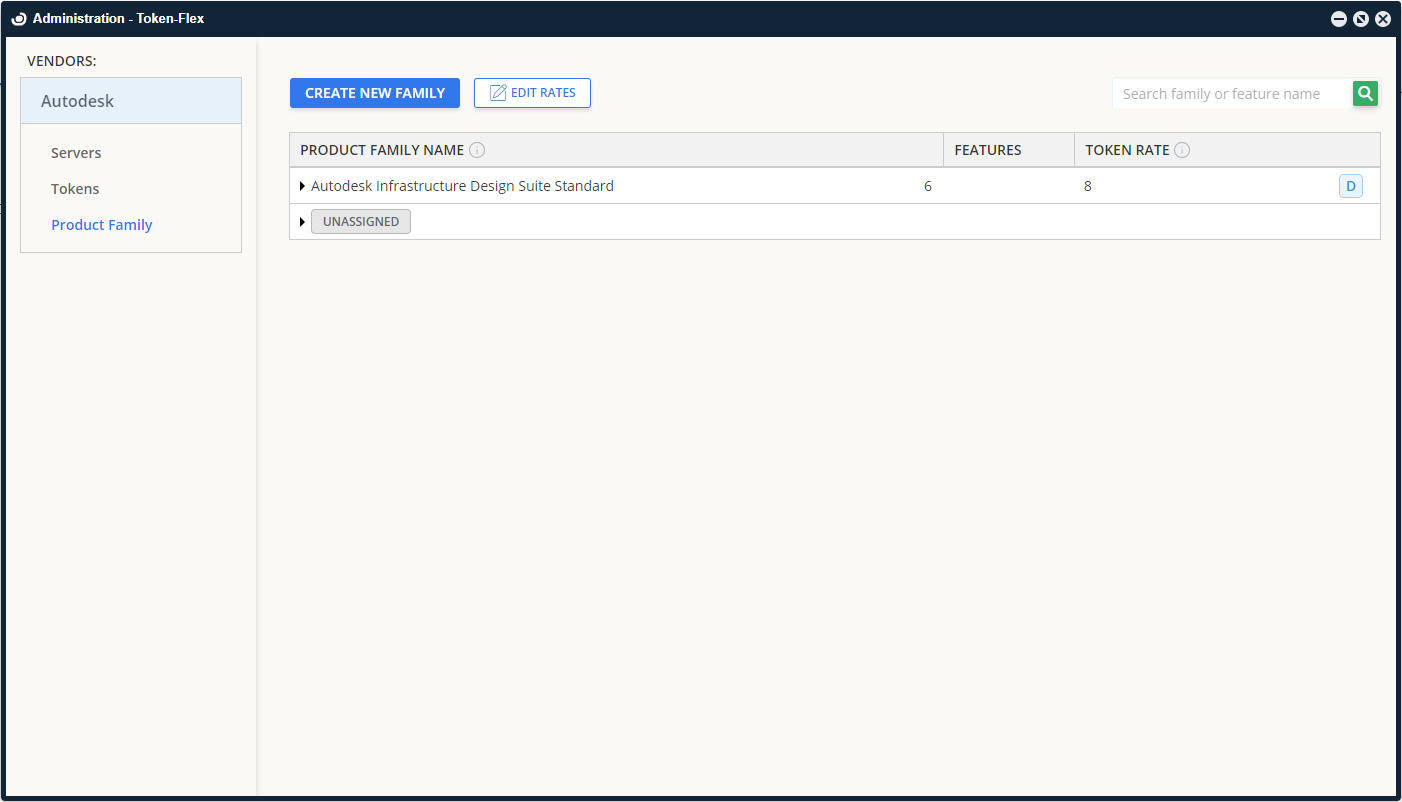
Product Family Name - the name of the application(s) group. By default, there are several product families which are provided by OpenLM for Autodesk products. The blue icon on the right side of the product family name indicates whether it's an **[D]**efault or a **[C]**ustom user-defined product family. Selecting on the product name row will expand the selection, allowing you to assign a feature to a different product family.
Features - the number of applications (features) that have been assigned to a specific product family.
Token Rate - the number of tokens that will be deducted from the token pool, per unique user, per day
Lastly, if you're looking for a specific family or feature name you can make use of the search box in the top right corner to locate it.
Note that if you select on the "Save & Exit" wizard instead of Next at this stage of the wizard some features may be reported inaccurately or not at all. If you're using the Token Flex functionality from a previous version of OpenLM, it might be necessary to quit the Wizard by selecting "Save & Exit", importing a new mapping file (see section 3.2) then starting the Wizard again by selecting on the vendor name (that is, "Autodesk") and then on "Start Wizard".
This will ensure that all the TokenFlex features are reported accurately.
- Once you've finished configuring the products and token rates on this page, select **Next **to advance to the "Unassigned Features" tab.
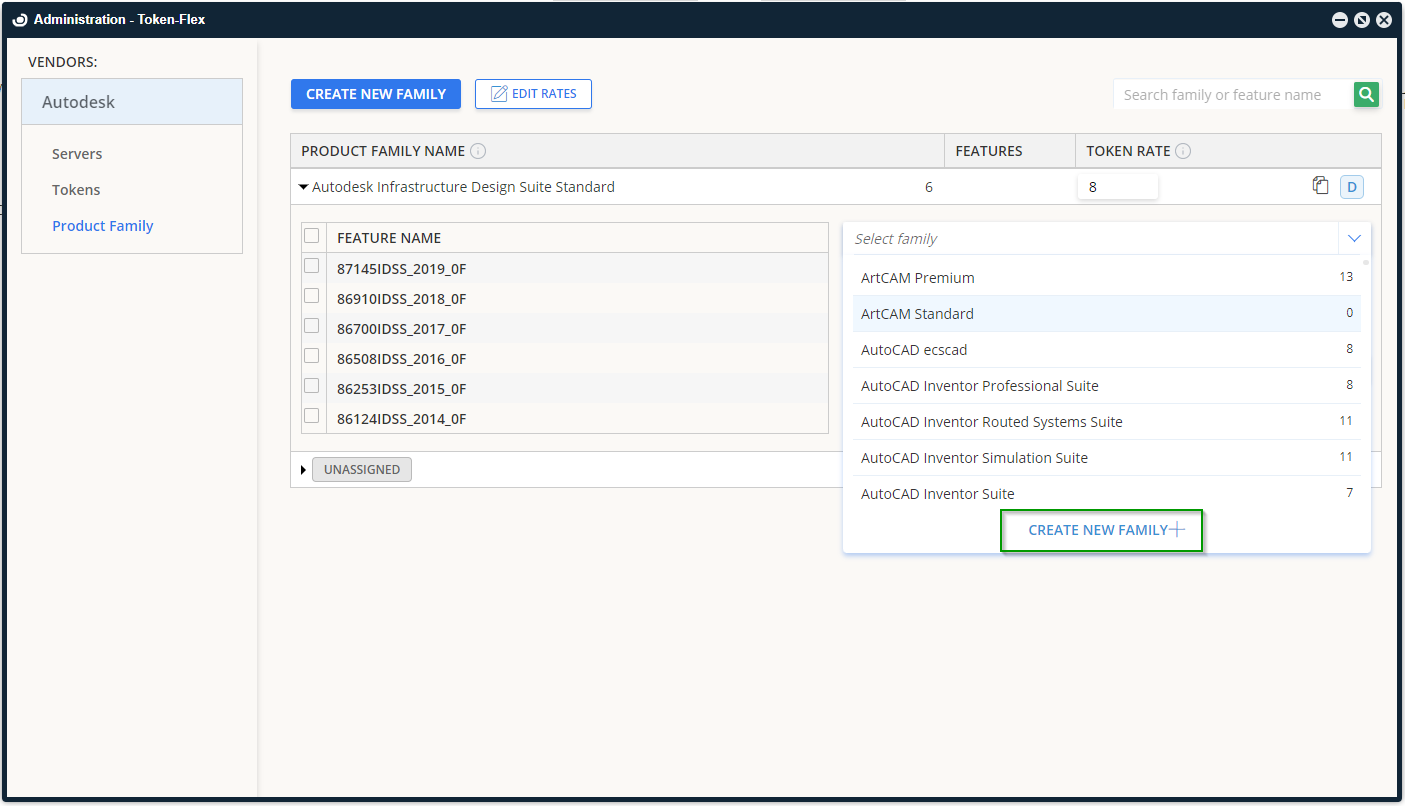
On this screen, you will see all the features that the wizard detected on the token servers but was not able to assign to a specific product family.
6a) At this point you have the option of either selecting the features that you require and assigning them to an existing or a new product family
To assign the features to an existing family
- Check the boxes for the features you require on the left, select the drop-down element on the right, select the family you would like to assign them to then select Apply. To create a new family
Check the boxes for the features you require on the left, select the drop-down box on the right, and select on Create New Family.
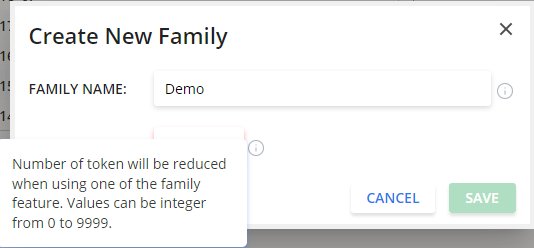
Enter a unique Family Name and a token rate between 1 and 9999 then select on Save.
6b) Or you can select the Save & Exit Wizard button to save your configuration without assigning the "orphan" features to any specific product family. You might see a final warning dialog:
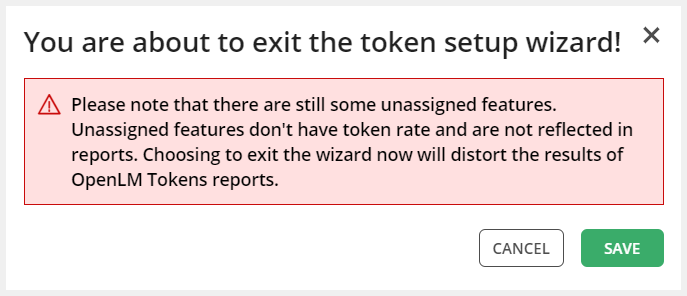
Select Save to confirm.
- A final confirmation message will appear. Select Close.
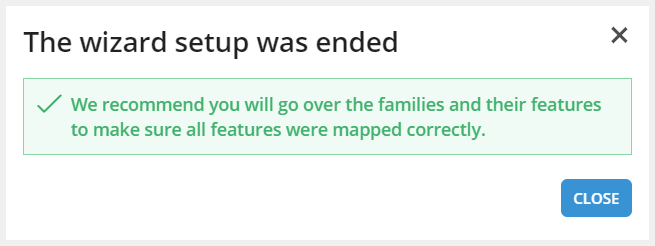
At this point, the wizard is complete and you should now be able to monitor and overview the Token Flex usage data on the appropriate reports.
Updating the default OpenLM feature and product family mappings
If you want to update the default feature and product family mappings that are provided with OpenLM:
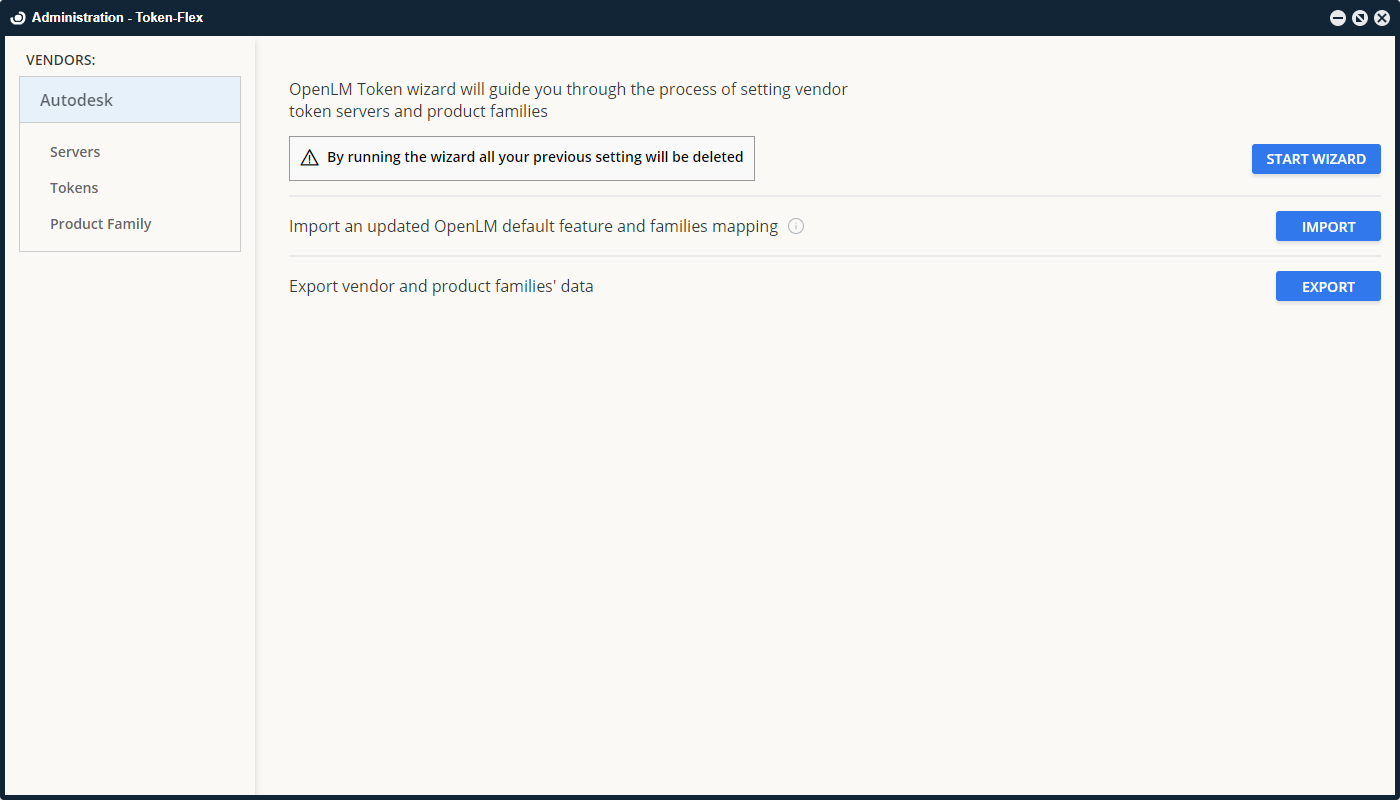
- On the default TokenFlex screen, select the vendor name in the left-side column (i.e, Autodesk)
- Select Import.
- On the pop-up that appears, you can either select "Online update from OpenLM website" or "Update from file" and then select on "Select File" to browse to the location of the definition table.
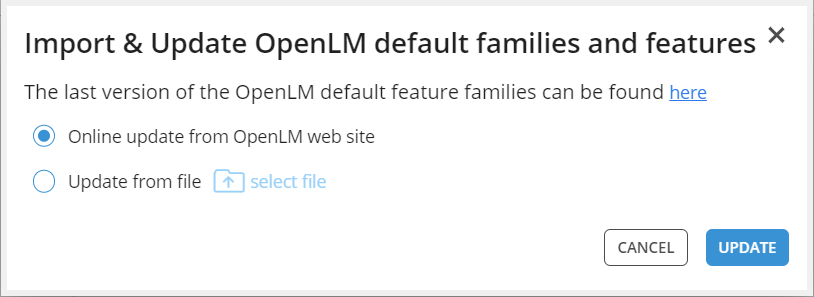
- Select Update to complete the process. A brief message will appear on the TokenFlex window to confirm whether the operation was successful or not.
Exporting OpenLM features and family mappings
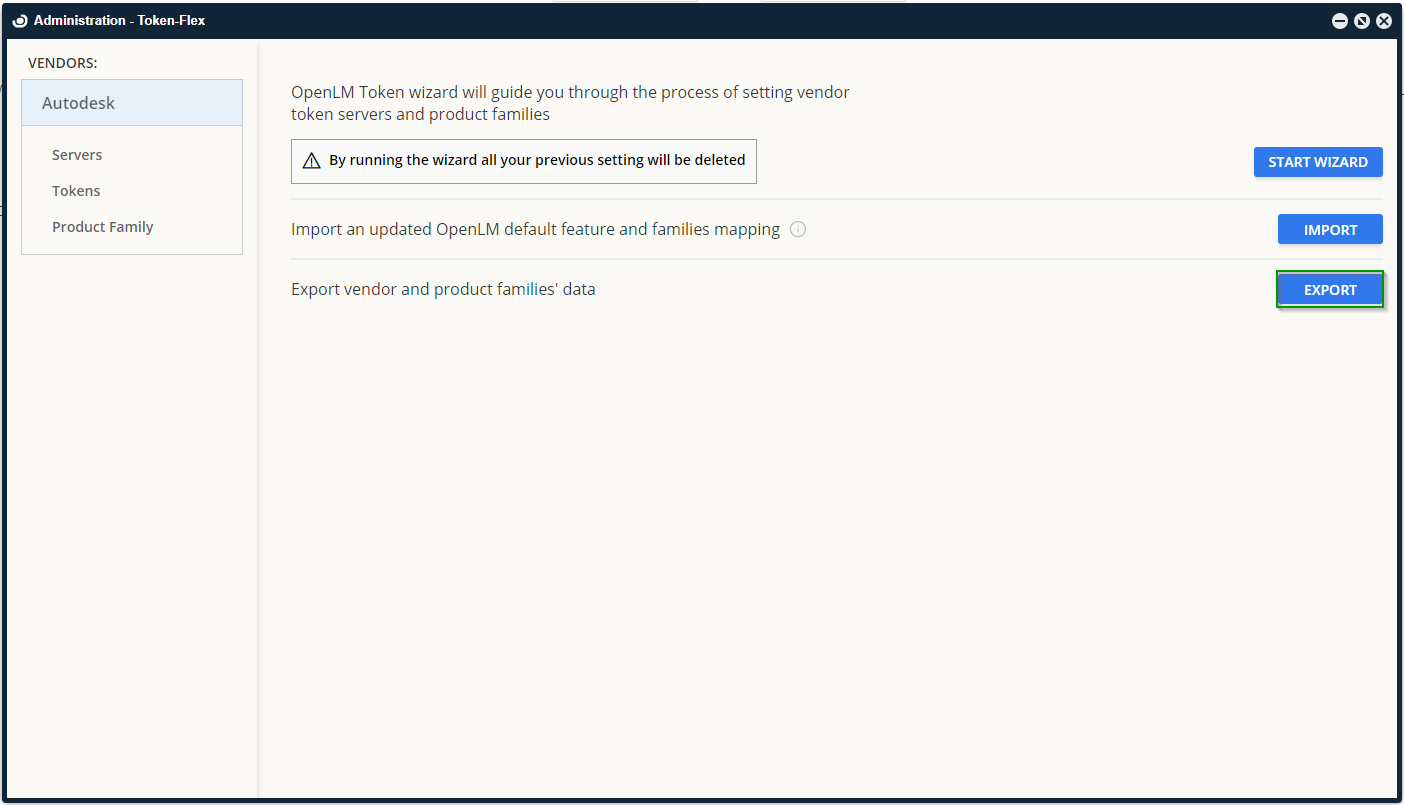
If you have already set up custom token rates and mappings for features and product families and you want to backup or replicate them on another OpenLM Server, you can easily export them by selecting Export on the main tab of the TokenFlex window:
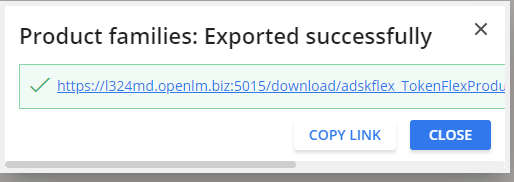
You should see a small window pop-up with a downloadable link open. Select on the link to begin the download:
Token Flex reports
To analyze and get an overview of the usage data of the Token Flex servers, you can open either of the reports by going to EasyAdmin User Interface → Start → Reports → Token Flex. There are 3 standard reports available. The following section will describe their usage and functionality.
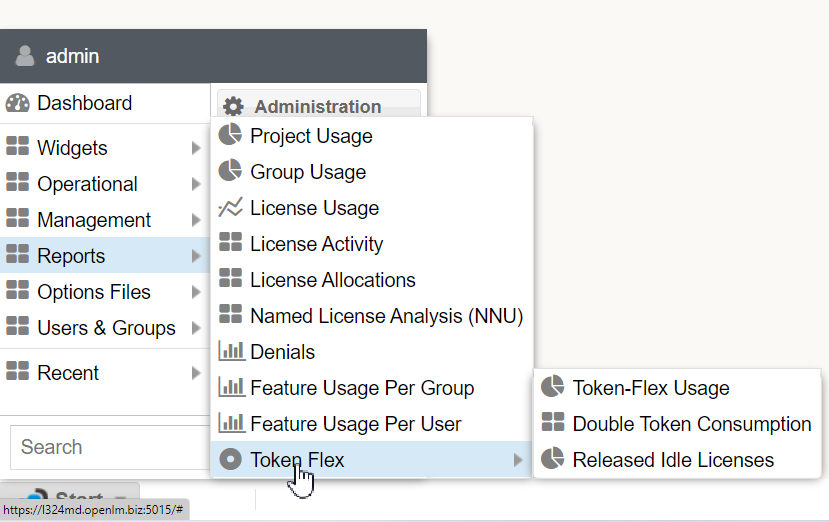
Token-Flex usage
This report shows the total number of tokens that were consumed for a certain product family along with the total consumption time. Two types of views are available: table and chart. Keep in mind that due to the way vendors calculate token consumption, the reports show a 48-hour delay.
In addition to this, the Token Usage report can group the data by User, allowing you to see how many tokens a certain user has consumed.
Double token consumption
This report shows suspected cases where a user might have been charged twice for the same product family during a working day.
Released idle licenses
This report shows idle licenses that were released automatically by OpenLM. For OpenLM to gather data to generate this report, the automatic release functionality must be activated for the associated Token Flex processes.
Idle Token Flex licenses will then be released, by default, 15 minutes before the end of the day (that is, 00:00) to avoid unnecessary token spending. To configure this functionality:
- Go to EasyAdmin User Interface → Start → Administration → Process Features.
- Select the row with the Token Flex process/vendor (for example, acad/adskflex) and either double-click on it or select Edit in the upper right corner of the window to open the Process Editor window.
- Check the "Enabled" box and then the "Enable automatic license release functionality" box.
- Set the "Idle Time License Release Threshold" parameter to configure how long before the end of the license server day the license will be released (by default: 15 minutes).
- Select Save.
- Ensure that the OpenLM Workstation Agent is installed and configured on the target workstation(s).
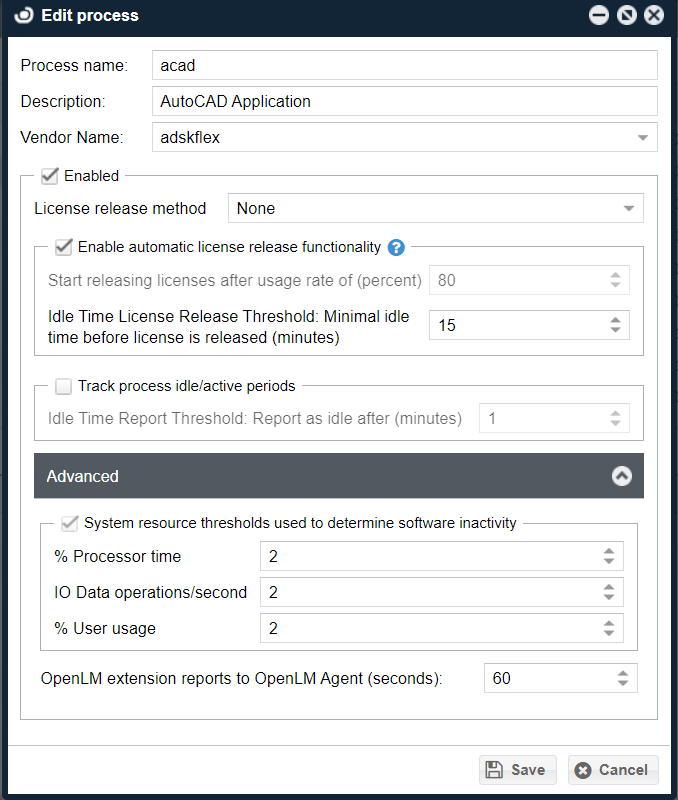
Note: Your OpenLM license must have support for Active Agent for this to work.