OpenText
OpenLM can interface with OpenText to monitor license usage and obtain statistics.
This guide is based on integration with OpenLM Broker v4.8.8 or higher.
For older Broker versions using the EventLog Monitor tool, see this KB.
Requirements
- OpenLM SLM v4.3 or higher installed on a machine in your organization
- OpenLM Broker v4.8.8 or higher installed on the same machine as OpenText
Monitoring capabilities and features
| Feature | Resolution | License totals | License usage | Denials reporting | Borrowed license reporting | Expiration date reporting | Multiple server redundancy |
|---|---|---|---|---|---|---|---|
| Support | By second | ✔ | ✔ | ✔ | ❌ | ✔ | ❌ |
Using Broker also allows buffered communication and remote start/stop of the license manager service.
Activating OpenText logging
-
Open the
ImgLM.inifile on the OpenText server. -
In Event log message IDs, set the value to
1for events you want logged and0for those you don't.
Example:257=1This means that a successful license check-out event will not be logged, whereas
257=1
means that a successful license check-out will be logged, but a failed check-out will not.
logs successful license check-outs.
3. In Event Log File settings:
- Max Size: set to a large enough value in MB.
- Max Duration: set to 365 days.
Broker configuration
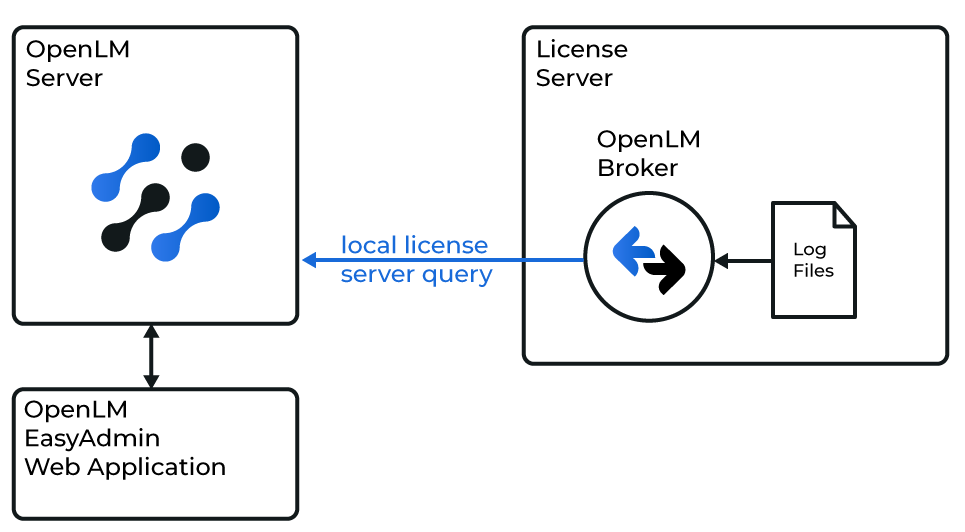
How OpenLM interfaces with OpenText
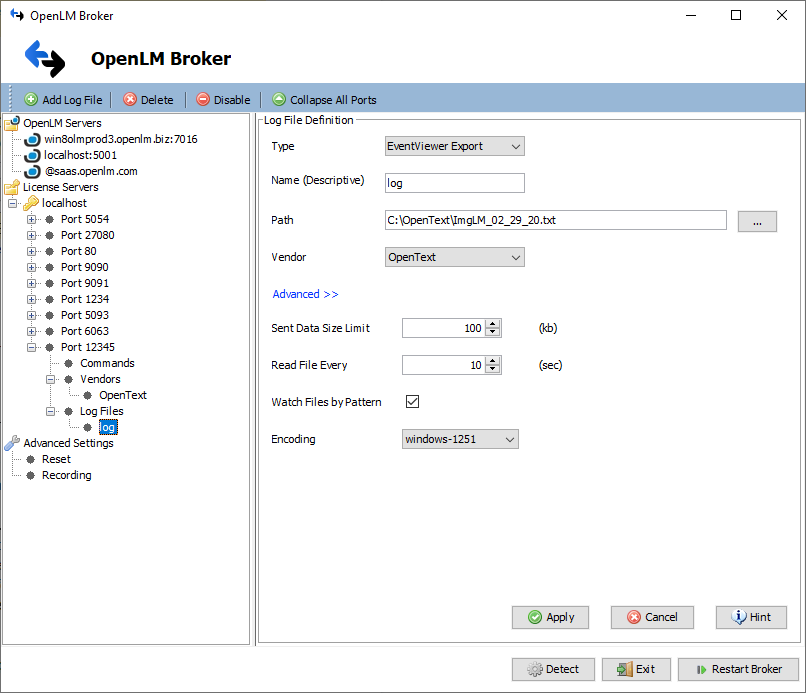
- In Broker, select Add Port.
- Enter any port number (OpenText is log-file only, for example,
12345). - In License Manager Type, select OpenText. Select Apply.
- In Vendors, enter the name you want shown in reports (for example,
OpenText). - In Log Files, select Add Log File and browse to the OpenText log file path (for example,
C:\OpenText\ImgLM_##_##_##.txt). - Select Advanced and enable Watch Files by Pattern.
- Select Apply.
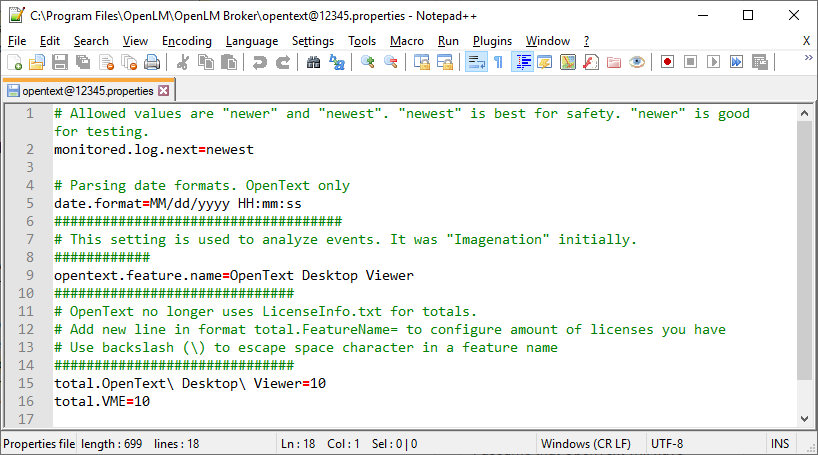
- Open the
opentext@PORT.propertiesfile in the Broker installation folder and adjust settings:
monitored.log.next:newest(default) ornewerfor testing.date.format: defaultMM/dd/yyyy HH:mm:ss.opentext.feature.name: feature to monitor (for example,OpenText Desktop Viewer).total.<FeatureName>: total licenses for that feature (for example,total.OpenText Desktop Viewer=10).
- Save changes and Restart Broker.
SLM configuration
Automatic (EasyAdmin)
- Open EasyAdmin (on-premises or cloud).
- Approve the pending OpenText license manager under Servers pending approval.
Manual
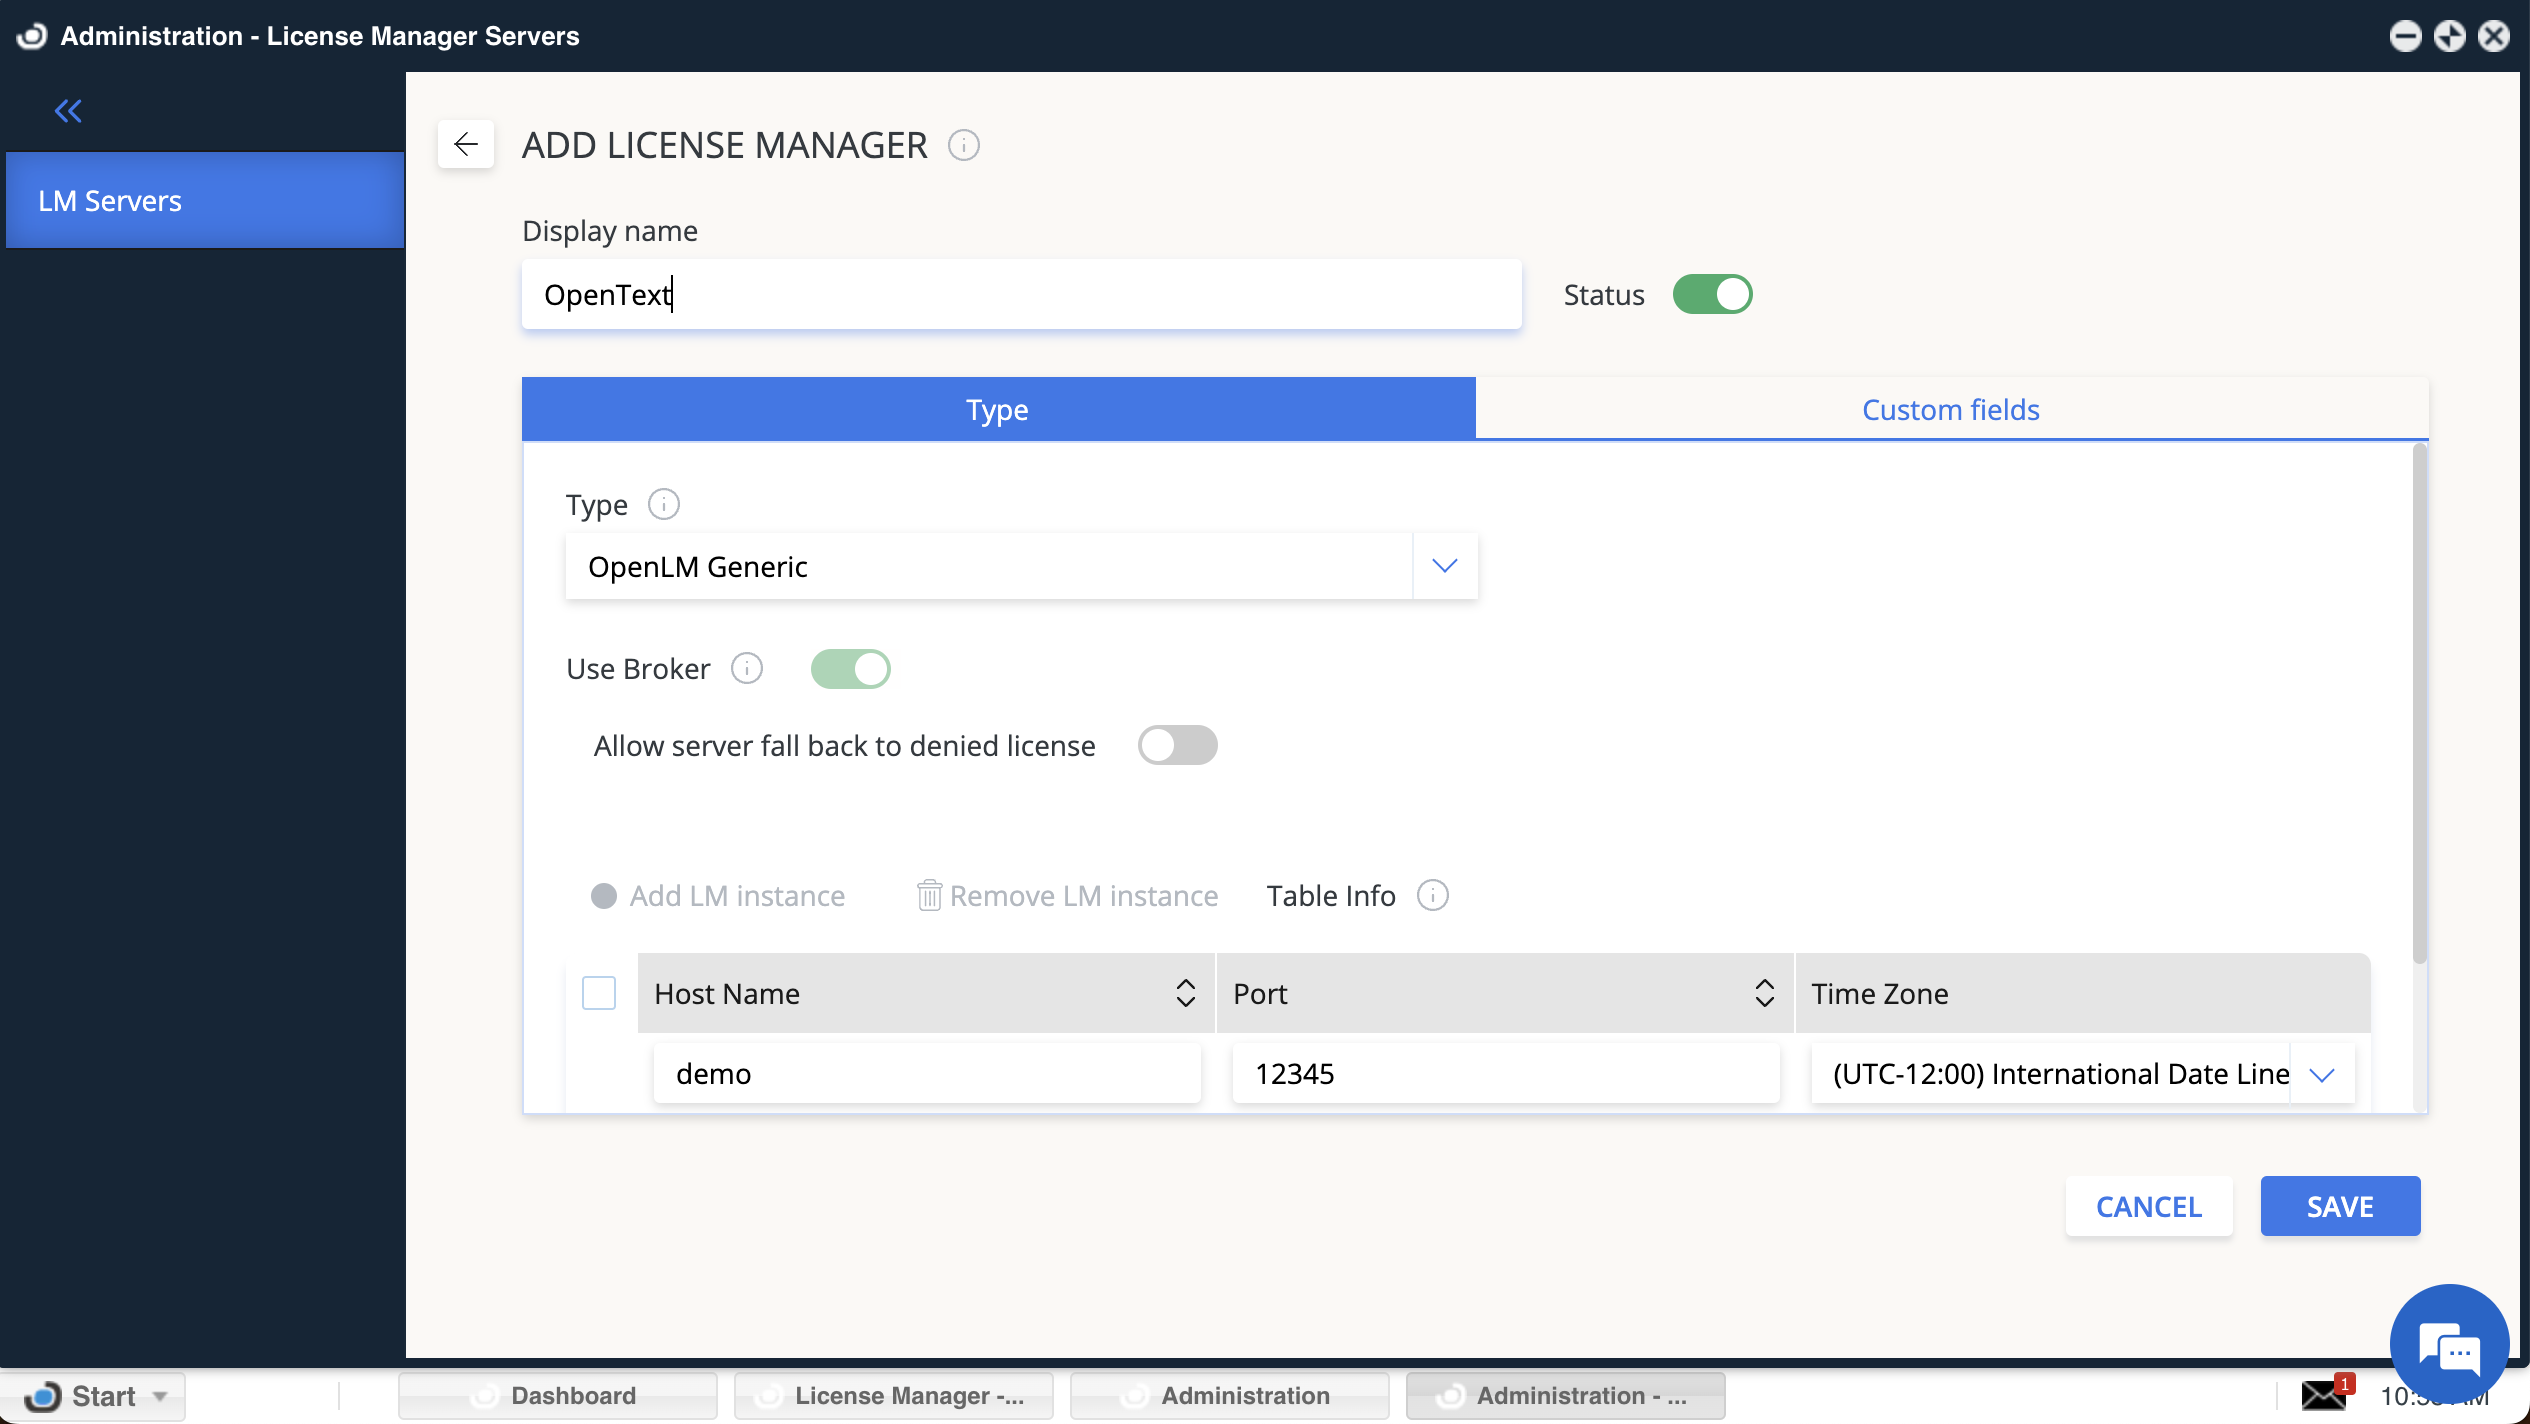
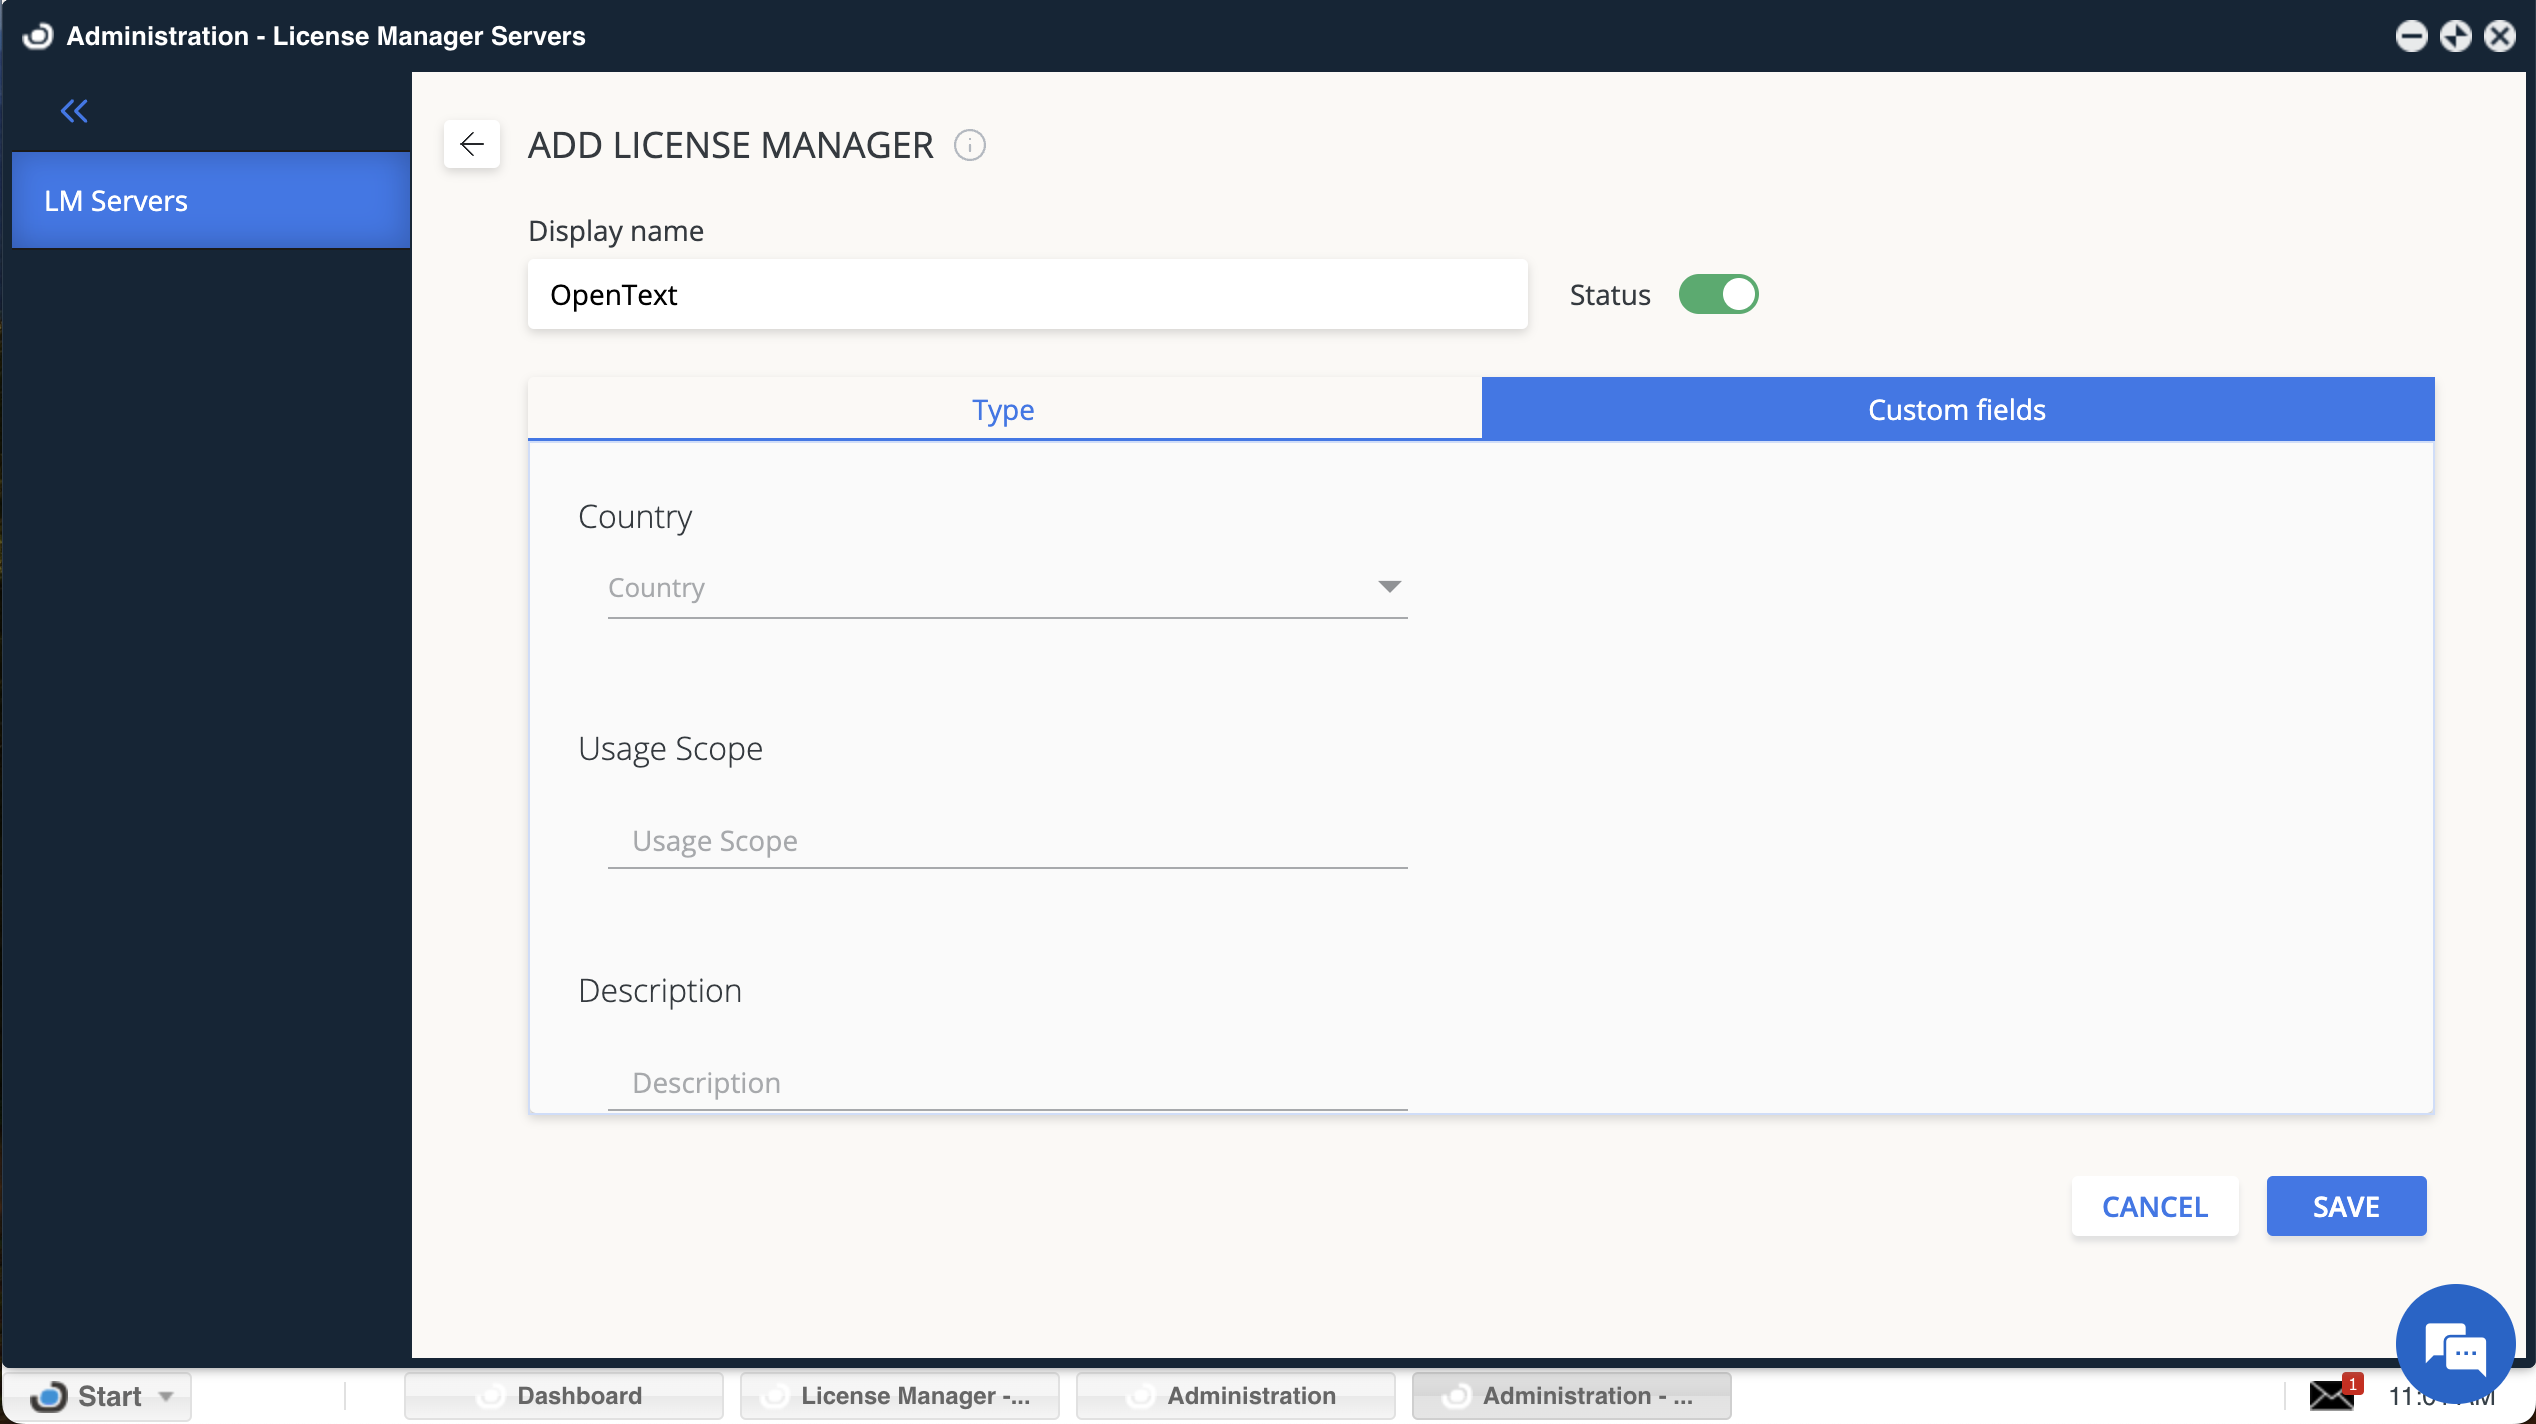
- In EasyAdmin → Start → Administration → License Manager Servers, select Add LM.
- Type:
OpenLM Generic. - Display Name: for example,
OpenText license manager. - Set Time Zone.
- Enter Hostname and Port (must match Broker settings).
- Use Broker: activated.
- (Optional) In Custom Fields, add country, usage scope, description.
- Select Save.
Verifying in EasyAdmin
- In EasyAdmin, go to Start → Widgets → License Servers.
- Confirm the OpenText license manager appears in the list.
- A green circle indicates an active connection.
New connections may take up to 3 minutes to show as active.