UniSim
This document describes how to interface OpenLM with UniSim License Manager to monitor license usage and obtain statistics.
Requirements
To query UniSim license manager, install:
- OpenLM Server v5 or higher on a machine in your organization.
- OpenLM Broker v4.14 or higher on the same machine as UniSim license manager.
Monitoring capabilities and features
Current monitoring capabilities through OpenLM Broker:
| Feature | Resolution | License totals | License usage | Denials reporting | Borrowed license reporting | Expiration date reporting | Multiple server redundancy |
|---|---|---|---|---|---|---|---|
| Support | By minute | ❌ | ✔ | ✔ | ❌ | ❌ | ❌ |
Using Broker also allows buffered communication and the ability to start or stop the license manager service remotely.
OpenLM Broker configuration
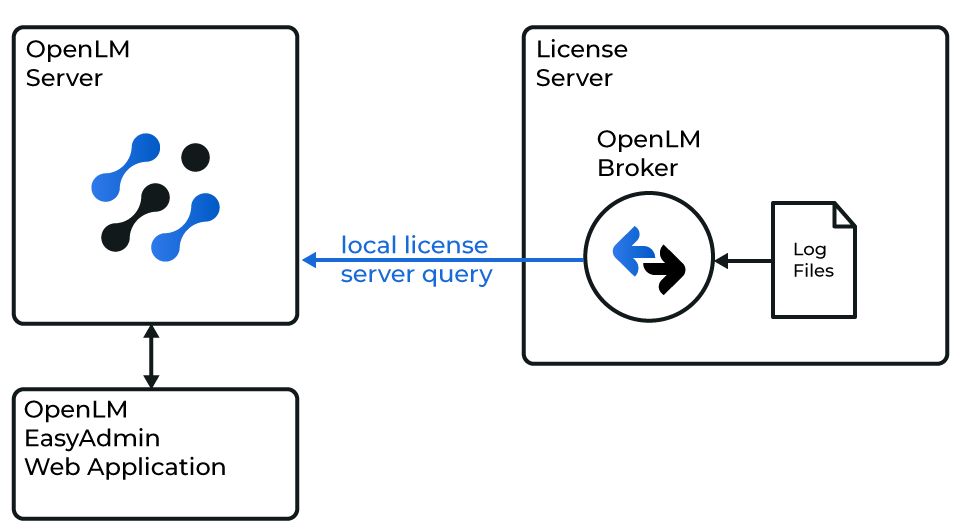 Diagram of OpenLM interface with UniSim
Broker queries UniSim locally through the NetworkLicenceManager tool and the UniSim log file. Once collected, data is sent to OpenLM Server.
Broker must be installed and configured to report to OpenLM Server before continuing.
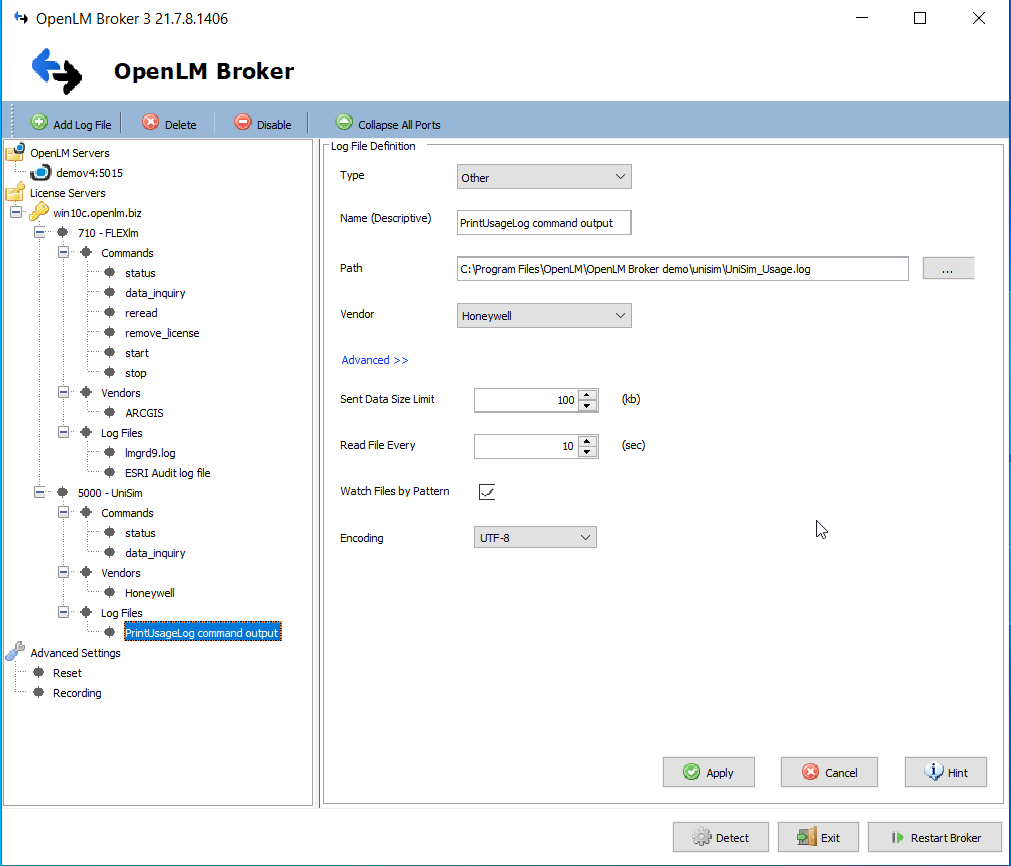
Manual configuration
If auto-detect does not work, add and configure the license manager manually:
- Select Add Port.
- Enter the UniSim LM port number (for example, 6607).
- Select UniSim from the License Manager Type list. Select Apply.
- Go to Commands. In Update path for commands, enter or browse to the UniSim installation root folder. Select Update, then Apply.
- Broker automatically adds vendor name and log file path.
- Select Apply.
- Select Restart Broker.
OpenLM Server configuration
Automatic configuration through EasyAdmin
If Broker is transmitting data, approve the configuration in EasyAdmin:
-
Open EasyAdmin in your browser or through Windows Start → OpenLM → OpenLM EasyAdmin User Interface.
-
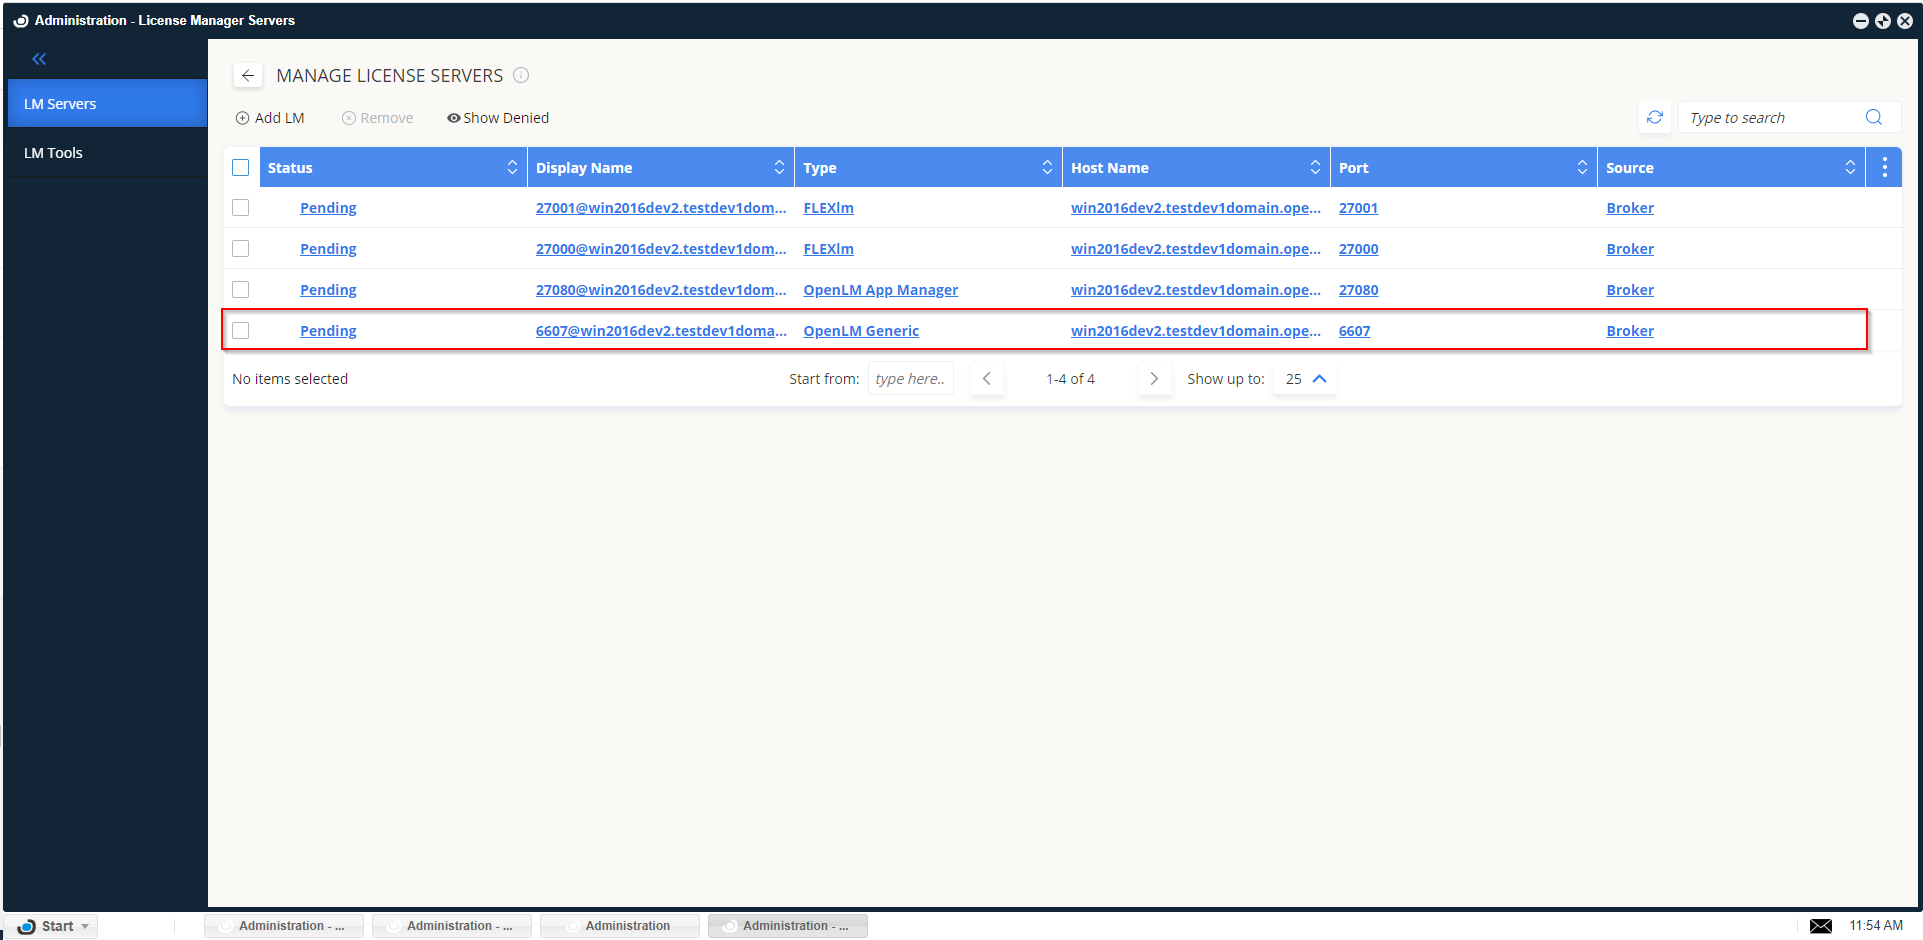
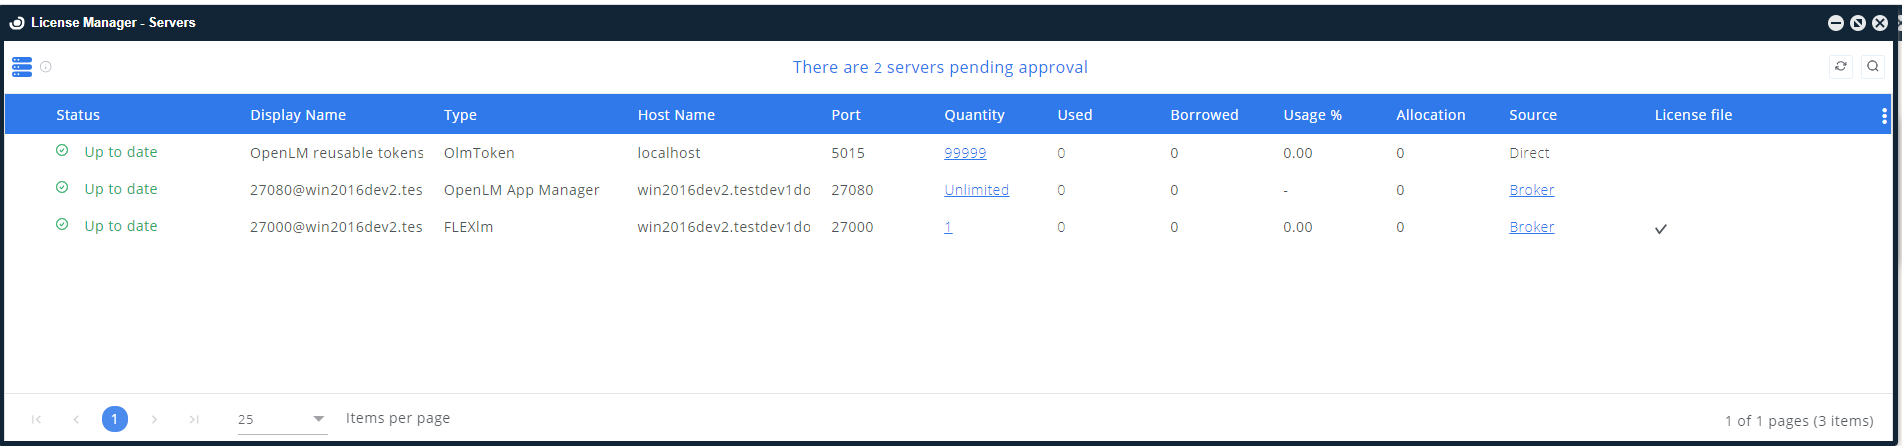
Go to Start → Administration → License Manager Servers.
-
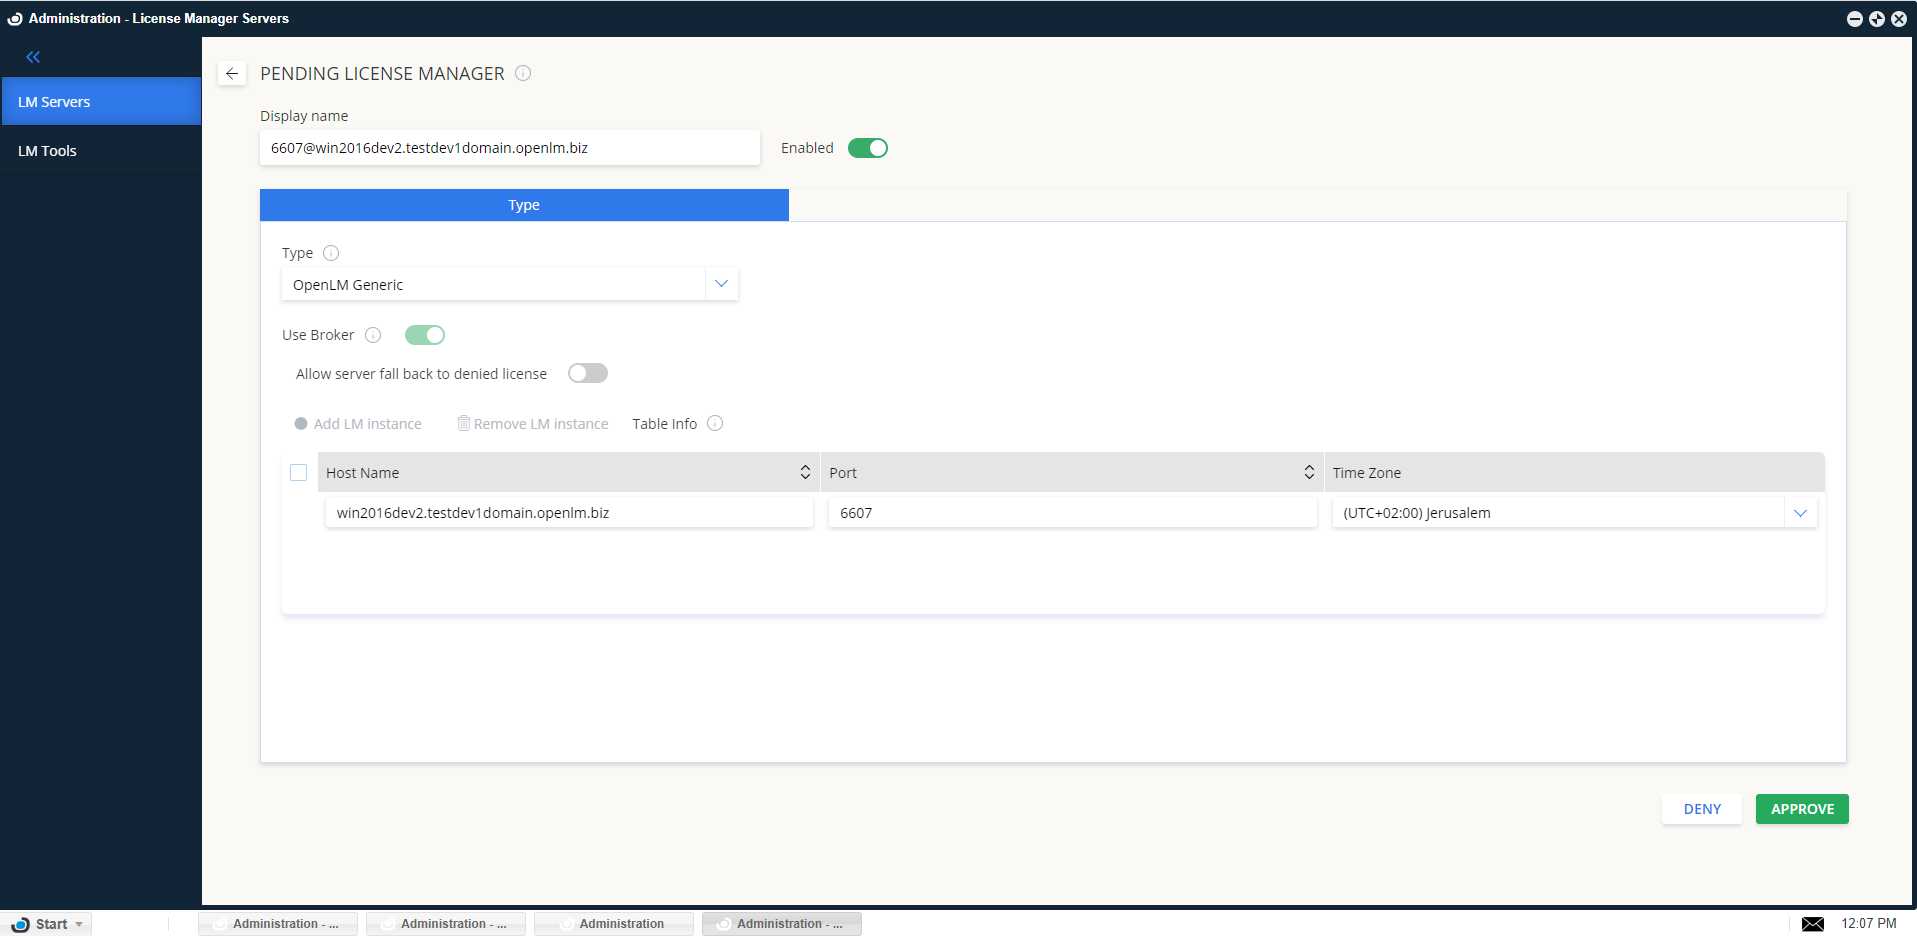
Double-click the UniSim License Manager entry that requires approval.
-
Enter a display name.
-
Activate the license server.
-
Select OpenLM Generic as Type.
-
Verify hostname and port. Adjust if needed.
-
Set the Timezone.
-
Select Approve.
At this point, UniSim License Manager is added and configuration is complete.
How to verify configuration
- Open EasyAdmin in a browser.
- Go to Start → Widgets → License Servers.
- Verify UniSim License Manager appears in the list. A green circle indicates an active connection.
If new, status may take up to three minutes to update.