Zoo
This guide describes how to configure OpenLM with McNeel's Zoo License Manager to monitor license usage and collect statistics.
Requirements
To monitor Zoo License Manager, ensure the following:
- OpenLM Server v2.x or higher installed on-premises or on a Cloud account.
- OpenLM Broker v4.8.8 or higher installed on the same machine as Zoo License Manager.
Monitoring capabilities
OpenLM collects the following from Zoo License Manager:
| Feature | Resolution | License totals | License usage | Denials reporting | Borrowed license reporting | Expiration date reporting | Multiple server redundancy |
|---|---|---|---|---|---|---|---|
| Support | By second | ✔ | ✔ | ✔* | ❌ | ❌ | ❌ |
* Denials are classified as Limit Reached. Only denials with a readable Feature Name are recorded.
Since Zoo is queried through OpenLM Broker, you also get:
- Buffered communication to OpenLM Server (tolerates network failures).
- Ability to remotely start/stop the license service.
- 1-second resolution for usage reports.
Configuring OpenLM Broker
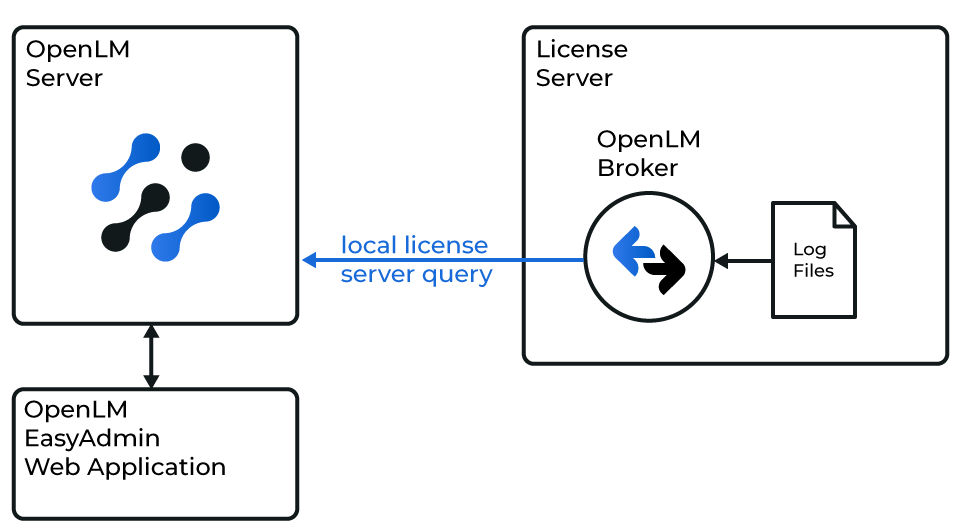
Diagram of how OpenLM interfaces with Zoo License Manager
OpenLM Broker must be installed on the same machine as Zoo (installation guide) and connected to OpenLM Server (configuration guide).
Automatic configuration
- In Broker, select Detect.

- If the Zoo service (for example, McNeelZoo6) is running, Broker auto-configures the required settings.
Manual configuration
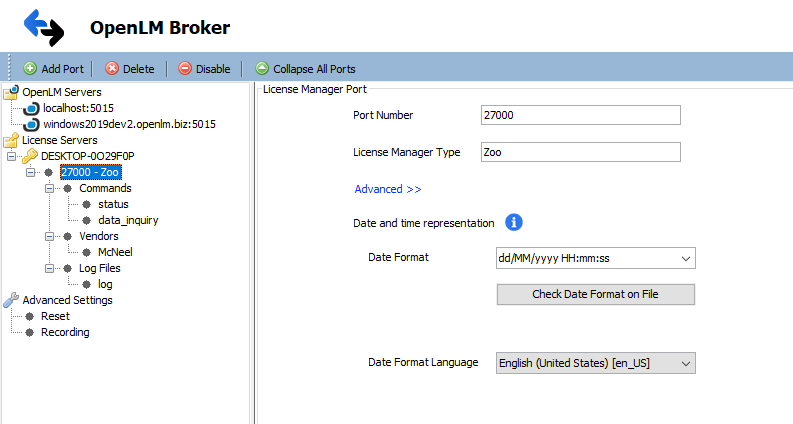
If autodetect fails:
- Select Add Port and enter the Zoo port (default: 80).
- From License Manager Type, select Zoo → Apply.
- If EasyAdmin shows invalid dates or language:
- Zoo Output Language: Match OS system locale.
- Zoo Date Time Format: Match Zoo output date format. You can also set a custom format.
- Under Vendors, replace Vendor Name to Be Filled with McNeel → Apply.
- Add a log file: Log Files → Add Log File → Other.
- Point to the CSV Zoo log file (default:
C:\ProgramData\McNeel\Zoo#.#\Usage, where#.#is version, for example,6.0). - In Advanced, check Watch Files by Pattern.
- Apply → Restart Broker.
- Continue with OpenLM Server configuration.
Configuring OpenLM Server
Automatic configuration (EasyAdmin)
If Broker is configured, approve it in EasyAdmin:
- Open EasyAdmin (
http://<OpenLM Server>:5015or Windows Start → OpenLM → EasyAdmin). - In License Manager Servers, select the pending approval link.
- Select the Zoo LM server entry → select Approve.
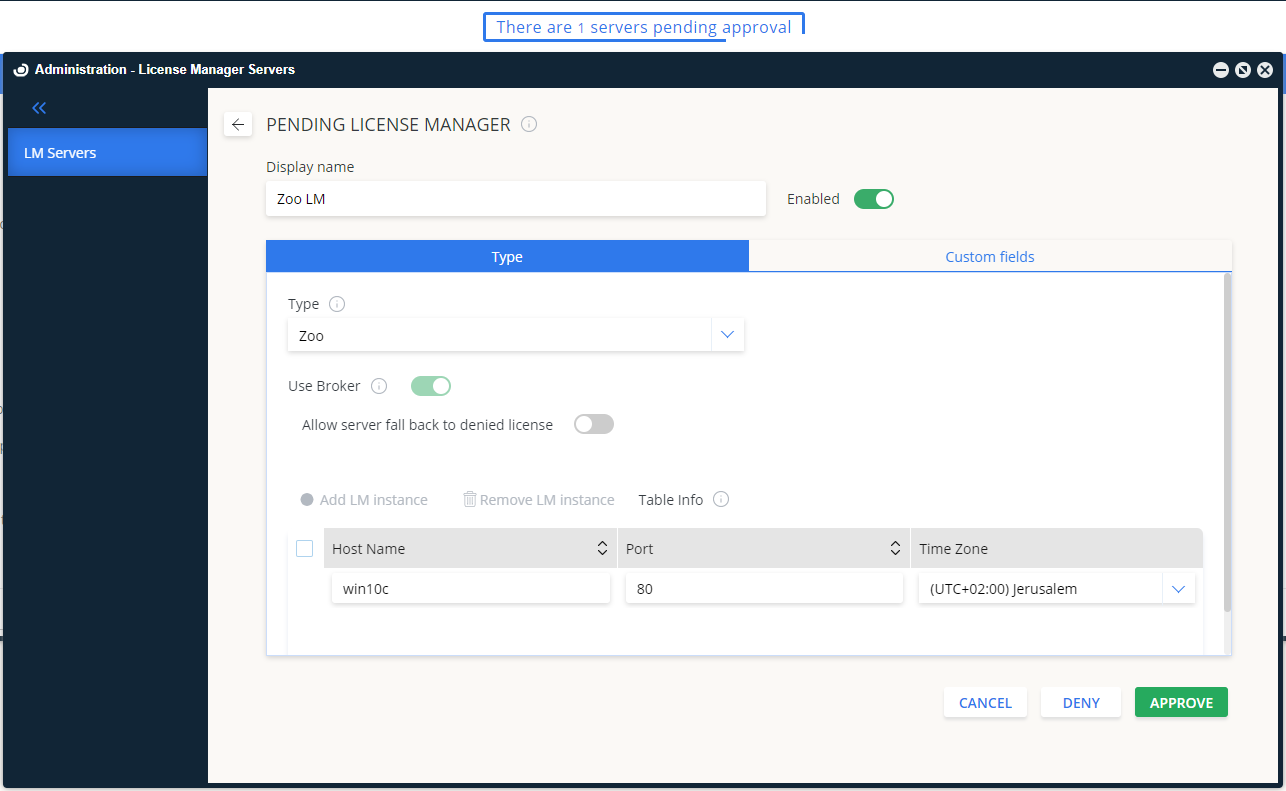
At this point, Zoo License Manager is added to OpenLM Server.
Manual configuration (EasyAdmin)
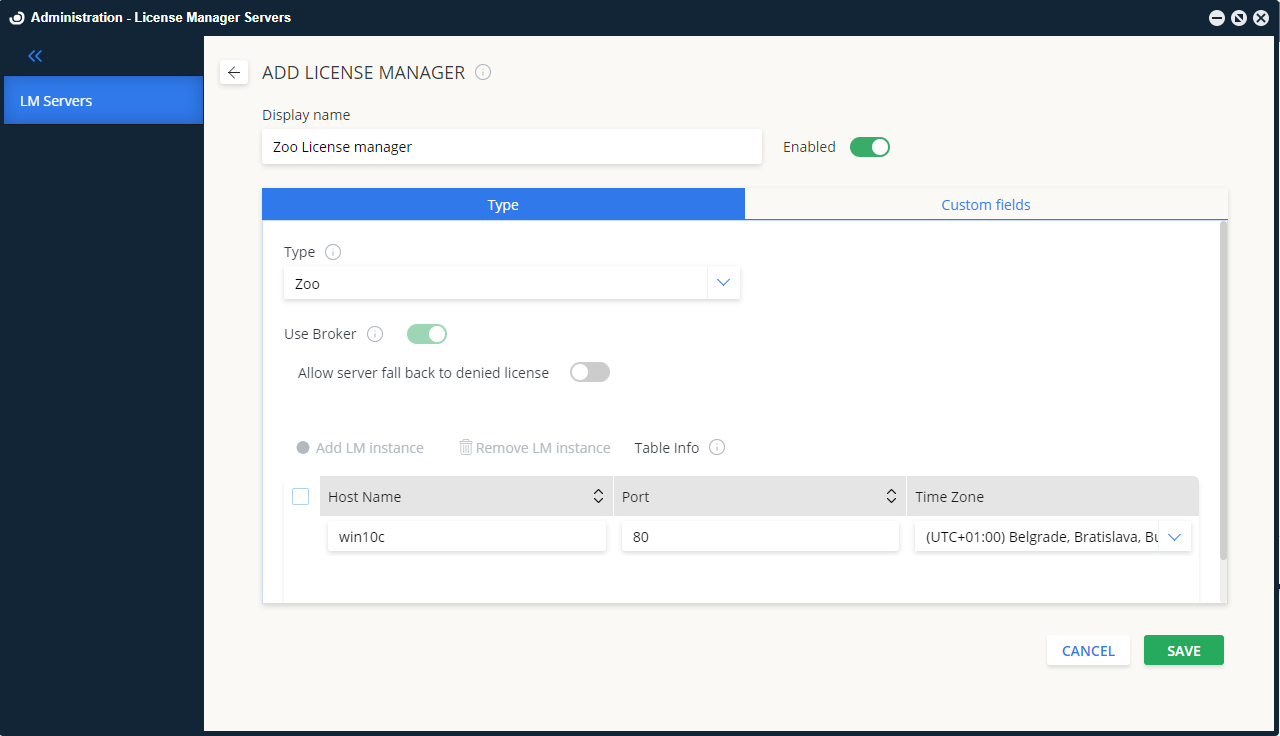
If automatic approval fails:
- In License Manager Servers, select Add LM.
- From Type, select Zoo.
- Add a Display name and description.
- Set the Time Zone to match the server.
- Enter the Hostname and Port (default: 80).
- Activate Use Broker.
- Select Save.
OpenLM Server is now configured to monitor Zoo.
Verifying monitoring
- In EasyAdmin → Start → Widgets → License Manager Servers, verify Zoo appears in the server list.
- Status indicator shows green when connected.
It may take up to 3 minutes for a new connection to display as active.