Managed DSLS
Follow these steps to configure OpenLM to monitor license usage and retrieve statistics from the Managed DSLS license manager.
Requirements
Before starting, make sure you have:
- OpenLM Server v2.x installed on a machine in your organization or an OpenLM Cloud (SLMC) account
- OpenLM Broker v22.6 or higher installed on a machine with access to the
dslsstatutility
Monitoring capabilities
Monitoring capabilities depend on the query method:
- Querying remotely via OpenLM Server:
- License totals
- License usage
- Querying locally via OpenLM Broker:
- All the above, plus:
- Buffered communication to overcome temporary network failures
- Ability to start/stop the license manager service remotely
- License denial reporting
- 1-minute resolution for license usage reports
- Reading Managed DSLS license and log files
- Viewing license file content in EasyAdmin
- All the above, plus:
OpenLM Broker configuration
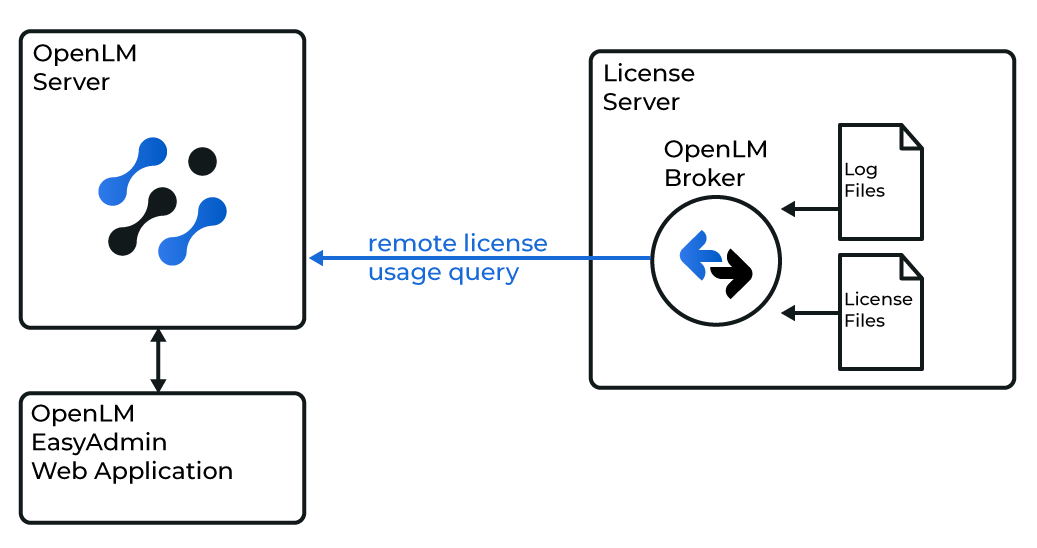
Diagram of how OpenLM interfaces with the Managed DSLS license manager
note
Install and configure OpenLM Broker on the same machine as Managed DSLS before proceeding.
Automatic configuration
- Access the Broker web UI on the Managed DSLS machine.
- Go to License Managers and click Detect.

If the service is running, Broker will auto-configure all required settings.
For accuracy, review the Manual configuration section below.
Manual configuration
- Open Broker and go to License Managers → Add License Manager.
- From LM Type, select DSLS Cloud, enter the port number, and click Add.
- Go to the Commands tab and set the executable path to the Managed DSLS utility.
- If running as a service, turn Use operating system start/stop commands file on and set the service name.
- Turn Data Inquiry on and click Execute to test the connection.
- Go to the Vendors tab → Add Vendor, enter the vendor name, and click Continue.
- Go to the Log Files tab → Add Log File, select the latest Managed DSLS log file, choose the vendor, and click Continue.
- Click Save.
OpenLM Server configuration
Automatic configuration via EasyAdmin
- Open EasyAdmin in your browser or from Windows Start → OpenLM → EasyAdmin User Interface.
- In License Servers, click the “servers pending approval” message.
- Select the Managed DSLS entry and click Approve.
Verify your configuration
- Open EasyAdmin.
- Go to Start → Widgets → License Servers.
- Confirm the Managed DSLS license manager appears in the list with a green status circle.
note
A new connection may take up to 3 minutes to display an active status.