Lloyd's Register Licence Manager (LiMBR)
This integration allows OpenLM to monitor Lloyd's Register Licence Manager (LiMBR) for license usage, denials, borrowed licenses, and expiration dates.
Requirements
- OpenLM Server v21.x or higher installed on a machine in your organization or on a Cloud account.
- OpenLM Broker v21.x or higher installed on the same machine as LiMBR.
Monitoring capabilities and features
| Feature | Resolution | License totals | License usage | Denials reporting | Borrowed license reporting | Expiration date reporting | Multiple server redundancy |
|---|---|---|---|---|---|---|---|
| Support | Start time: by second, end time: by minute | ✔ | ✔ | ✔ | ✔ | ✔ | ❌ |
Additionally, using OpenLM Broker allows for buffered communication and the ability to remotely start or stop the LiMBR service.
OpenLM Broker configuration
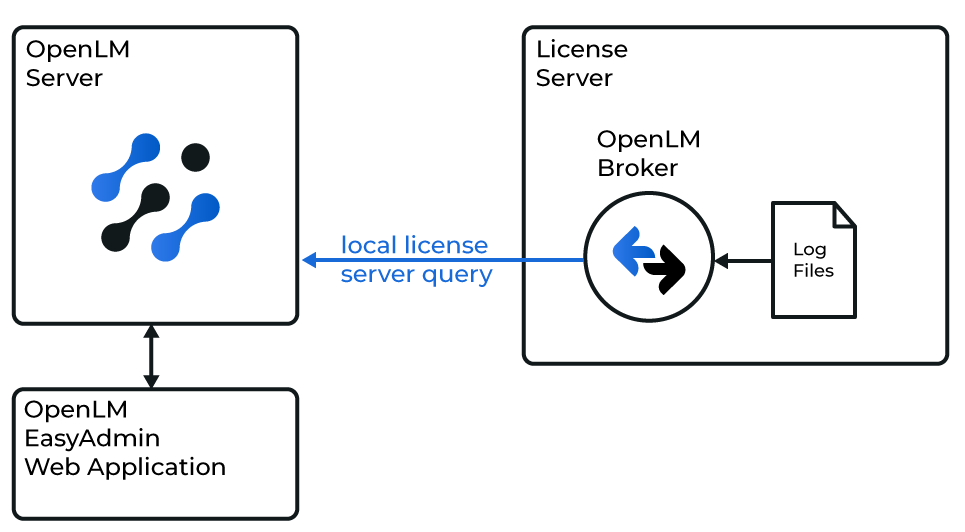
Diagram of how OpenLM interfaces with LiMBR.
OpenLM Broker queries LiMBR locally through its command-line utility, compiles the results, and sends the data to OpenLM Server.
note
OpenLM Broker must already be installed and configured to report to OpenLM Server before proceeding.
Automatic configuration
- In the Broker configuration tool, select Detect.
- If LiMBR is running, Broker creates a port node with the required settings.
- Select Apply.
- Select Restart Broker.
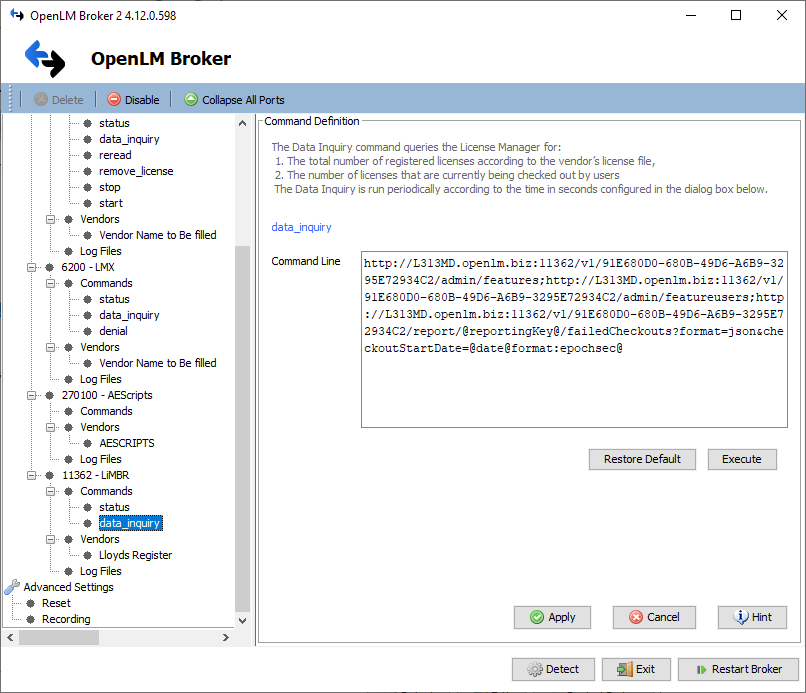
- To verify, go to Commands → data_query and select Execute.

Manual configuration
- Select Add Port.
- Enter the LiMBR port number (default:
11362). - Set License Manager Type to LiMBR and select Apply.
- In Commands, browse to the folder where LiMBR is installed, select Update, then Apply.
- In status, check configuration.
- In data_inquiry, select Execute and ensure the output is valid.
- Select Restart Broker.
- Under Vendors, enter LiMBR in Vendor Name and select Apply.
- Select Apply again.
- Select Restart Broker.
OpenLM Server configuration
Automatic configuration through EasyAdmin
- Open EasyAdmin (
http://<OpenLM Server FQDN>:5015or through Windows Start → OpenLM → OpenLM EasyAdmin User Interface). - In License Manager Servers, approve the new LiMBR entry.
![]()

Manual configuration
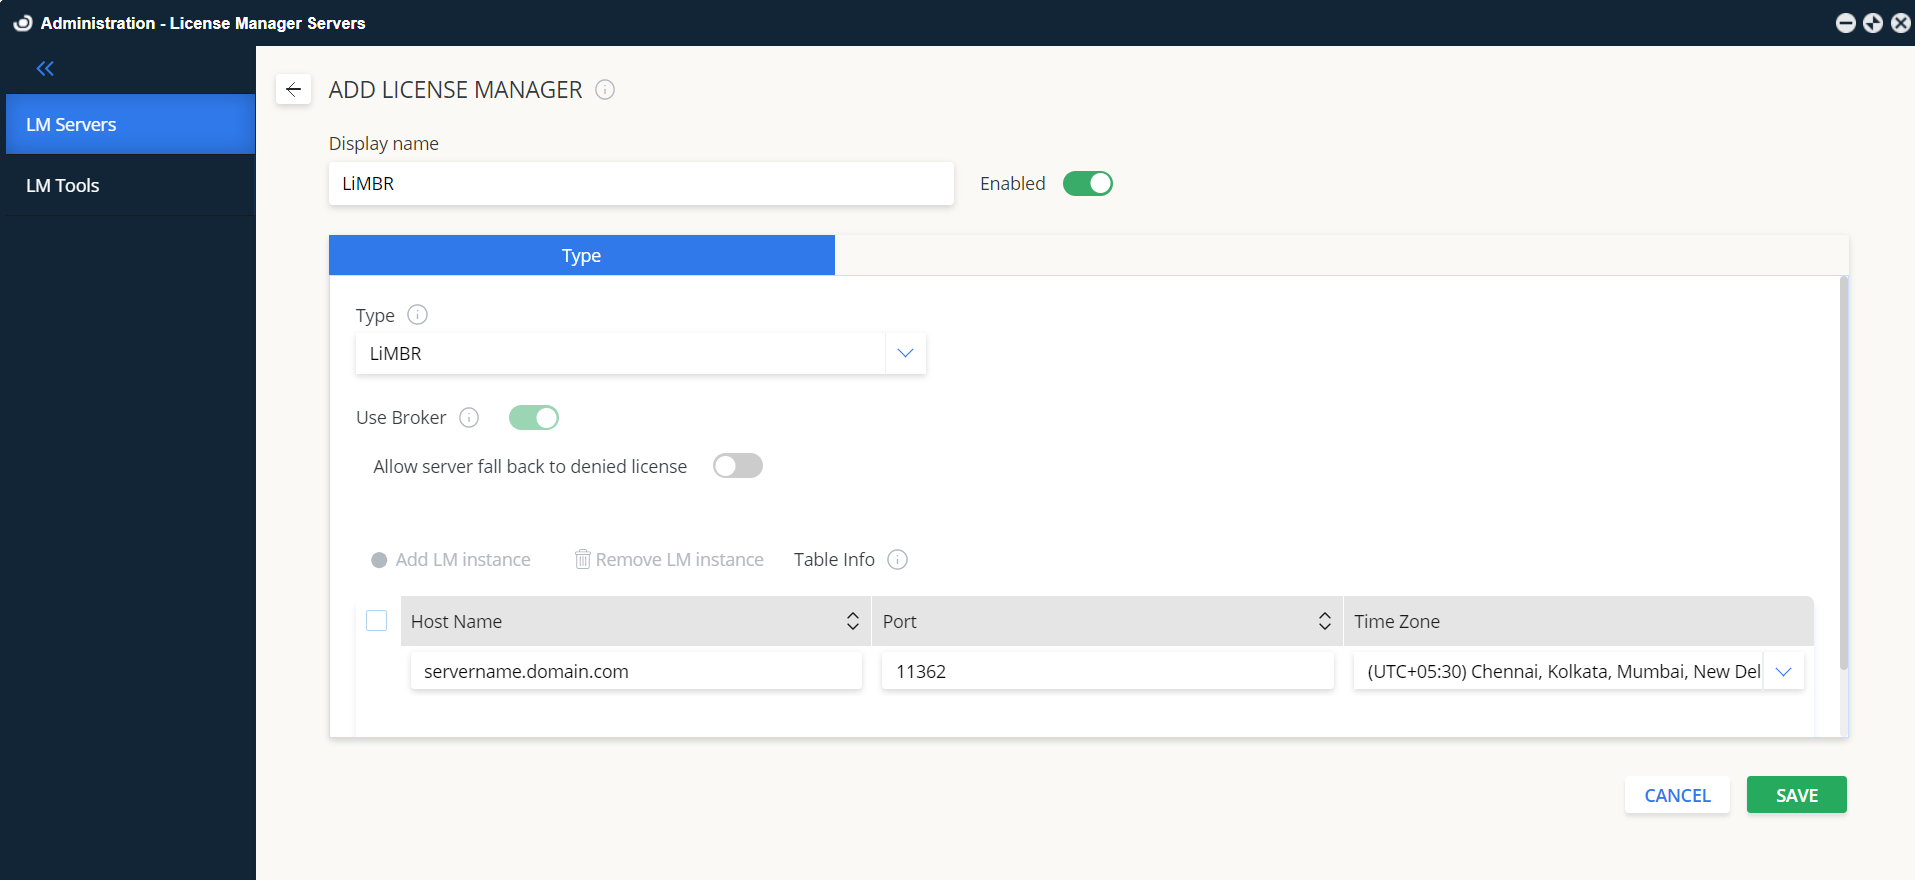
- In EasyAdmin, go to Administration → License Manager Servers → Add LM.
- Set Type to LiMBR.
- Enter a display name and description (for example, LiMBR).
- Set the time zone.
- Enter the hostname and port (default:
11362). - Is Triad Configuration: off.
- Use Broker: on.
- Select Save.
How to verify configuration
- Open EasyAdmin (
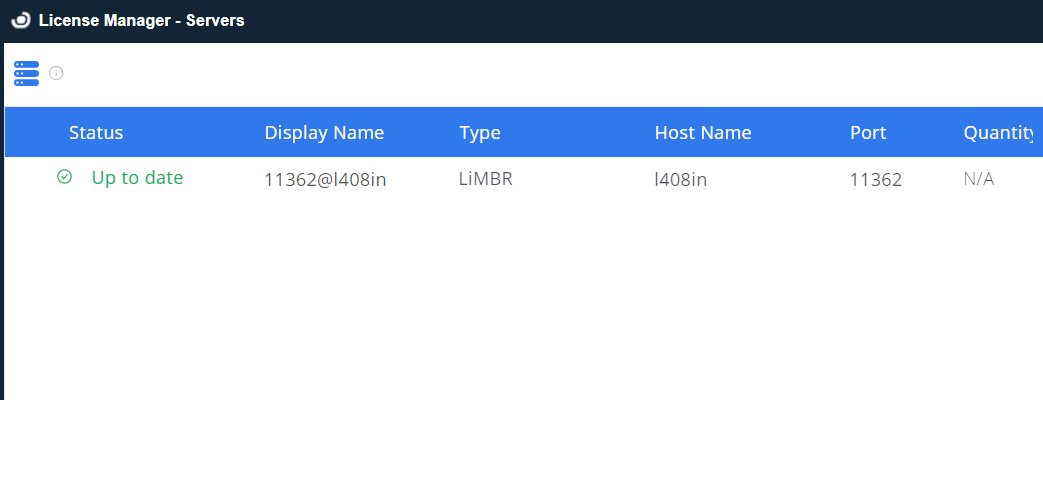
http://<OpenLM Server FQDN>:5015orCloud.openlm.com). - Go to Start → Widgets → License Manager Servers.
- Verify that LiMBR appears with a green status indicator.
note
It may take up to 3 minutes for a new connection to appear as active in EasyAdmin.