COSCOM
OpenLM can interface with COSCOM LicenseMonitor through OpenLM Broker to monitor license usage, expirations, and other statistics.
Requirements
- OpenLM Server v4.7 or higher installed on a machine in your organization.
- OpenLM Broker v4.10 or higher installed on the same machine as COSCOM LicenseMonitor.
Monitoring capabilities and features
| Feature | Resolution | License totals | License usage | Denials reporting | Borrowed license reporting | Expiration date reporting | Multiple server redundancy |
|---|---|---|---|---|---|---|---|
| Support | By second | ✔ | ✔ | ❌ | ❌ | ✔ | ❌ |
Broker also allows buffered communication with the license server.
OpenLM Broker configuration
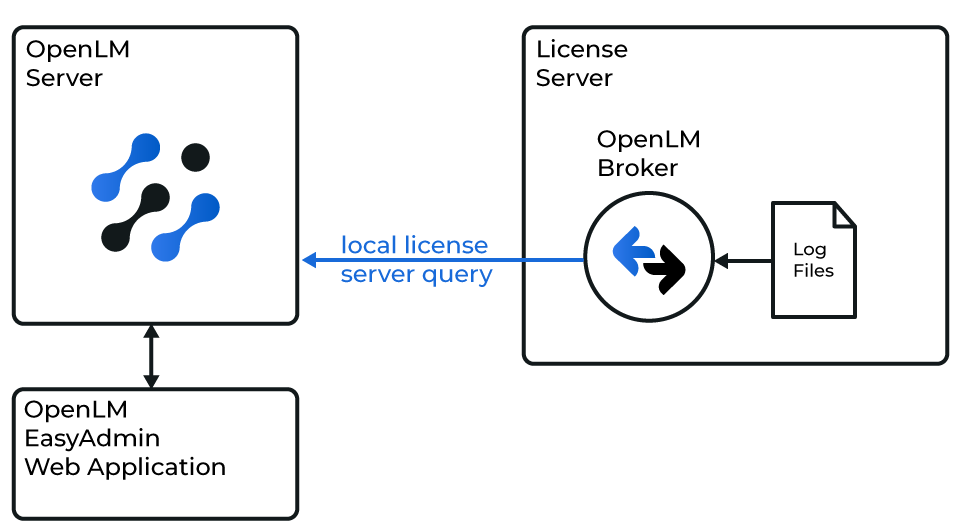
How OpenLM interfaces with the COSCOM LicenseMonitor
The Broker reads the COSCOM LicenseMonitor log file, compiles the data, and sends it to OpenLM Server.
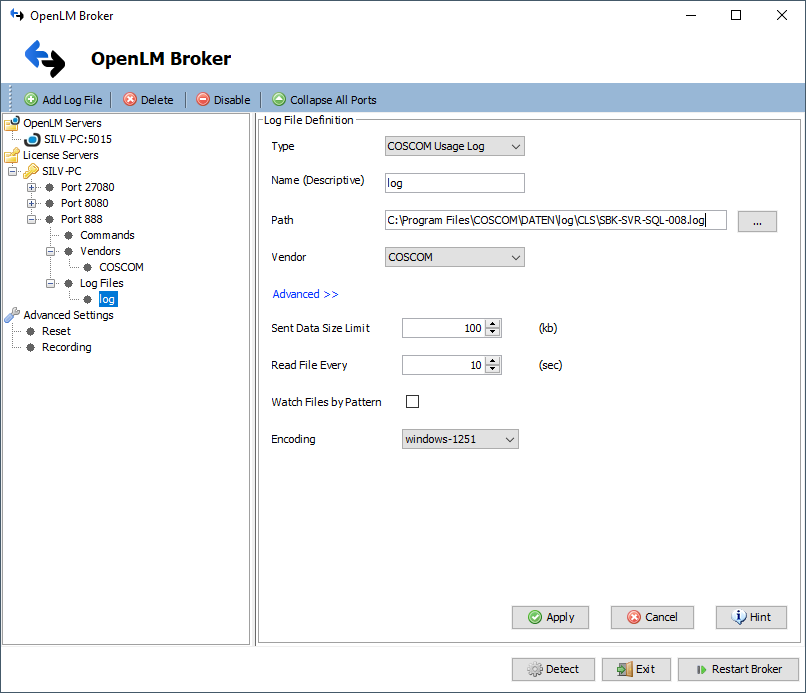
- In OpenLM Broker, select Add Port.
- Enter any port number (for example,
888). - Select COSCOM from the License Manager Type list and select Apply.
- In Vendors, set the vendor name to COSCOM and select Apply.
- In Log Files, select Add Log File.
- Select the newly created log node, browse to the path of the COSCOM LicenseMonitor
.logfile (typically the CLS Data path from installation), and select Apply. - Select Restart Broker.
OpenLM Server configuration
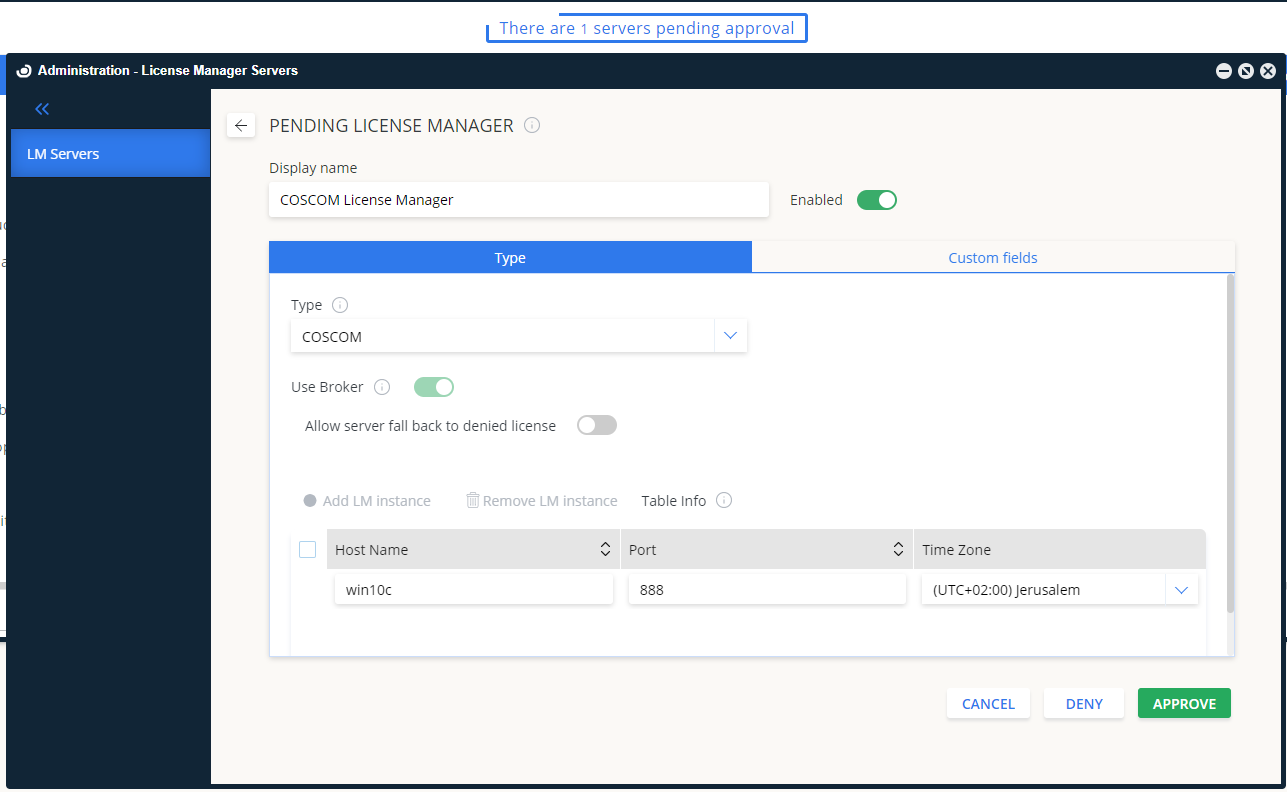
Automatic through EasyAdmin
- Open EasyAdmin.
- In License Servers, find the pending COSCOM entry and select Approve.
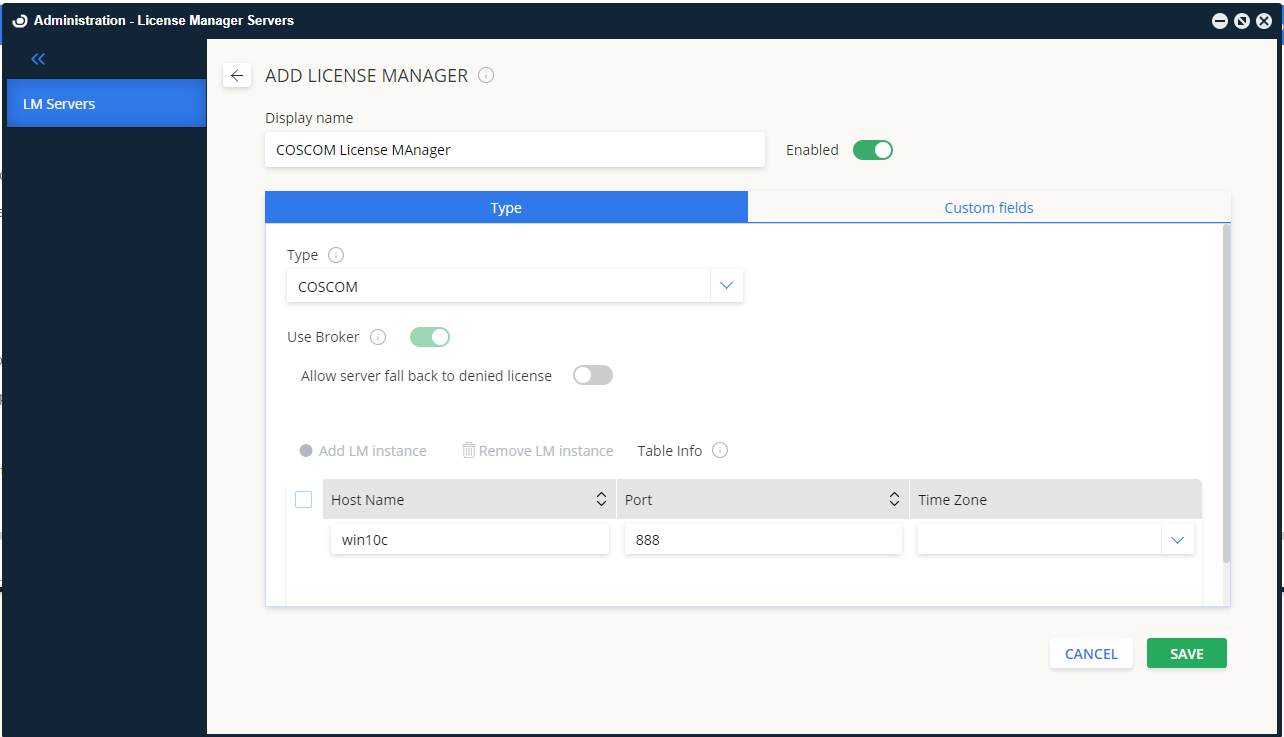
Manual through EasyAdmin
- In EasyAdmin, go to Start → Administration → License Manager Servers.
- Select Add LM.
- Type: COSCOM.
- Display name: for example, "COSCOM LicenseMonitor".
- Set the time zone.
- Enter hostname and port.
- Activate Use Broker.
- Select Save.
Verifying the configuration
- In EasyAdmin, go to Start → Widgets → License Manager Servers.
- Confirm COSCOM appears in the list with a green status indicator.
Note: Status updates for new connections may take up to 3 minutes.