Intergraph SPLM
This document describes how to interface OpenLM with the Intergraph SmartPlant License Manager (SPLM) to monitor license usage and obtain license statistics.
Requirements
To query Intergraph SPLM:
- OpenLM Server v4.3 or higher must be installed on a machine in your organization or an SLMC account.
- (Optional) OpenLM Broker v4.x or higher must be installed on the Intergraph SPLM machine to activate additional monitoring features.
Monitoring capabilities and features
OpenLM can monitor the following Intergraph SPLM activity:
| Feature | Resolution | License totals | License usage | Denials reporting | Borrowed license reporting | Expiration date reporting | Multiple server redundancy |
|---|---|---|---|---|---|---|---|
| Support | By minute | ✔ | ✔ | ❌ | ❌ | ❌ | ❌ |
Installing OpenLM Broker on the SPLM host machine also allows buffered communication to OpenLM Server in case of network interruptions.
Interfacing with OpenLM Server only
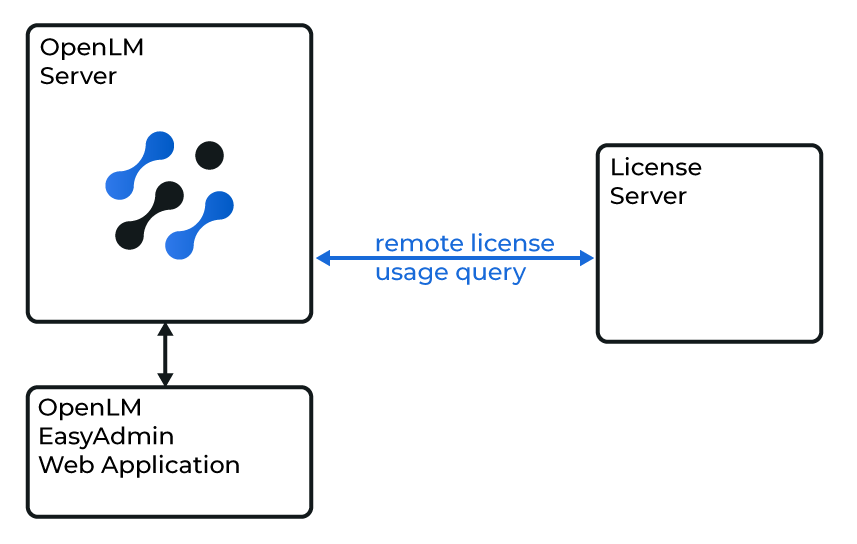
Diagram: OpenLM Server querying SPLM directly
OpenLM Server can query the SPLM server directly using SPLM command-line tools.
- Open EasyAdmin: Windows Start → OpenLM → EasyAdmin User Interface.
- Navigate to Start → Administration → License Manager Servers. Select Add LM.
- Enter a description in the Description field.
- From the Type list, select SPLM.
- Ensure the Enabled toggle is set to On.
- Leave Use Broker Off for this setup.
- Enter the hostname, port, and time zone of the SPLM server.
- Select Apply.
OpenLM Server should now be able to query SPLM remotely and display usage data in EasyAdmin.
Interfacing with OpenLM Server + Broker
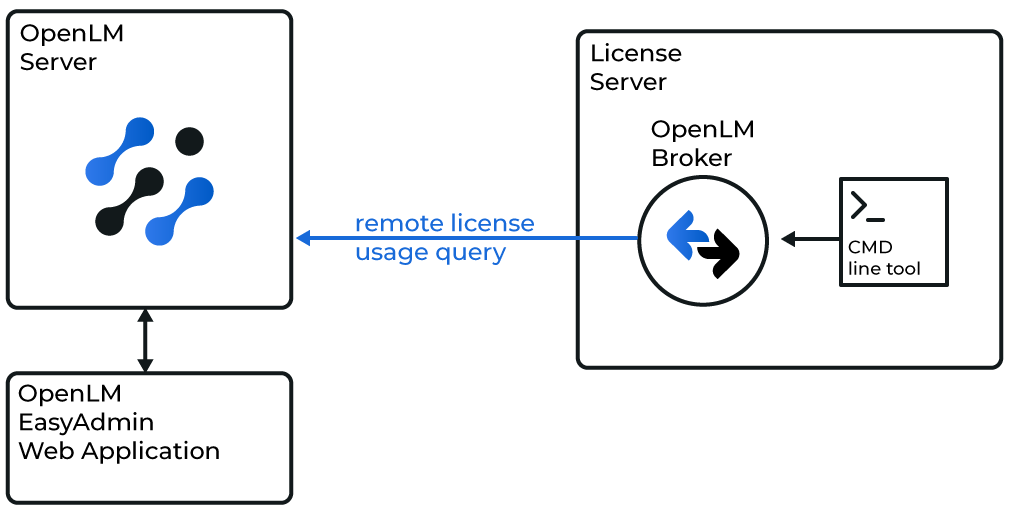
Diagram: OpenLM Broker querying SPLM locally
This option uses OpenLM Broker to run SPLM's command-line utility (pdlice.exe). Broker buffers usage data, ensuring continuity even if the server connection is interrupted.
Broker configuration
- Access your Broker Web UI:
http://<FQDN>:5090. - Go to License Managers → Add License Manager.
- Select SPLM from the License Manager Type menu.
- Enter the SPLM port number (for example, 807). Select Add.
- In Commands, set the executable path to the
pdlice.exeutilities (for example,C:\Win32applingr\pdlice\bin\pdlice). - In Vendors, add a new vendor and give it a name (for example, SPLM).
- Save the configuration.
OpenLM Server configuration
- Open EasyAdmin.
- Go to License Servers.
- Approve the pending SPLM server configuration.
Once approved, OpenLM Server begins collecting SPLM usage data.
Verifying the SPLM configuration
To confirm monitoring is active:
- Open EasyAdmin: Windows Start → OpenLM → EasyAdmin User Interface, or navigate to
http://<OpenLM Server host>:5015/. - Go to Start → Widgets → License Servers.
A green status indicator confirms the connection is active. Note that new connections may take up to 3 minutes to display.