ESPRIT
info
ESPRIT is one of the license managers supported by OpenLM. This guide explains how to configure OpenLM to monitor the DPTC ESPRIT License Manager and track license usage and statistics.
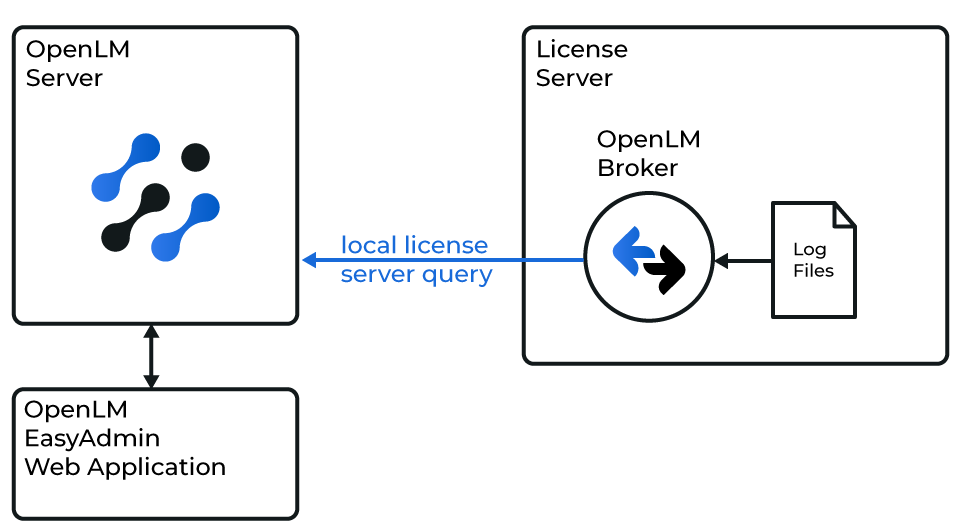 Diagram of how OpenLM Broker interfaces with ESPRIT License Manager and OpenLM Server
Requirements
- OpenLM Broker v4.10 or later installed and configured on the ESPRIT license manager machine.
- OpenLM Server v4.6 or later installed and configured on a network computer.
Print license mapping details
Broker requires license mapping details from the ESPRIT license printout file.
- Launch DP Technology Server Security Manager.
- In the left panel, locate the license under the LocalHost node (for example,
E1009703_872223). Right-click → Print.
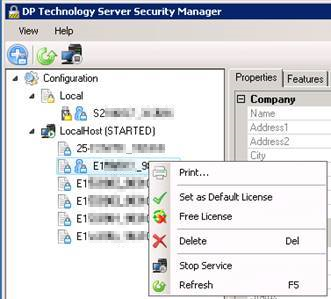
- Select either Microsoft Print to PDF or Generic / Text Only Printer (recommended).
- Save the file. If using PDF, copy contents into a text file (
.txt). - Repeat for each license.
Example printout:
********** E1009703_872223 **********
Company
Name: WAYNE ENTERPRISES, INC
Company
Name: WAYNE ENTERPRISES, INC
Address1: 123 BAT RD
Address2:
City: GOTHAM CITY
State/Region: NY
Country: US
Postal Code: 102109
Customer Code: wayneent
General
Name: 2_Axis_Lathe(1)
Product: ESPRIT 20xx Series
Serial Number: E1009703
Activation Id: 872223
Status: eLicenseInUse
Client Id: bwayne@TLC-2ZQABC2
License Details
Lock Code: S5580101
Expiration Date: N/A
SMC Expiration Date: Saturday, October 31, 2020
Borrowable: True
Lease Expiration Date: N/A
License Type: eLicenseTypeNormal
Lock Device: eLockDpFloat
OEM: DP Technology
Miscellaneous
File Path: C:\ProgramData\D.P.Technology\Security\Licenses\2_Axis_Lathe(1).dptlic
Comments:
Features
1-Base License
2-Editor
3-DNC
10-Surface Modeler
11-SolidTurn Traditional
21-Post Processor
22-DWG / DXF
23-IGES
24-STEP
25-VDA-FS
27-Solid Modeler
29-VBA
30-Machine Simulation
31-STL
36-Cutting Tool KB
38-Parasolid SE SW 3DM
Install Generic / Text Only Printer (Windows)
Using a Generic / Text Only Printer saves the output directly as a .txt file.
- Search Windows for add printer.
- Select Add printer or scanner.
- In the window, select Add a printer or scanner.

- Wait, then select The printer that I want isn't listed.
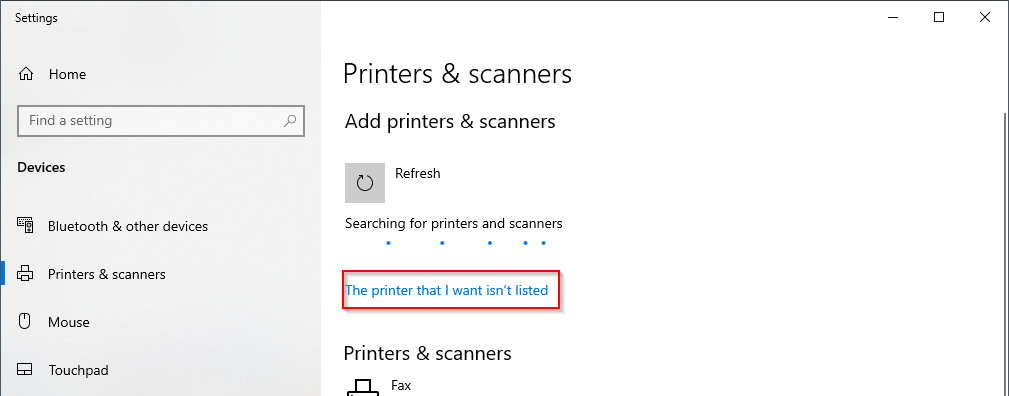
- Select Add a local printer with manual settings → Next.
- Use existing port:
FILE: (Print to File). - Select Generic → Generic / Text Only driver → Next.
- Keep Use the driver that is currently installed → Next.
- Name the printer → Next.
- Select Do not share this printer → Next.
- Finish setup.
Whenever you print with this device, Windows will prompt you to save the output as a file.
OpenLM Broker configuration
- Open OpenLM Broker Web UI → License Managers tab (
http://localhost:5090/#/license-managers). - Select Add License Manager.
- Enter any port number and select ESPRIT as the license manager type.
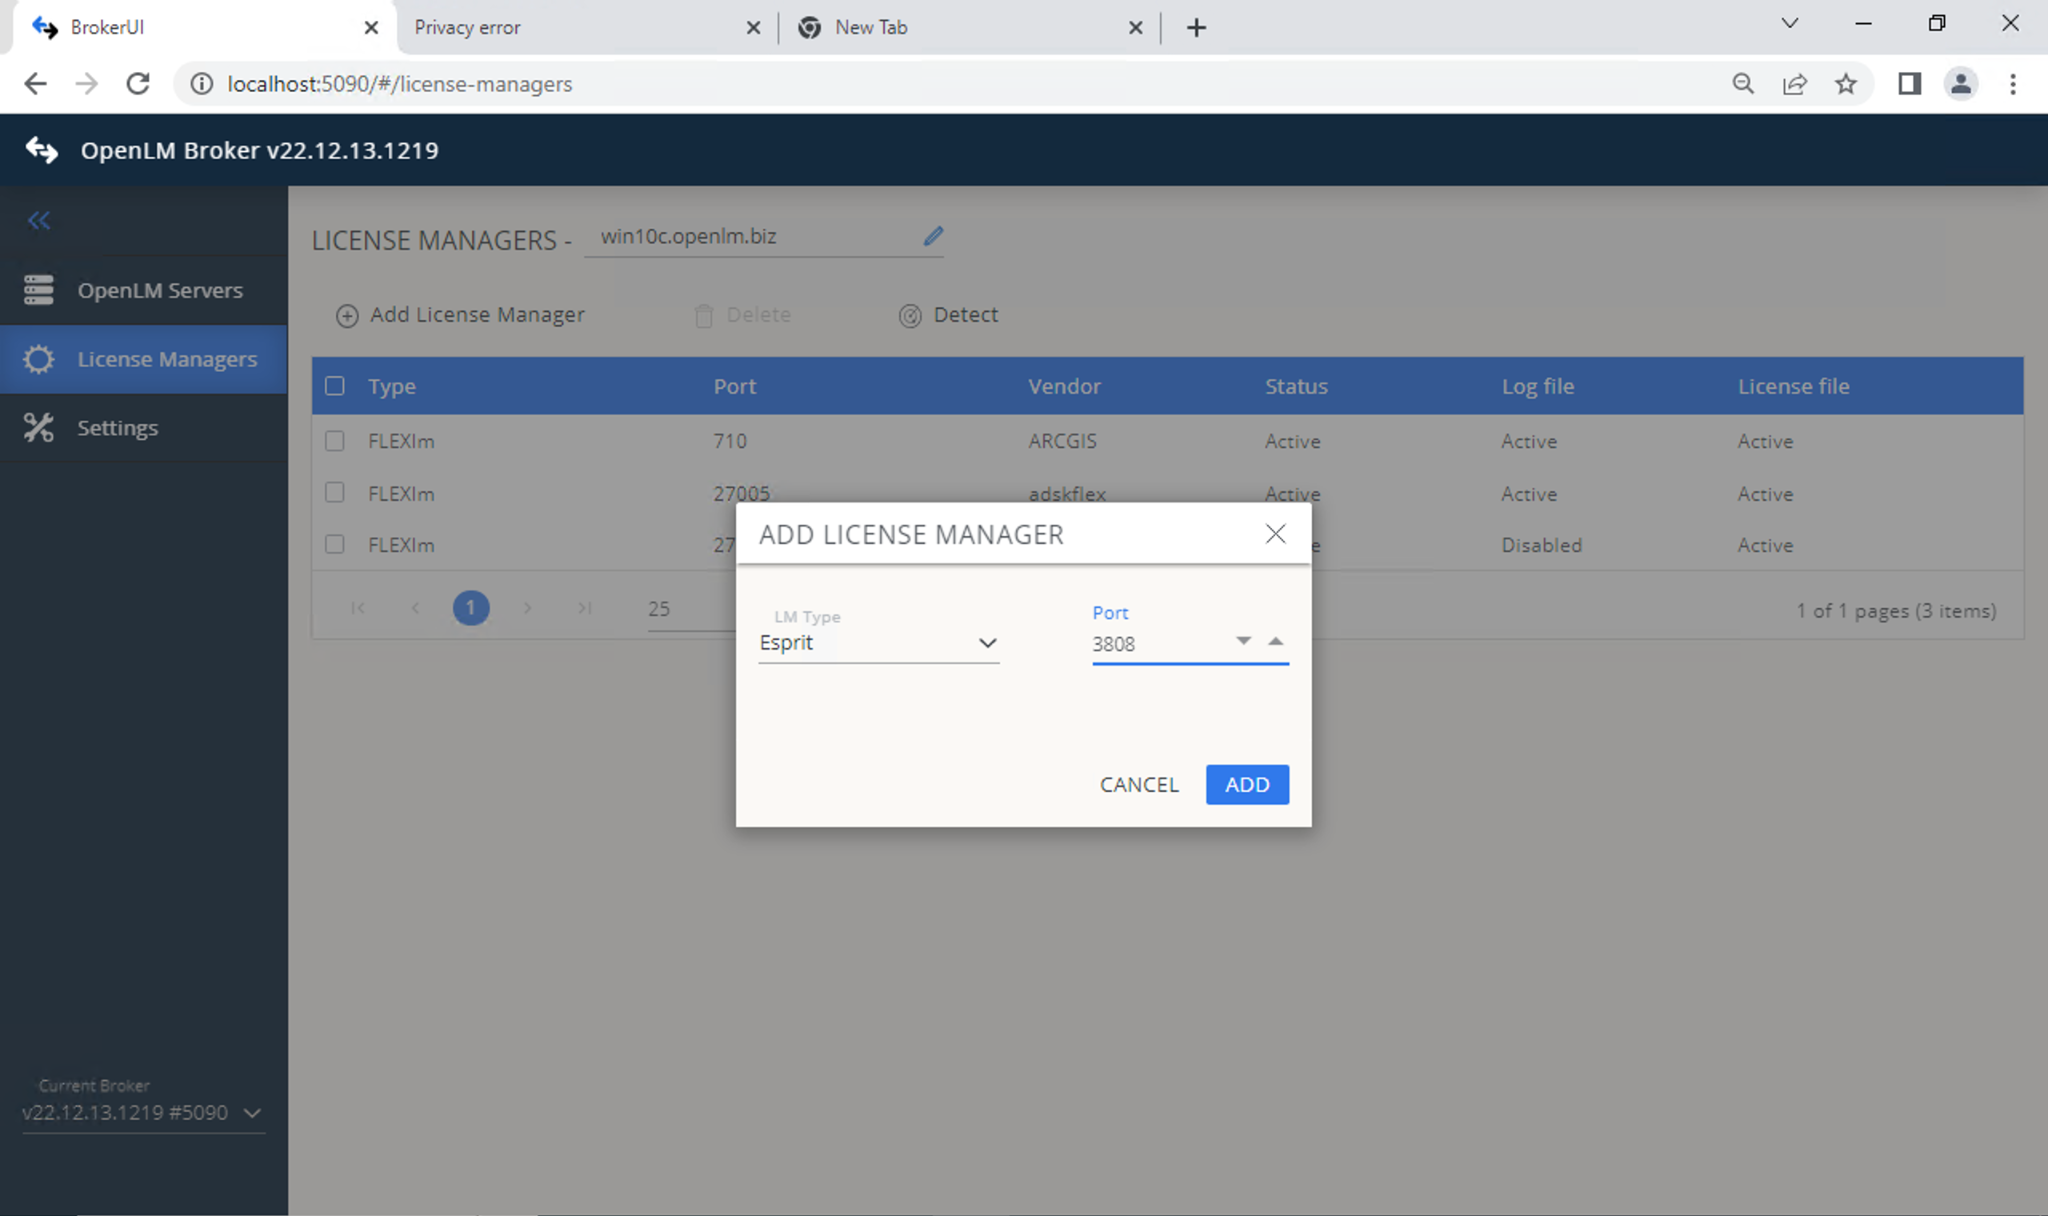
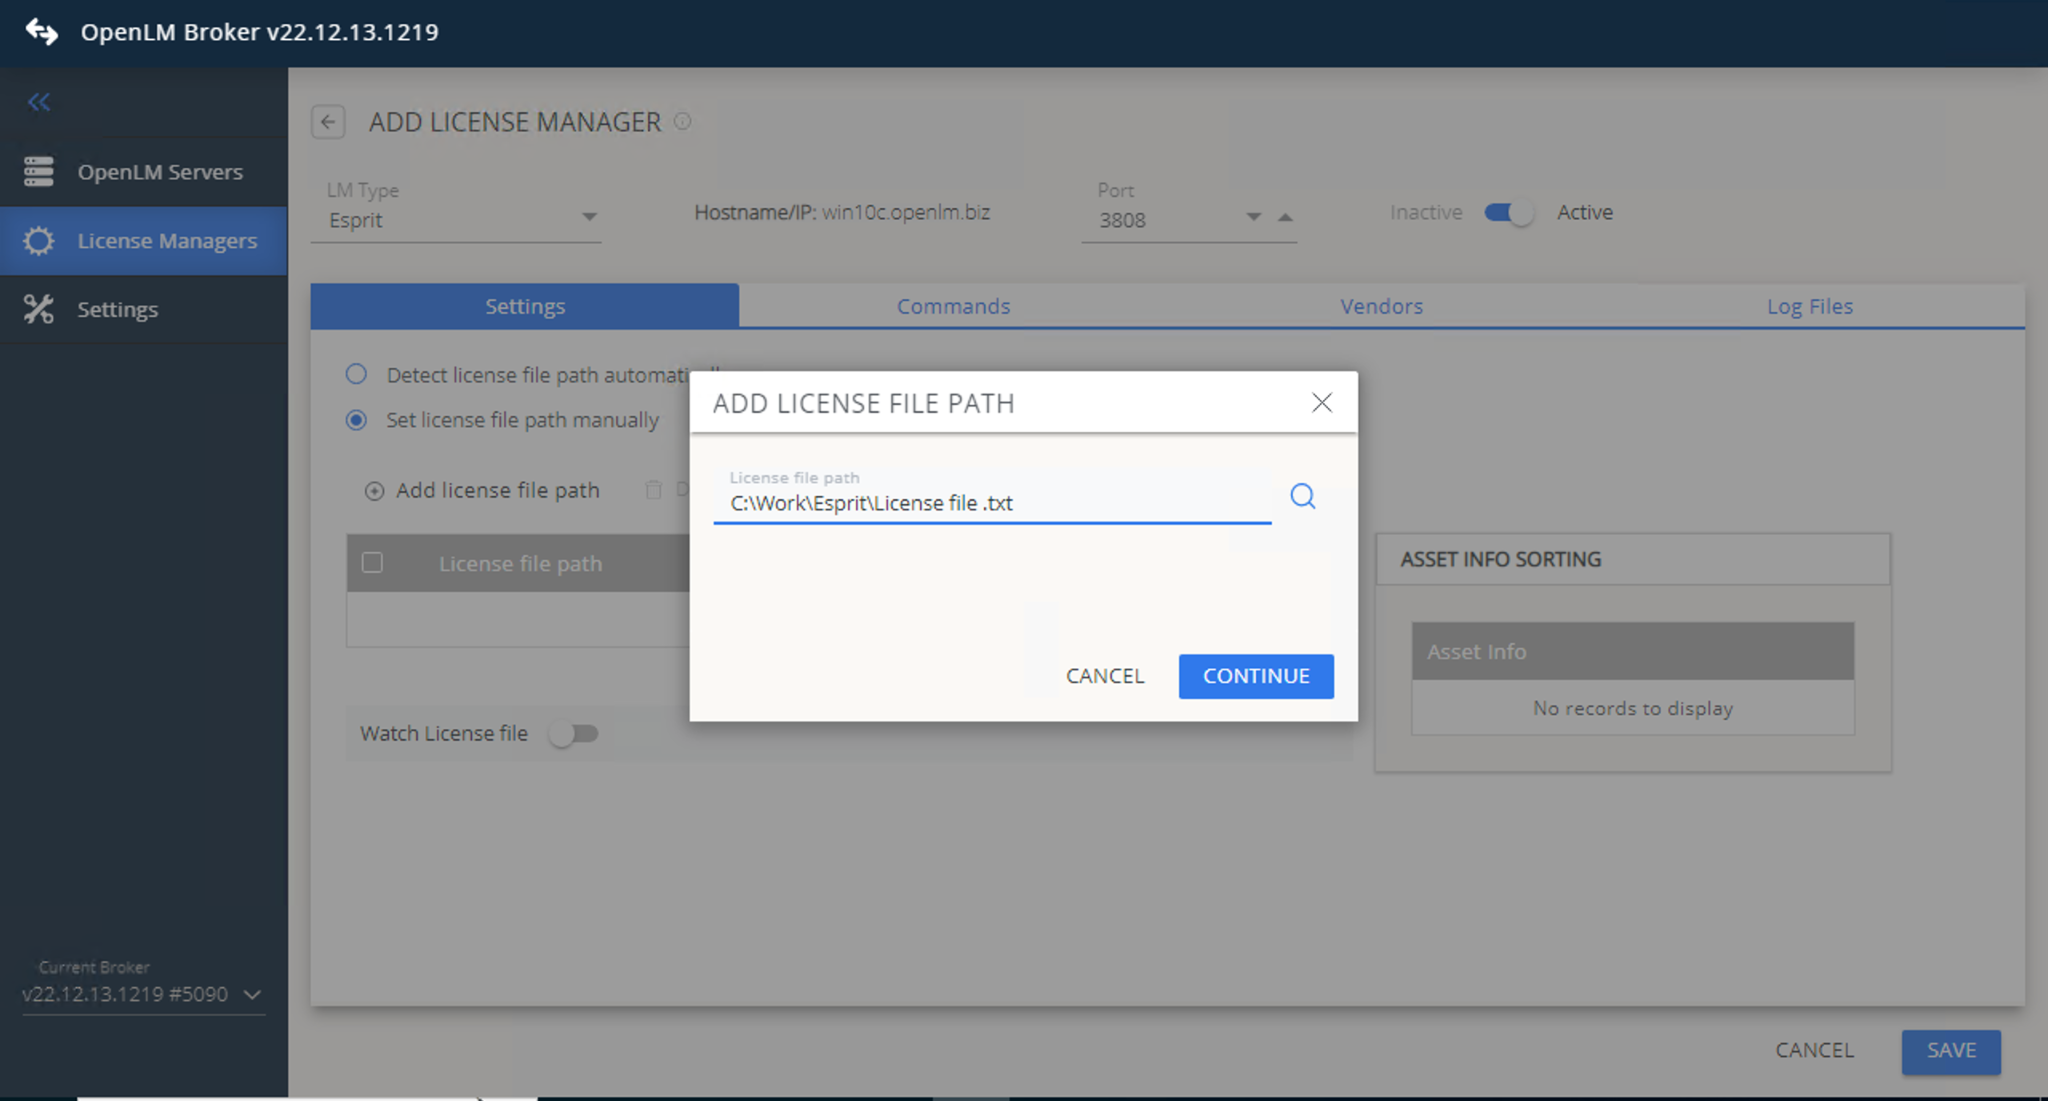
- In the Settings tab, set the license file path:
- Auto-detect
- Or set manually → Continue
warningMake sure Watch License File remains unchecked.
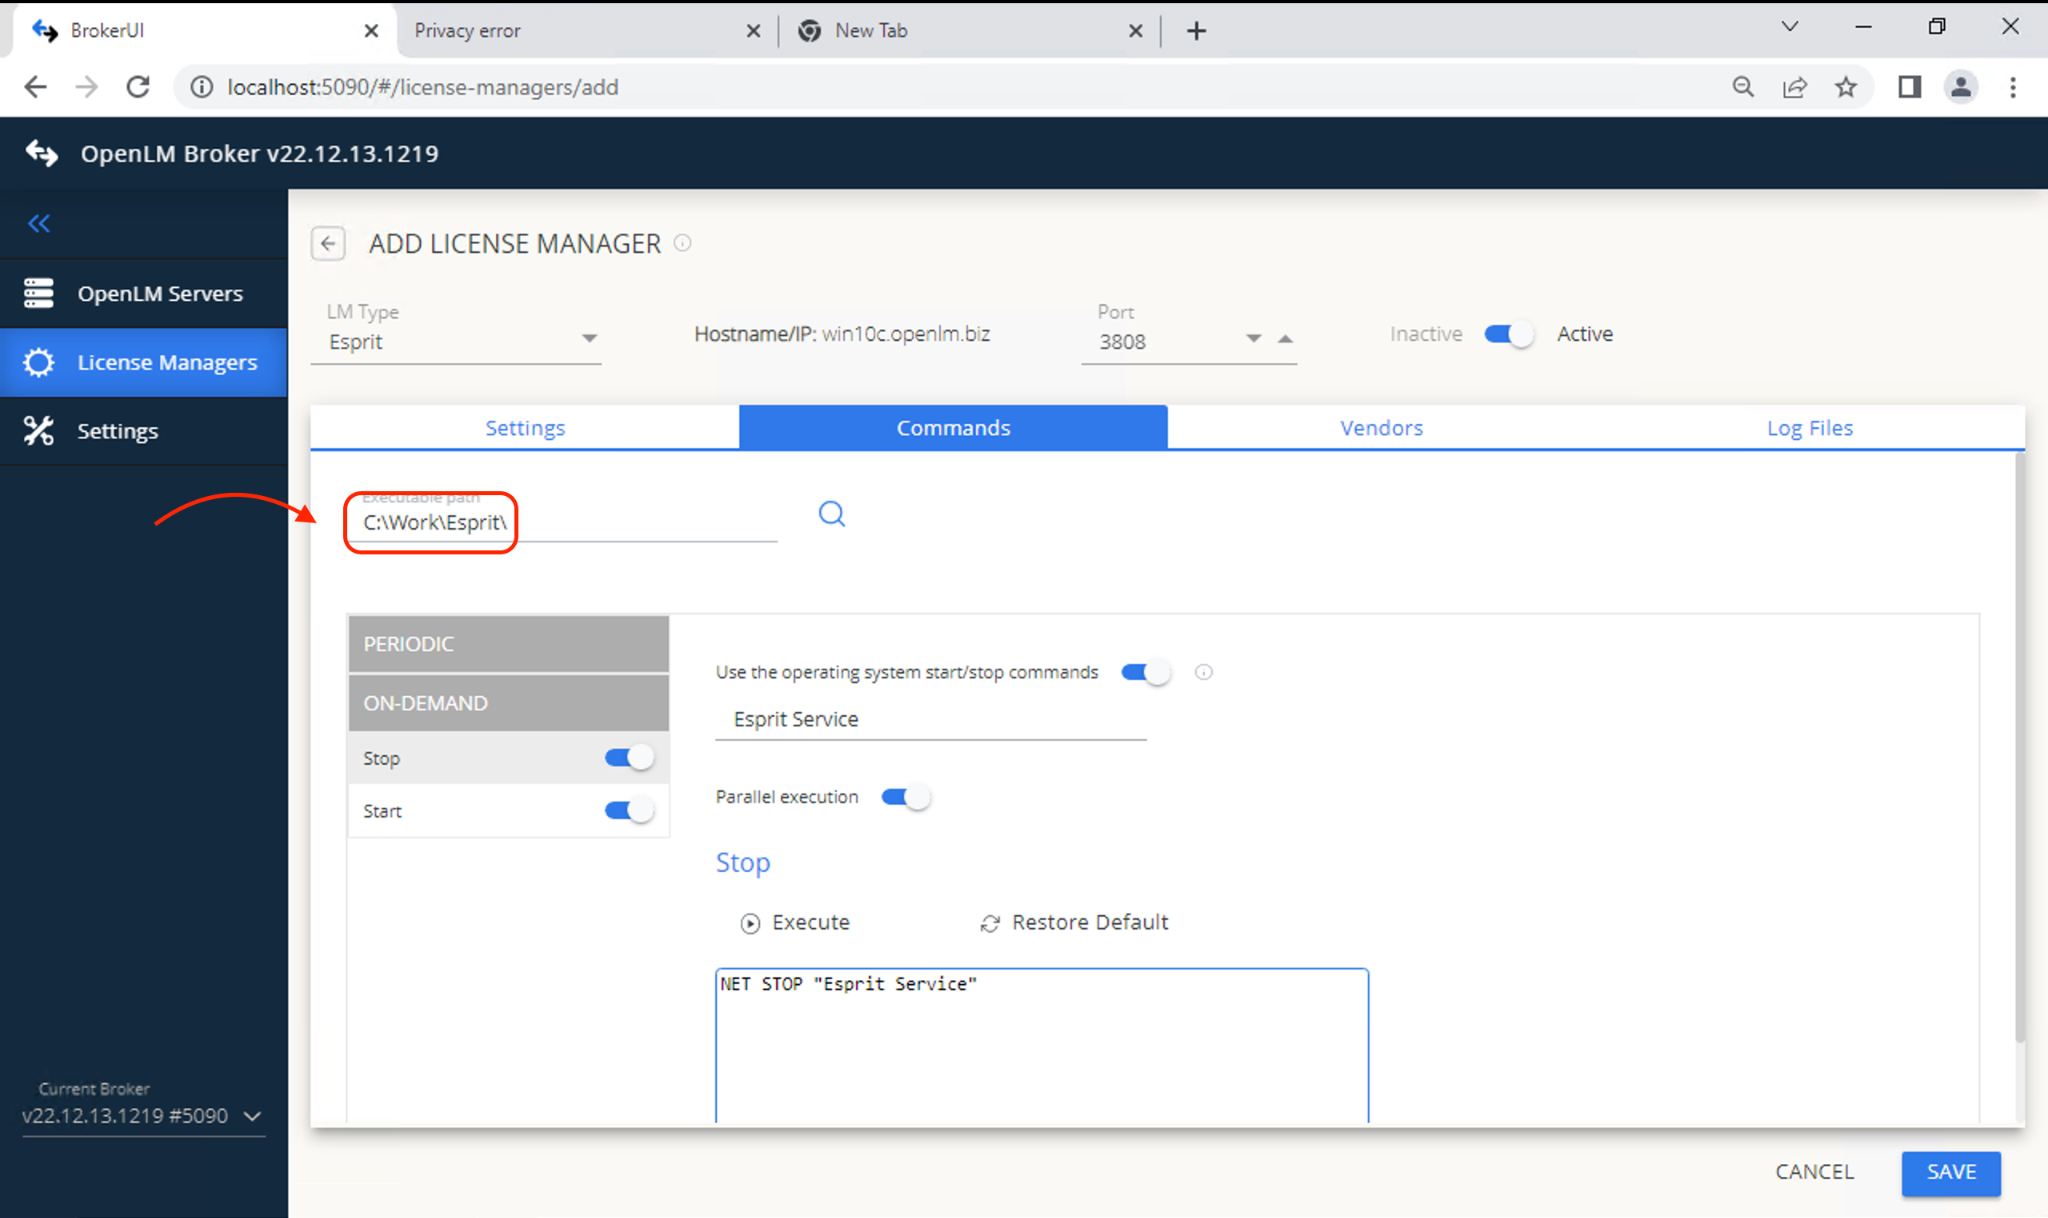
- Go to Commands tab and set the ESPRIT executable path.
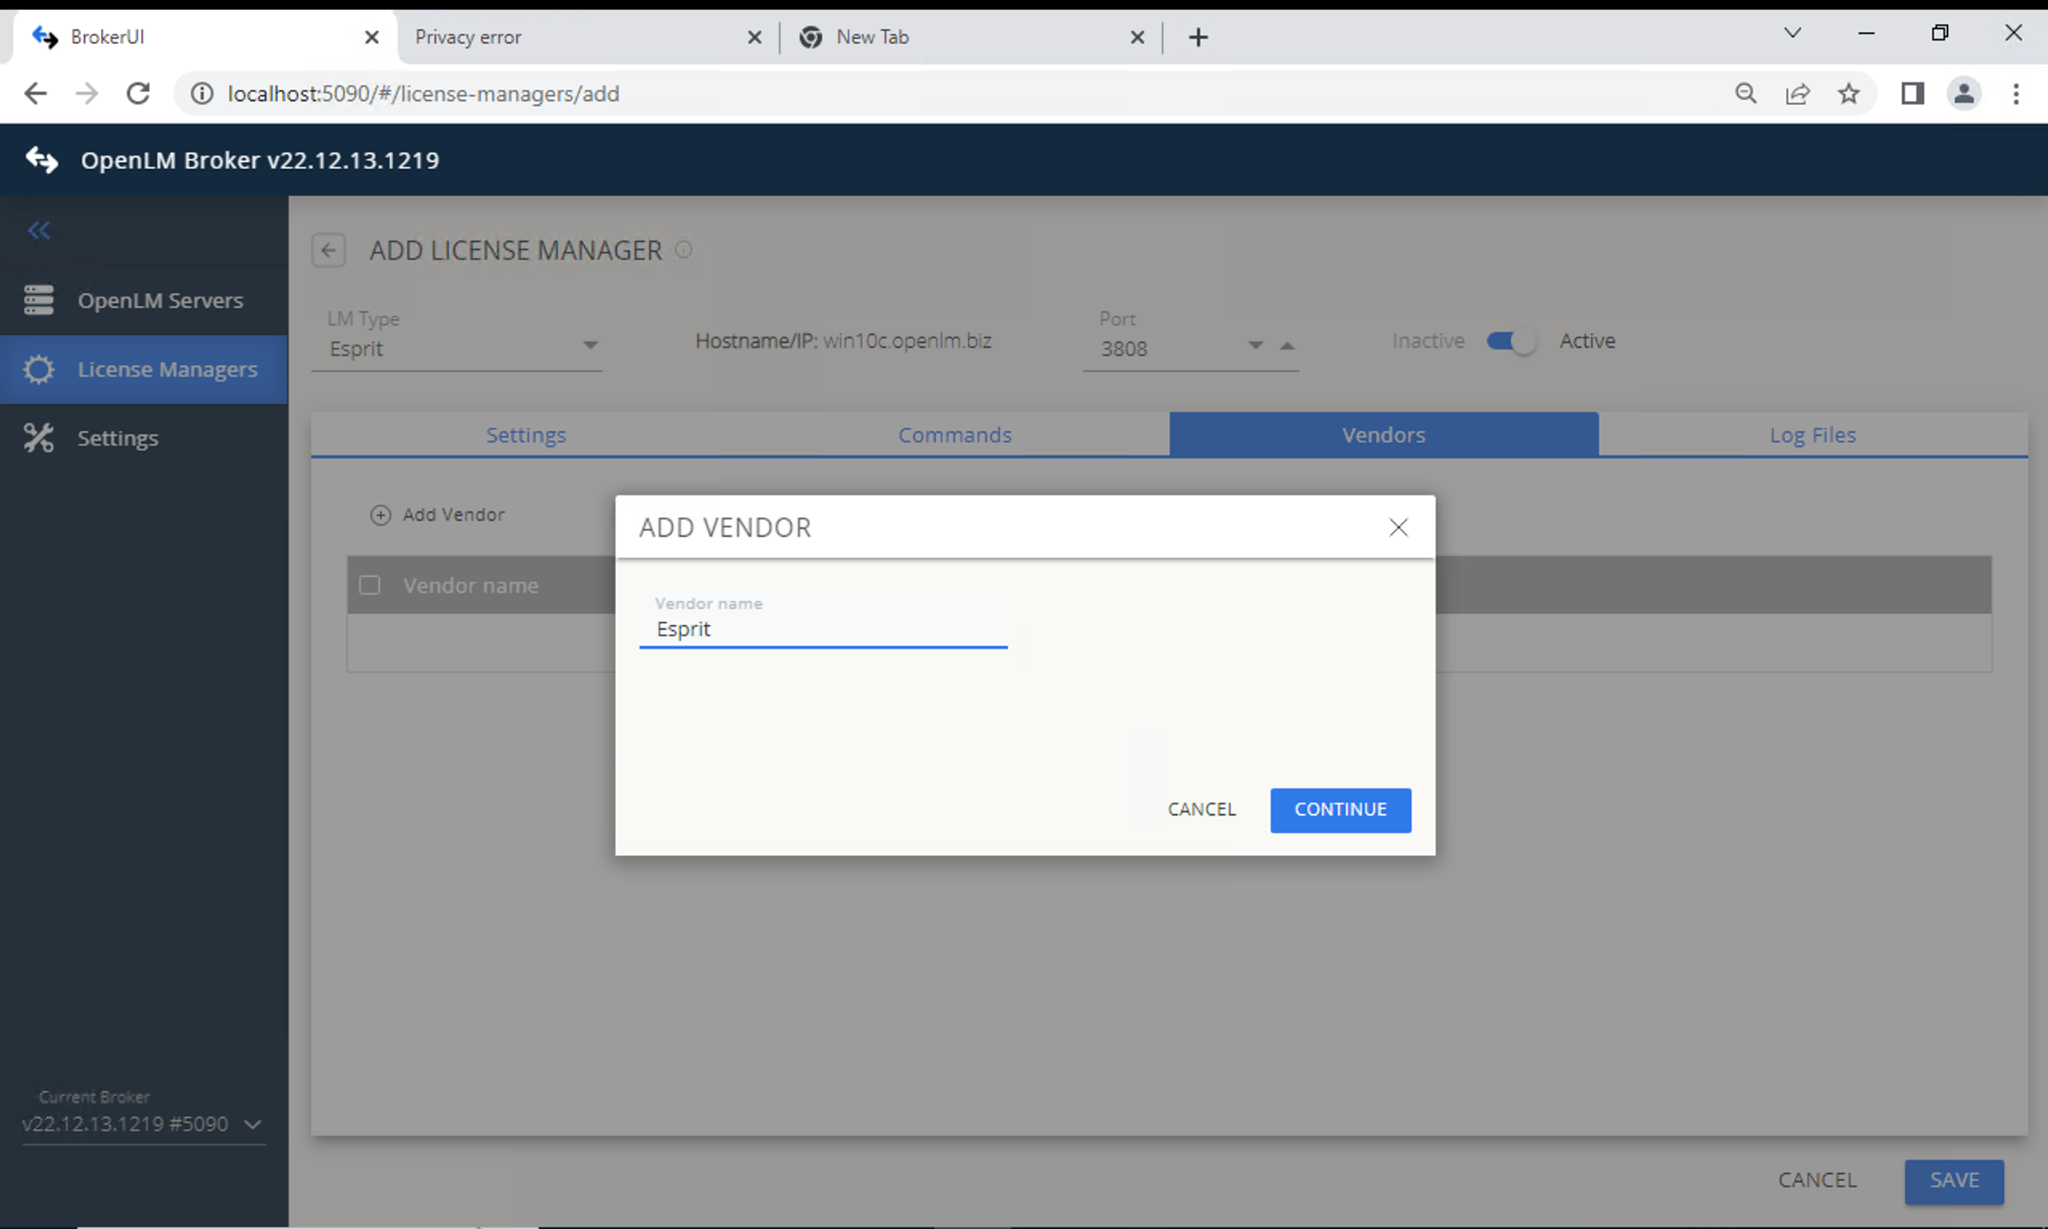
- Go to Vendors tab → Add Vendor. Enter a descriptive name.
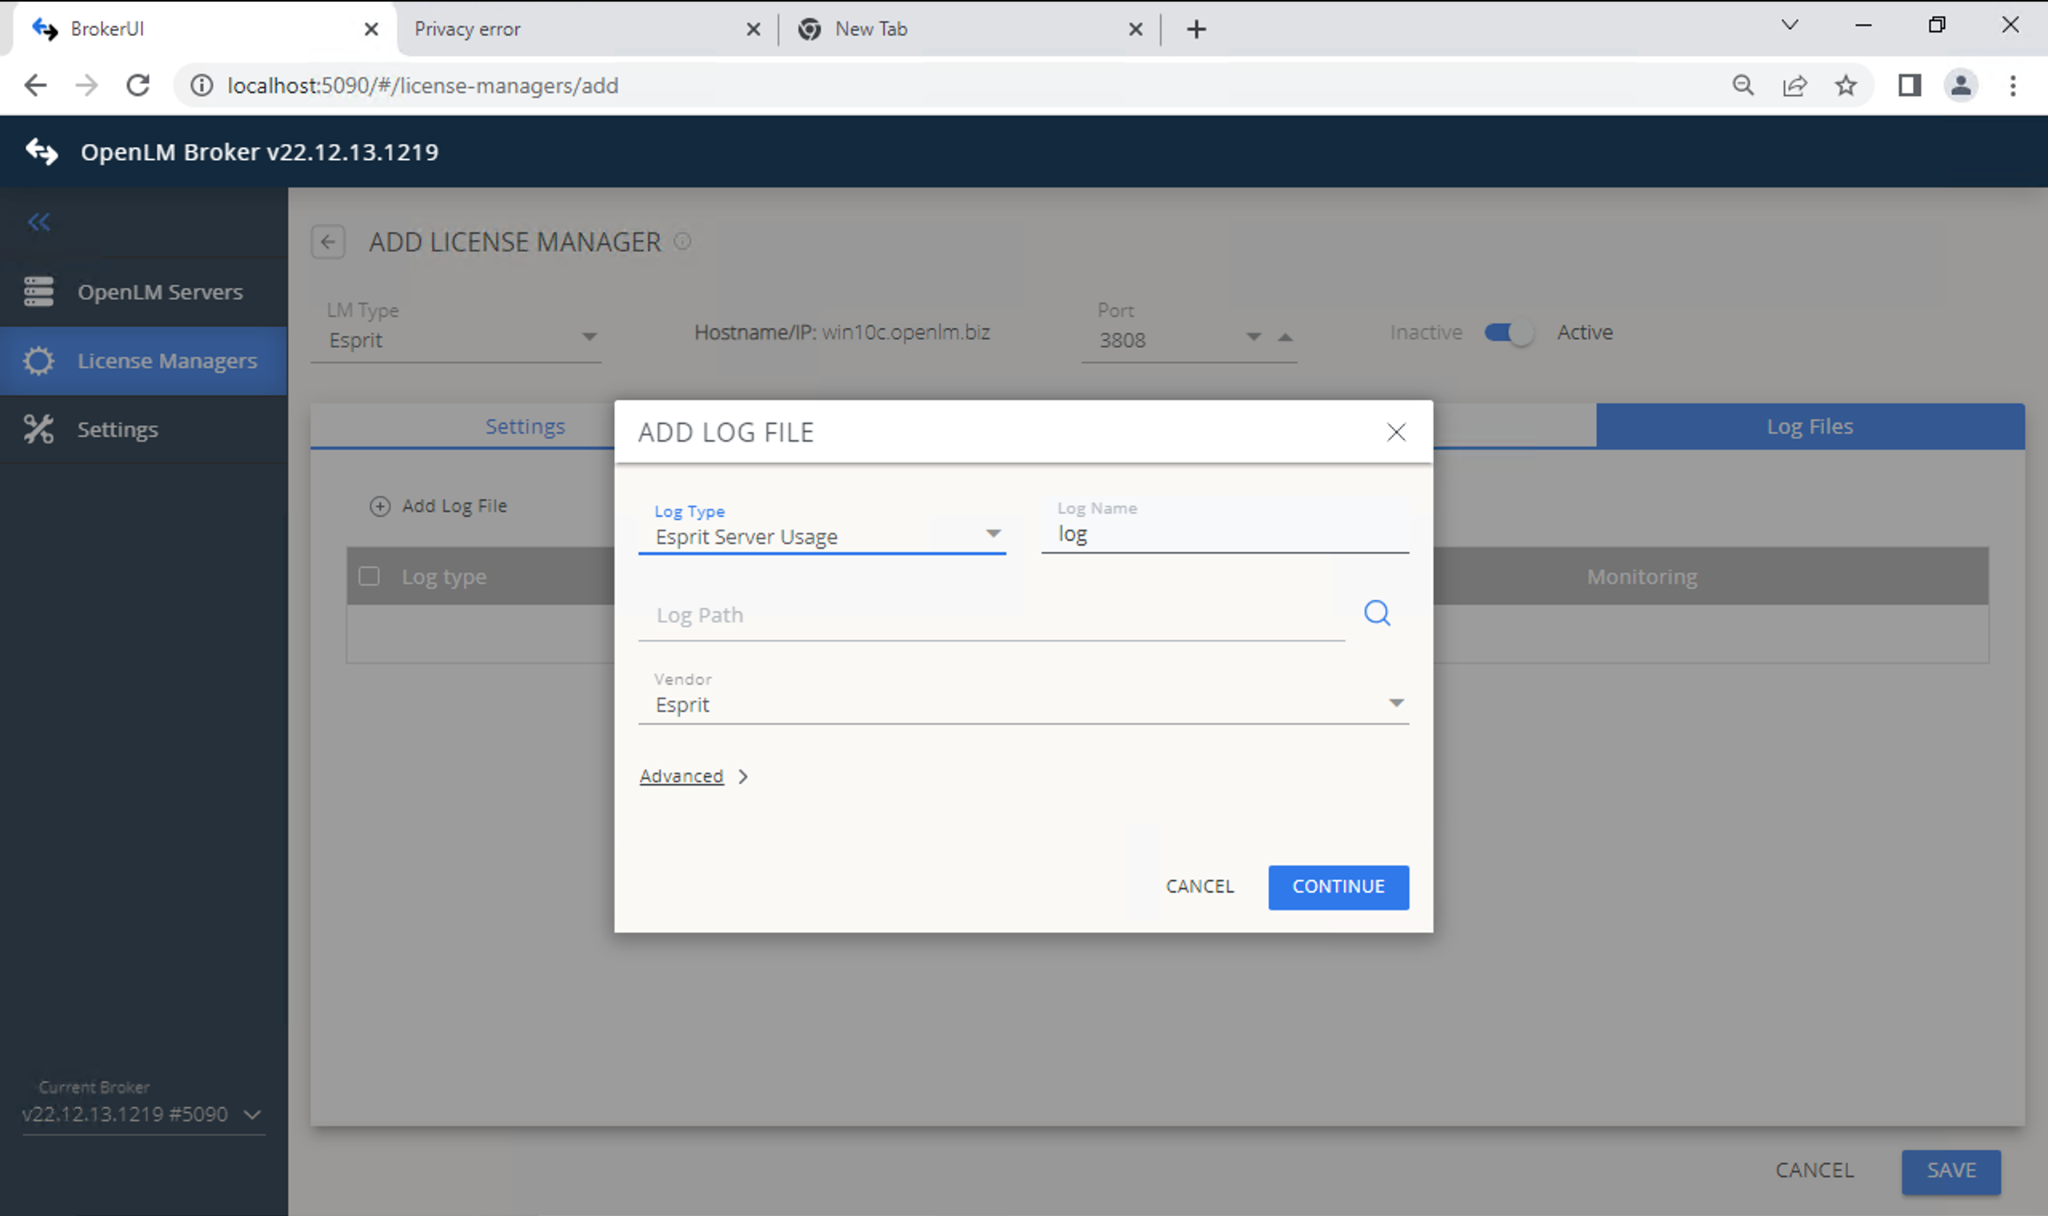
- Go to Log File tab → Add Log File. Configure:
- Type: ESPRIT Server Usage
- Log (Descriptive): name to identify the log
- Path:
DptSecLogServerUsage.txt(in ESPRIT logs folder) - Vendor: select vendor from previous step
- Save configuration.
- Open EasyAdmin (
http://<Server IP>:5015). - Approve the ESPRIT License Manager entry in License Managers Pending Approval.
Verify ESPRIT License Manager configuration
- Open EasyAdmin (
http://<Server IP>:5015). - Go to EasyAdmin Start → Widgets → License Servers.
- Confirm that ESPRIT appears in the list.
- A green circle indicates an active connection.
Known limitations
- License denials are not currently monitored.
- The number of licenses cannot be read, so it displays as Unlimited.