Introduction #
OpenLM Broker facilitates communication between OpenLM Server and the license manager to provide enhanced license statistics and functionality. It interacts directly with the license manager, querying it regularly for license information and relaying this data to the OpenLM Server. While OpenLM Broker is an optional component, it is highly recommended for enhancing the license management experience and capabilities of the OpenLM system.
This document covers the installation of the OpenLM Broker module. It includes:
OpenLM Broker Installation #
OpenLM Broker is Java-based and can run on any Java-supported platform. The Broker needs to be installed on the same machine as the license manager. As the Java environment is required, Java Runtime Environment (JRE) is bundled as part of the installation (available only for the Broker installation). Before starting the installation, it is advisable to check the system requirements on the OpenLM website. This document covers the installation of the OpenLM Broker on Windows in both standard wizard installation (see A. Installing OpenLM Broker with the Installation Wizard) and through the silent installation (see B. OpenLM Broker Silent Installation).
Both methods of installation require the OpenLM Broker installer. It can be located in the download area (https://www.openlm.com/download/).
Installing OpenLM Broker with the Installation Wizard
- Double-click the installer file (OpenLM.Broker.Installer-#.#.##.##.msi) to initiate installation.
- Click [Next] to continue with the installation. The License Agreement screen will appear.

- If you agree to the terms and want to continue with the installation, click the “I Agree” radio button (see Figure 4). Clicking the radio button will enable the [Next] button. Clicking [Cancel] will exit the installer without any changes.
Figure 4: License agreement with “I Agree” checked. - Click [Next]. The Java selection screen will appear. Either accept the bundled OpenJDK distributive or choose and point to a path where Java 11 is already installed (see Figure 5).


Figure 5: The Java selection screen.
- Click [Next]. The Select Installation Folder screen will appear with the default installation path (see Figure 6).
Figure 6: Select Installation Folder screen. - [Optional] Click [Browse] to select a different installation path. The default path is recommended.
- Click [Next]. An installation confirmation screen will appear (see Figure 7).
Figure 7: Installation confirmation screen. - Click the [Next] button to continue with the installation. An installation progress screen will appear (see Figure 8). The installation will continue until completion. The Success screen (see Figure 9) will appear at the end of a successful installation.
Figure 8: Installation progress screen. - Notification of successful installation appears. Click the [Close] button to exit the installer. After that, the Broker web UI opens (Figure 10):


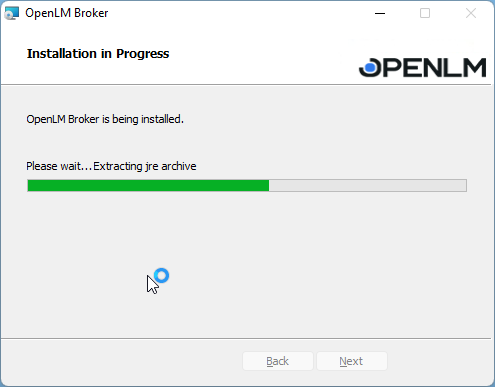

Figure 9: Installation Complete
Figure 10: Broker web UI opens
- At this stage, the Broker instance installation is complete. Follow the below Initial Broker Setup steps to make the necessary connections and configurations.
Connecting the Broker to an OpenLM Server #
Local OpenLM Installation
- Go back the browser where the Broker is opened and Continue with the Local OpenLM Installation(See figure 10).
- The Authorization window appears. To generate the Authorization file, access your EasyAdmin User Interface→Start→Administration→System&Security→Security→Authorization→ADD:
- The ADD CLIENT form opens. From the drop down list select the client type – Broker and a meaningful description. Click SAVE:

- Note the Secret key will be displayed only once. Make sure to download the JSON file to automatically import the credentials or save the Client ID and Client Secret to input manually.
- Go back to the Broker web UI and choose one of the options:
A. Manually input the Server URL, Client ID and Client Secret
B. Import (Click Import Broker Authorization File and browse to the location where the previously downloaded file is located) the JSON Authorization file, so the data will be automatically inserted. Once done, click CONTINUE: - The Broker will automatically look for the License Managers and add them to the OpenLM Server. To finish the setup, approve the detected License servers by accessing the “License Servers” window in OpenLM user interface. Find “Pending” entries, double click or click “Edit” to open details, click “Approve” button.

OpenLM Cloud Account
- Go back the browser where the Broker is opened and Continue with the OpenLM Cloud Account(See figure 10).
- The Authorization window appears. To generate the Authorization file, access your Cloud Portal→Client Authorization menu→ADD:

Figure 11: Cloud Portal – Generating Authorization File for the Broker - The ADD CLIENT form opens. From the drop down list select the client type – Broker and a meaningful description. Click SAVE:

Figure 12: Cloud Portal – Generating Authorization File for the Broker - Note the Secret key will be displayed only once. Make sure to download the JSON file to automatically import the credential or save the Client ID and Client Secret to input manually.

Figure 13: Cloud Portal – Generated Authorization File for the Broker - Go back to the Broker web UI and choose one of the options:
A. Manually input the Server URL, Client ID and Client Secret
B. Import (Click Import Broker Authorization File and browse to the location where the previously downloaded file is located) the JSON Authorization file, so the data will be automatically inserted. Once done, click CONTINUE: - If the authorization succeeds, the Broker is successfully connected to the OpenLM Server and it will scan for the License Managers Automatically. If the License Manager is detected, the following screen will appear:

- If there were no License Managers detected the following screen will appear:

- Proceed to the OpenLM EasyAdmin to approve all the discovered License Managers.


